Rainbow Stars Crochet Spiral: Free Crochet Pattern
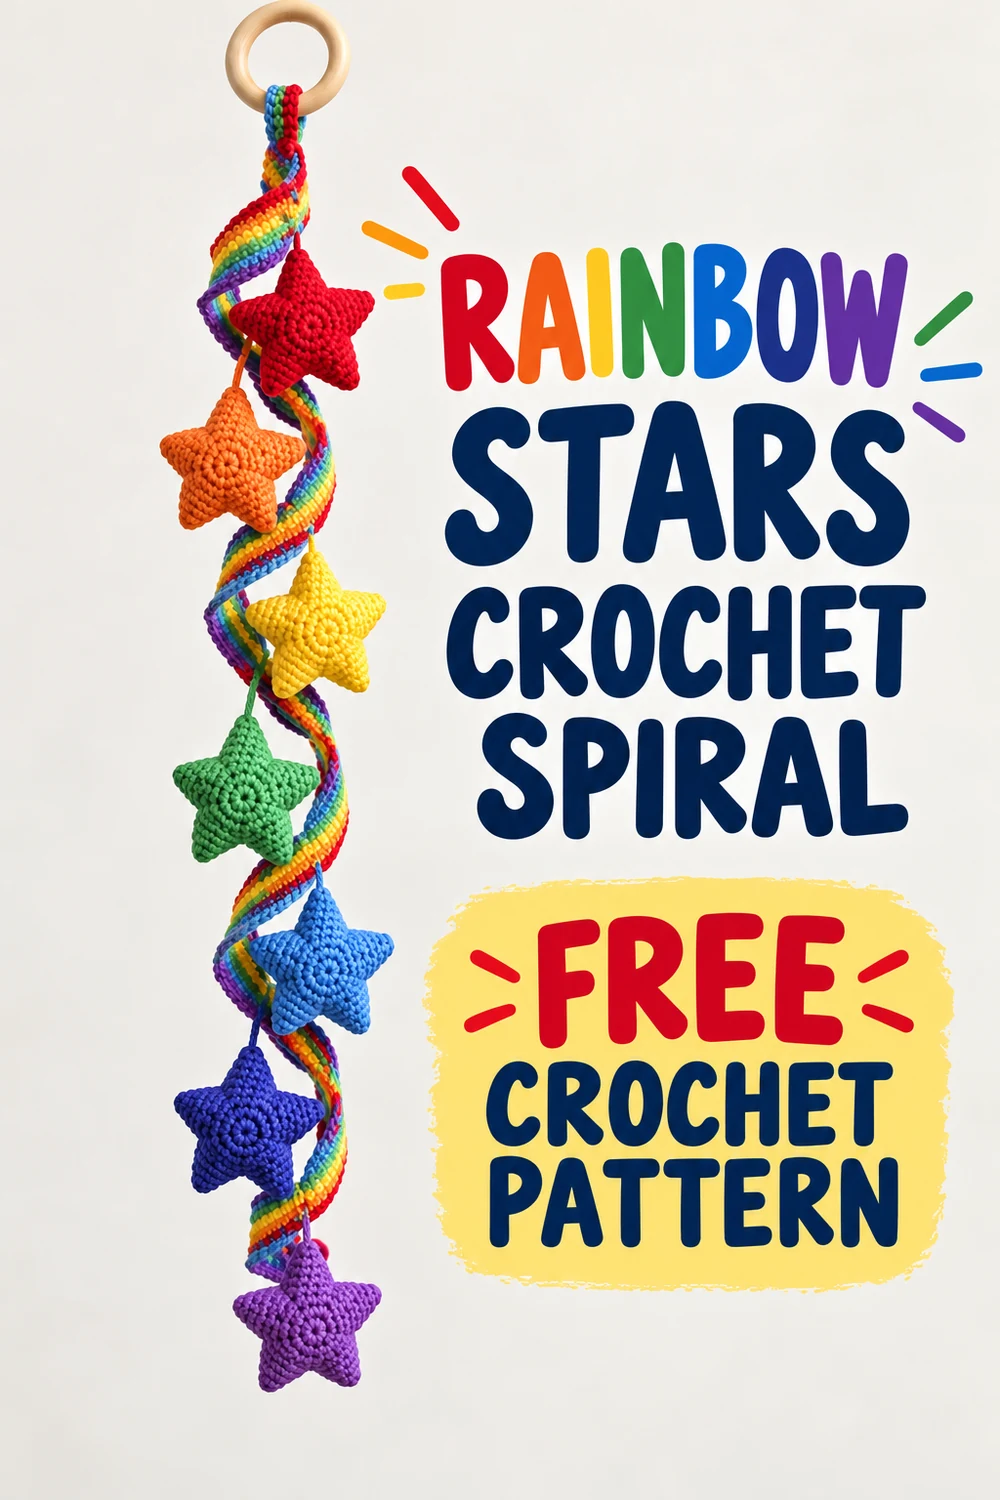
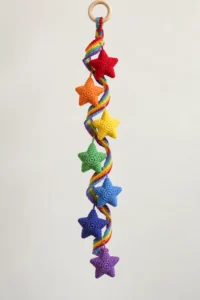
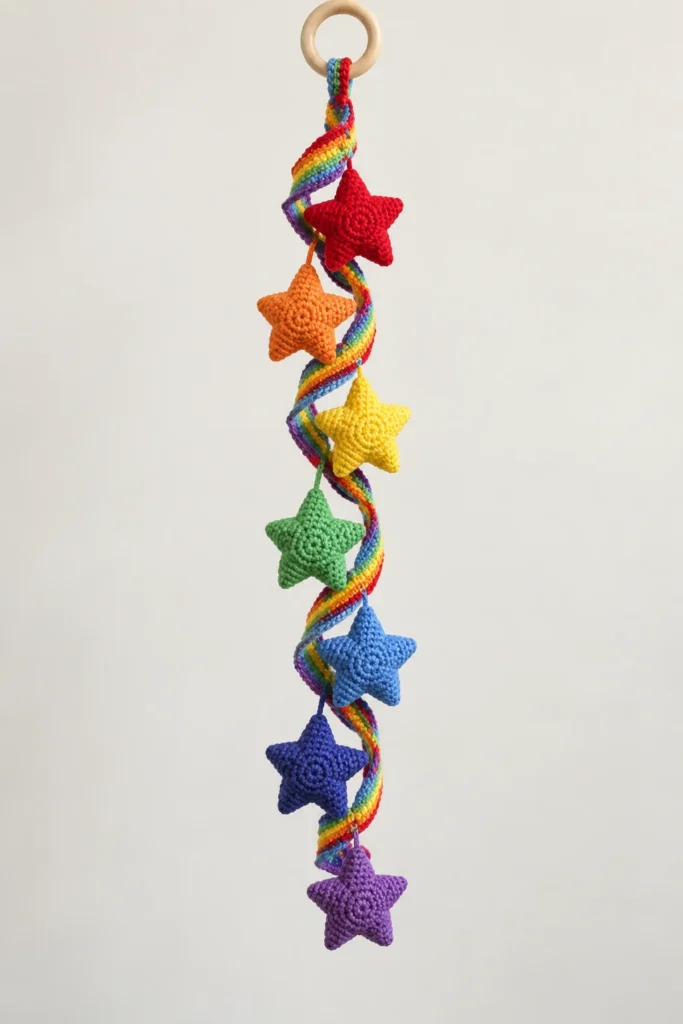
Bring cheerful color and handmade texture to a craft room, nursery wall, or creative corner with the Rainbow Stars Crochet Spiral. This original decorative hanging pairs one naturally curling rainbow ribbon with seven lightly stuffed stars arranged in classic rainbow order.
This pattern uses US crochet terminology. It has been mathematically checked against the approved construction plan but has not been claimed as physically tested, so finished dimensions may vary with yarn, hook, and tension.
Pattern at a Glance
- Skill level: Confident beginner to intermediate
- Construction: One corkscrew spiral, one hanging loop, seven connector cords, and fourteen panels assembled into seven stuffed stars
- Techniques: Chains, slip stitches, single crochet, half double crochet, double crochet, working in a magic ring, picots, seaming, light stuffing, and attachment to a wooden ring
- Terminology: US crochet terms
- Finished arrangement: Red, orange, yellow, green, blue, indigo, and violet from top to bottom
Materials You’ll Need
- Approximately 180 yd (165 m) total of DK-weight, category 3 acrylic or cotton-blend yarn
- Approximately 65 yd (60 m) rainbow self-striping yarn for the spiral and hanging loop
- Approximately 15 yd (14 m) each of solid red, orange, yellow, green, blue, indigo, and violet yarn
- US G/6 (4 mm) crochet hook
- One smooth natural-wood ring measuring 2 in (5 cm) across the outside and at least 1/4 in (6 mm) thick
- Approximately 0.5 oz (14 g) washable polyester fiberfill
- Yarn needle
- Scissors
- Removable stitch marker
- Rustproof pins
Gauge
16 sc and 18 rows = 4 in (10 cm) in an unblocked single-crochet swatch.
Exact gauge is not critical, but the star fabric should be firm enough to prevent fiberfill from showing. Change hook size if necessary.
Finished Measurements
- Complete hanging: approximately 25 in (63.5 cm) from the top of the wooden ring to the lowest star, excluding natural variation in the curl
- Spiral ribbon: approximately 18 in (45.5 cm) relaxed
- Each star: approximately 3.5 in (9 cm) from point to point
- Hanging loop: approximately 4 in (10 cm) folded
- Connector cords: approximately 1.5–3.5 in (4–9 cm)
Crochet Abbreviations
- beg = beginning
- ch = chain
- dc = double crochet
- hdc = half double crochet
- rep = repeat
- rnd = round
- sc = single crochet
- sl st = slip stitch
- st(s) = stitch(es)
Important Pattern Notes
- Chains at the beginning of a component do not count as stitches unless expressly stated.
- Join rounds with a sl st where directed.
- Stitch counts exclude joining slip stitches and the five ch-2 picots.
- Leave every sewing tail at least 12 in (30 cm) long.
- Use rainbow self-striping yarn for the spiral and hanging loop.
- Make one connector cord and two star panels in each solid rainbow color.
- The stars are decorative and should be stuffed only lightly.
- Confirm that every star panel has five evenly spaced points and lies flat before pairing.
- Blocking and final dimensions can vary with yarn substitution and personal tension.
Complete Free Crochet Pattern
Component 1: Rainbow Corkscrew Spiral Ribbon — Make 1
With rainbow self-striping yarn, ch 86.
Row 1: Work 3 dc in 3rd ch from hook and 3 dc in each remaining ch across. The 2 skipped chains plus 84 worked chains account for all 86 foundation chains. The 84 worked chains multiplied by 3 dc produce 252 dc.
Do not force the curls into place; the dense increases form the corkscrew naturally. Fasten off, leaving a 24 in (61 cm) tail at each end. Gently rotate the coils in one direction so the spiral hangs evenly. Do not flatten-block.
Component 2: Hanging Loop — Make 1
With rainbow self-striping yarn, ch 36. Taking care not to twist the chain, sl st in the first ch to form a ring.
Edging rnd: Sl st in each of the 36 chains around. (36 sl sts)
Fasten off with a 24 in (61 cm) sewing tail.
Component 3: Connector Cords — Make 7
Use the color assigned to each star. Each foundation chain is worked back over with slip stitches to create one firm crocheted cord.
- Red cord: Ch 9. Beginning in 2nd ch from hook, sl st in each ch across. (8 sl sts)
- Orange cord: Ch 12. Beginning in 2nd ch from hook, sl st in each ch across. (11 sl sts)
- Yellow cord: Ch 15. Beginning in 2nd ch from hook, sl st in each ch across. (14 sl sts)
- Green cord: Ch 18. Beginning in 2nd ch from hook, sl st in each ch across. (17 sl sts)
- Blue cord: Ch 15. Beginning in 2nd ch from hook, sl st in each ch across. (14 sl sts)
- Indigo cord: Ch 12. Beginning in 2nd ch from hook, sl st in each ch across. (11 sl sts)
- Violet cord: Ch 9. Beginning in 2nd ch from hook, sl st in each ch across. (8 sl sts)
For every cord, fasten off with a 12 in (30 cm) tail at both ends. Set the cords aside without stretching them.
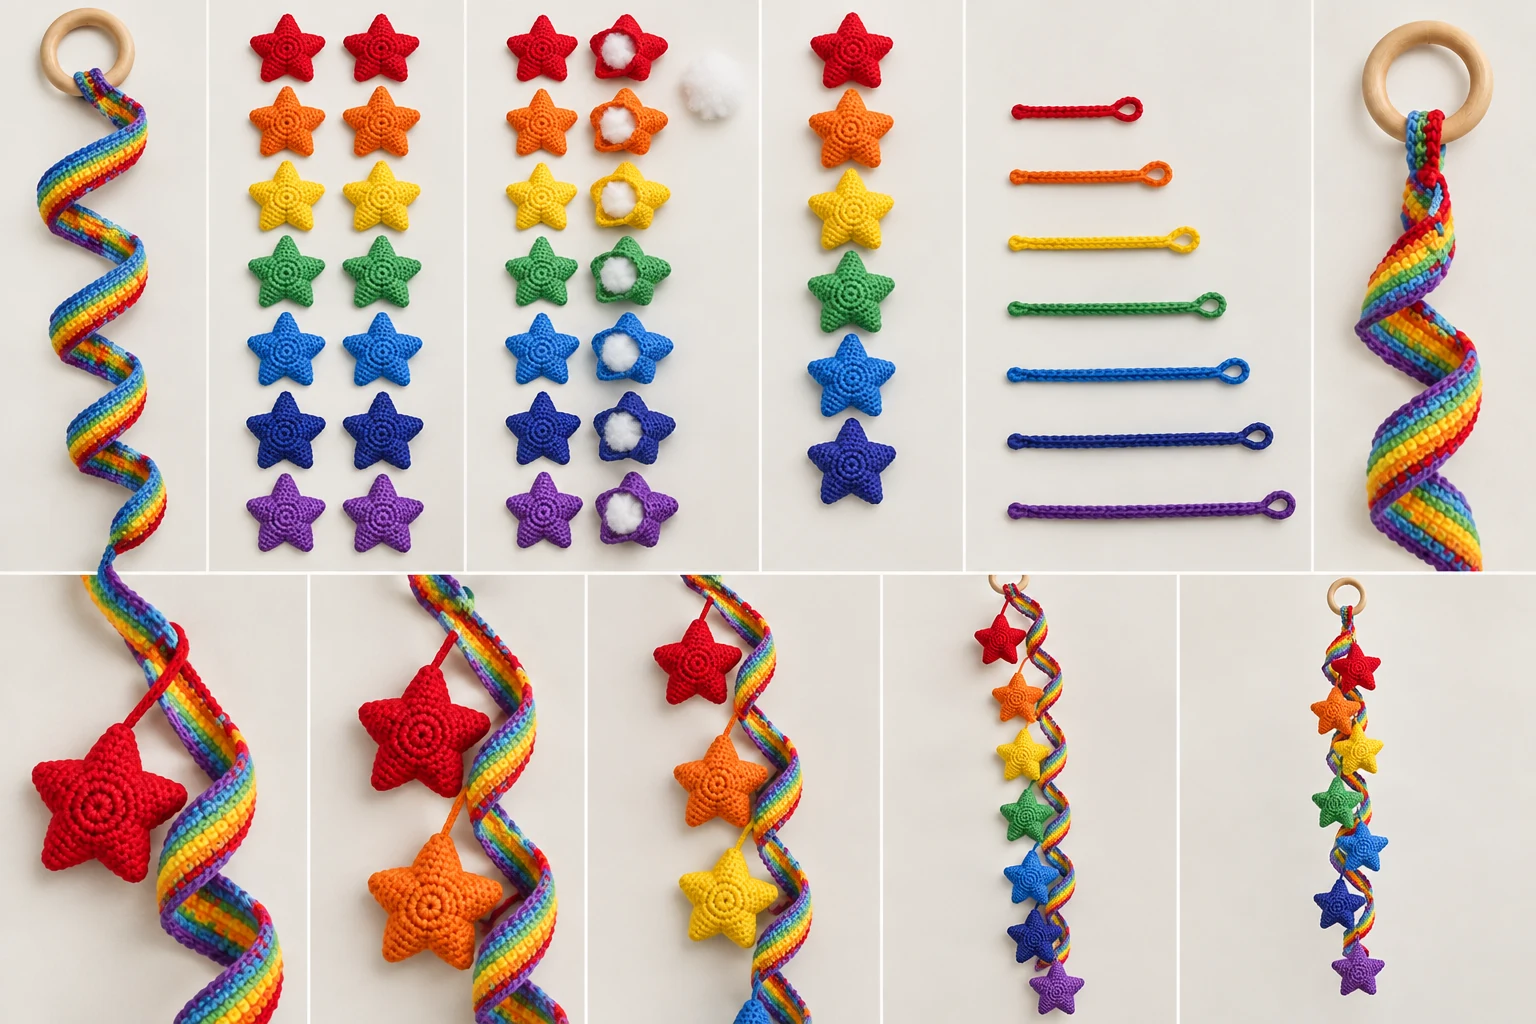
Component 4: Five-Point Star Panels — Make 14
Make two panels in each of these colors: red, orange, yellow, green, blue, indigo, and violet.
Rnd 1: Make a magic ring, ch 1, work 10 sc into the ring, pull the ring firmly closed, and join with sl st in first sc. (10 sc)
Rnd 2: Rep the following sequence 5 times: sl st in next sc; in next sc work (sc, hdc, dc, ch 2, sl st in 2nd ch from hook to form a picot, dc, hdc, sc). Join with sl st in the first sl st. (35 sts total: 5 anchoring sl sts and 30 body sts; five ch-2 picots excluded)
Fasten off the first panel of each color with a 12 in (30 cm) tail to weave in. Fasten off the second panel of each color with a 36 in (91 cm) tail for seaming. Close and secure every magic ring, then weave its starting tail in three directions on the wrong side.
Assembly
Assemble the Seven Stars
- Match the two panels of one color with wrong sides together. Align all five points.
- Thread the 36 in (91 cm) tail. Using small whipstitches through both edge loops, seam around four complete points and most of the fifth. Keep the stitches close enough to contain the fiberfill.
- Add approximately 0.07 oz (2 g) of fiberfill, using only enough to give gentle dimension. Push a small amount into each point with the blunt end of the hook. Do not overstuff.
- Finish seaming the fifth point. Pass the yarn through the body once, pull gently, trim, and let the end retract inside.
- Repeat for all seven colors to produce exactly seven stuffed stars.
Final Assembly and Wooden-Ring Attachment
- Secure the spiral: Thread one 24 in (61 cm) spiral tail through the base of the wooden ring three times. Pass the tail through the first four dc at the top end of the spiral, then through the ring twice more. Tie a square knot against the wrong side of the spiral. Weave the tail through at least 2 in (5 cm) of dense stitches in three directions and trim. The first curl should begin immediately below the ring.
- Add the hanging loop: Fold the crocheted loop in half. Pass its folded midpoint through the wooden ring, bring the opposite end of the loop through that midpoint, and pull snug to form a lark’s-head attachment. With the 24 in (61 cm) tail, sew through both sides of the loop immediately above the ring six times. Knot securely, weave through the slip-stitch fabric in three directions, and trim.
- Mark the positions: Mark seven attachment positions down the spiral, placing each at the outer edge of a different full turn. Space them evenly from approximately 2 in (5 cm) below the ring to approximately 2 in (5 cm) above the lower end. Confirm the top-to-bottom order: red, orange, yellow, green, blue, indigo, violet.
- Attach the cords: With one tail from each cord, sew through its marked spiral edge and through the cord end at least four times. Knot on the inner side of the curl, weave through 1 in (2.5 cm) of dense stitches, and trim.
- Attach the stars: Center the free end of each cord in the valley between the two uppermost points of its matching star. With the remaining cord tail, sew through both panels and the cord end at least four times without compressing the stuffing. Knot securely. Bury the tail through the star body and trim after it exits at least 1 in (2.5 cm) away.
- Finish the lower spiral tail: Weave it upward through at least 2 in (5 cm) of dense dc stitches in three directions and trim. Do not use this tail to support a star.
- Balance the hanging: Suspend the piece temporarily. Rotate individual coils until the stars face forward and confirm that no cord crosses another.
Finishing
If the yarn label permits steaming, steam lightly from a safe distance without pressing or flattening the corkscrew. Shape each star point by hand. Inspect the project for exposed fiberfill, loose knots, split yarn, and rough or sharp areas on the wooden ring.
Tug-test the hanging loop, ring connection, all seven cord-to-spiral joins, and all seven cord-to-star joins before display.
Customization Ideas
You may substitute another coordinated seven-color palette or use one solid color throughout without changing the construction. A different DK-weight fiber can also be used, provided the star fabric remains dense enough to hide the filling. For a softer or firmer star, adjust only the amount of fiberfill—not the stitch counts. Avoid changing the cord lengths unless you are prepared to rebalance the hanging and verify that the stars do not collide.
Common Mistakes to Avoid
- Working into the 2 skipped chains of the spiral and accidentally exceeding 252 dc
- Twisting the hanging-loop chain before joining it
- Counting joining slip stitches or picot chains in the stated star count
- Missing one anchoring sl st in Rnd 2, which disrupts the five-point spacing
- Pairing panels with the right sides together instead of placing the wrong sides together
- Overstuffing the stars and rounding off their points
- Attaching a star to the wrong colored cord or changing the rainbow order
- Placing more than one cord on the same full turn of the spiral
- Using the lower spiral tail to support a star
Troubleshooting
Why is the spiral not curling evenly?
Check that you worked exactly 3 dc into each of 84 chains for 252 dc. Gently rotate all coils in the same direction, but do not stretch or flatten-block them.
Why does my star have fewer or more than five points?
Rnd 1 must contain 10 sc. In Rnd 2, each repeat uses one sc for an anchoring sl st and the next sc for the point. Complete the sequence exactly five times.
Why does a star panel cup or ruffle?
Confirm the stitch placement and count first. If both are correct, your tension may differ from the gauge. Make a fresh panel with a slightly larger hook if it cups or a slightly smaller hook if it ruffles excessively.
Why is fiberfill showing?
The fabric may be too loose or the star may be overstuffed. Use a smaller hook for a firmer fabric and insert only about 0.07 oz (2 g) of filling per star.
Why do the stars twist or cross?
Temporarily hang the piece, rotate each spiral coil, and make sure every cord drops from the outer edge of a separate turn without crossing another cord.
Care Instructions
Dust gently or spot-clean with cool water and mild detergent. Blot rather than wring, reshape the spiral and star points, and dry flat before rehanging. Do not soak the wooden ring unless its care instructions permit it. Keep the hanging away from flame, prolonged moisture, and direct heat.
Safety: This decorative hanging is not a toy. Keep the wooden ring, cords, and fiberfill away from infants, small children, and pets.
Frequently Asked Questions
Is this pattern written in US terms?
Yes. All stitches and abbreviations use US crochet terminology.
How many separate crocheted pieces are made?
You will crochet one spiral ribbon, one hanging loop, seven connector cords, and fourteen star panels. The fourteen panels are paired to form seven stuffed stars.
Can I use worsted-weight yarn?
You can experiment with another weight, but it will change the dimensions, drape, yarn requirements, and possibly the ring size. The stated measurements and material estimates apply to DK-weight yarn.
Do I need to block the spiral?
No. Do not flatten-block it. If the yarn permits steaming, use only light steam from a safe distance and shape the curls by hand.
Can the stars be left unstuffed?
The approved construction uses seven lightly stuffed stars. Omitting the filling changes their intended appearance, although it does not change the panel stitch counts.
Has the pattern been physically tested?
The construction and explicit counts have been mathematically checked, but this pattern is not presented as physically tested. Make and inspect each component carefully, and perform every specified tug test before display.