Easy Crochet Strawberry Coaster Pattern
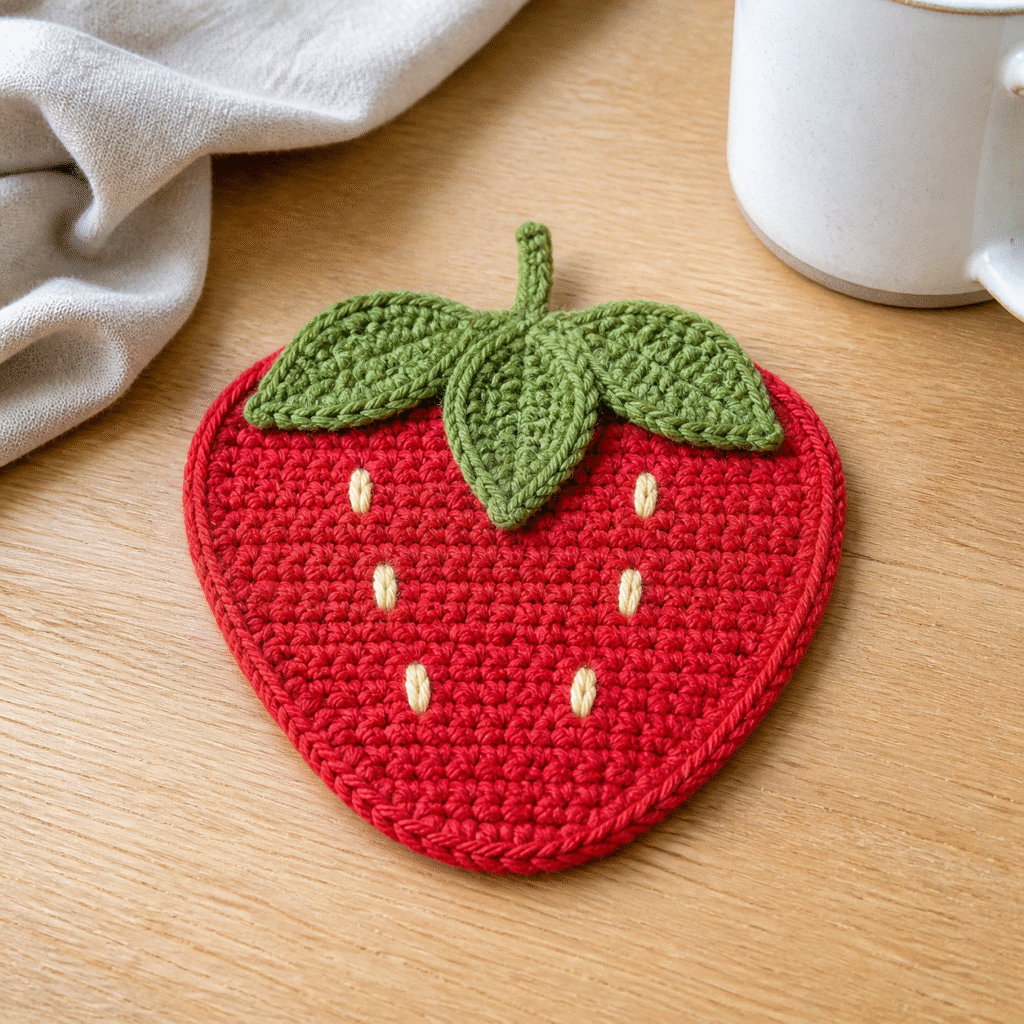
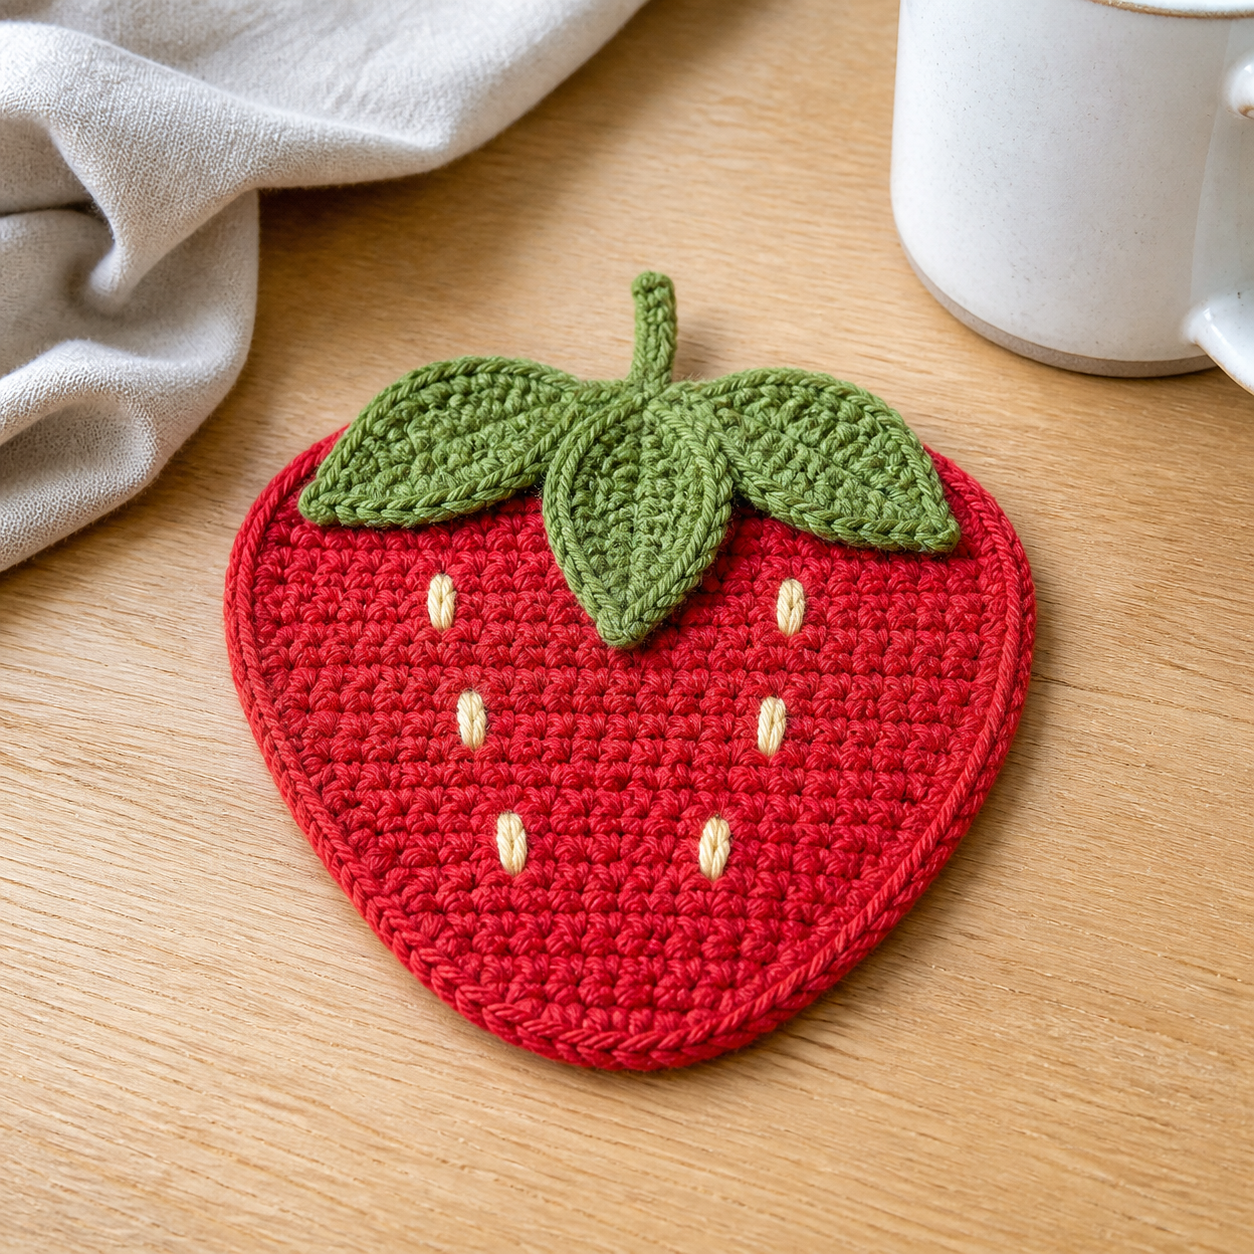
Bring a little summer color to your coffee table with this easy crochet strawberry coaster. The design starts at the berry’s bottom point and grows in simple turned rows, so you can see the strawberry shape appear as you work. A red border smooths the outline, while three small green leaves and six embroidered seeds finish the fruit.
This pattern uses standard US crochet terms and is written for an adventurous beginner. You only need small amounts of worsted cotton yarn, making it a satisfying scrap-yarn project for a picnic table, kitchen, teacher gift, or handmade housewarming set.
Why You’ll Love It
- The coaster uses basic single crochet plus straightforward increases and decreases.
- Turned rows make the shaping easy to count and correct.
- It uses small yarn amounts and can be completed without special tools.
- Cotton yarn creates a practical, absorbent surface for cold drinks.
- The leaf and seed colors are easy to personalize for seasonal sets.
Skill Level
Easy / adventurous beginner. You should be comfortable making chains, single crochet, half double crochet, double crochet, slip stitches, two single crochet stitches in one stitch, and a single crochet decrease. You will also sew on small pieces and add simple embroidery.
Finished Size
Approximately 4.5 inches wide by 4.25 inches tall, including the leaves but excluding the optional stem. Your size may vary with yarn, hook, and tension.
Materials
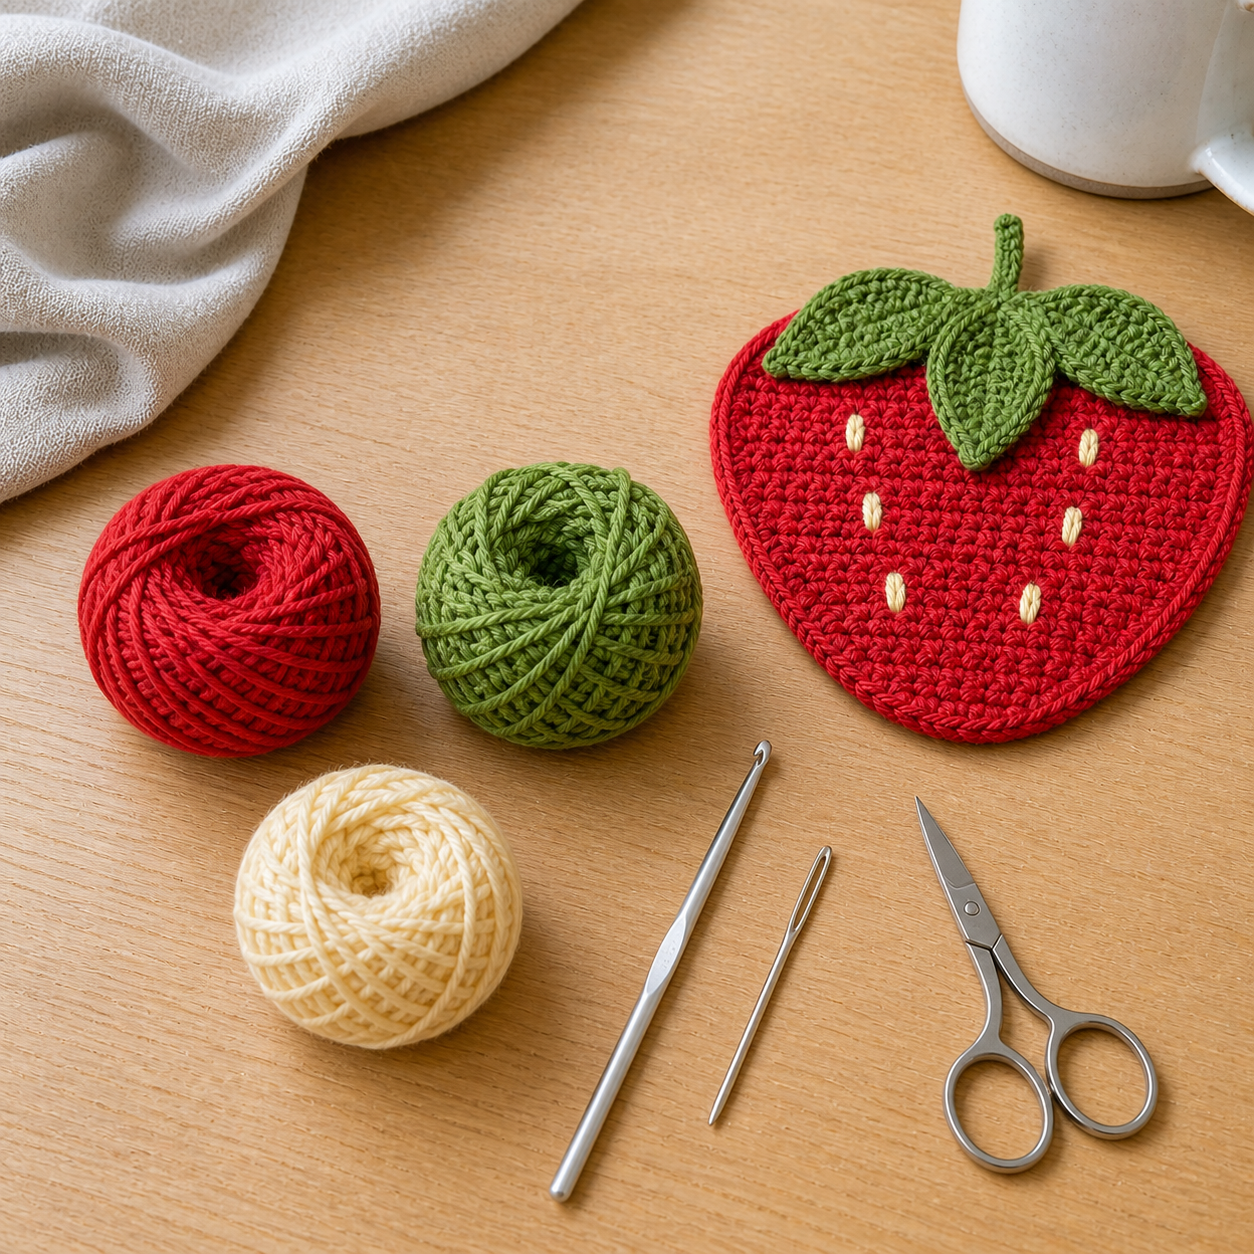
- CYC 4 medium/worsted-weight, 100% cotton yarn: about 20 yards tomato red, 8 yards leaf green, and 2 yards warm cream or pale yellow
- US G/6 (4 mm) crochet hook
- Blunt-tip yarn needle
- Scissors
- Removable stitch markers, optional
- Rust-resistant pins and blocking mat, optional
Yarn
Worsted-weight cotton is recommended because it is absorbent, washable, and sturdy enough to protect a table. Choose a smooth, plied yarn that makes individual stitches easy to see. Avoid fuzzy yarn for your first coaster because it can hide stitch placement and make the edge less crisp.
If you substitute acrylic, the coaster may absorb less condensation and can react differently to heat. Never place extremely hot cookware on a coaster unless the yarn manufacturer confirms that use is safe.
Hook Size
Use a US G/6 (4 mm) hook, or choose the size that gives you a firm, flat fabric. If your coaster curls tightly, relax your tension or try a hook 0.5 mm larger. If it feels loose and open, try a smaller hook.
Abbreviations (US Terms)
- ch: chain
- dc: double crochet
- hdc: half double crochet
- inc: increase; work 2 sc in the indicated stitch
- sc: single crochet
- sc2tog: single crochet 2 stitches together; one decrease
- sl st: slip stitch
- st(s): stitch(es)
Gauge
Approximately 3.5 sc and 4 rows per inch in firm single crochet after light blocking.
Gauge is not critical for a decorative coaster, but it affects the dimensions and stability. After Row 10, the body should be close to 4 inches wide at its broadest point.
Pattern Notes
- The body is worked flat in turned rows from the bottom tip to the top.
- Chain 1 does not count as a stitch. Work the first stitch into the first stitch of the prior row.
- An increase is 2 sc in one stitch; a decrease is sc2tog over the next 2 stitches.
- Row totals are 2, 4, 6, 8, 10, 12, 14, 14, 14, 14, 12, 10, and 8.
- Space border stitches evenly so the piece lies flat.
- Three leaves and the optional stem are made separately and sewn across the eight-stitch top edge.
Complete Strawberry Coaster Pattern
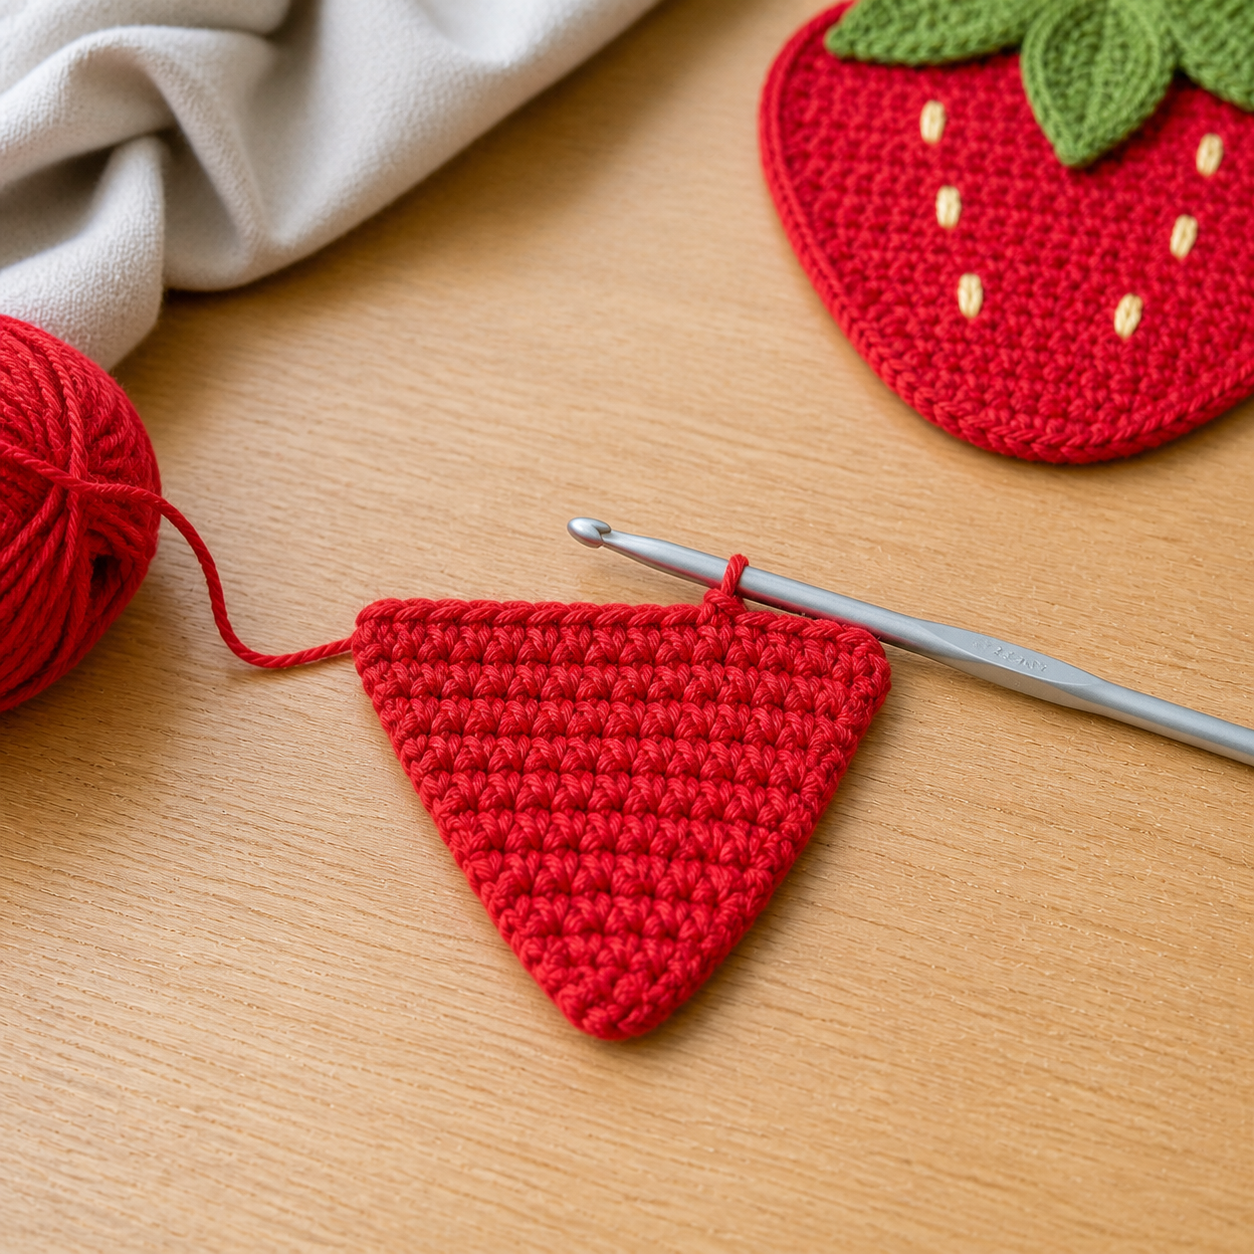
Red Strawberry Body
With red yarn, ch 2.
- Row 1: Work 2 sc in the second ch from the hook. Turn. (2 sts)
- Row 2: Ch 1, inc in each st across. Turn. (4 sts)
- Row 3: Ch 1, inc in first st, sc in next 2 sts, inc in last st. Turn. (6 sts)
- Row 4: Ch 1, inc in first st, sc in next 4 sts, inc in last st. Turn. (8 sts)
- Row 5: Ch 1, inc in first st, sc in next 6 sts, inc in last st. Turn. (10 sts)
- Row 6: Ch 1, inc in first st, sc in next 8 sts, inc in last st. Turn. (12 sts)
- Row 7: Ch 1, inc in first st, sc in next 10 sts, inc in last st. Turn. (14 sts)
- Rows 8–10: Ch 1, sc in each st across. Turn. (14 sts)
- Row 11: Ch 1, sc2tog, sc in next 10 sts, sc2tog. Turn. (12 sts)
- Row 12: Ch 1, sc2tog, sc in next 8 sts, sc2tog. Turn. (10 sts)
- Row 13: Ch 1, sc2tog, sc in next 6 sts, sc2tog. Do not turn. (8 sts)
Red Border
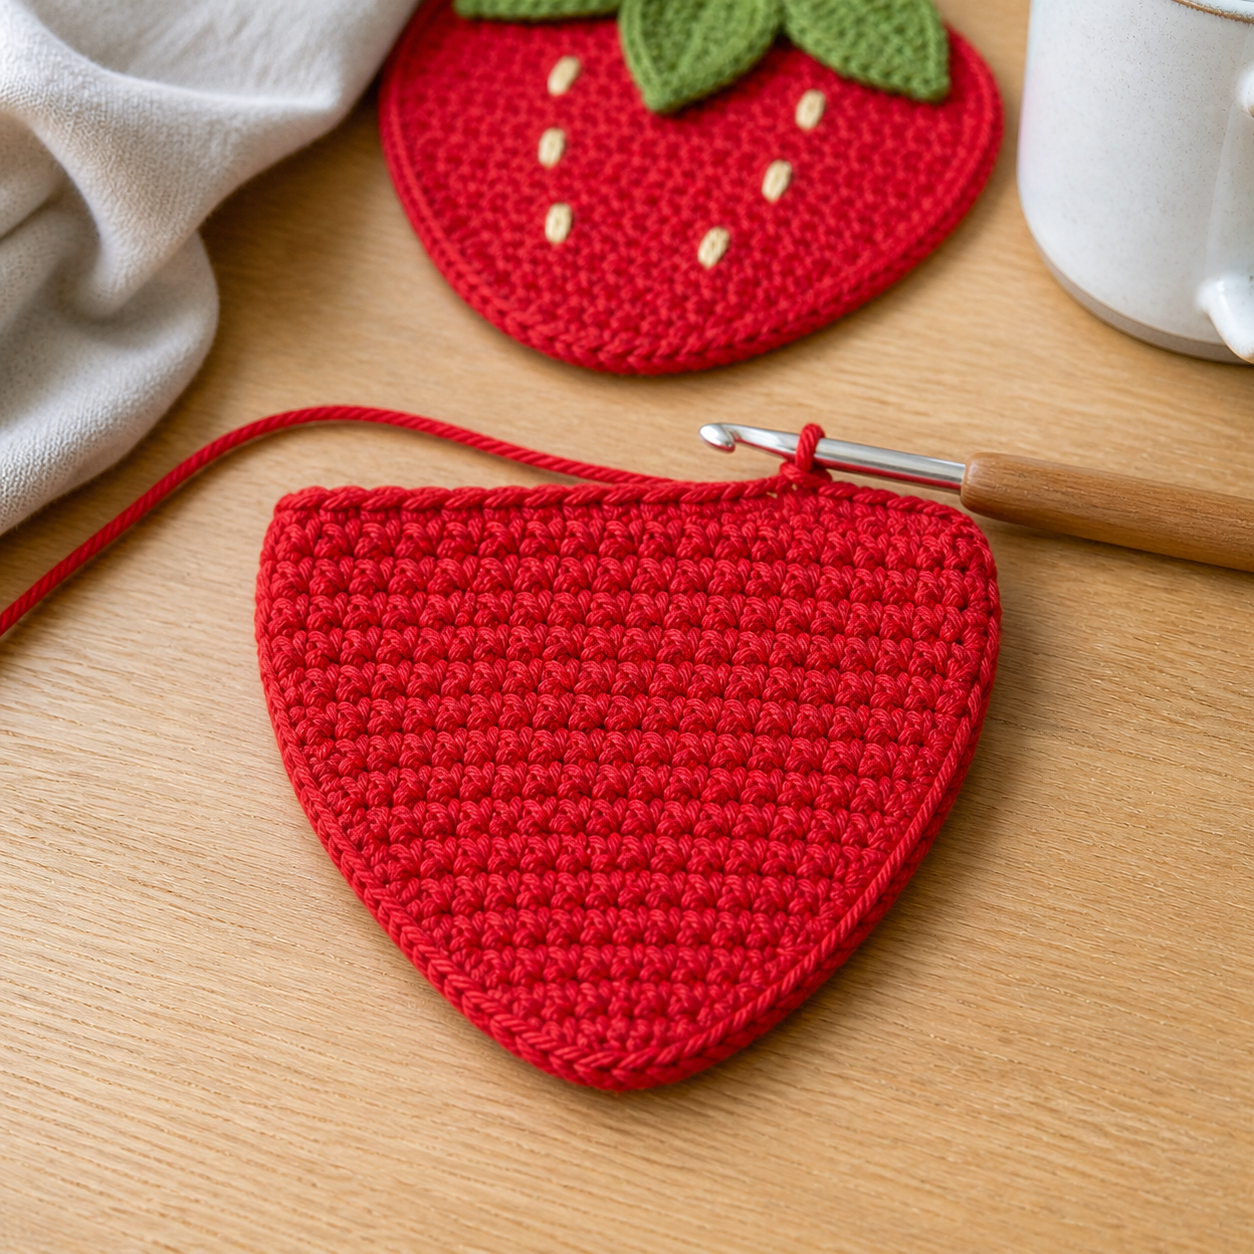
Ch 1. With the right side facing, sc evenly around the entire edge. Work about one sc into each row end, one or two extra stitches around the bottom point only if needed, and one sc in each top stitch. Join with a sl st. Fasten off. If the border ruffles, use fewer side stitches; if it cups, add a few evenly spaced side stitches.
Green Leaves (Make 3)
With green yarn, ch 8. Starting in the second ch from the hook, work: sl st, sc, hdc, dc, hdc, sc, sl st across the seven chains. (7 sts) Fasten off with a 10-inch sewing tail. Repeat twice.
Optional Stem
With green yarn, ch 5. Starting in the second ch from the hook, sl st in each of the next 4 chains. Fasten off with a sewing tail.
Step-by-Step Assembly and Finishing
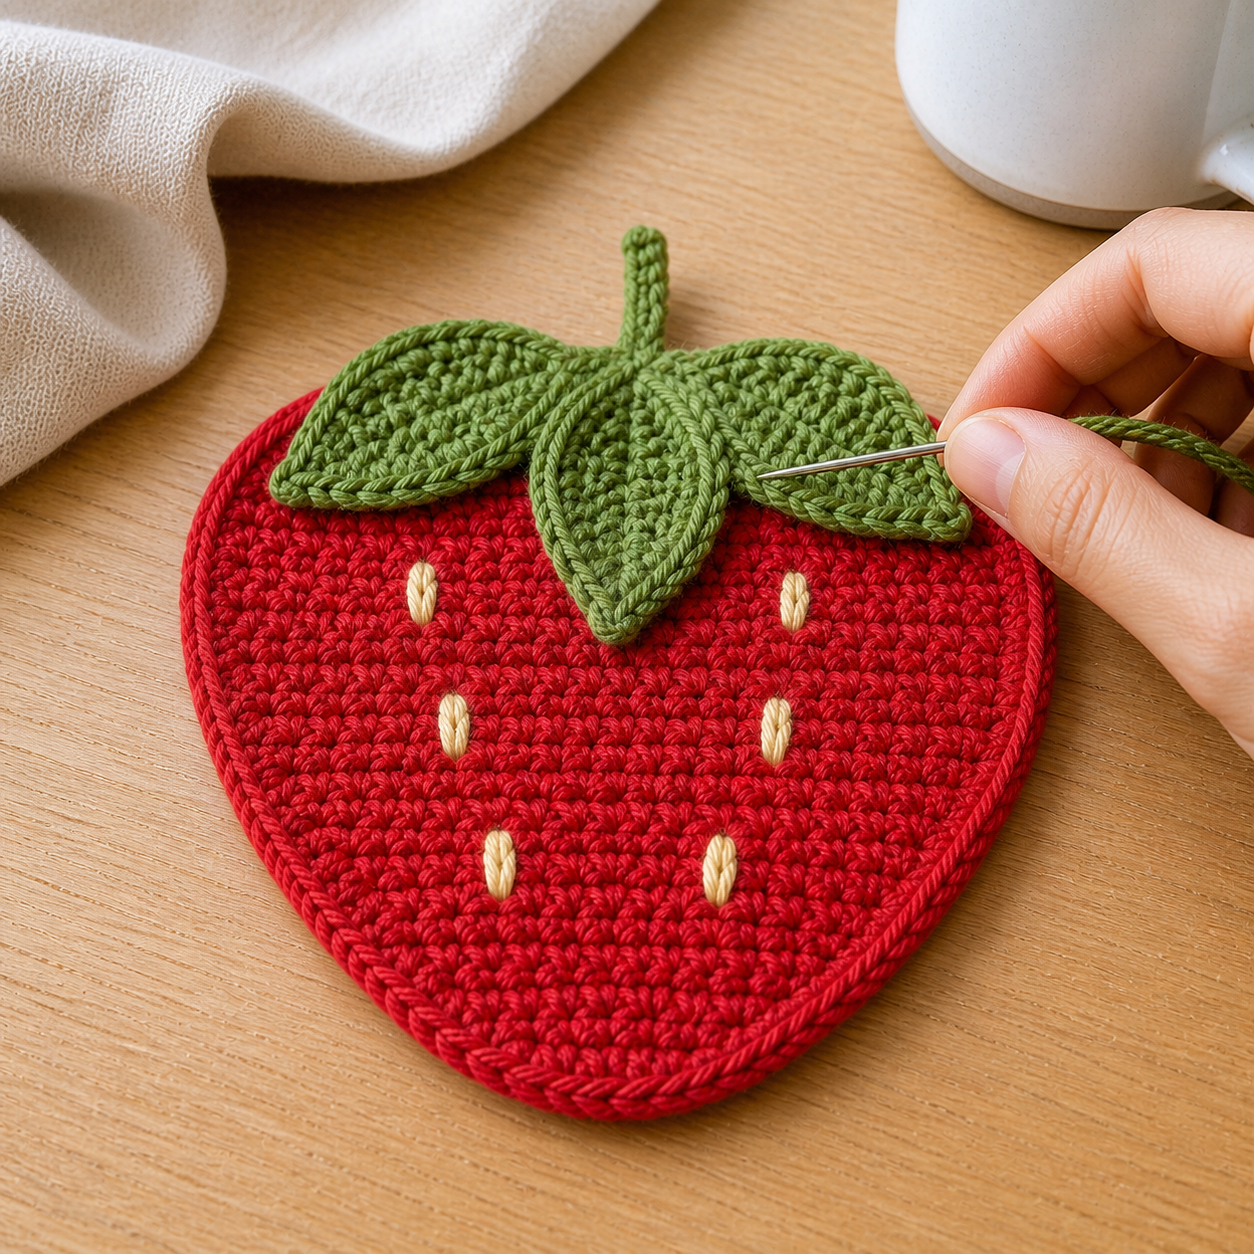
- Lay the body right side up with the tip at the bottom.
- Sew the optional stem behind the center of the top edge.
- Place the center leaf pointing down and the side leaves angled down-left and down-right, overlapping to cover the top red edge.
- Sew through the upper half of each leaf, leaving the pointed lower half relatively free.
- Use cream yarn to add six short straight-stitch seeds in two offset columns of three without puckering the fabric.
- Weave in all ends flat on the wrong side.
- Lightly damp-block to about 4.5 by 4.25 inches and dry flat.
Tips
Count every row. Mark the first and last stitch if edge placement is difficult. Keep the initial chain loose enough for two single crochets, and make both decreases consistently. Let the fabric determine side-border spacing, and keep leaf seams and yarn ends flat so a mug does not wobble.
Troubleshooting
The strawberry leans
Recount the rows and check that shaping occurred at both edges and that you did not work into the turning chain.
The body cups
Lightly block it. If it still cups, relax tension, use a larger hook, or add a few evenly spaced border stitches.
The border ruffles
Remove some stitches from the side edges and redistribute them evenly.
The leaves are bulky
Sew only their upper halves or use a hook 0.5 mm smaller to create slightly firmer leaves that still cover the top edge neatly.
The seeds pucker
Undo and restitch them with enough slack to rest on the surface.
Customization Ideas
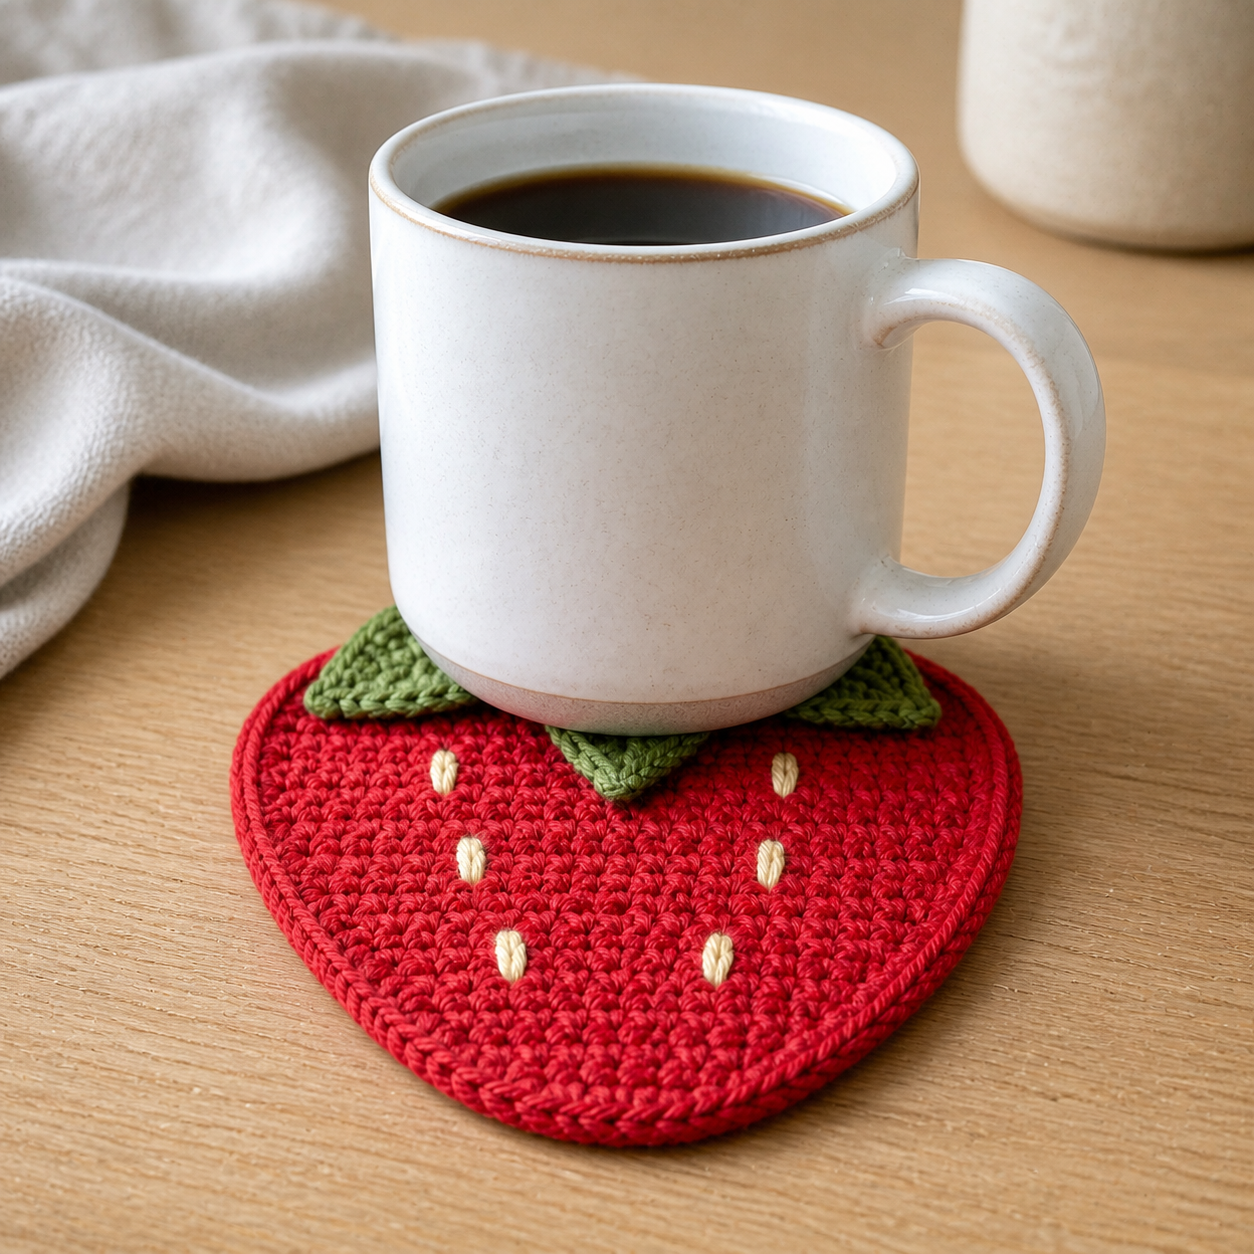
Try deep berry, coral, or pink cotton while retaining the green top. Use cream or pale yellow seeds. Omit the stem for a clean silhouette, or add a flat embroidered vein to each leaf. Thicker yarn can create a larger mat and sport yarn a smaller applique, but recheck measurements and material suitability whenever yarn changes.
Frequently Asked Questions
Is it suitable for beginners?
It suits an adventurous beginner ready to practice shaping, edging, sewing, and simple embroidery.
Can I use acrylic?
Yes, but cotton is usually more absorbent. Follow the yarn label and never treat acrylic as a hot pad.
Does gauge matter?
Not for an exact fit, but it affects size, firmness, and cup stability.
How many can one skein make?
A typical skein should make several, but weighing a finished sample gives the best estimate.
Can I sell finished coasters?
Check the published pattern terms and marketplace rules, test a sample first, and describe materials accurately.