Easy Crochet Granny Square Blanket
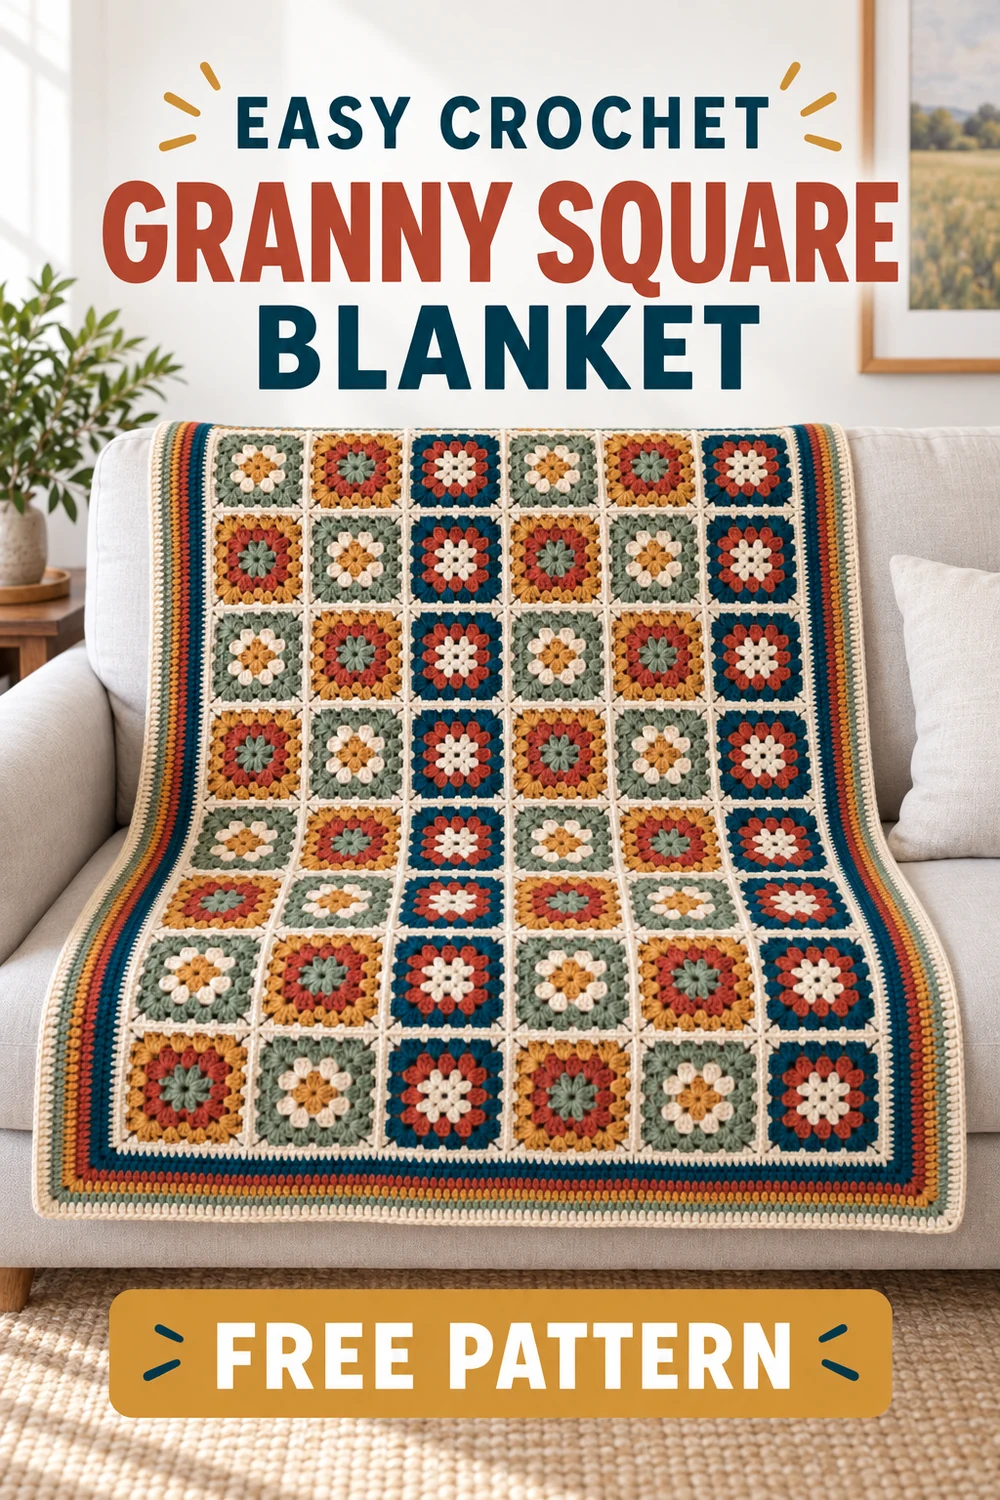
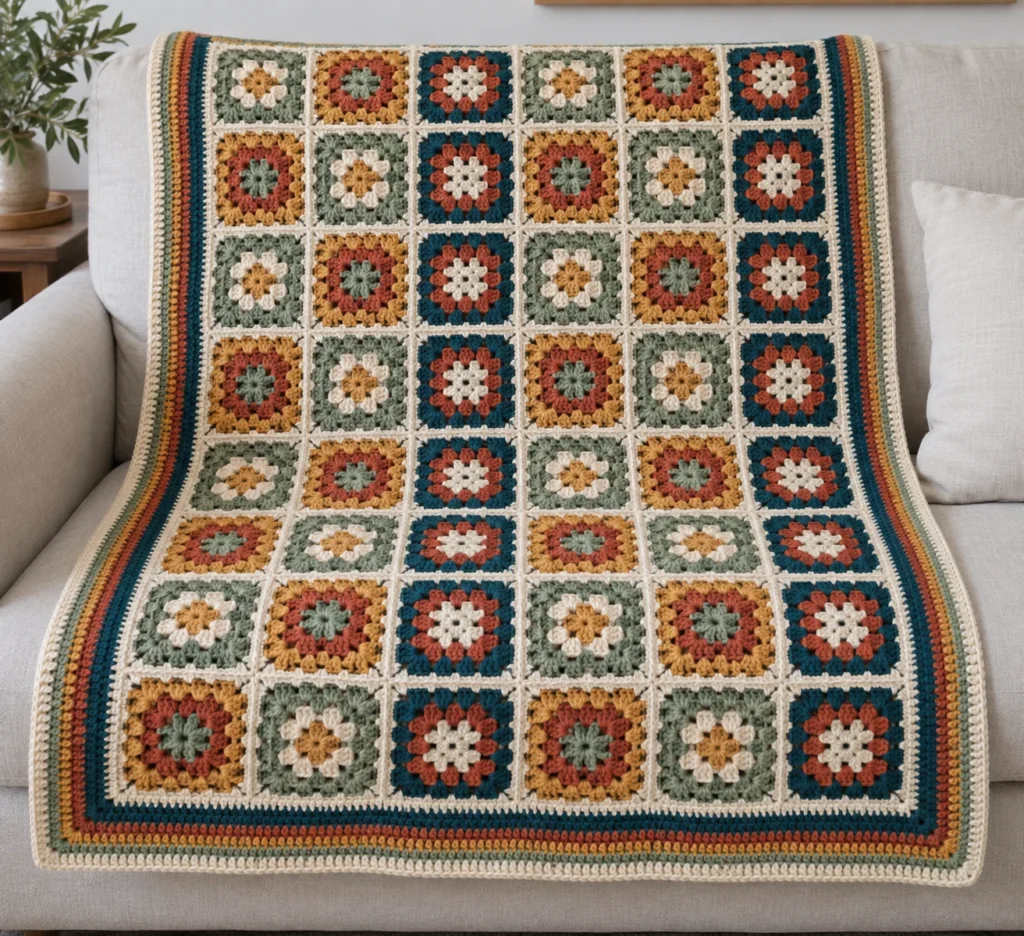
This Easy Crochet Granny Square Blanket is an original, beginner-friendly design made from 48 five-round motifs. Three rotating color sequences create a cheerful diagonal rhythm, while visible cream flat-slip-stitch seams form a tidy lattice. A six-round striped border completes the approximately 39 × 51 in blanket.
Pattern at a Glance
- Skill level: Easy
- Terminology: US crochet terms
- Construction: 48 separately crocheted squares arranged 6 across by 8 down
- Motifs: 16 Square A, 16 Square B, and 16 Square C
- Joining: Five vertical and seven horizontal flat-slip-stitch seam lines
- Border: Six rounds of single crochet
- Finished size: Approximately 39 × 51 in/99 × 130 cm
- Special techniques: Granny-square rounds, color changes, flat-slip-stitch joining, and working an even border
Visible Crocheted Components
- 48 five-round granny squares arranged 6 across by 8 down: 16 Square A, 16 Square B, and 16 Square C.
- Five vertical flat-slip-stitch joining seams.
- Seven horizontal flat-slip-stitch joining seams.
- One six-round crocheted outer border.
Materials You’ll Need
- CYC 4 medium/worsted-weight washable yarn: approximately 3,300 yd/3,018 m total
- Color A—Cream: 1,100 yd/1,006 m
- Color B—Sage: 550 yd/503 m
- Color C—Gold: 550 yd/503 m
- Color D—Terracotta: 550 yd/503 m
- Color E—Deep Teal: 550 yd/503 m
- US H/8 (5 mm) crochet hook, or size needed to obtain gauge
- Locking stitch markers
- Yarn needle
- Scissors
- Rustproof blocking pins and blocking mats
No stuffing, buttons, fasteners, or other hardware are used.
Gauge
One completed five-round granny square, blocked: 6 × 6 in/15 × 15 cm.
Exact stitch gauge is less important than producing consistently sized squares. Crochet and block one test square before making the full set. If it is too small, try a larger hook; if it is too large, try a smaller hook. Each border round is designed to add approximately 1/4 in/6 mm outward at this gauge.
Finished Measurements
- Joined motif field: Approximately 36 × 48 in/91.5 × 122 cm
- Border depth: Approximately 1 1/2 in/3.8 cm on every side
- Finished blanket: Approximately 39 × 51 in/99 × 130 cm after blocking
Handmade dimensions can vary slightly with yarn, tension, and blocking.
Crochet Abbreviations
- beg = beginning
- ch = chain
- ch-sp = chain space
- dc = double crochet
- rep = repeat
- rnd = round
- sc = single crochet
- sl st = slip stitch
- sp = space
- st(s) = stitch(es)
Important Pattern Notes
- The beginning ch 3 counts as one dc.
- A “3-dc group” means 3 dc worked into the indicated space.
- Join each square round with a sl st to the top of the beginning ch 3.
- Chain stitches are excluded from the stated dc counts.
- Turn after every square round. Turning helps keep the motifs balanced.
- Use the assigned color for every round and fasten off the old color with a 6-in/15-cm tail at each color change.
- Join each new color with a sl st in any corner ch-2 sp. Because every round changes color, the positioning slip stitches stated at the beginning of Rnds 2–5 are unnecessary after the new color has already been joined in a corner; begin with ch 3 in that corner.
- Weave motif tails before assembly, changing direction at least once and leaving all corner spaces unobstructed.
- Keep joining slip stitches relaxed so the seams remain flat and do not shorten the blanket.
- Move each border corner marker into the center sc of the new 3-sc corner after every round.
Color Sequences and Quantities
Make 16 squares in each sequence, for 48 squares total.
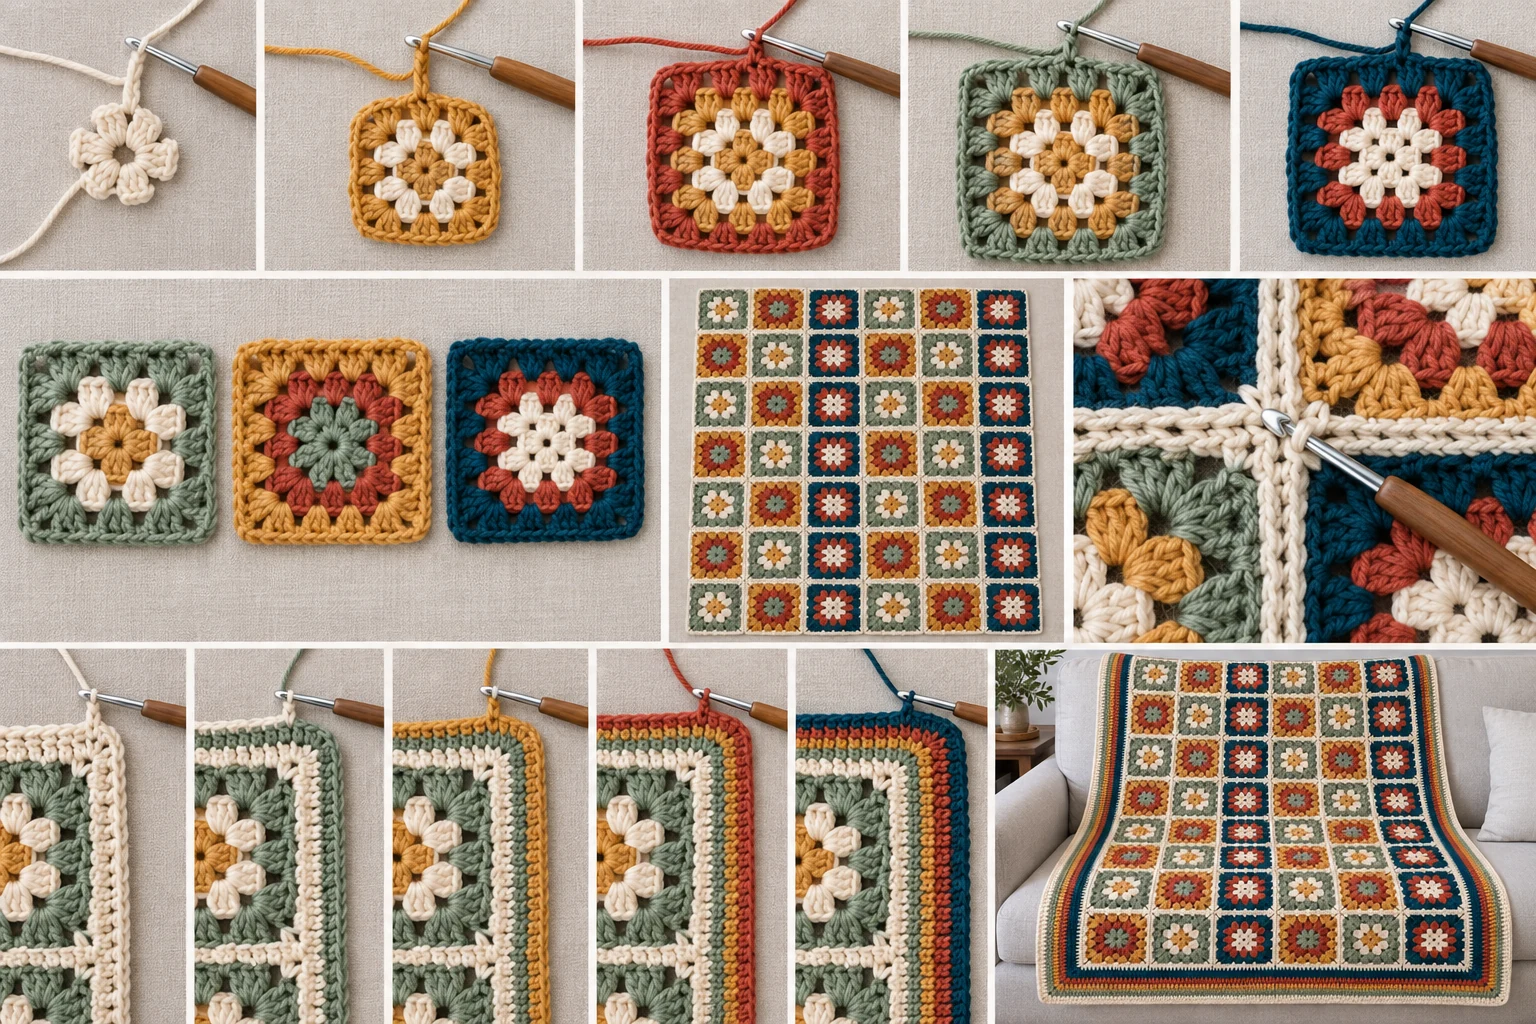
- Square A: Rnd 1 C, Rnd 2 B, Rnd 3 A, Rnd 4 D, Rnd 5 E.
- Square B: Rnd 1 D, Rnd 2 E, Rnd 3 A, Rnd 4 C, Rnd 5 B.
- Square C: Rnd 1 E, Rnd 2 C, Rnd 3 A, Rnd 4 B, Rnd 5 D.
Work all joining seams with A. Border colors are given in the border instructions.
Complete Free Crochet Pattern
Universal Five-Round Granny Square
Follow these instructions for every motif, using the appropriate Square A, B, or C color sequence.
Rnd 1
With the assigned color, ch 4; join with sl st in first ch to form a ring. Ch 3, 2 dc in ring, ch 2; [3 dc in ring, ch 2] 3 times. Join. Turn.
Count: 12 dc and four ch-2 corner spaces.
Rnd 2
Join the assigned color in any corner ch-2 sp. Ch 3, 2 dc, ch 2, 3 dc in the same corner sp; ch 1. In each of the next 3 corner ch-2 spaces work (3 dc, ch 2, 3 dc); ch 1 after each corner. Join, placing the final ch 1 before the join. Turn.
Count: 24 dc, four ch-2 corner spaces, and four ch-1 side spaces.
Rnd 3
Join the assigned color in any corner ch-2 sp. Ch 3, 2 dc, ch 2, 3 dc in the same corner sp; ch 1, 3 dc in the next ch-1 sp, ch 1. Rep from the next corner as follows: [(3 dc, ch 2, 3 dc) in corner ch-2 sp, ch 1, 3 dc in next ch-1 sp, ch 1] 3 times. Join. Turn.
Count: 36 dc, four ch-2 corner spaces, and eight ch-1 side spaces.
Rnd 4
Join the assigned color in any corner ch-2 sp. Ch 3, 2 dc, ch 2, 3 dc in the same corner sp; ch 1, 3 dc in each of the next 2 ch-1 spaces with ch 1 after each group. Rep from the next corner as follows: [(3 dc, ch 2, 3 dc) in corner ch-2 sp, ch 1, 3 dc in each of the next 2 ch-1 spaces with ch 1 after each group] 3 times. Join. Turn.
Count: 48 dc, four ch-2 corner spaces, and twelve ch-1 side spaces.
Rnd 5
Join the assigned color in any corner ch-2 sp. Ch 3, 2 dc, ch 2, 3 dc in the same corner sp; ch 1, 3 dc in each of the next 3 ch-1 spaces with ch 1 after each group. Rep from the next corner as follows: [(3 dc, ch 2, 3 dc) in corner ch-2 sp, ch 1, 3 dc in each of the next 3 ch-1 spaces with ch 1 after each group] 3 times. Join.
Count: 60 dc, four ch-2 corner spaces, and sixteen ch-1 side spaces.
Fasten off with a 6-in/15-cm tail.
Stitch-Count Check for Each Square
- Rnd 1: 4 corner groups × 3 dc = 12 dc.
- Rnd 2: 4 corners × 2 groups × 3 dc = 24 dc.
- Rnd 3: (4 corners × 2 groups + 4 side groups) × 3 dc = 36 dc.
- Rnd 4: (4 corners × 2 groups + 8 side groups) × 3 dc = 48 dc.
- Rnd 5: (4 corners × 2 groups + 12 side groups) × 3 dc = 60 dc.
Block the Squares
Gently wet-block all 48 squares to 6 × 6 in/15 × 15 cm and let them dry completely. Confirm that every motif has five rounds, four clear corner spaces, and the correct color sequence. You should have exactly 16 Square A motifs, 16 Square B motifs, and 16 Square C motifs.
Assembly
Square Placement Chart
Place every square with Rnd 5 facing up. Read each row from left to right and arrange the rows from top to bottom:
| Row | Six squares from left to right |
|---|---|
| 1 | A, B, C, A, B, C |
| 2 | B, C, A, B, C, A |
| 3 | C, A, B, C, A, B |
| 4 | A, B, C, A, B, C |
| 5 | B, C, A, B, C, A |
| 6 | C, A, B, C, A, B |
| 7 | A, B, C, A, B, C |
| 8 | B, C, A, B, C, A |
The chart contains 6 squares across × 8 squares down = 48 squares and uses 16 of each square type.
Flat-Slip-Stitch Join
The cream seams are a visible part of the design. Keep all squares facing up and hold neighboring edges together with wrong sides touching. Work every seam from the front.
- Insert the hook through the back loop of the next stitch or chain on the first square.
- Insert the hook through the back loop of the matching stitch or chain on the second square.
- Yarn over with A and pull through both layers and the loop already on the hook to complete one sl st.
- Continue across the full edge, matching every corner chain, every dc, and every ch-1.
- At a four-square intersection, work through the matching corner chain of the next pair without adding an extra chain.
Keep the slip stitches loose and even. A tight join will pucker the motifs and shorten the blanket.
Joining Order
- Join the five vertical seam lines first. Each seam line connects eight square pairs continuously from the top of Row 1 to the bottom of Row 8.
- Begin and end each vertical seam with an 8-in/20-cm tail.
- Join the seven horizontal seam lines next. Each seam line connects six square pairs continuously from the left edge to the right edge.
- Begin and end each horizontal seam with an 8-in/20-cm tail.
There are 5 vertical seams + 7 horizontal seams = 12 seam lines total. Weave each seam tail along its seam for at least 2 in/5 cm, reverse direction, and weave for another 1 in/2.5 cm.
Six-Round Outer Border
Keep the blanket facing up and identify its four outer corners. Border counts treat each outer side of each square as one segment. Place a marker in the center sc of every 3-sc blanket corner and move the markers upward after each round. The joining sl st does not count as a stitch.
Border Rnd 1—A
Join A with sl st at a blanket corner. Ch 1, 3 sc in that corner. Work exactly 18 sc evenly along each of the 6 square-edge segments across the top; 3 sc in the next blanket corner; work exactly 18 sc along each of the 8 square-edge segments down the side; 3 sc in the next corner; work exactly 18 sc along each of the 6 bottom segments; 3 sc in the next corner; work exactly 18 sc along each of the 8 remaining side segments. Join with sl st to first sc.
Count: 516 sc. Fasten off with a 6-in/15-cm tail.
Border Rnd 2—B
Join B in any marked corner sc. Ch 1, 3 sc in the same st; sc once in every st to the next marked corner; [3 sc in marked corner, sc once in every st to next marked corner] 3 times. Join.
Count: 524 sc. Fasten off with a 6-in/15-cm tail.
Border Rnd 3—C
Join C in any marked corner sc. Repeat Border Rnd 2.
Count: 532 sc. Fasten off with a 6-in/15-cm tail.
Border Rnd 4—D
Join D in any marked corner sc. Repeat Border Rnd 2.
Count: 540 sc. Fasten off with a 6-in/15-cm tail.
Border Rnd 5—E
Join E in any marked corner sc. Repeat Border Rnd 2.
Count: 548 sc. Fasten off with a 6-in/15-cm tail.
Border Rnd 6—A
Join A in any marked corner sc. Repeat Border Rnd 2.
Count: 556 sc. Fasten off with an 8-in/20-cm tail.
Border Count Check
- Rnd 1: (6 top segments × 18 sc) + (6 bottom segments × 18 sc) + (8 left segments × 18 sc) + (8 right segments × 18 sc) + (4 corners × 3 sc) = 516 sc.
- Rnd 2: 516 + four 2-st corner increases = 524 sc.
- Rnd 3: 524 + eight stitches = 532 sc.
- Rnd 4: 532 + eight stitches = 540 sc.
- Rnd 5: 540 + eight stitches = 548 sc.
- Rnd 6: 548 + eight stitches = 556 sc.
Finishing
Weave each border tail for at least 2 in/5 cm, reverse direction, and weave for another 1 in/2.5 cm. Inspect the seams and intersections for loose ends. Wet-block the completed blanket to approximately 39 × 51 in/99 × 130 cm, keeping the corners square and the visible seam lines straight. Let the blanket dry completely before trimming the woven tails.
Customization Ideas
You may choose different shades while preserving the five-color roles and the exact round sequences. A tonal palette produces a quiet effect, while high-contrast colors make the diagonal placement more prominent.
For a different yarn, make and block a test square first. Yarn substitution can change the finished dimensions and required yardage. To preserve this pattern’s checked quantities, keep the specified 6-by-8 layout, 48 motifs, five vertical seams, seven horizontal seams, and six border rounds.
Common Mistakes to Avoid
- Skipping the final ch 1: In square Rnds 2–5, the final ch 1 must be made before joining.
- Miscounting corner groups: Every corner receives two 3-dc groups separated by ch 2.
- Blocking inconsistent squares: All 48 motifs should measure the same before assembly.
- Reversing the placement chart: Keep Rnd 5 facing up and read every row from left to right.
- Joining mismatched edge elements: Match corner chains to corner chains, dc to dc, and ch-1 to ch-1.
- Pulling seams too tightly: Tight slip stitches make the blanket pucker.
- Losing the marked border corner: The center stitch of each 3-sc corner becomes the corner stitch for the next round.
- Trimming tails before blocking: Wait until the final blocking is dry so tails have time to settle securely.
Troubleshooting
My granny square twists or leans.
Confirm that you turned after every round and placed all groups into the correct chain spaces. Blocking will relax minor movement, but missing groups must be corrected.
My square has the wrong dc count.
Check the corners first. Every round has eight corner groups in total. Then check the side groups: Rnd 1 has none, Rnd 2 has none, Rnd 3 has four, Rnd 4 has eight, and Rnd 5 has twelve.
The joined blanket puckers.
The flat-slip-stitch seams are probably too tight. Relax the working loop, avoid tugging after each stitch, and compare the joined edge with an unjoined square edge as you work.
The border ripples.
Verify that Rnd 1 has exactly 18 sc per square-edge segment and three sc at each blanket corner. Extra stitches along the straight sides cause rippling.
The border pulls inward.
Confirm that no edge segment has fewer than 18 sc and that every marked corner received three sc. Also check that the joining slip stitches are loose.
My final measurement differs slightly.
Small variations are normal. Compare a blocked square with the 6-in/15-cm target. If every square differs, that difference will accumulate across six columns and eight rows.
Care Instructions
Follow the care directions on the yarn label. For a washable worsted-weight yarn, use a gentle cycle with cool water or wash by hand. Avoid bleach unless the yarn manufacturer permits it. Support the wet blanket when lifting it, reshape it to the finished measurements, and dry it flat. Store clean and folded away from direct sunlight. Never hang the blanket for long-term storage, because its weight may stretch the motifs and seams.
Frequently Asked Questions
Is this granny square blanket suitable for beginners?
Yes. It is intended for an easy skill level, but you should already be comfortable making chains, slip stitches, single crochet, double crochet, and color changes.
How many granny squares do I need?
You need 48 five-round squares: 16 Square A, 16 Square B, and 16 Square C.
How are the squares arranged?
They are arranged in eight rows of six squares. The placement chart rotates A, B, and C to produce the diagonal color rhythm.
How many joining seams are there?
There are 12 continuous seam lines: five vertical seams and seven horizontal seams.
Can I sew the squares instead?
The visible cream flat-slip-stitch grid is a defining component of this design. Substituting a sewn join would change the appearance and may change the finished dimensions.
Why is cream used in the third round of every square?
The shared cream round visually connects the three color sequences and echoes the cream joining grid and final border round.
Do chain spaces count as double crochets?
No. Chain stitches and chain spaces are reported separately and are excluded from all stated dc counts.
Can I carry yarn between square rounds?
No. Each round uses a different color. Fasten off after each round and weave the tails securely before assembly.
When should I block the blanket?
Block the individual squares before joining, then block the completed blanket again after all seams and border rounds are finished.