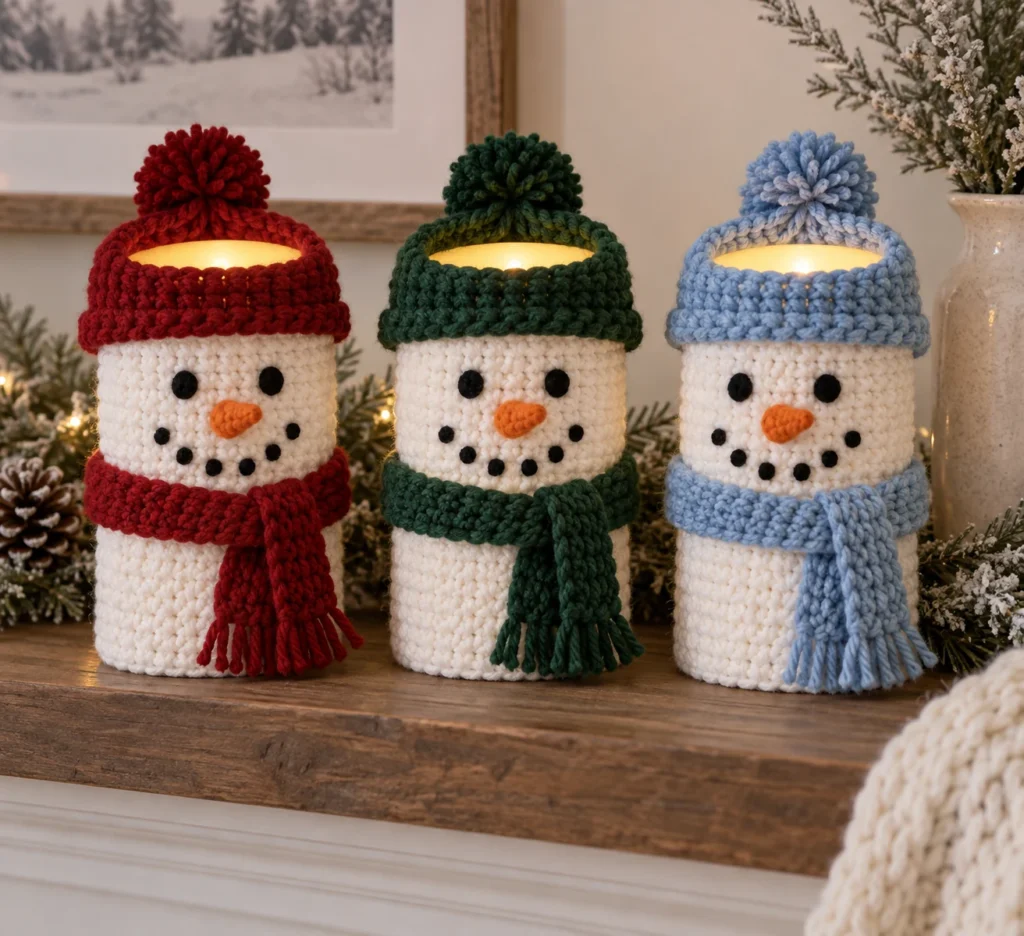
Crochet Snowman Candle Covers
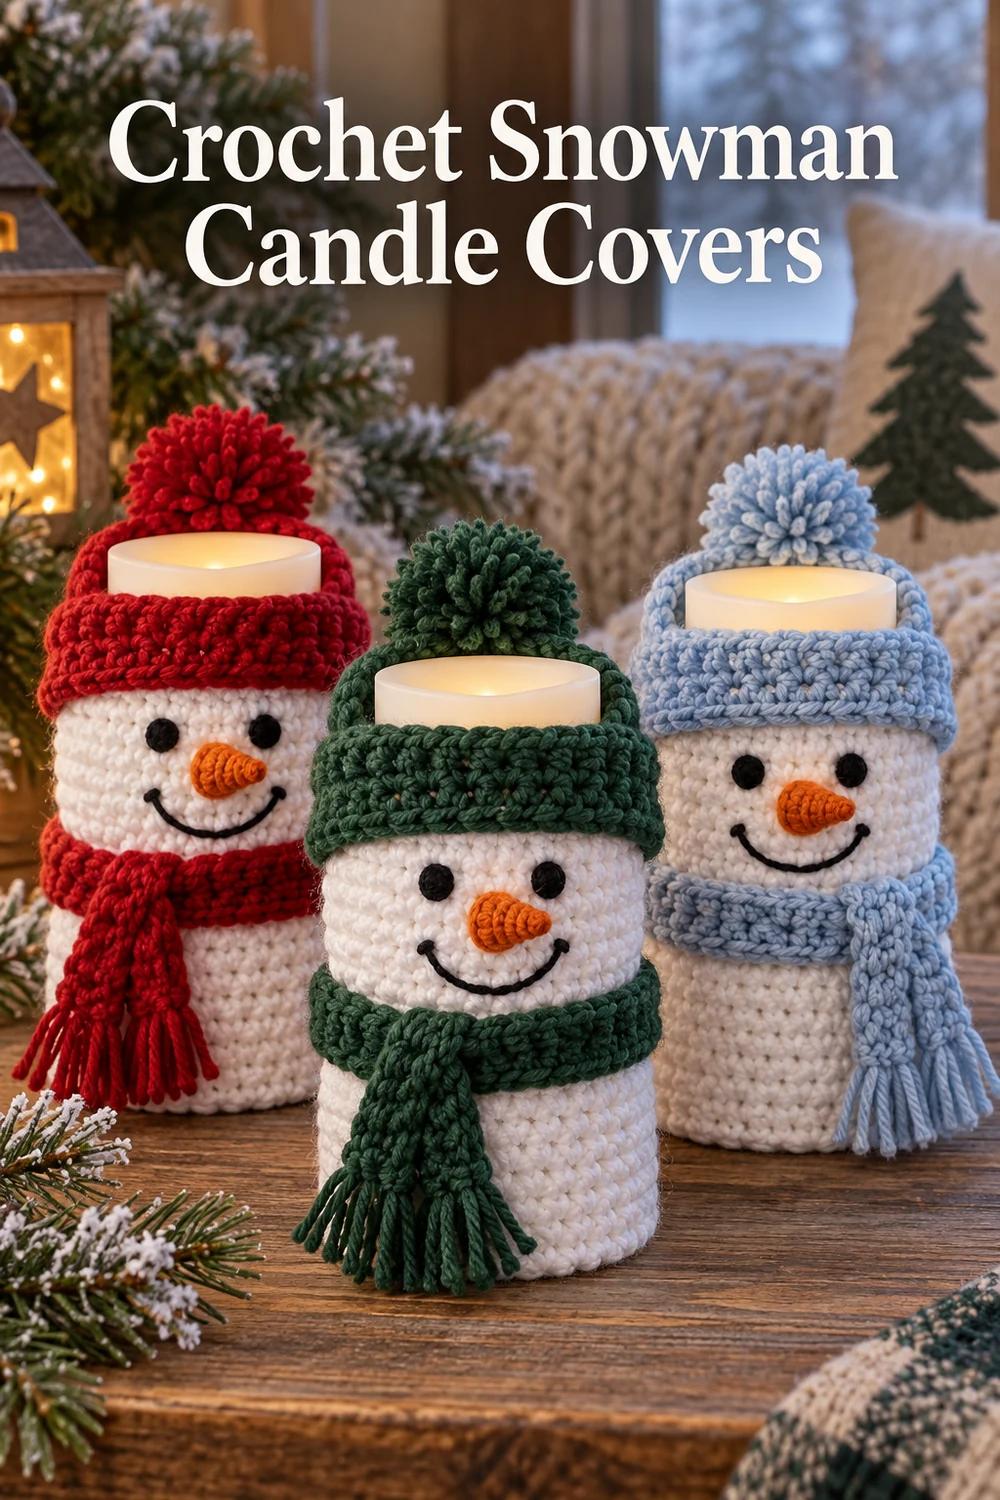
Turn three flameless pillar candles into a cheerful snowman trio. Each open-ended sleeve is topped with a removable hat and scarf, while yarn embroidery and a tiny crocheted carrot create a friendly face.
Safety: These covers are for cool-running flameless LED candles only. Never use them with a real flame, wax candle, warmer, or hot vessel.
Pattern at a Glance
- Skill level: Intermediate beginner
- Terminology: US crochet terms
- Construction: Three open sleeves, three hats, three scarves, and three carrot noses are made separately.
- Visible components: 3 snowman sleeves, 3 hats, 3 scarves, and 3 carrot noses.
Materials You’ll Need
- Category 4 worsted yarn: 180 yd white; 45 yd each red, forest green, and icy blue; 15 yd orange; 12 yd black
- 4 mm (G-6) hook
- Yarn needle, scissors, stitch markers
- Three cool-running flameless LED pillar candles, approximately 3 in/7.5 cm diameter by 4 in/10 cm tall
Gauge
15 sc and 16 rounds = 4 in/10 cm. Measure around the LED candle; the sleeve should fit snugly without stretching open.
Finished Measurements
Each sleeve is approximately 9 in/23 cm in circumference and 3.75 in/9.5 cm tall. Hat and scarf sizing corresponds to the stated LED pillars.
Crochet Abbreviations
- ch = chain
- sc = single crochet
- sl st = slip stitch
- dec = single crochet 2 together
- st(s) = stitch(es)
- MR = magic ring
Important Pattern Notes
- Work sleeves and hats in continuous rounds, marking the first stitch.
- Do not crochet a bottom; access to the candle switch remains open.
- Embroider facial details with yarn only. Do not use buttons, beads, glue, or wire.
- Remove the cover before charging, changing batteries, or storing the LED candle.
Complete Free Crochet Pattern
Snowman Sleeves — Make 3 in White
Ch 30 loosely and join with sl st, taking care not to twist.
Rounds 1–15: Sc in each st around. (30)
After Round 8, test the sleeve over the unlit LED pillar. Adjust hook size rather than stitch count if necessary. Fasten off after Round 15 and weave in the ends.
Hats — Make 1 Each in Red, Green, and Blue
Ch 30 and join without twisting.
Rounds 1–4: Sc around. (30)
Round 5: [Sc 4, dec] 5 times. (25)
Round 6: [Sc 3, dec] 5 times. (20)
Round 7: [Sc 2, dec] 5 times. (15)
Round 8: [Sc 1, dec] 5 times. (10)
Round 9: Dec 5 times. (5)
Fasten off with an 8 in/20 cm tail. Thread through the final stitches, close firmly, knot, and bury the tail.
Scarves — Make 1 Each in Red, Green, and Blue
Ch 51.
Row 1: Sc in second ch and across. (50)
Rows 2–3: Ch 1, turn, sc across. (50)
Fasten off and weave in ends. Cut six 4 in/10 cm strands per scarf and knot three through each short end for fringe.
Carrot Noses — Make 3 in Orange
Ch 5. Sl st in the second ch from hook and in the next 3 ch. (4 sl sts) Fasten off with two 8 in/20 cm tails for sewing.
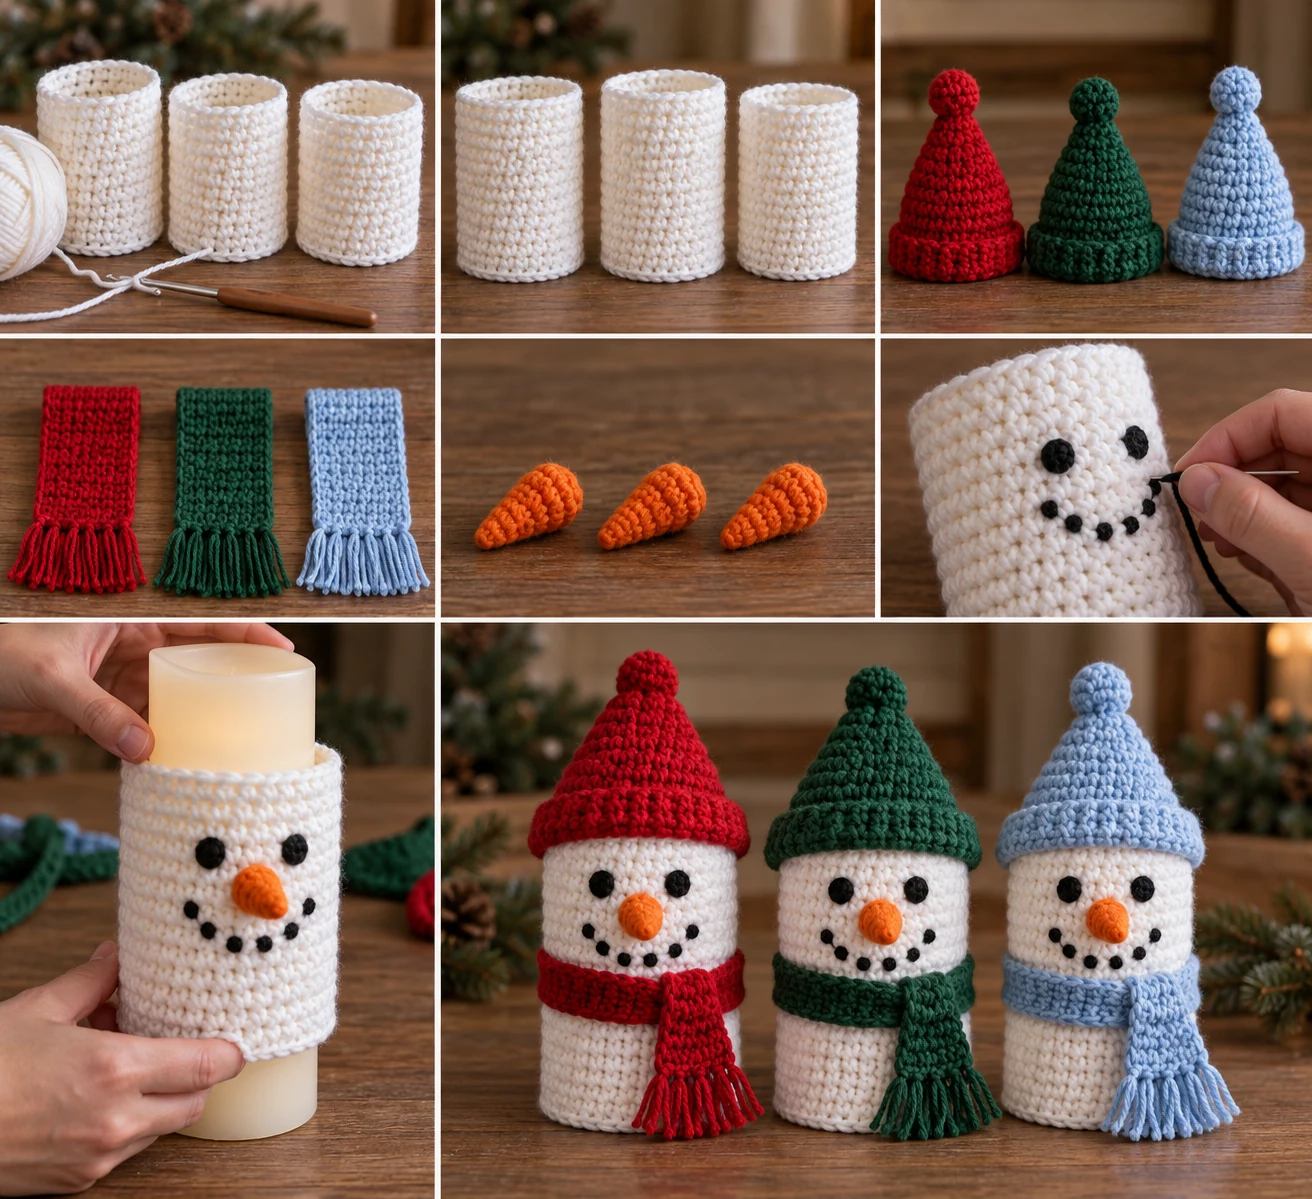
Assembly
- Place each sleeve over an unlit LED pillar with the seam at the back.
- Using black yarn, embroider two small eyes between Rounds 10 and 11, spaced about 5 stitches apart. Embroider five small coal dots in a smile between Rounds 6 and 8. Knot securely on the wrong side and bury the yarn ends.
- Center an orange nose between the eyes and smile. Sew both ends through adjacent sleeve stitches several times, knot inside, and bury the tails.
- Wrap one scarf around each cover between Rounds 3 and 5 and tie once at the front side. Keep it loose enough to remove easily.
- Place the matching hat over the upper edge. The hat remains removable for access and cleaning.
Finishing
Check every yarn end, straighten the embroidered faces, trim scarf fringe evenly, and verify that each LED candle can be removed without pulling the crochet.
Customization Ideas
Mix winter colors, embroider eyebrows, or vary the smile. For a different LED pillar diameter, make a gauge swatch and adjust the foundation chain to an even number that fits snugly; keep all pieces away from heat and flame.
Troubleshooting
Why is the sleeve loose?
Use a smaller hook or firmer tension. A snug sleeve keeps the face aligned.
Why does the hat lean?
Confirm each decrease round contains exactly five evenly spaced decreases.
Can I use safety eyes?
Yarn embroidery is recommended because it stays soft and avoids rigid detachable parts.
Care Instructions
Remove all LED candles before cleaning. Hand-wash the crochet pieces in cool water, press in a towel, reshape, and dry flat. Never wash electronic candles.
Frequently Asked Questions
Can I use real candles?
No. Use only cool-running flameless LED pillar candles.
Are the hats attached?
No. They are removable for easy access and care.
Has this pattern been physically tested?
No physical testing is claimed. Check gauge and fit against your specific unlit LED pillars.