Crochet Pumpkin Blanket Pattern
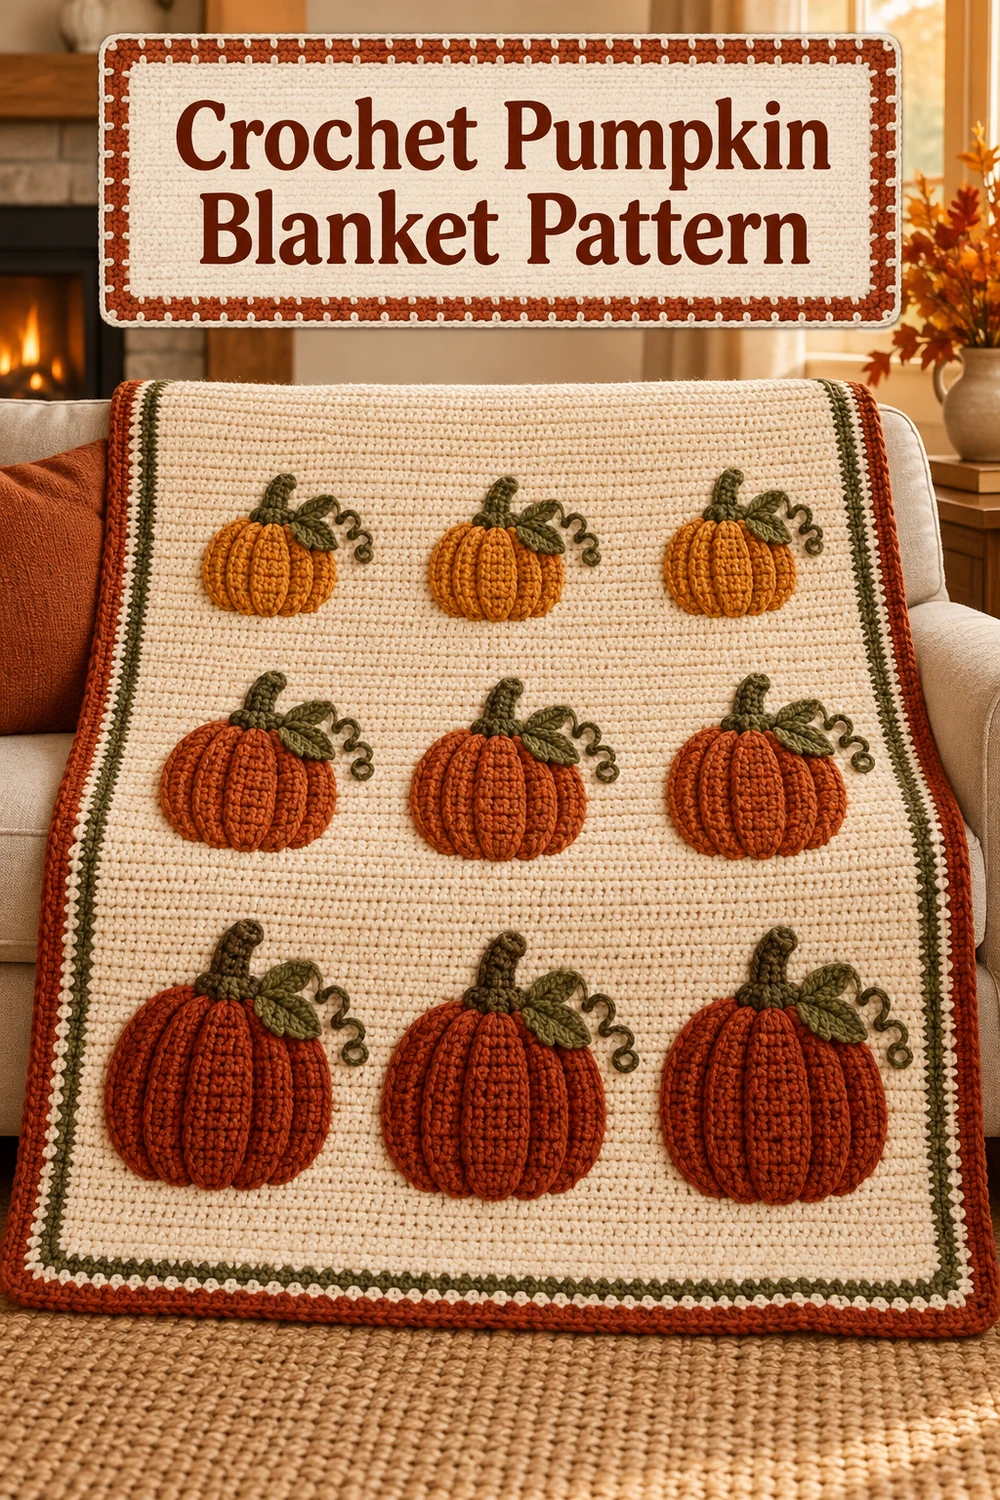
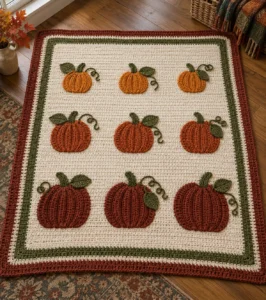
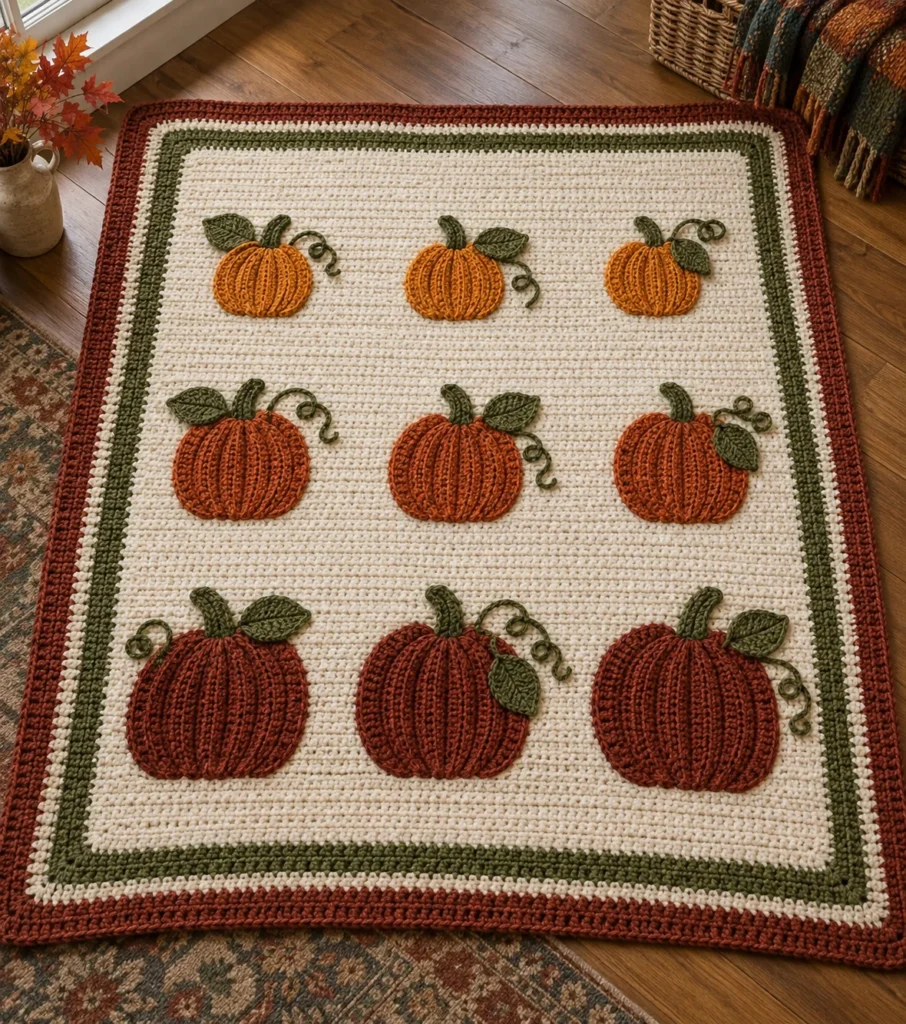
Bring a cozy autumn pumpkin patch indoors with this original crochet pumpkin blanket pattern. The throw combines a warm cream blanket, a three-round contrasting border, and nine dimensional ribbed pumpkin appliqués. Three pumpkin sizes and a gently scattered layout create movement, while crocheted stems, oval leaves, and curling vines complete every pumpkin.
This free pattern uses US crochet terminology. The pumpkins are shaped without stuffing, and the project contains no buttons, wire, beads, or other hardware.
Pattern at a Glance
- Skill level: Intermediate
- Construction: One flat rectangular panel with an integrated three-round border and sewn-on appliqués
- Visible crocheted components: 1 blanket panel, 1 integrated border, 9 pumpkin bodies, 9 stems, 9 leaves, and 9 spiral vine tendrils
- Pumpkin sizes: 3 small, 3 medium, and 3 large
- Terminology: US crochet terms
- Stuffing or hardware: None
Materials You’ll Need
- Worsted-weight category 4 yarn in Color A, warm cream: 2,150 yd for the blanket panel and Border Round 1
- Worsted-weight category 4 yarn in Color B, deep rust: 350 yd for 3 large pumpkin bodies and Border Round 3
- Worsted-weight category 4 yarn in Color C, burnt orange: 250 yd for 3 medium pumpkin bodies
- Worsted-weight category 4 yarn in Color D, golden orange: 175 yd for 3 small pumpkin bodies
- Worsted-weight category 4 yarn in Color E, olive green: 175 yd for 9 stems, 9 leaves, 9 tendrils, and Border Round 2
- US I/9 (5.5 mm) crochet hook
- Removable stitch markers
- Yarn needle
- Scissors
- Rustproof blocking pins or blocking mats
Gauge
14 sc and 15 rows = 4 in in unblocked single crochet using Color A.
Make and wash a gauge swatch before beginning. Change hook size if necessary. Exact gauge matters for the stated blanket measurements but is not essential for the appliqués.
Finished Measurements
- Blanket: Approximately 45 in wide × 51 in long after blocking
- Small pumpkin: Approximately 4 × 3 in after gathering and flattening
- Medium pumpkin: Approximately 5 × 4 in after gathering and flattening
- Large pumpkin: Approximately 6 × 5 in after gathering and flattening
Measurements are approximate because yarn, ribbing, tension, and blocking response can vary.
Crochet Abbreviations
- beg = beginning
- BLO = back loop only
- ch = chain
- ch-2 sp = chain-2 space
- dc = double crochet
- hdc = half double crochet
- rep = repeat
- rnd = round
- RS = right side
- sc = single crochet
- sl st = slip stitch
- st(s) = stitch(es)
- tr = treble crochet
- WS = wrong side
Important Pattern Notes
- Turning chains do not count as stitches.
- Join rounds with a sl st only where directed.
- Stitch counts exclude chains and chain spaces unless explicitly stated.
- The blanket panel is worked flat.
- Pumpkin bodies are BLO rectangles. Their first and last rows are seamed to form rings; the ring edges are gathered, flattened, and sewn onto the blanket without stuffing.
- Leave all specified sewing tails intact.
- When a color change is required, complete it on the final yarn-over of the preceding stitch.
- A standing sc may be made by placing a slip knot on the hook, inserting the hook in the indicated space, pulling up a loop, and completing a sc.
Complete Free Crochet Pattern
Component 1: Blanket Panel — Make 1
With Color A, ch 151.
Row 1 (WS): Sc in second ch from hook and in each ch across; turn. (150 sc)
Rows 2–180: Ch 1, sc in each st across; turn. (150 sc)
Do not fasten off after Row 180. The panel contains 180 rows total. Place a marker in each corner. The working loop is at the top-left corner when the RS of Row 180 faces up.
Component 2: Integrated Border — Make 1 Around the Panel
Round 1, Color A: Ch 1. Work 150 sc evenly across the top edge, ch 2 at the corner, 180 sc evenly down the right edge at one sc per row end, ch 2, 150 sc across the unused loops of the foundation chain, ch 2, and 180 sc evenly up the left edge at one sc per row end; ch 2 and join with sl st to first sc. (660 sc; four ch-2 spaces)
Fasten off Color A.
Round 2, Color E: Join with standing sc in any ch-2 sp, ch 2, sc again in the same sp. Sc in every sc around; in each remaining ch-2 sp work (sc, ch 2, sc). Join with sl st to first sc. (668 sc; four ch-2 spaces)
Fasten off Color E.
Round 3, Color B: Join with standing sc in any ch-2 sp, ch 2, sc again in the same sp. Sc in every sc around; in each remaining ch-2 sp work (sc, ch 2, sc). Join with sl st to first sc. (676 sc; four ch-2 spaces)
Fasten off Color B and weave in the border ends.
Component 3: Small Ribbed Pumpkin Body — Make 3
With Color D, leave an 18-in beginning tail and ch 14.
Row 1: Sc in second ch from hook and in each ch across; turn. (13 sc)
Rows 2–18: Ch 1, sc BLO in each st across; turn. (13 sc)
Each piece has 18 rows and 234 sc total. Fasten off, leaving a 36-in tail for seaming, gathering, shaping, and attachment.
Component 4: Medium Ribbed Pumpkin Body — Make 3
With Color C, leave an 18-in beginning tail and ch 17.
Row 1: Sc in second ch from hook and in each ch across; turn. (16 sc)
Rows 2–22: Ch 1, sc BLO in each st across; turn. (16 sc)
Each piece has 22 rows and 352 sc total. Fasten off, leaving a 42-in tail for seaming, gathering, shaping, and attachment.
Component 5: Large Ribbed Pumpkin Body — Make 3
With Color B, leave a 20-in beginning tail and ch 20.
Row 1: Sc in second ch from hook and in each ch across; turn. (19 sc)
Rows 2–26: Ch 1, sc BLO in each st across; turn. (19 sc)
Each piece has 26 rows and 494 sc total. Fasten off, leaving a 48-in tail for seaming, gathering, shaping, and attachment.
Component 6: Stem — Make 9
With Color E, leave a 12-in beginning tail and ch 5.
Row 1: Sc in second ch from hook and in each ch across; turn. (4 sc)
Rows 2–6: Ch 1, sc in each st across; turn. (4 sc)
Fasten off, leaving a 15-in sewing tail. Each stem has 6 rows and 24 sc. Fold the piece lengthwise during attachment so the finished stem appears approximately 0.6 in wide and 1.5 in tall.
Component 7: Leaf — Make 9
With Color E, leave a 15-in beginning tail and ch 8.
Round 1: Beginning in second ch from hook, work sc, hdc, dc, tr, dc, hdc in the next 6 chains, 3 sc in the last chain; rotate to work along the opposite side of the foundation chain and work hdc, dc, tr, dc, hdc, sc in the next 6 unused chain loops. Join with sl st to the first sc. (15 sts: 5 sc, 4 hdc, 4 dc, 2 tr)
Fasten off, leaving a 20-in sewing tail. The beginning tail may be woven in before assembly.
Component 8: Spiral Vine Tendril — Make 9
With Color E, leave a 12-in beginning tail and ch 18.
Row 1: Work 3 sc in second ch from hook and 3 sc in each remaining ch. (51 sc)
Fasten off, leaving a 15-in sewing tail. Let the strip curl naturally; do not block it straight.
Component 9: Assembly and Finishing
Pumpkin Body Formation
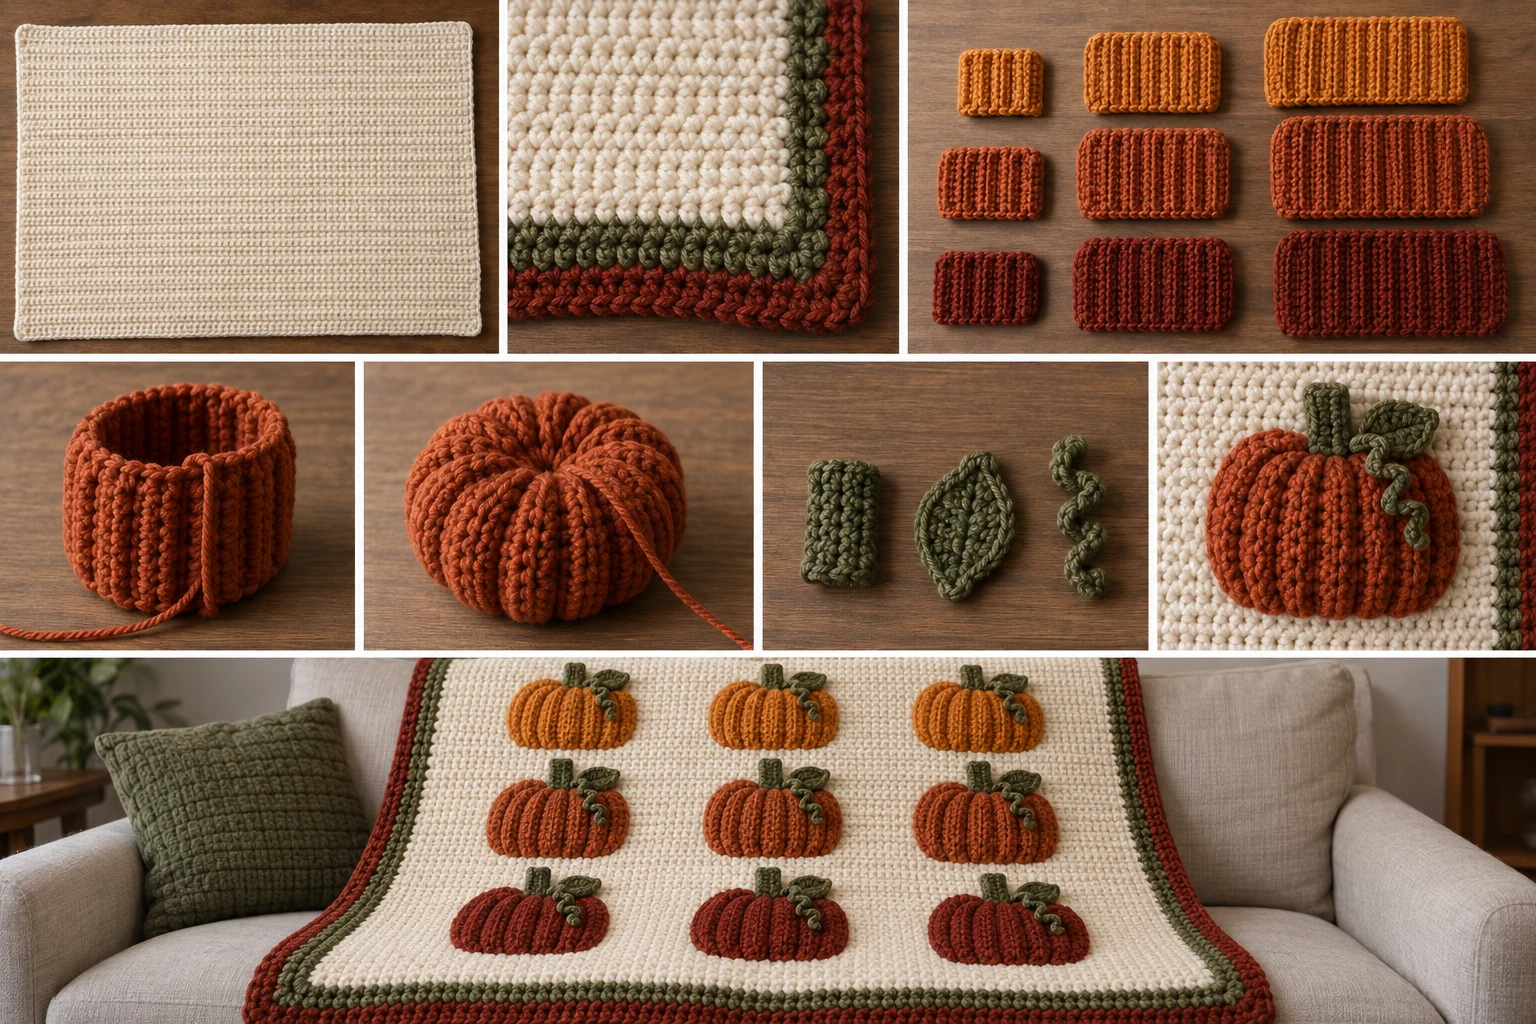
Complete all nine pumpkin bodies before positioning them. For each body, bring the first and last rows together with the RS facing outward. Using the long finishing tail, whipstitch the 13, 16, or 19 corresponding stitch pairs to form a ring. Do not fasten off.
Run the same tail through the row-end edge around one opening, catching one loop at each of the 18, 22, or 26 row ends. Pull firmly closed and secure with two small stitches. Pass the needle through the hollow center to the other opening. Run the tail through every row end around that opening, pull until the opening is approximately 0.5 in across, and secure.
Do not add stuffing. Flatten the ribbed form into an oval and distribute the ribs evenly. Pass the tail through the center from back to front and back again twice, tightening gently to create the central indentation. Retain the remaining tail for sewing the body to the blanket.
Pumpkin Layout
Place the blanket RS up with the 45-in edges at the top and bottom. All measurements are taken from the outer edge of the finished border to the approximate center of each pumpkin body. Adjust a position by up to 0.5 in when needed to align it with the crochet rows, while retaining at least 3 in between adjacent pumpkin edges.
- Top row: Medium pumpkin 9 in from the left and 11 in from the top; small pumpkin 23 in from the left and 8 in from the top; large pumpkin 36 in from the left and 13 in from the top.
- Middle row: Small pumpkin 8 in from the left and 27 in from the top; large pumpkin 22 in from the left and 25 in from the top; medium pumpkin 37 in from the left and 29 in from the top.
- Bottom row: Large pumpkin 10 in from the left and 42 in from the top; medium pumpkin 25 in from the left and 40 in from the top; small pumpkin 38 in from the left and 44 in from the top.
Rotate individual pumpkins between 5 and 15 degrees in alternating directions to create a drifting patch arrangement. Keep every pumpkin body within the Color A field and clear of the border.
Assembly
- Block the blanket panel and border to approximately 45 × 51 in. Block the leaves flat, but do not stretch the pumpkin bodies or tendrils.
- Form and flatten all nine pumpkin bodies as directed. Pin them at the listed positions and verify the complete layout and spacing before sewing.
- Using each body’s retained tail, sew around its entire back perimeter with small whipstitches through the blanket’s surface loops only. Add three short anchoring stitches near the center indentation. Preserve the raised ribs and avoid carrying stitches unnecessarily through to the blanket’s WS. Knot securely beneath the appliqué and weave the tail under the body.
- Center one folded stem behind the top of each body, inserting its lower 0.5 in beneath the pumpkin. With the stem’s 15-in tail, sew both long sides and its exposed top edge to the blanket. Use the 12-in beginning tail to secure the concealed lower edge to the pumpkin body. Knot and bury both tails beneath the appliqué.
- Place one leaf beside each stem, alternating left and right across the nine pumpkins. Overlap the leaf base and stem by approximately 0.25 in. With the leaf’s 20-in tail, sew around the leaf perimeter while leaving the outermost tip free for slight dimension. Add one straight line of running stitches along the center foundation chain to suggest a vein. Knot and weave in beneath the leaf.
- Place one tendril on the side opposite each leaf. Position its first 1 in beside the stem and allow the remaining spiral to curve outward without touching another appliqué or the border. Use the 15-in tail to secure the first inch and tack every third curl to the blanket. Use the 12-in beginning tail to secure the far end. Knot and weave both tails beneath the tendril.
- Inspect the WS. Weave every remaining tail through at least 2 in of same-color stitches, reverse direction once, and trim. Remove all markers.
Stitch-Count Check
- Blanket Row 1: 151 foundation chains minus 1 skipped chain = 150 sc.
- Blanket Rows 2–180: 150 sc worked across 150 sts = 150 sc.
- Border Round 1: 150 + 180 + 150 + 180 = 660 sc.
- Border Round 2: 660 sc plus 2 additional sc at each of 4 corners = 668 sc.
- Border Round 3: 668 sc plus 2 additional sc at each of 4 corners = 676 sc.
- Each small body: 13 sc × 18 rows = 234 sc.
- Each medium body: 16 sc × 22 rows = 352 sc.
- Each large body: 19 sc × 26 rows = 494 sc.
- Each stem: 4 sc × 6 rows = 24 sc.
- Each leaf: 6 first-side sts + 3 sc at the chain end + 6 opposite-side sts = 15 sts.
- Each tendril: 17 worked chains × 3 sc = 51 sc.
- Appliqué inventory: 9 bodies + 9 stems + 9 leaves + 9 tendrils = 36 separate crocheted pieces.
Finishing
Steam lightly or wet-block the finished blanket again without flattening the pumpkin ribs or tendril curls. Confirm that every pumpkin perimeter and center, plus every stem, leaf, and tendril tack, is secure.
Customization Ideas
You may change the palette while retaining the yarn category and following the same component instructions. Try muted harvest shades, modern neutrals, or several tones from one color family. A solid color may be used for all nine pumpkin bodies if you preserve the required quantities and sizes. For a quieter finish, choose low-contrast border colors; for a bolder frame, use strongly contrasting shades.
The alternating 5–15-degree rotations may be adjusted within that range, and each listed pumpkin position may move by up to 0.5 in to align with the blanket stitches. Keep the pumpkins in the Color A field, clear of the border, and maintain at least 3 in between adjacent pumpkin edges.
Common Mistakes to Avoid
- Counting the turning chain as a stitch, which can gradually increase the panel width.
- Missing a row end on a side edge, preventing Border Round 1 from reaching 180 sc on that side.
- Working through both loops on ribbed body Rows 2 onward instead of working in BLO.
- Stuffing the pumpkins; this design relies on gathered, flattened ribbing and uses no stuffing.
- Cutting the long tails before formation and assembly are complete.
- Pulling appliqué stitches so tightly that the blanket puckers or the ribs flatten.
- Blocking tendrils straight instead of retaining their natural spirals.
- Sewing before pinning and checking the complete nine-pumpkin arrangement.
Troubleshooting
Why is my blanket panel getting narrower or wider?
Count 150 sc after every row and mark the first and last stitches. Work into both edge stitches, and remember that ch 1 does not count as a stitch.
My border is rippling. What should I check?
Confirm that Round 1 contains exactly 150 sc across each horizontal edge and 180 sc along each vertical edge. Also confirm that each corner is a ch-2 space and that later rounds add exactly two sc per corner.
My pumpkin does not look ribbed.
Rows 2 onward must be worked through the back loop only. The unworked front loops form the raised lines.
The gathered opening will not close completely.
The first opening should be pulled firmly closed, but the second is intentionally left approximately 0.5 in across. Catch one loop from every row end so the gathers distribute evenly.
The blanket puckers beneath an appliqué.
Release or redo overly tight sewing stitches. Secure the pumpkin through surface loops with small, even stitches while the blanket lies flat.
A tendril keeps twisting out of position.
Secure its first inch, tack every third curl, and anchor the far end. Do not stitch down every curl or block the spiral straight.
Care Instructions
Hand wash or machine wash on a gentle cycle in cool water, following the yarn label. Reshape the blanket flat to dry. Avoid hanging it while wet because the weight can stretch the panel. After washing, reshape the pumpkin ribs, leaf tips, and vine curls by hand. Inspect all appliqué stitching periodically, particularly if the blanket receives frequent use.
Frequently Asked Questions
Is this crochet pumpkin blanket worked in one piece?
The rectangular blanket and its three-round border form one base. The 36 pumpkin, stem, leaf, and tendril pieces are crocheted separately and sewn to that base.
Does the pattern use US or UK crochet terminology?
It uses US crochet terminology throughout.
Are the pumpkins stuffed?
No. Each ribbed rectangle is seamed, gathered, flattened, indented, and attached without stuffing.
How many pumpkins are on the blanket?
There are nine: three small, three medium, and three large.
Can I substitute another yarn?
Yes. Choose a category 4 yarn and make a washed gauge swatch. Different fibers may change the finished size, drape, yardage, and definition of the appliqués.
Can a beginner make this blanket?
A confident beginner familiar with consistent single crochet, BLO ribbing, working around a foundation chain, and sewing appliqués may enjoy it, but the overall pattern is rated intermediate because the border placement, shaped pieces, and assembly require care.
Why are the pumpkin bodies made as rectangles?
The BLO rows create flexible ribs. Seaming and gathering the rectangle produces a dimensional pumpkin form while keeping the construction repeatable and stuffing-free.
Should I block the assembled blanket?
Yes, but use light steam or wet blocking and reshape gently. Do not flatten the ribs or straighten the vine curls.