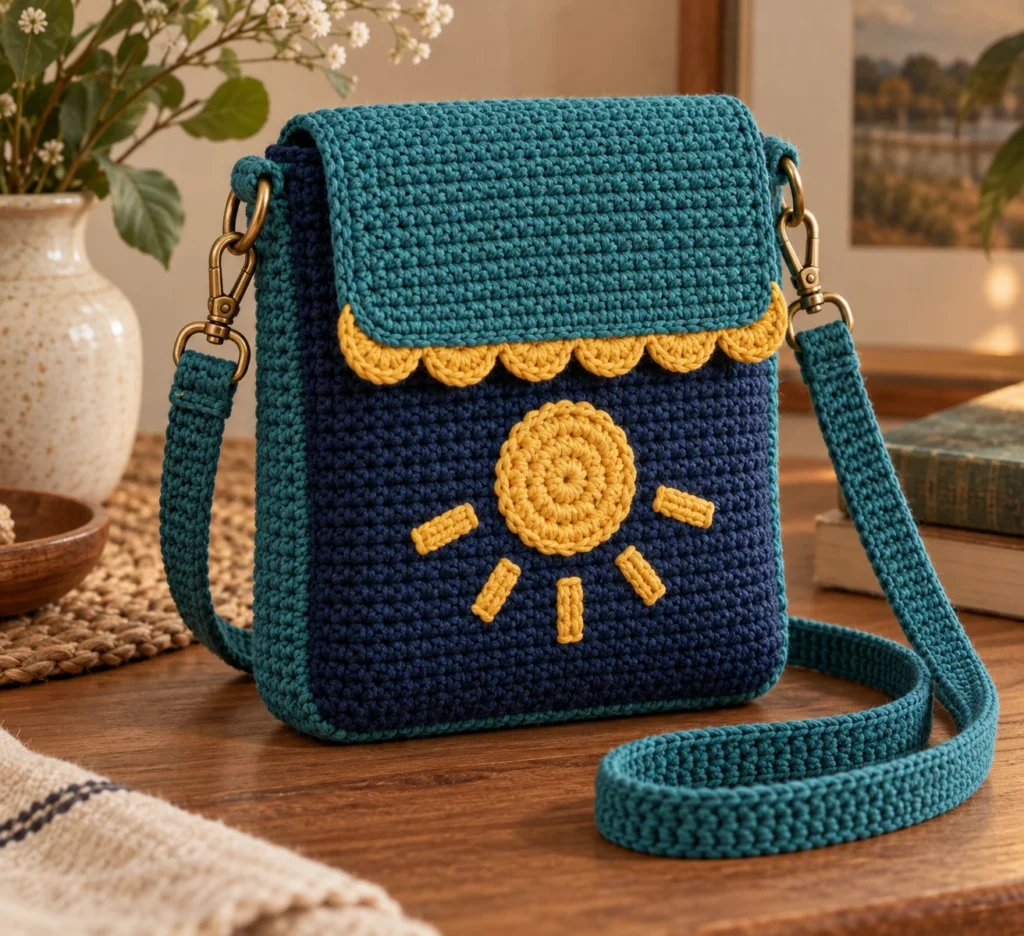
Crochet Crossbody Phone Bag: Free Crochet Pattern
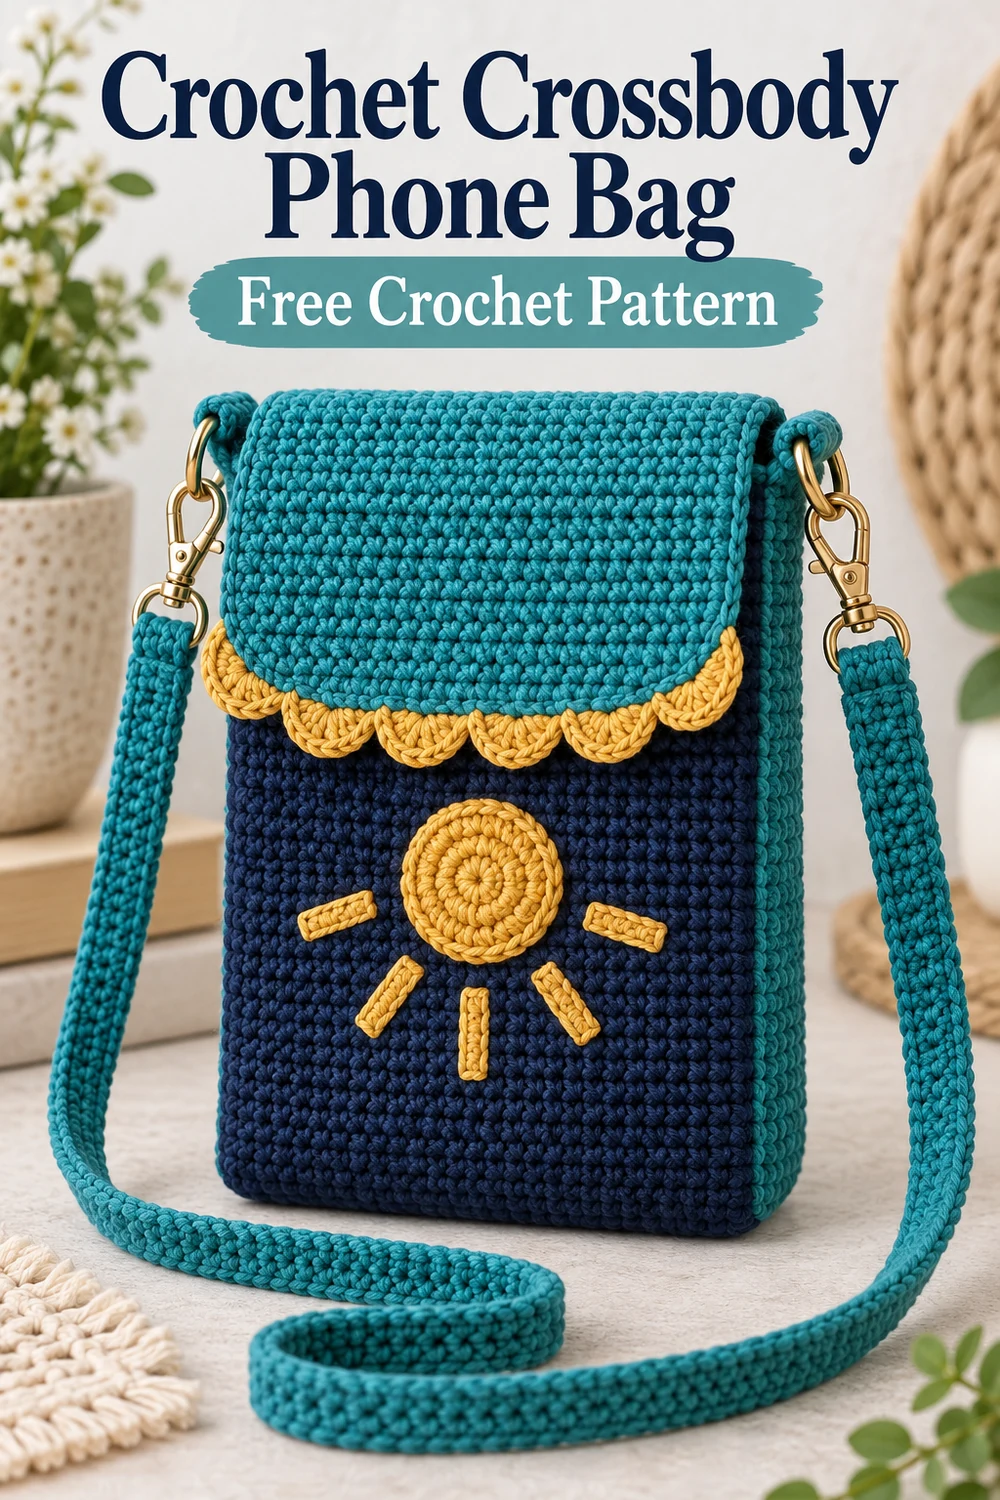
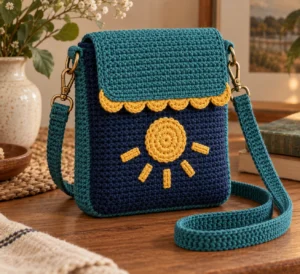
Make a compact, color-block phone bag with a contrasting gusset, scalloped flap, detachable crossbody strap, and cheerful sun appliqué. This original free crochet pattern uses firm single-crochet fabric and countable flat pieces, making every seam easy to align.
The finished bag is designed for a phone and other light essentials. Check your phone against the stated interior measurements before assembly.
Pattern at a Glance
- Skill level: Confident beginner to intermediate
- Terminology: US crochet terms
- Construction: Eight component types made separately, then sewn together
- Main techniques: Single crochet, double crochet scallops, working in rounds, appliqué, seaming, and hardware installation
- Yarn: DK-weight category 3 cotton or cotton blend
- Hook: 4 mm (G-6), or size needed for gauge
- Finished size: Approximately 5.5 in wide × 6.25 in tall × 1 in deep, excluding flap and strap
- Strap length: Approximately 60 in before the ends are folded around the clasps
Component Inventory
- Front panel: make 1 in Color A
- Back panel: make 1 in Color A
- Side-and-bottom gusset: make 1 in Color B
- Scalloped flap: make 1 in Color B with Color C edging
- D-ring tabs: make 2 in Color B
- Detachable crossbody strap: make 1 in Color B
- Sun appliqué: make 1 in Color C
- Sunray appliqués: make 5 in Color C
Materials You’ll Need
- Approximately 300 yd (275 m) total DK-weight category 3 mercerized cotton or cotton-blend yarn
- Color A, midnight blue: approximately 90 yd (82 m) for the front and back panels
- Color B, teal: approximately 185 yd (169 m) for the gusset, flap, tabs, and strap
- Color C, golden yellow: approximately 25 yd (23 m) for the scallops, sun, and rays
- 4 mm (G-6) crochet hook, or size needed for gauge
- Two 1 in (25 mm) D-rings
- Two 1 in (25 mm) swivel clasps
- One 14 mm sew-on magnetic snap with backing washers or reinforcement patches
- Locking stitch markers
- Yarn needle and scissors
- Rustproof sewing thread and sewing needle
Choose a firm, low-stretch DK cotton so the weight of the phone does not pull the bag out of shape.
Gauge
18 sc and 20 rows = 4 in (10 cm) in unblocked single crochet worked flat.
Make and wash a gauge swatch before beginning. Matching both stitch and row gauge is important for phone fit, gusset alignment, and strap length.
Finished Measurements
- Approximately 5.5 in (14 cm) wide
- Approximately 6.25 in (16 cm) tall
- Approximately 1 in (2.5 cm) deep
- Strap approximately 60 in (152.5 cm) long before its ends are folded around the clasps
Interior dimensions may vary slightly with seam tension. Confirm that your phone fits within an interior approximately 5.5 in wide by 6.25 in tall before attaching the flap.
Crochet Abbreviations
- beg = beginning
- ch = chain
- dc = double crochet
- rep = repeat
- rnd = round
- RS = right side
- sc = single crochet
- sl st = slip stitch
- st(s) = stitch(es)
- WS = wrong side
- yo = yarn over
Important Pattern Notes
- Work all flat pieces in rows unless a round is specified.
- Ch 1 at the beginning of a single-crochet row and turn. The turning chain never counts as a stitch.
- Work the first sc in the first stitch and the last sc in the last stitch.
- Place markers in the first and last stitches of long rows if needed.
- To fasten off, cut the yarn and pull the tail completely through the final loop.
- Leave every sewing tail at the length specified. These tails are used during assembly.
- This project is not stuffed.
- Gauge and finished dimensions are design targets and have not been physically tested. Block and measure every panel before assembly.
Complete Free Crochet Pattern
Component 1: Front Panel — Make 1, Color A
Leave an 18 in (46 cm) sewing tail at the beginning.
Ch 26.
Row 1 (WS): Sc in second ch from hook and in each remaining ch; turn. (25 sc)
Rows 2–32: Ch 1, sc in each st across; turn. (25 sc)
Fasten off, leaving an 18 in (46 cm) sewing tail. Block to approximately 5.5 × 6.25 in (14 × 16 cm).
Component 2: Back Panel — Make 1, Color A
Leave an 18 in (46 cm) sewing tail at the beginning.
Ch 26.
Row 1 (WS): Sc in second ch from hook and in each remaining ch; turn. (25 sc)
Rows 2–32: Ch 1, sc in each st across; turn. (25 sc)
Fasten off, leaving an 18 in (46 cm) sewing tail. Block to match the front panel exactly.
Component 3: Side-and-Bottom Gusset — Make 1, Color B
This strip forms the left side, bottom, and right side. Leave a 24 in (61 cm) sewing tail at each end.
Ch 6.
Row 1 (WS): Sc in second ch from hook and in each remaining ch; turn. (5 sc)
Rows 2–89: Ch 1, sc in each st across; turn. (5 sc)
Do not stretch the strip when measuring. Fasten off with the specified tail. Place markers after Rows 32 and 57. Rows 1–32 correspond to one side, Rows 33–57 correspond to the 25-stitch bottom edge, and Rows 58–89 correspond to the other side.
Component 4: Scalloped Flap — Make 1, Colors B and C
Leave an 18 in (46 cm) Color B sewing tail at the beginning.
With Color B, ch 26.
Row 1 (WS): Sc in second ch from hook and in each remaining ch; turn. (25 sc)
Rows 2–17: Ch 1, sc in each st across; turn. (25 sc)
Row 18 (RS): Ch 1, sc in each st across. (25 sc)
Fasten off Color B, leaving an 8 in (20 cm) tail.
Scalloped edge: With RS facing, join Color C with a sl st in the first stitch of Row 18. Make no additional stitch in the joined stitch. Rep the following sequence six times: skip next st, 5 dc in next st, skip next st, sl st in next st.
All 25 base stitches are used. The edging produces six scallops and 37 worked stitches when the joining sl st is included. Fasten off Color C, leaving an 8 in (20 cm) tail. Weave in the Color C tails and final Color B tail, but retain the long foundation-edge tail for assembly.
Component 5: D-Ring Tabs — Make 2, Color B
For each tab, leave a 12 in (30.5 cm) sewing tail at both ends.
Ch 6.
Row 1: Sc in second ch from hook and in each remaining ch; turn. (5 sc)
Rows 2–8: Ch 1, sc in each st across; turn. (5 sc)
Fasten off with the specified tail. Each tab should measure approximately 1 in (2.5 cm) wide and 1.6 in (4 cm) long.
Component 6: Detachable Crossbody Strap — Make 1, Color B
Leave a 15 in (38 cm) sewing tail at both ends.
Ch 6.
Row 1: Sc in second ch from hook and in each remaining ch; turn. (5 sc)
Rows 2–300: Ch 1, sc in each st across; turn. (5 sc)
Fasten off with the specified tail. At the stated row gauge, 300 rows measure approximately 60 in (152.5 cm). For a shorter strap, remove rows in equal whole-row increments while retaining 5 sc in every row.
Component 7: Sun Appliqué — Make 1, Color C
Leave a 15 in (38 cm) tail before making an adjustable ring. This tail will be used for sewing.
Rnd 1: Work 6 sc in adjustable ring; join with sl st to first sc. (6 sc)
Rnd 2: Ch 1, 2 sc in each st around; join with sl st to first sc. (12 sc)
Rnd 3: Ch 1, rep [sc in next st, 2 sc in next st] 6 times; join with sl st to first sc. (18 sc)
Rnd 4: Ch 1, rep [sc in each of next 2 sts, 2 sc in next st] 6 times; join with sl st to first sc. (24 sc)
Fasten off, leaving a 15 in (38 cm) sewing tail. Tighten and secure the adjustable-ring tail, but retain both tails until the appliqué is sewn.
Component 8: Sunray Appliqués — Make 5, Color C
For each ray, leave an 8 in (20 cm) sewing tail at both ends.
Ch 5.
Row 1: Sc in second ch from hook and in each remaining ch; turn. (4 sc)
Row 2: Ch 1, sc in each st across. (4 sc)
Fasten off with the specified tail.
Hardware Preparation
Separate each magnetic-snap half from its backing washer. Center the outer snap half on the WS of the flap, approximately 1 in (2.5 cm) above the lowest point of the scallops. Center the matching half on the RS of the front panel so the flap closes without pulling.
Reinforce both locations with a small, tightly woven fabric patch or doubled scrap of matching crochet fabric. Install the prongs through the reinforcement and crochet fabric, then bend them outward over the backing washer. If using a sew-on snap, stitch through every hole repeatedly with doubled rustproof thread. Confirm alignment before permanently securing the second half.
Assembly
- Block all flat pieces to the gauge measurements and let them dry completely. Do not stretch the gusset length.
- Install the magnetic snap as described above before closing the bag so the attachment areas remain accessible.
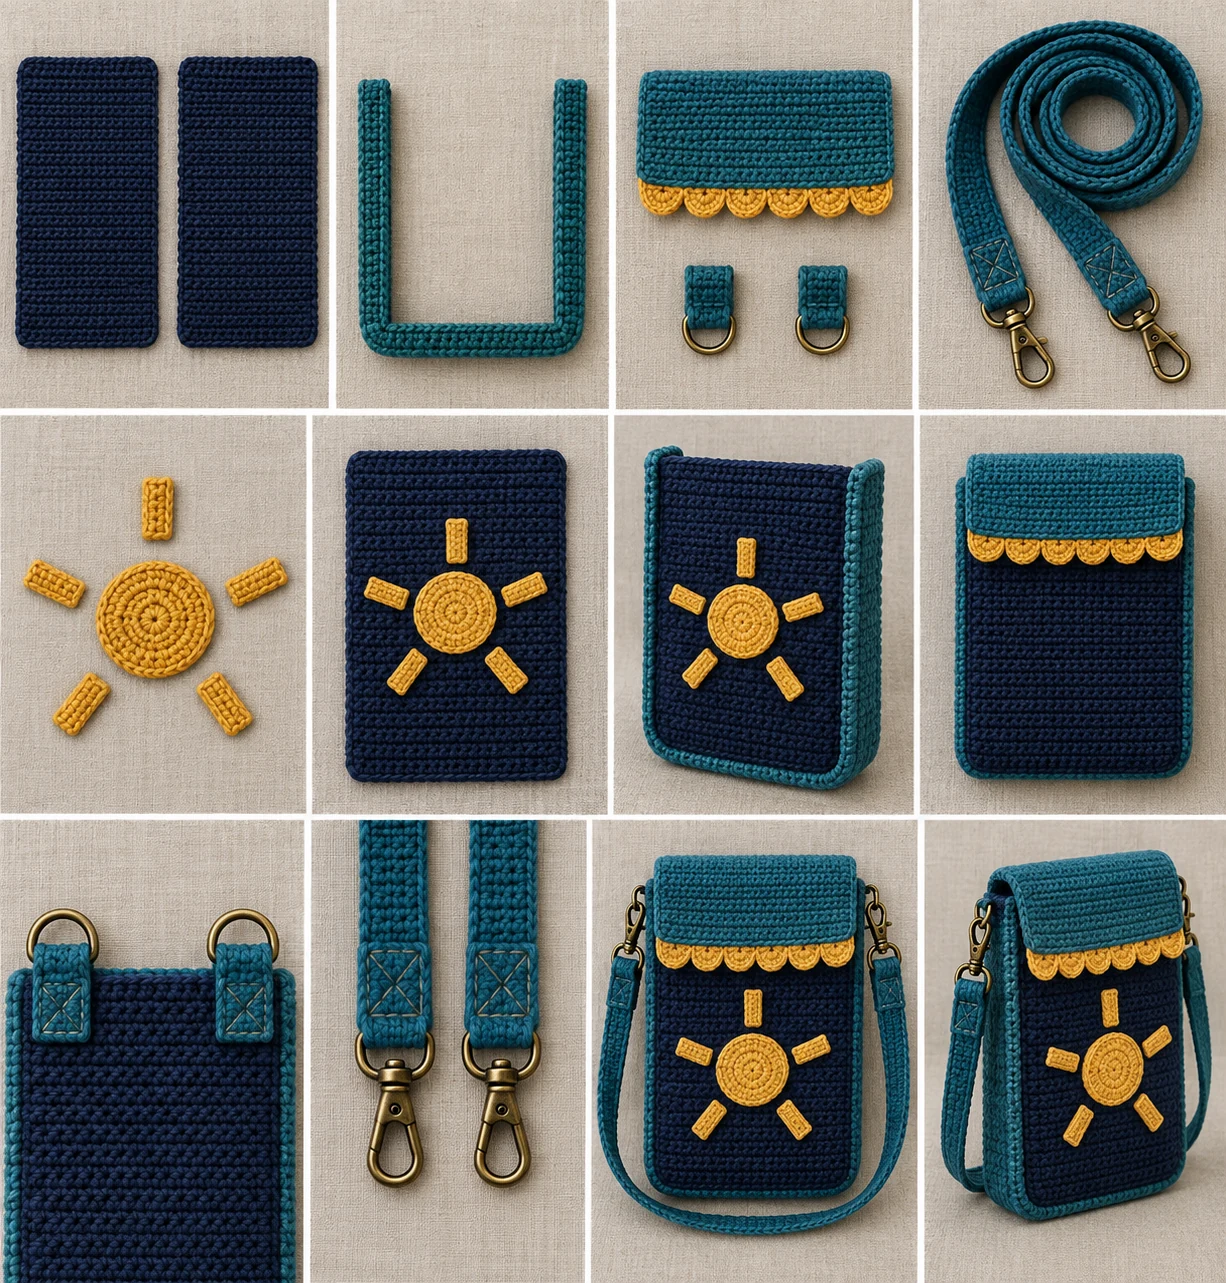
- Place the sun on the RS of the front panel, centered approximately 2.75 in (7 cm) from either side and 2.25 in (5.5 cm) above the bottom edge. Arrange the five rays evenly below and beside the lower half of the sun, leaving approximately 0.25 in (6 mm) between the circle and each ray. Using the retained Color C tails, whipstitch through the back loops of each appliqué and shallowly through the panel. Secure every tail with two passes under nearby stitches, then weave it in.
- With the RS of the front panel and one long edge of the gusset facing outward, align Gusset Row 1 with the front panel’s upper-left corner. Match Gusset Rows 1–32 to the 32 left-side row ends, Rows 33–57 to the 25 bottom stitches, and Rows 58–89 to the 32 right-side row ends. The gusset markers must meet the lower corners. Whipstitch evenly with the retained tails, making one seam stitch per panel row along each side and one per panel stitch along the bottom. Secure and weave in the tails.
- Attach the back panel to the free long edge of the gusset in the same manner. Keep its RS outward and match the same 32-row side, 25-stitch bottom, and 32-row side divisions. Leave the front and back upper edges open. Secure and weave in the tails.
- Center the flap’s foundation edge over the back panel’s upper edge, matching all 25 flap stitches to the 25 back-panel stitches. The flap RS and back-panel RS must face the same outward direction when the flap folds forward. Using the retained 18 in (46 cm) Color B tail, backstitch or whipstitch one-to-one through both layers across all 25 stitches. Secure and weave in the tail.
- Pass one D-ring tab through each D-ring and fold the tab so its short ends meet. Position one folded tab over each upper gusset end, keeping the D-ring above the opening and the joined tab ends extending at least 0.5 in (1.25 cm) down the inside and outside faces of the gusset. With both retained tails, box-stitch through the tab and gusset, then sew an X inside the box. Keep stitches clear of the ring so it can pivot. Knot securely on the interior and weave each tail through at least 1 in (2.5 cm) of dense fabric.
- Pass one strap end through the fixed bar of a swivel clasp. Fold 1.5 in (4 cm) of strap back onto itself. Using the retained tail, stitch a rectangle through both layers, then stitch an X inside it. Repeat at the other end with the second clasp. Secure and weave in both tails, then clip the clasps to the D-rings.
- Close the flap and verify that the snap meets without distorting the fabric. Steam lightly only if permitted by the yarn label, keeping heat away from the hardware.
Finishing
Weave every remaining tail through at least 1 in (2.5 cm) of dense crochet, reverse direction, and weave through again before trimming. Confirm that the gusset divisions meet both lower corners, the opening is unobstructed, and the appliqué stitches cannot catch the phone.
Tug firmly by hand on each D-ring tab and clasp connection before use. This bag is intended for a phone and other light items, not heavy loads. Inspect the tab stitching, strap-end stitching, snap reinforcement, and yarn regularly.
Customization Ideas
- Shorter strap: Remove equal whole-row increments from the 300-row strap while keeping 5 sc in every row. Remember that the finished length is reduced further when 1.5 in at each end is folded around the clasps.
- Color placement: Substitute any three colors while keeping Color A consistent on both panels, Color B on the structural contrasting pieces, and Color C on the scallops and appliqués.
- Flap style: For a quieter look, work Color C in a low-contrast shade without changing the six-scallop construction.
Do not alter panel, gusset, flap, or tab stitch counts unless you recalculate every corresponding seam and verify the hardware fit.
Common Mistakes to Avoid
- Counting the turning ch as a stitch, which makes the flat pieces widen.
- Missing the first or last sc in a row and reducing the required count.
- Stretching the gusset while measuring, causing poor corner alignment.
- Reversing the gusset divisions instead of matching 32 side rows, 25 bottom stitches, and 32 side rows.
- Attaching the flap with its RS facing the wrong direction.
- Installing the snap without reinforcement.
- Sewing too close to a D-ring and preventing it from pivoting.
- Trimming structural tails before the seams and hardware are secure.
Troubleshooting
Why are my panels getting narrower?
You are probably missing the first or last stitch. Each panel and flap row must contain 25 sc. Mark both edge stitches and count after every row.
Why does the gusset not reach both upper corners?
Verify that it contains exactly 89 rows and that the panel contains 32 rows. Align Rows 1–32 with one side, Rows 33–57 with the 25-stitch bottom, and Rows 58–89 with the other side. Do not stretch either piece to compensate.
Why do I have the wrong number of scallops?
Begin with one joining sl st in the first base stitch and make no additional stitch there. Work the four-stitch repeat six times: skip 1, make 5 dc in the next stitch, skip 1, and sl st in the next stitch. This consumes all 25 base stitches and creates six scallops.
Why does the flap pull to one side?
Match its 25 foundation-edge stitches one-to-one with the 25 stitches across the back-panel opening. Check snap alignment before sewing permanently.
Why is the strap longer or shorter than expected?
Row gauge controls strap length. At 20 rows per 4 in, 300 rows measure approximately 60 in before the ends are folded. Measure without stretching.
Why is the finished bag too small for my phone?
The stated size depends on matching gauge and blocking. Measure the phone and blocked panels before assembly. If the phone does not fit within the approximate interior, begin again with a hook that produces the required gauge rather than forcing the fabric.
Care Instructions
Follow the yarn label’s care directions. For a cotton or cotton-blend bag, gentle hand washing is safest: detach the strap, close the snap, wash in cool water with mild detergent, and avoid soaking the metal hardware unnecessarily. Press out water in a towel without wringing. Reshape to the finished measurements and dry flat. Do not apply direct heat to the snap, D-rings, or clasps.
Frequently Asked Questions
Is this crochet phone bag suitable for beginners?
It suits a confident beginner who can maintain even single-crochet rows, count stitches, sew pieces accurately, and install bag hardware.
What yarn works best?
A firm, low-stretch DK-weight cotton or cotton blend gives the bag useful structure and limits sagging.
Are the turning chains included in the stitch counts?
No. Every turning ch 1 is excluded from the stitch count.
Can I omit the appliqués?
The sun and five rays are part of this design. Omitting them does not affect the bag’s structural seams, but it changes the intended finished appearance.
Is the strap adjustable?
The pattern makes one fixed-length detachable strap. You may shorten it by removing whole rows before assembly, but the plan does not include an adjustment slider.
How much weight can the bag carry?
Use it only for a phone and other light essentials. The crocheted tabs and sewn hardware connections are not intended for heavy loads.