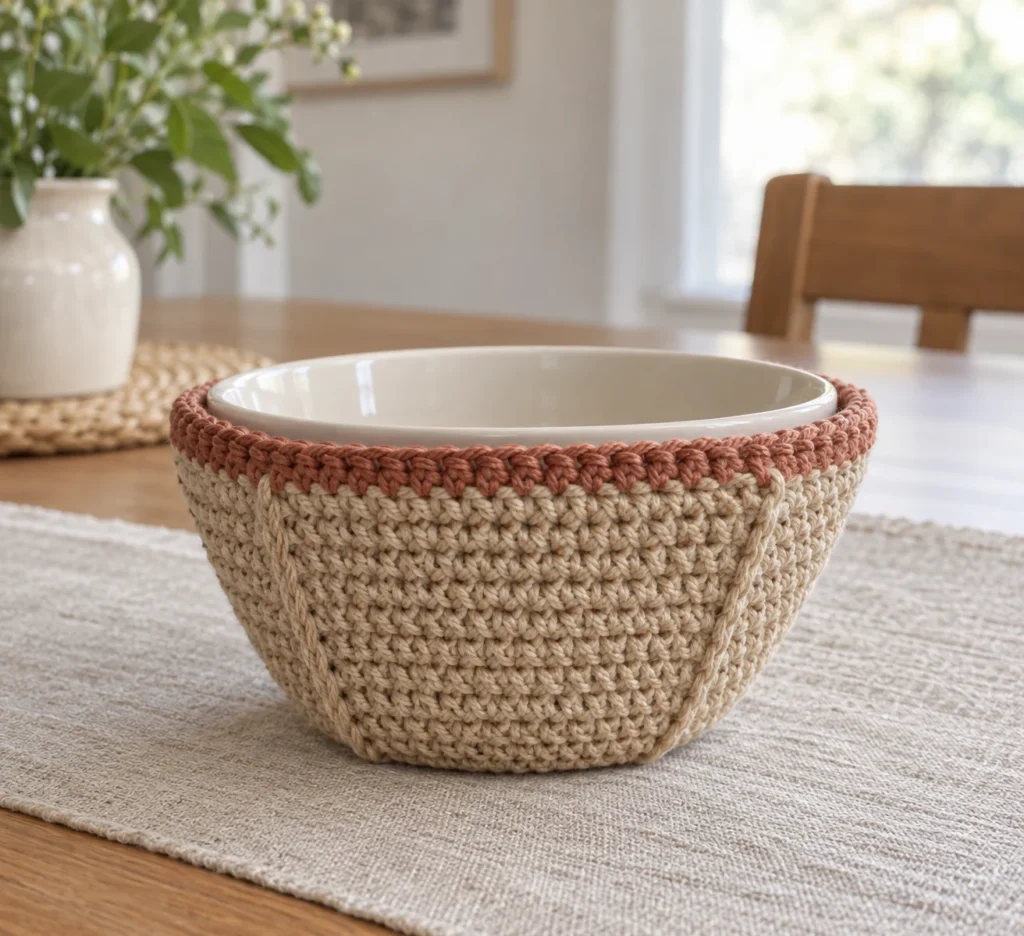
Crochet Cotton Soup Bowl Cozy
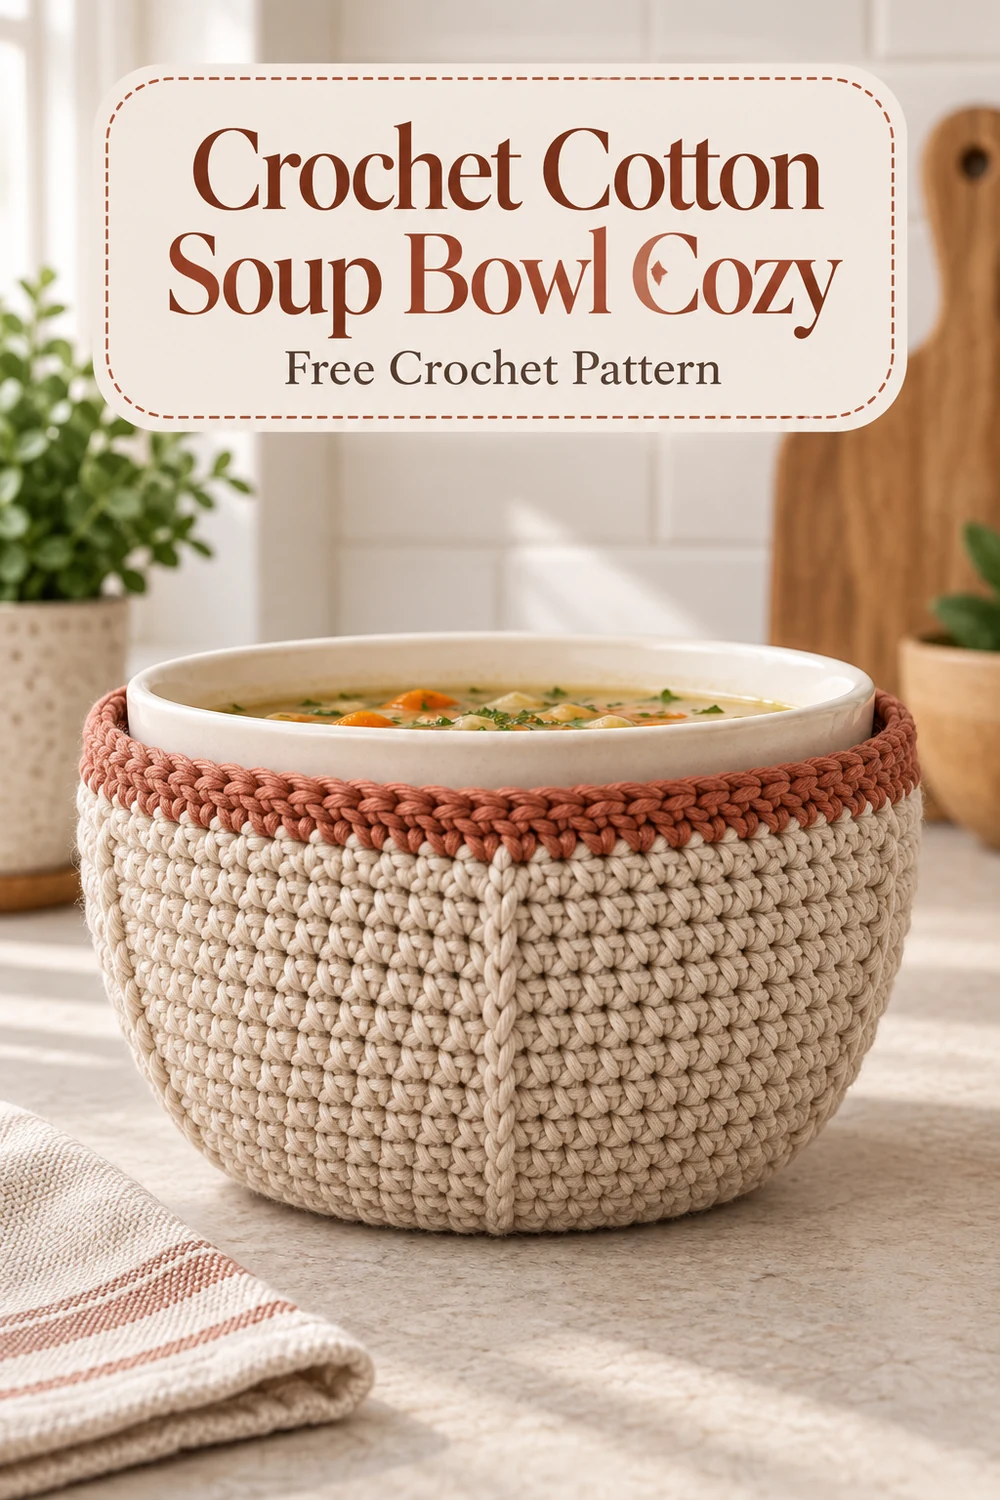
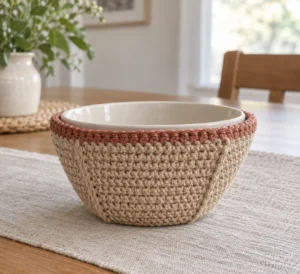
Keep a favorite soup or cereal bowl comfortably cradled with this original cotton crochet bowl cozy. The design begins with one flat circular base, adds four identical flared side panels, closes those panels with four structural seams, and finishes with one contrasting border around the opening. The finished cozy has a softly faceted shape that supports the bowl while leaving its rim exposed.
This free pattern uses US crochet terminology and straightforward single crochet. Careful counting and simple seaming make it approachable for an advanced beginner.
Pattern at a Glance
- Skill level: Advanced beginner
- Terminology: US crochet terms
- Construction: One circular base in Color A, four flared side panels in Color A, four structural side seams in Color A, and one continuous top-edge border in Color B
- Main stitches: Chain, single crochet, slip stitch, and single-crochet increase
- Working methods: Joined rounds, turned rows, and sewn seams
- Finished size: Approximately 5 in (12.5 cm) across the base, 2.25 in (5.5 cm) high, and 7.5 in (19 cm) across the relaxed opening
- Designed to fit: A typical soup or cereal bowl approximately 5.5–6.5 in (14–16.5 cm) across; bowl profiles vary, so measure yours before beginning
Materials You’ll Need
- Color A: Approximately 120 yd (110 m) worsted-weight, smooth, plain 100% cotton yarn
- Color B: Approximately 15 yd (14 m) worsted-weight, smooth, plain 100% cotton yarn
- US G/6 (4 mm) crochet hook, or size needed to obtain gauge
- Removable stitch markers
- Yarn needle
- Scissors
- Flexible measuring tape
- Four separate 18 in (46 cm) lengths of Color A for seaming
Material Safety
If the cozy may be placed in a microwave, every yarn and sewing material must be plain 100% cotton. Do not use metallic, glitter, conductive, synthetic, or novelty yarn, and do not add hardware or decorations. Never leave a microwave unattended. Stop using the cozy if it scorches, overheats, stretches out of shape, or becomes damaged. This written design has not been represented as physically or microwave tested.
Gauge
16 sc and 16 rows = 4 in (10 cm) in firmly worked single crochet after light blocking.
Gauge is important for bowl fit. Change hook size if necessary while keeping the fabric dense and stable. Make a flat single-crochet swatch before beginning if fit is critical.
Finished Measurements
- Base diameter: approximately 5 in (12.5 cm)
- Height: approximately 2.25 in (5.5 cm)
- Relaxed top opening: approximately 7.5 in (19 cm) across after blocking
The cozy is intended for a bowl approximately 5.5–6.5 in (14–16.5 cm) across. Measure the intended bowl because its slope, foot, and rim can affect fit.
Crochet Abbreviations
- beg = beginning
- ch = chain
- inc = work 2 single crochet in the indicated stitch
- rep = repeat
- rnd(s) = round(s)
- RS = right side
- sc = single crochet
- sl st = slip stitch
- st(s) = stitch(es)
Important Pattern Notes
- The turning ch-1 never counts as a stitch.
- The joining slip stitch never counts as a stitch.
- Work the circular base in joined rounds without turning.
- Work each side panel in turned rows.
- Count stitches after every row and round.
- Divide the base into four consecutive groups of exactly 16 stitches. Every base stitch is used once, with no gaps or overlap.
- When seaming, join only corresponding row-end edges. Keep all 24 stitches along the top of every panel unsewn and available for the border.
- Before making the border, identify all 96 top-edge stitches. A marker after each group of 24 helps preserve the four-panel allocation.
- The finished project contains no stuffing and no hardware.
Complete Free Crochet Pattern
Component 1: Circular Base — Make 1 in Color A
Make an adjustable ring.
Rnd 1: Ch 1, work 8 sc in ring; join with sl st to first sc. Pull ring closed. (8 sc)
Rnd 2: Ch 1, inc in each st around; join. (16 sc)
Rnd 3: Ch 1, [sc in next st, inc in next st] 8 times; join. (24 sc)
Rnd 4: Ch 1, [sc in next 2 sts, inc in next st] 8 times; join. (32 sc)
Rnd 5: Ch 1, [sc in next 3 sts, inc in next st] 8 times; join. (40 sc)
Rnd 6: Ch 1, [sc in next 4 sts, inc in next st] 8 times; join. (48 sc)
Rnd 7: Ch 1, [sc in next 5 sts, inc in next st] 8 times; join. (56 sc)
Rnd 8: Ch 1, [sc in next 6 sts, inc in next st] 8 times; join. (64 sc)
Fasten off, leaving a 6 in (15 cm) tail. Weave the tail securely into the wrong side.
With the RS facing, divide the 64 stitches into four consecutive groups of 16. Mark the first and last stitch of each group. Check that every base stitch belongs to exactly one group.
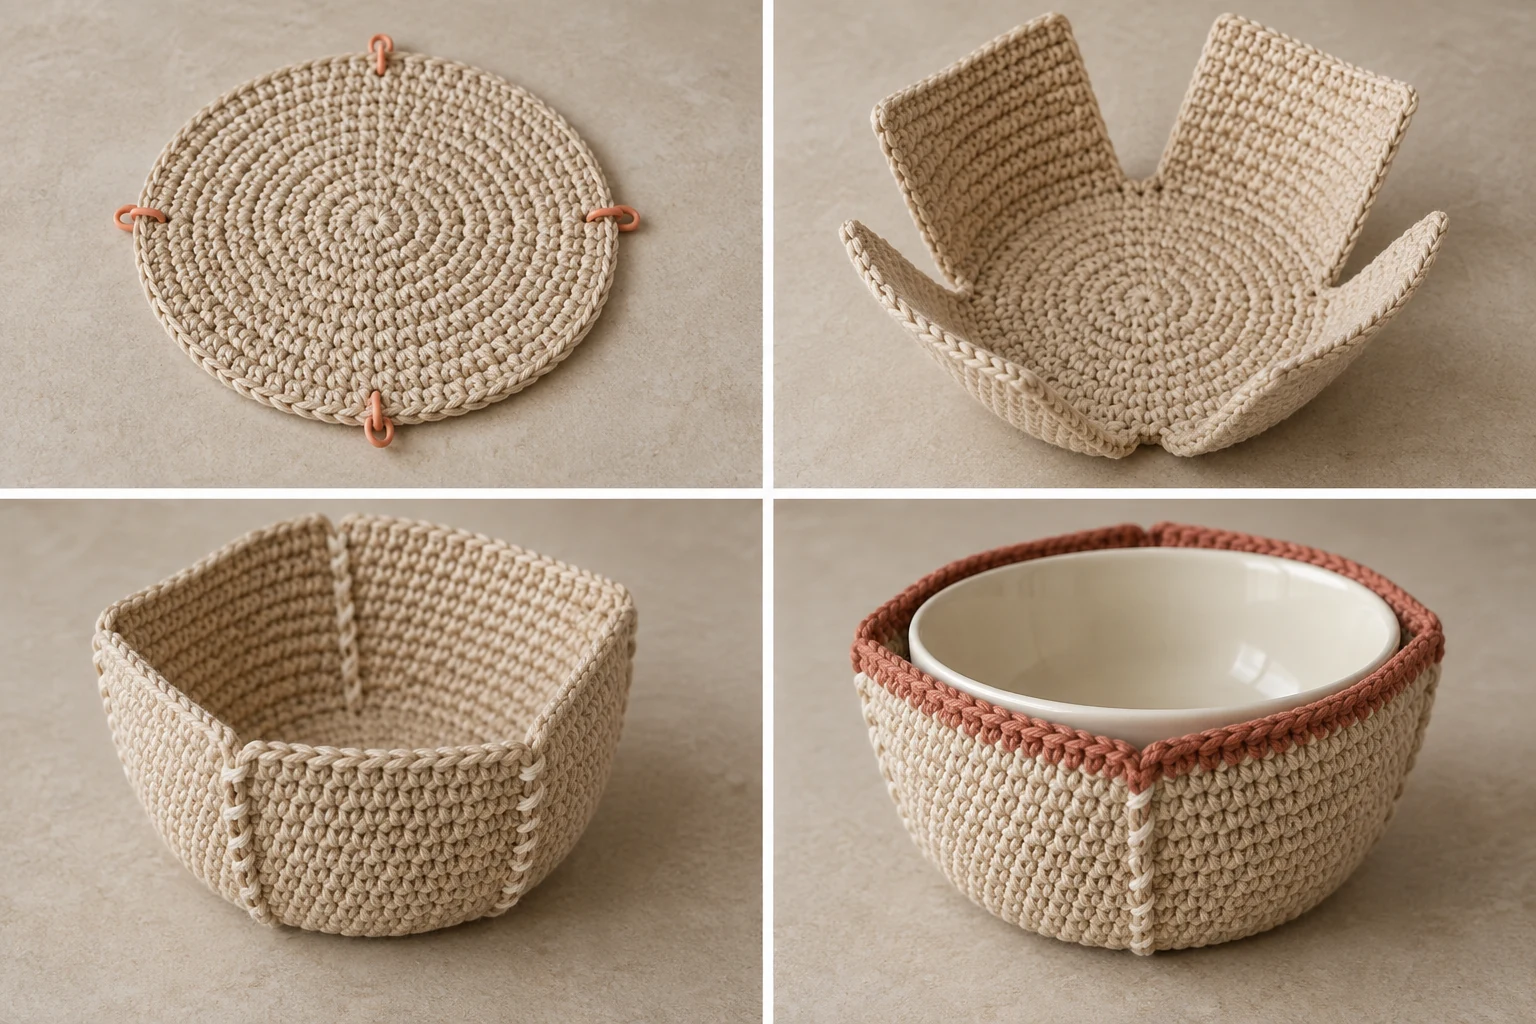
Components 2–5: Flared Side Panel — Make 4 in Color A
Work one panel into each marked 16-stitch group. Hold the base with the RS facing. Join Color A with a sl st in the first stitch of the selected group.
Row 1 (RS): Ch 1, sc in the same st and in each of the remaining 15 sts in that group; turn. (16 sc)
Row 2: Ch 1, inc in first st, sc in next 14 sts, inc in last st; turn. (18 sc)
Row 3: Ch 1, sc in each st across; turn. (18 sc)
Row 4: Ch 1, inc in first st, sc in next 16 sts, inc in last st; turn. (20 sc)
Row 5: Ch 1, sc in each st across; turn. (20 sc)
Row 6: Ch 1, inc in first st, sc in next 18 sts, inc in last st; turn. (22 sc)
Row 7: Ch 1, sc in each st across; turn. (22 sc)
Row 8: Ch 1, inc in first st, sc in next 20 sts, inc in last st; turn. (24 sc)
Row 9: Ch 1, sc in each st across. (24 sc)
Fasten off, leaving a 6 in (15 cm) tail. Weave the tail into the wrong side without drawing in the panel edge. Repeat for the other three marked base groups. When all four panels are complete, every base stitch should have been used exactly once.
Assembly
Components 6–9: Structural Side Seams — Make 4 in Color A
Block only enough to flatten the base and align the panels. Do not stretch the panel tops.
- Arrange the work with the wrong sides facing outward. Number the panels 1–4 clockwise.
- Align the right row-end edge of Panel 1 with the left row-end edge of Panel 2. Match the base junction, all nine row ends, and the top corners.
- Thread one separate 18 in (46 cm) length of Color A onto the yarn needle.
- Beginning at the base, whipstitch through corresponding edge loops toward the top. Keep the seam firm but flexible.
- Knot securely on the wrong side. Weave both ends for at least 2 in (5 cm), reverse direction once, and trim.
- Repeat for Panel 2 to Panel 3, Panel 3 to Panel 4, and Panel 4 to Panel 1.
- Turn the cozy RS out. Confirm that each of the four panel tops remains open with 24 stitches, giving 96 top-edge stitches total.
Component 10: Continuous Top-Edge Border — Make 1 in Color B
With the RS facing, join Color B with a sl st in the first top-edge stitch immediately after any seam. Place a marker in that stitch.
Border Rnd 1: Ch 1, sc in the same stitch and in every remaining top-edge stitch, working exactly 24 sc across each panel and placing no stitches in the seams; join with sl st to first sc. (96 sc)
Fasten off, leaving an 8 in (20 cm) tail. If needed, use the tail to make a discreet needle join between the first and last border stitches. Weave the tail into the wrong side for at least 2 in (5 cm), reverse direction, and trim.
Stitch-Count Check
- The base grows by 8 stitches per round: 8, 16, 24, 32, 40, 48, 56, and 64 stitches.
- 64 base stitches divided among 4 panels gives exactly 16 base stitches per panel.
- Each panel progresses through 16, 18, 18, 20, 20, 22, 22, 24, and 24 stitches.
- Four panel tops with 24 stitches each give 96 stitches for the border.
- The border uses one sc in each of those 96 stitches and adds no seam stitches, so it finishes with 96 sc.
Finishing
Weave in any remaining ends without tightening the base, panel edges, or border. Lightly wet-block the cozy to the finished measurements, shaping the base flat and spacing the four seams evenly. Allow it to dry completely. Inspect every seam and confirm that the top border lies flat.
Place the intended empty bowl inside the dry cozy. The base should sit flat, the panels should support the bowl sides, and the top edge should remain below the bowl rim. Do not use the cozy if the bowl rocks, the cozy can slip over the rim, a seam opens, or the fiber content is uncertain.
Customization
Customize the appearance without changing the construction by selecting two contrasting solid cotton colors, using a tonal border, or making the entire cozy in one color while still treating Color B as the border yarn. For consistent dimensions, keep both yarns the same worsted weight and match the stated gauge.
For a different bowl size, first make this pattern as written and test it with the intended empty bowl. Changing the base rounds, panel allocation, panel height, or increase schedule requires a new set of stitch calculations and is outside this pattern. Do not improvise those structural changes if you need the stated counts and fit.
Common Mistakes to Avoid
- Counting the ch-1: It never counts as a stitch in this pattern.
- Working across a group marker: Each panel must use only its assigned 16 base stitches.
- Missing an end increase: Rows 2, 4, 6, and 8 each gain exactly two stitches.
- Seaming top stitches together: Sew only the row-end edges; all 24 top stitches on each panel must remain available.
- Crocheting into the seams during the border: The border is worked only into the 96 panel-top stitches.
- Stretching during blocking: Shape gently so the opening does not become loose.
- Using unknown fibers: Fiber content matters if the cozy will be exposed to microwave heat.
Troubleshooting
Why is my base wavy?
Your stitches may be looser than the stated gauge. Confirm the base counts, try a smaller hook, and block lightly rather than stretching it.
Why is my base cupping?
Your tension may be too tight, or an increase may be missing. Recount every round and try a larger hook if the counts are correct.
Why does one panel look narrower?
Check that Row 1 contains 16 stitches and that both end increases were made on Rows 2, 4, 6, and 8. Compare the completed sequence with 16, 18, 18, 20, 20, 22, 22, 24, 24.
Why does the border pucker?
Verify that it contains exactly 96 sc: 24 across each panel and none in the seams. Also check that the border was not worked more tightly than the panels.
Why is the opening too loose?
Confirm gauge and make sure no border stitches were added at the four seams. Excessive blocking can also enlarge the opening.
Why does the bowl rock?
Check that the base is flat, the four panels each began over exactly 16 stitches, and the seams align corresponding row ends. The bowl’s foot or profile may also be incompatible with the stated size. Do not use the cozy with a bowl that is unstable.
Care Instructions
Follow the care directions for the cotton yarn used. For a plain 100% cotton cozy, hand washing in cool or lukewarm water is the gentlest option. Reshape the base, panels, seams, and opening, then dry completely before use. Inspect regularly for scorched fibers, thinning fabric, loose ends, or opening seams. Retire the cozy if it is damaged.
Frequently Asked Questions
Is this pattern written in US terms?
Yes. All stitches and instructions use US crochet terminology.
Can I use acrylic yarn?
Not if the cozy may go into a microwave. The pattern specifies smooth, plain 100% cotton yarn and cotton sewing material, with no metallic, synthetic, novelty, or conductive elements.
Does the cozy contain batting or stuffing?
No. The design contains only crocheted cotton components and sewn cotton-yarn seams.
Can I crochet the panels continuously instead of making four separate panels?
No. The four separately worked panels and four structural seams create the planned faceted shape. Changing that method would create a different construction.
How many stitches should remain around the opening before the border?
There should be 96: exactly 24 stitches along the top of each of the four panels.
Do I work border stitches into the seams?
No. Work one sc in each panel-top stitch and place no stitches in the seams.
Can I use a different yarn weight?
A different yarn weight will change the size, thickness, and fit. Use worsted-weight cotton and adjust only the hook size needed to match gauge for the stated result.
Is every cotton yarn microwave-safe?
No universal safety claim is made. Verify every material yourself, use only plain 100% cotton yarn and cotton sewing material, follow appliance and yarn-manufacturer guidance, remain present during use, and stop immediately if overheating or damage occurs.