Crochet Christmas Character Spiral Ornaments: Free Pattern
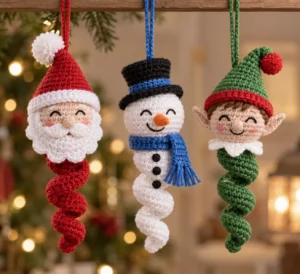
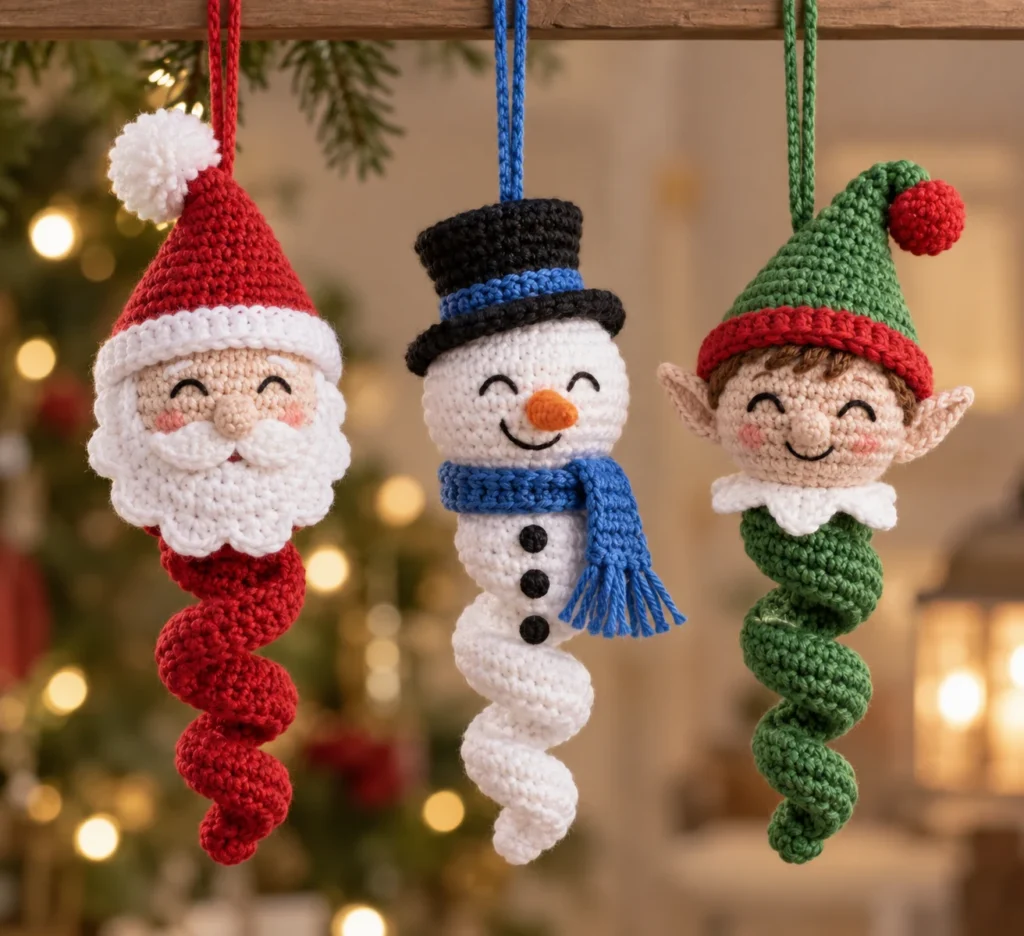
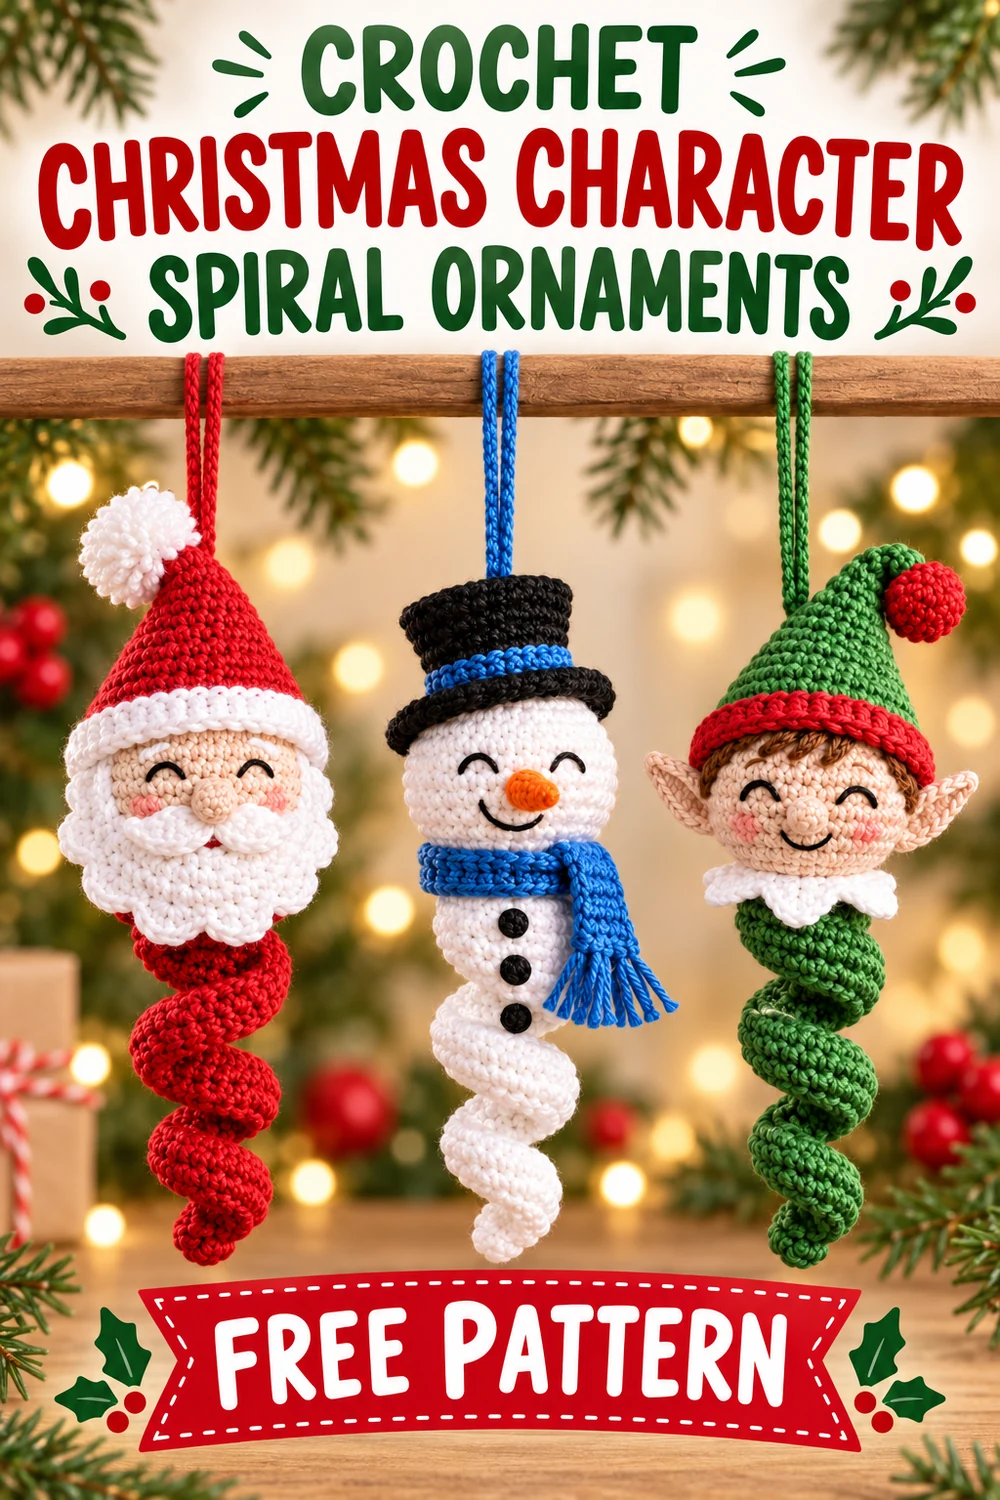
Bring a playful handmade twist to your holiday decorating with this original set of three crochet Christmas character spiral ornaments. The collection includes Santa, a snowman, and an elf, each with a softly stuffed circular head, a lively corkscrew body, character-specific accessories, and a secure crocheted hanging loop.
This free pattern uses US crochet terminology and DK/light worsted yarn. The construction is approachable: crochet the flat pieces, embroider the faces, secure the body and hanging loop inside the head, lightly stuff the head, and add the finishing details.
Testing note: This original design has been mathematically checked, but it has not been claimed as physically tested. Finished measurements are gauge-based estimates.
Pattern at a Glance
- Skill level: Adventurous beginner to intermediate
- Terminology: US crochet terms
- Construction: Flat head panels and accessories, continuous-round pom-poms, and one-row corkscrews
- Characters: One Santa, one snowman, and one elf
- Techniques: Magic ring, increases, decreases, working in rows and rounds, embroidery, stuffing, and sewing
- Hardware: None; each hanging loop is crocheted and securely sewn into the head
Component Inventory
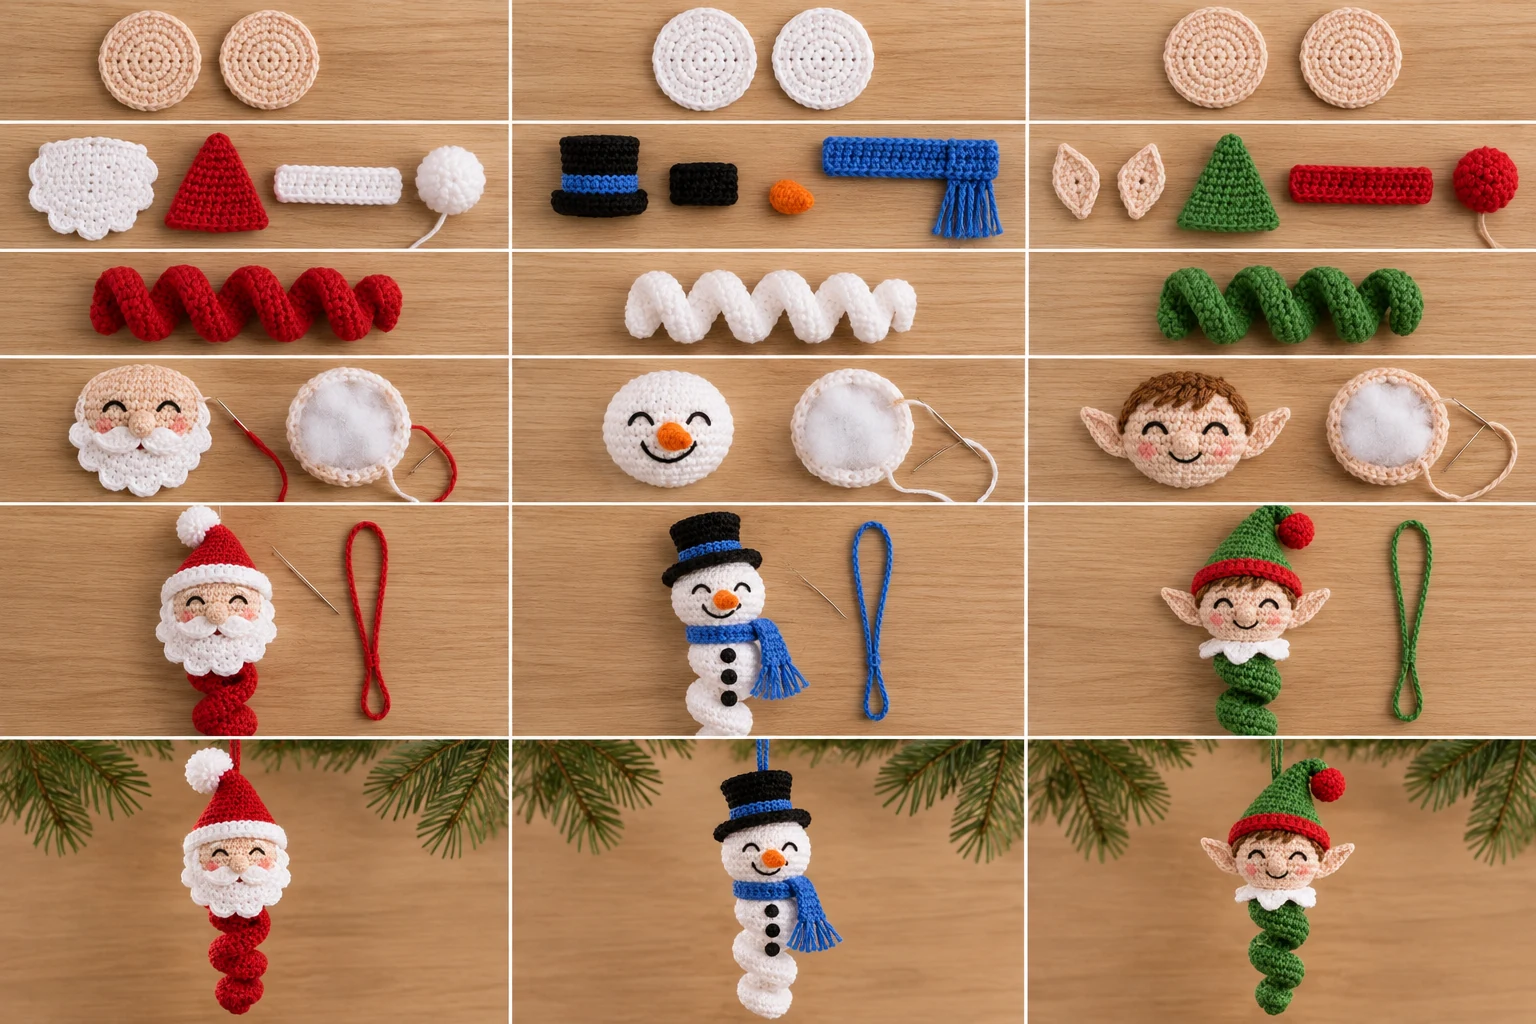
- Santa: Two skin-tone head panels, one red corkscrew body, one red hat triangle, one white hat brim, one white stuffed pom-pom, one white beard strip, one red hanging loop, and embroidered eyes, nose, and eyebrows.
- Snowman: Two white head panels, one white corkscrew body, one black hat crown, one black hat brim, one blue scarf, one orange carrot nose, one blue hanging loop, and embroidered eyes, mouth, and coal buttons.
- Elf: Two skin-tone head panels, one green corkscrew body, one green hat triangle, one red hat brim, one red stuffed pom-pom, two skin-tone ears, one white collar strip, one green hanging loop, and embroidered eyes, mouth, nose, and hair.
Materials You’ll Need
- DK/light worsted (#3) smooth acrylic or cotton yarn
- A: Red, approximately 25 yd/23 m
- B: White, approximately 45 yd/41 m
- C: Warm skin tone, approximately 25 yd/23 m
- D: Black, approximately 12 yd/11 m
- E: Orange, approximately 2 yd/2 m
- F: Evergreen, approximately 25 yd/23 m
- G: Medium blue, approximately 12 yd/11 m
- 3.5 mm (E/4) crochet hook
- Yarn needle
- Removable stitch marker
- Scissors
- Small amount of washable polyester stuffing
Gauge
18 sc and 20 rows = 4 in/10 cm in firm, unblocked fabric. Exact gauge is not critical, but the fabric must be tight enough to contain the stuffing.
Finished Measurements
- Each head panel: approximately 2.5 in/6.5 cm across
- Each finished ornament: approximately 7 in/18 cm long, excluding the hanging loop
- Maximum ornament width: approximately 2.75 in/7 cm
- Hanging-loop drop: approximately 2.5 in/6.5 cm
Crochet Abbreviations
- ch: chain
- sc: single crochet
- hdc: half double crochet
- dc: double crochet
- sl st: slip stitch
- inc: work 2 sc in the indicated stitch
- dec: single crochet 2 stitches together
- MR: magic ring
- st(s): stitch(es)
- rnd(s): round(s)
- FO: fasten off
Important Pattern Notes
- Work head panels and pom-poms in continuous rounds. Mark the first stitch of each round.
- Beginning chains on turned rows do not count as stitches.
- Unless another length is specified, leave an 8 in/20 cm tail when fastening off.
- Use doubled strands for embroidery when a bolder feature is desired.
- All facial features are embroidered. Do not add beads or safety eyes.
- The corkscrew forms naturally because three hdc are worked in every foundation chain. Do not flatten it.
- Keep knots and yarn ends inside the heads whenever possible.
Complete Free Crochet Pattern
Shared Head Panels
Make six total: two in C for Santa, two in B for the snowman, and two in C for the elf.
Rnd 1: Make an MR and work 6 sc in ring. (6)
Rnd 2: Inc in each st around. (12)
Rnd 3: [Sc in next st, inc in next st] 6 times. (18)
Rnd 4: [Sc in next 2 sts, inc in next st] 6 times. (24)
Rnd 5: [Sc in next 3 sts, inc in next st] 6 times. (30)
Sl st in next st. For each character, FO the front panel with an 8 in/20 cm tail. FO the back panel with a 30 in/76 cm sewing tail.
Shared Corkscrew Bodies
Make three: one in A for Santa, one in B for the snowman, and one in F for the elf.
Ch 31.
Row 1: Beginning in second ch from hook, work 3 hdc in each ch across. (90 hdc)
Allow the strip to curl naturally. FO, leaving a 16 in/41 cm sewing tail at the upper end. Weave in the lower starting tail.
Santa Components
Red Hat Triangle — A
Ch 13.
Row 1: Sc in second ch from hook and across. (12)
Row 2: Ch 1, turn, dec, sc in next 8 sts, dec. (10)
Row 3: Ch 1, turn, dec, sc in next 6 sts, dec. (8)
Row 4: Ch 1, turn, dec, sc in next 4 sts, dec. (6)
Row 5: Ch 1, turn, dec, sc in next 2 sts, dec. (4)
Row 6: Ch 1, turn, dec twice. (2)
FO with a 20 in/51 cm sewing tail.
White Hat Brim — B
Ch 13.
Rows 1–2: Sc in second ch from hook and across; ch 1 and turn after Row 1 only. (12 each row)
FO with a 16 in/41 cm sewing tail.
White Stuffed Pom-Pom — B
Rnd 1: MR, 6 sc. (6)
Rnd 2: Inc around. (12)
Rnd 3: Dec around. (6)
Insert a pea-sized amount of stuffing. FO with a 14 in/36 cm tail. Thread the tail through the remaining front loops and cinch closed.
White Beard Strip — B
Ch 13.
Row 1: Sc in second ch from hook and across. (12)
Row 2: Ch 1, turn, [sl st in next st, 5 dc in next st] 6 times. (36 worked sts)
FO with a 20 in/51 cm sewing tail.
Snowman Components
Black Hat Crown — D
Ch 13.
Rows 1–5: Sc in second ch from hook and across; ch 1 and turn after Rows 1–4. (12 each row)
FO with a 24 in/61 cm sewing tail.
Black Hat Brim — D
Ch 17.
Rows 1–2: Sc in second ch from hook and across; ch 1 and turn after Row 1 only. (16 each row)
FO with a 20 in/51 cm sewing tail.
Blue Scarf — G
Ch 41.
Row 1: Sc in second ch from hook and across. (40)
FO with a 16 in/41 cm sewing tail. Cut four 3 in/7.5 cm strands of G. Knot two strands through each short scarf end as fringe, then trim evenly to 1 in/2.5 cm.
Orange Carrot Nose — E
Ch 4.
Row 1: Sc in second ch from hook and across. (3)
Row 2: Ch 1, turn, dec, sc in next st. (2)
Row 3: Ch 1, turn, dec. (1)
FO with a 14 in/36 cm sewing tail.
Elf Components
Green Hat Triangle — F
Work exactly as the Santa red hat triangle, Rows 1–6, using F. (12, 10, 8, 6, 4, 2)
FO with a 20 in/51 cm sewing tail.
Red Hat Brim — A
Work exactly as the Santa hat brim using A. (12 each row)
FO with a 16 in/41 cm sewing tail.
Red Stuffed Pom-Pom — A
Work exactly as the Santa pom-pom using A. (6, 12, 6)
Stuff lightly. FO with a 14 in/36 cm sewing tail and cinch closed.
Skin-Tone Ears — C
Make two. Ch 4. Beginning in second ch from hook, sl st in next ch, sc in next ch, hdc in final ch. (3 sts)
FO each ear with a 14 in/36 cm sewing tail.
White Collar Strip — B
Ch 13.
Row 1: Sc in second ch from hook and across. (12)
Row 2: Ch 1, turn, [sl st in next st, 3 dc in next st] 6 times. (24 worked sts)
FO with a 20 in/51 cm sewing tail.
Crocheted Hanging Loops
Make three: one in A for Santa, one in G for the snowman, and one in F for the elf.
Leaving a 12 in/30 cm starting tail, ch 24. Without twisting the chain, sl st in the first ch. FO with a 12 in/30 cm ending tail. Tie the two tails together with a square knot close to the crochet. Do not trim them; both tails form the structural attachment.
Facial and Body Embroidery
Complete facial embroidery on the front head panels before joining them.
Santa
With D, make two small straight-stitch eyes centered across Rnd 3 and spaced approximately four stitches apart. With C, make two horizontal stitches between the eyes and one round lower for the nose. With B, add one short eyebrow above each eye. The beard conceals the mouth area.
Snowman
With D, embroider two eyes as for Santa. Make a shallow smiling mouth from three short stitches below the nose position. After attaching the body, embroider three D coal buttons vertically on the upper visible portion of the white corkscrew.
Elf
With D, embroider two eyes as for Santa and a shallow smiling mouth. With C, add two horizontal stitches for the nose. With A, embroider three short hair strokes across the upper forehead, keeping them below the future hat brim.
Knot every embroidery end on the wrong side and weave it through several stitches.
Assembly
Use a yarn needle and matching yarn. Read through all steps before beginning.
- Prepare the front decorations. Sew the straight Row 1 edge of Santa’s beard in a shallow curve across the lower half of the Santa front panel, leaving the scallops free. Sew the orange nose to the center of the snowman front panel, with its wide edge between the eyes and its point angled toward the viewer’s right. Sew one elf ear behind each side of the elf front panel at approximately the Rnd 3–4 level, leaving the pointed ends visible.
- Attach each corkscrew body. Place the matching front and back head panels wrong sides together. Insert the upper 0.5 in/1.25 cm of the corkscrew between the panels at bottom center. Using its 16 in/41 cm tail, stitch through both panels and the corkscrew end six times, distributing the passes across three adjacent head stitches. Knot inside and weave through the inner seam allowance. This is the load-bearing lower connection.
- Attach each hanging loop. Insert the loop’s knotted end between the panels at top center. Using both 12 in/30 cm tails together, stitch down through both panels, around the top-center stitch, and back through the loop base four times. Tie securely inside and weave the tails in opposite directions. Tug firmly to confirm that the loop does not shift.
- Join and stuff each head. Using the long back-panel tail, whipstitch corresponding front and back panel stitches together through both loops. Align the circular edges carefully. When approximately eight stitches remain open, add about 1–2 tablespoons of polyester stuffing—only enough to make the head softly rounded. Complete the seam, knot securely, and bury the tail.
- Finish Santa. Center the red hat triangle over the upper third of the head. Sew its side and lower edges down, leaving the upper point free. Sew the white brim over the triangle’s lower edge. Bend the triangle tip slightly toward the viewer’s right. Sew the white pom-pom to both the tip and one nearby point of the hat so it cannot swing loose.
- Finish the snowman. Fold the black crown rectangle so its short edges meet. Sew those edges together to form a tube. Flatten the tube with the seam at center back and sew across the top through both layers. Sew the crown’s lower edge to the upper third of the head. Center the brim across the crown base and sew it in place with equal overhang on both sides. Wrap the blue scarf once around the narrow connection immediately below the head, cross its ends at the front, and secure the crossing point to itself and the top of the corkscrew with at least four passes. Add the three embroidered coal buttons if they are not already complete.
- Finish the elf. Attach the green hat triangle and red brim as described for Santa. Bend the hat tip toward the viewer’s left. Sew the red pom-pom to the tip and one nearby point of the hat. Curve the straight edge of the white collar around the bottom of the head with its scallops pointing down. Sew through the head edge and the secured corkscrew top so the collar conceals the join.
Finishing
Weave each remaining tail through at least 1 in/2.5 cm of dense fabric, reverse direction once, and trim. Shape each corkscrew gently with your fingers so its turns hang evenly. Confirm that every head seam is closed, no stuffing is exposed, each pom-pom is anchored at two points, and the scarf and collar cannot slide off. Give every hanging loop a firm hand tug before display.
Customization Ideas
You may personalize the ornaments without changing their construction. Try coordinated pastel, jewel-tone, or rustic neutral palettes; embroider different expressions; or add surface embroidery to the existing hat, scarf, or corkscrew pieces. Keep the listed yarn weight and component counts unchanged so the proportions and assembly remain reliable. Avoid glued decorations or loose embellishments, particularly where children or pets may reach the ornaments.
Common Mistakes to Avoid
- Losing the head-panel count: Each completed panel must have 30 stitches after Rnd 5.
- Working into only part of a foundation chain: Each corkscrew uses 30 worked chains and must finish with 90 hdc.
- Flattening the corkscrew: Let its natural spiral form as you crochet.
- Overstuffing: Too much stuffing distorts the round head and strains the seam.
- Adding accessories too early: Complete face embroidery and the specified front decorations before closing the head, but add the hats, scarf, and collar afterward.
- Weak loop attachment: Retain both loop tails and follow the four-pass attachment method.
- Leaving pom-poms free-swinging: Anchor each pom-pom to both the hat tip and a nearby part of the hat.
Troubleshooting
Why is my corkscrew not curling evenly?
Confirm that you worked exactly 3 hdc into each of the 30 available chains. Gently rotate and shape the finished spiral with your fingers rather than blocking it flat.
Why are my head panels different sizes?
Recount each round and compare tension. Both panels must end with 30 stitches. Use the same hook and yarn for the matching pair.
Why does the stuffed head look lumpy?
Remove some stuffing, tease the remainder into small pieces, and distribute it evenly before closing the final eight stitches.
Why does the ornament tilt?
Check that the corkscrew is secured at bottom center and the hanging loop is secured at top center. Reposition accessories if one side is noticeably heavier or tighter.
Why does the snowman scarf slide?
The crossed section must be stitched both to itself and to the top of the corkscrew with at least four passes.
Care Instructions
Spot-clean gently with cool water and mild detergent. Press moisture out in a towel without twisting, reshape the corkscrew and accessories, and dry flat. If the chosen yarn permits washing, place the ornaments in a mesh laundry bag and use a gentle cold cycle; air-drying is still recommended. Store completely dry in a rigid container without crushing the hats or spiral bodies.
Frequently Asked Questions
Is this pattern written in US or UK terms?
It uses US crochet terminology throughout.
Can I use worsted-weight yarn?
You can, but the ornaments will be larger and may require more yarn and stuffing. Use a hook that creates a firm fabric and keep every listed stitch count unchanged.
Do I need safety eyes?
No. All eyes and facial details are embroidered.
Are the heads worked as spheres?
No. Each head consists of two flat circular panels that are whipstitched together and lightly stuffed.
How many pieces do I crochet?
The set uses six head panels, three corkscrew bodies, four Santa accessory pieces, four snowman accessory pieces, six elf accessory pieces when the two ears are counted separately, and three hanging loops.
Can I make only one character?
Yes. Follow the shared instructions only for that character’s two head panels, one body, and one hanging loop, then make all character-specific components listed for it.
Are the ornaments suitable as toys?
This pattern is designed as holiday décor. If making it for handling, inspect all seams and attachments frequently and supervise young children and pets.
Save this pattern for your holiday crochet list, or make the complete trio as cheerful handmade ornaments and gift toppers.