In this complete guide you will learn everything you need to make your own DIY calm-down bottles at home. We cover the exact materials, a clear step-by-step process, expert tips for getting the perfect glitter swirl, variations for different age groups, and the science behind why these bottles actually work. Whether you are a parent making one special bottle for your toddler, a classroom teacher crafting a set for the reading corner, or a therapist looking for a tactile self-regulation aid, this guide has you covered.
What Are Calm-Down Bottles?
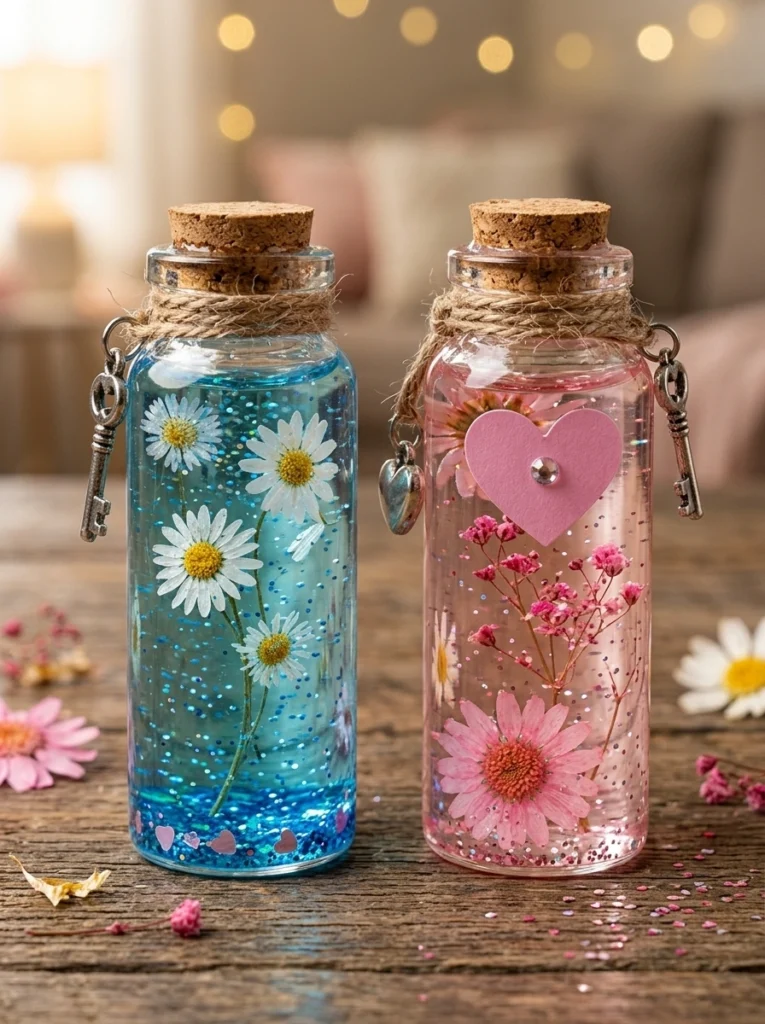
Calm-down bottles — also called glitter jars, sensory bottles, or meditation bottles — are sealed containers filled with a slow-moving, glittery liquid mixture. When shaken, the glitter and decorative elements swirl and drift through the liquid in a hypnotic, graceful pattern. As the child watches the glitter settle, they naturally slow their breathing, shift their attention, and move their nervous system from fight-or-flight toward calm.
The concept draws on mindfulness principles and is widely used in Montessori education, occupational therapy, and child psychology. Some therapists describe them as a visual metaphor for the mind itself: just as the shaken glitter eventually settles, so too do our big feelings when we give them time and space.
Why They Work
Watching slow, repetitive visual motion activates the parasympathetic nervous system — the body’s “rest and digest” state. The focused attention required to track drifting glitter provides a gentle mindfulness anchor, interrupting the stress response naturally and without words.
Materials You Will Need
One of the best things about calm-down bottles is that most of the materials are inexpensive and easy to find. Here is everything you need before you begin:
Choosing the Right Bottle
The bottle is the heart of the project. Look for small, clear glass or high-quality plastic bottles with an airtight seal — a screw-top lid or a snug cork both work well. Thick glass is beautiful and durable; if the bottles will be used by very young children, opt for sturdy plastic to prevent breakage. Bottles with a volume of 100–250 ml (roughly 3–8 oz) are ideal: large enough to create a satisfying swirl, small enough to fit in little hands.
Apothecary-style bottles, empty spice jars, small mason jars, and dedicated craft-store sensory bottles are all excellent choices. Avoid thin plastic bottles that may crack when squeezed or dropped.
The Role of Borax
Borax (sodium tetraborate) is a naturally occurring mineral powder commonly found in the laundry aisle. When dissolved in the glue-water mixture it creates a mild cross-linking effect that gives the liquid a slightly viscous, gel-like quality — just thick enough to make the glitter drift slowly and beautifully. Without borax (or a similar thickener), the glitter would sink almost immediately and the calming visual effect would be lost.
Borax Safety Note
Borax is safe for adult use in craft applications, but the finished bottles should always be completely sealed before being given to children. The liquid inside the bottle is not intended to be touched or consumed. If you prefer to avoid borax entirely, see the Variations section below for a borax-free alternative.
Step-by-Step Instructions
Mix Warm Water and Clear Glue
Pour 1 cup (240 ml) of warm water into your small mixing bowl. Add 1 tablespoon of clear glue and stir gently with a spoon. Warm water helps the glue dissolve more evenly. Do not use hot water, as this can cause the mixture to become stringy. Stir slowly to avoid creating air bubbles — a smooth, clear liquid is the goal at this stage.
Dissolve the Borax
Add ½ teaspoon of borax powder to the bowl and stir steadily until it is fully dissolved — about 60 to 90 seconds of mixing. You should see no visible granules remaining. The liquid will begin to feel very slightly thicker. This step is what gives your calm-down bottle its signature slow, mesmerizing drift. Rushing the dissolving process can leave undissolved borax in the bottle, which may affect clarity.
Add Color
Add a few drops of food coloring to the mixture and stir until the color is evenly distributed throughout the liquid. Start with 2–3 drops and add more gradually to reach your desired intensity. Soft, translucent colors — pale lavender, dusty teal, blush pink, or sky blue — tend to create the most calming visual effect. Deep, saturated colors are striking but can make it harder to see the glitter and flowers through the liquid.
Place Dried Flowers and Decorations
Using tweezers, carefully place your dried flowers and any other small decorative elements into the bottles. Dried lavender buds, rose petals, chamomile flowers, and small leaf fragments all work beautifully. The tweezers allow precise placement without getting your hands wet or disturbing the arrangement. Fill each bottle loosely — the decorations will shift and drift once the liquid is added, which is part of the charm.
Add Glitter
Add a pinch or two of glitter directly into each bottle. A combination of fine glitter (which drifts slowly and creates a snow-globe shimmer) and a small amount of chunky glitter or star-shaped sequins (which catches the light dramatically) gives the most visually interesting result. Holographic or iridescent glitter is particularly effective, as it shifts color as it moves.
Pour in the Liquid Mixture
Carefully pour your glue-water mixture into each bottle using a small funnel or a measuring cup with a pour spout. Fill the bottle to within about 1 cm (½ inch) of the top — leaving a small air gap is important, as it allows the contents to move freely when the bottle is shaken. Filling too full can prevent the glitter from swirling properly and may cause the lid to leak under pressure.
Seal, Shake, and Marvel
Press the cork firmly into the bottle neck or screw the lid on as tightly as possible. Give the bottle a gentle shake and watch the glitter begin its slow, spiraling descent. If the glitter settles too quickly, you can add a touch more glue to thicken the liquid. Once you are happy with the movement, seal the lid permanently with a ring of strong craft glue or a glue gun bead around the seal — this is an essential step if the bottle will be used by children.
Expert Tips for the Perfect Calm-Down Bottle
- Use fine glitter for the slowest movement. The finer the glitter particles, the longer they stay suspended in the liquid and the slower they drift to the bottom. Chunky glitter or large sequins are beautiful but settle much faster.
- Always seal the lid with glue. No matter how snug the cork or lid feels, apply a ring of strong craft glue, hot glue, or clear waterproof sealant around the joint before the bottle is used. This prevents accidental leaks, especially if the bottle is squeezed, dropped, or shaken vigorously.
- Adjust color intensity gradually. It is much easier to add more food coloring than to remove it. Start with 2 drops, shake the mixture, hold the bottle up to the light, and add more only if needed. Remember that the color will appear lighter once the bottle is sealed and the contents are in motion.
- Warm the water to the right temperature. Water that is too cool will not dissolve the borax fully; water that is too hot can make the glue stringy and cloudy. Aim for warm tap water — comfortable to the touch but not hot.
- Allow time for bubbles to settle. After pouring the liquid into the bottle, let it sit upright for 5–10 minutes before sealing. This gives any air bubbles introduced during pouring time to rise and escape, resulting in a clearer finished bottle.
- Store finished bottles away from direct sunlight. Prolonged UV exposure can bleach the food coloring and cause dried flowers to fade. A shaded shelf or storage basket keeps them looking their best for months.
- Label each bottle with the child’s name. If you are making a set for a classroom or therapy setting, a small label on the base of each bottle helps prevent mix-ups and gives each child a sense of ownership over their personal calming tool.
Variations and Creative Ideas
Borax-Free Calm-Down Bottle
If you prefer to avoid borax, you can achieve a similar slow-moving effect by replacing the borax entirely and simply increasing the ratio of clear glue to water. A mixture of roughly 60% clear glue to 40% warm water, without any borax, produces a thicker liquid that makes glitter drift satisfyingly slowly. This version is slightly cloudier but works beautifully. You can also use clear hair gel thinned with a small amount of water as a completely borax-free base.
Themed Bottles for Different Moods
Consider making a set of bottles with different themes and intentions. A sleep bottle might use deep blue or purple coloring with silver star-shaped sequins and a few drops of lavender essential oil added to the outside of the cork for scent. A focus bottle for a homework desk might use clear liquid with gold glitter for a minimal, undistracting look. An energy bottle for physical activity cool-downs could use bright orange or red with chunky holographic glitter.
Glow-in-the-Dark Bottles
For bedtime use, try adding glow-in-the-dark powder (available at craft stores) in place of or alongside regular glitter. After being exposed to light, the bottle will glow softly in a darkened room, making it an especially magical bedtime calming tool. Use a white or pale yellow liquid base so the glow is visible through the coloring.
Ocean Bottle
Create an ocean-themed calm-down bottle using blue-green coloring, fine iridescent glitter, small shell fragments, and tiny glass beads. Adding a drop of baby oil to the water mixture before sealing creates a two-liquid effect — the oil and water do not mix and create a slow, wave-like rolling motion that is deeply meditative to watch.
How to Use Calm-Down Bottles with Children
Simply handing a child a calm-down bottle in the middle of a meltdown may not be enough. The bottle is most effective when it has been introduced and practiced during calm moments first. Here are some suggestions for getting the most from your sensory bottles:
Introduce the bottle during a relaxed time. Sit with your child during a peaceful moment and explore the bottle together. Shake it, watch the glitter swirl, and narrate what you see: “Look at all that glitter spinning. Let’s take a slow breath together while we watch it settle.” This builds the association between the bottle and the calming breath before it is needed in a crisis moment.
Create a calm-down corner. Designate a cozy, low-stimulus spot in your home or classroom where the bottle lives alongside other regulating items — a soft cushion, a simple picture book, perhaps a weighted blanket. Children who know where to go when they feel overwhelmed are more likely to self-regulate rather than escalate.
Use the bottle as a breathing anchor. Teach children to hold the bottle at eye level, shake it once, and then try to take one slow breath before the glitter settles completely. This gives the breathing a visual timer and a sense of accomplishment when they manage it.
A Note for Educators and Therapists
Calm-down bottles are widely used in PBIS (Positive Behavioral Interventions and Supports) frameworks, Zones of Regulation curricula, and occupational therapy sensory diets. They are most effective as one tool within a broader co-regulation strategy rather than as a standalone intervention. Pairing the bottle with explicit teaching about emotions and calm-down strategies deepens its impact significantly.
Frequently Asked Questions
How long does a calm-down bottle last?
A properly sealed calm-down bottle can last for months or even years. The main factors that affect longevity are the quality of the seal (always use glue to secure the lid), storage away from direct sunlight, and whether the bottle is made of glass or plastic. Over time, the food coloring may gradually fade — this is normal and does not affect how the bottle works.
What is the best glitter to use?
Fine polyester glitter in iridescent or holographic finishes gives the best visual effect for calm-down bottles. It drifts slowly, catches the light from multiple angles, and creates a snow-globe shimmer that is genuinely hypnotic. Avoid chunky craft glitter as a primary ingredient — it settles too quickly — though a small amount mixed with fine glitter adds visual interest.
Can I make calm-down bottles without glitter?
Absolutely. Some children are sensitive to visual stimulation, or you may simply prefer a more natural look. Dried botanicals alone — small lavender sprigs, chamomile heads, rose petals — float and drift beautifully in the liquid without any glitter. You can also use small beads, tiny shells, or even biodegradable plant-based glitter for an eco-friendly option.
My glitter is settling too fast. What should I do?
This means the liquid is not thick enough. Open the bottle (before the sealant has set) and add a little more clear glue — a teaspoon at a time — stirring gently after each addition and testing the settle speed. Alternatively, you can pour the liquid out, mix it with additional glue in a bowl, and refill the bottle. Warming the mixture slightly before pouring can also help the glue incorporate more fully.
Are calm-down bottles safe for toddlers?
Yes, with appropriate precautions. Always use a bottle that cannot be easily opened — seal the lid with strong waterproof glue and allow it to cure fully before giving it to a toddler. Opt for plastic rather than glass for children under 4. The bottle should be used with adult supervision for very young children, and the child should understand it is for looking at, not for throwing or using as a projectile.
The Bigger Picture: Why Making Calm-Down Bottles Matters
In a world that increasingly demands instant responses and constant stimulation, teaching children — and ourselves — to pause, breathe, and wait for the glitter to settle is a genuinely radical act. The DIY calm-down bottle is, at its heart, a small handmade invitation to stillness. Making one together with a child is itself a moment of connection and calm: measuring, mixing, choosing colors, pressing flowers into place. The craft is the beginning of the lesson.
When the bottle is finished and sealed, hold it up to the light together. Shake it. Watch. Breathe. There is something about the gentle drift of glitter that seems to reach past words, past the rational mind, and speak directly to the nervous system in the language it understands best: slow, beautiful, and safe.
Whether you make one bottle or twenty, whether they live on a therapy shelf or a child’s bedside table or a classroom calm-down corner, these small handmade tools carry real weight. They are a message to whoever holds them: your big feelings are normal, they will pass, and you have what you need to get through them.


