Introduction to DIY Bioplastic Suncatchers
Welcome to the colorful world of DIY Bioplastic Suncatchers! If you’re looking for a fun and eco-friendly craft project that the whole family can enjoy, you’ve come to the right place. These suncatchers not only brighten up your windows but also spark creativity and joy in your home. I remember the first time I made these with my kids; the laughter and excitement filled the air as we mixed colors and shaped our creations. It’s a simple, rewarding activity that brings everyone together while being kind to our planet!
Why You’ll Love This DIY Bioplastic Suncatchers
Creating DIY Bioplastic Suncatchers is not just a craft; it’s an experience filled with joy and creativity! This project is easy on the wallet and perfect for all ages, making it a fantastic way to bond with your kids. As you mix colors and shape your suncatchers, you’ll find relaxation in the process. Plus, the satisfaction of seeing your colorful creations dance in the sunlight is simply magical!
Materials and Tools Needed for DIY Bioplastic Suncatchers
Before we jump into crafting our DIY Bioplastic Suncatchers, let’s gather our materials and tools! Having everything ready will make the process smooth and enjoyable. Each item plays a vital role in creating your colorful masterpieces. Plus, many of these materials are eco-friendly, making this project even more special. You can find most of these items at your local craft store or even in your kitchen!
Essential Materials
- Bioplastic (made from cornstarch or gelatin): This is the star of the show! It’s what gives your suncatchers their unique, translucent look. Cornstarch is a great option for a quick and easy setup, while gelatin can create a more flexible finish.
- Food coloring: This is where the magic happens! A few drops will transform your bioplastic into a vibrant work of art. Feel free to mix colors for a custom palette!
- Silicone molds or cookie cutters: These will help shape your suncatchers into fun designs. Silicone molds are easy to work with, while cookie cutters can add a playful touch.
- Wax paper: If you’re using cookie cutters, wax paper is perfect for preventing sticking and makes cleanup a breeze!
Tools for Crafting
- Paintbrush: A handy tool for spreading the bioplastic mixture into molds or for adding details.
- String or fishing line (for hanging): This will allow you to display your suncatchers beautifully in your windows.
- Scissors: Essential for trimming any rough edges and ensuring your suncatchers look polished.
- Mixing bowl: A must-have for combining your bioplastic and food coloring.
- Stirring stick: Use this to mix your ingredients thoroughly and create a smooth, colorful blend.
How to Make DIY Bioplastic Suncatchers
Now that you’re excited about creating your own DIY Bioplastic Suncatchers, let’s dive into the fun part! This step-by-step guide will walk you through the process, ensuring you have a blast while crafting. I remember the first time I made these with my kids; the kitchen was a delightful mess, but the joy on their faces was worth every drop of bioplastic! So, let’s get started!
Step 1: Prepare the Bioplastic
First things first, let’s prepare the bioplastic! Follow the package instructions carefully. If you’re using cornstarch, mix it with water in a bowl and heat it gently until it thickens. If you’re using gelatin, dissolve it in warm water. The aroma of the warm mixture is oddly comforting, like a cozy fall day. Remember, safety first! If you’re using heat, keep an eye on the kids and make sure they’re at a safe distance.
Step 2: Add Color
Now comes the fun part—adding color! Grab your food coloring and add a few drops to the bioplastic mixture. Stir it in with a stick until the color is evenly distributed. Watching the colors swirl together is like mixing a magical potion! You can create vibrant hues or soft pastels, depending on your mood. I love to experiment with different shades, and sometimes I even mix colors to see what new ones I can create!
Step 3: Shape Your Suncatchers
Next, it’s time to shape your suncatchers! Pour the colored bioplastic into your silicone molds or use cookie cutters on a piece of wax paper. This is where your creativity can really shine! I often let my kids choose their favorite shapes—stars, hearts, or even spooky Halloween designs! The excitement in their eyes as they pick out the molds is priceless.
Step 4: Cool and Harden
Once you’ve poured the mixture, it’s crucial to let it cool and harden completely. This might take a few hours, so be patient! You can use this time to clean up your crafting area or enjoy a cup of tea while dreaming about how beautiful your suncatchers will look in the sunlight. The anticipation is half the fun!
Step 5: Remove from Molds
After the suncatchers have set, it’s time for the big reveal! Carefully remove them from the molds or peel them off the wax paper. This part always feels like unwrapping a present! If they don’t come out easily, give them a little twist or gently pull at the edges. Just be careful not to break them; they’re like delicate little treasures!
Step 6: Trim Edges
Now, take a pair of scissors and trim any rough edges if necessary. This step is like giving your suncatchers a little haircut! It’s a simple way to make them look polished and professional. Plus, it’s a great opportunity to involve the kids in the finishing touches.
Step 7: Add Hanging String
To hang your beautiful creations, attach a piece of string or fishing line to the top of each suncatcher. You can poke a small hole or simply tie it around a corner. I love to use colorful string to match the suncatchers, adding an extra pop of fun! This is where your suncatchers will truly come to life.
Step 8: Display Your Art
Finally, it’s time to hang your suncatchers in a sunny window! Watch as the light filters through, casting colorful patterns around the room. It’s like bringing a piece of the rainbow indoors! Every time I see them, I’m reminded of the fun we had making them. Plus, they make for fantastic conversation starters when guests come over!
Tips for Best Results
- For a smoother finish, ensure your bioplastic mixture is well-stirred and free of lumps.
- If your suncatchers stick to the molds, try lightly greasing them with cooking spray before pouring in the mixture.
- Always supervise younger children, especially when using hot materials or scissors.
- Experiment with layering colors for a stunning effect—just let each layer set before adding the next!
- Don’t be afraid to get creative! Add glitter or small natural elements for extra flair.
Theme and Design Variations
One of the best parts about making DIY Bioplastic Suncatchers is the endless possibilities for creativity! You can easily customize your suncatchers to match the seasons or your personal style. Here are some fun ideas to inspire your crafting:
- Bright summer colors for a cheerful vibe—think sunny yellows, vibrant pinks, and ocean blues!
- Autumn leaves embedded for a seasonal touch—add real leaves or leaf shapes for a cozy fall feel.
- Pastel shades for a soft, spring look—gentle pinks, light blues, and mint greens create a serene atmosphere.
- Glow-in-the-dark options for nighttime fun—add glow powder to your mixture for a magical effect after the sun sets!
Display and Use Ideas
Now that you’ve crafted your stunning DIY Bioplastic Suncatchers, it’s time to showcase them! These colorful creations can brighten up any space and make delightful gifts. Here are some fun ways to display and use your suncatchers:
- Hang them in windows to catch the sunlight and create a dazzling display of colors.
- Use them as unique gifts for friends and family—everyone loves a handmade treasure!
- Create a colorful mobile for kids’ rooms, adding a whimsical touch to their space.
- Decorate classrooms or play areas, bringing a splash of creativity to learning environments.
FAQs about DIY Bioplastic Suncatchers
What is bioplastic made from?
Bioplastic is typically made from natural materials like cornstarch or gelatin. These eco-friendly options are perfect for crafting because they break down more easily than traditional plastics, making your DIY Bioplastic Suncatchers a sustainable choice!
How long do the suncatchers last?
With proper care, your suncatchers can last for several months. However, keep them out of direct sunlight for extended periods, as this can cause them to fade or become brittle over time. Enjoy their beauty while they last!
Can I use other colors besides food coloring?
Absolutely! While food coloring is the most common choice, you can experiment with natural dyes from fruits or vegetables for a unique twist. Just remember that the colors may not be as vibrant, but they’ll still be beautiful!
Are these suncatchers safe for kids?
Yes, DIY Bioplastic Suncatchers are generally safe for kids, especially when using cornstarch. Just be sure to supervise younger children when using hot materials or scissors. It’s a fun and creative project for the whole family!
How do I clean up after making suncatchers?
Cleaning up is a breeze! Simply wash your mixing bowl, stirring stick, and any tools used with warm, soapy water. If you’ve used silicone molds, they can usually be rinsed and reused. Just be sure to wipe down any surfaces to remove any sticky residue!
Final Thoughts
Creating DIY Bioplastic Suncatchers is not just about making art; it’s about the joy of crafting together and the memories you create along the way. The satisfaction of seeing your colorful creations dance in the sunlight is truly magical! I encourage you to gather your family or friends, dive into this fun project, and let your creativity shine. Don’t forget to share your beautiful suncatchers with us—we’d love to see your unique designs! Happy crafting, and may your windows be filled with vibrant colors all season long!
Print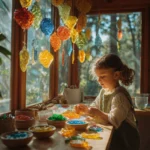
DIY Bioplastic Suncatchers: Create Colorful Art with Nature!
Description
Create beautiful and eco-friendly suncatchers using bioplastics made from natural materials. This project is perfect for adding a splash of color to your windows while being kind to the environment.
Instructions
- Prepare the bioplastic according to the package instructions, mixing in food coloring to achieve your desired colors.
- Pour the bioplastic mixture into silicone molds or use cookie cutters to create different shapes.
- Allow the mixture to set according to the instructions (this may involve refrigerating or baking).
- Once set, carefully remove the suncatchers from the molds.
- Use scissors to cut a small hole at the top of each suncatcher for hanging.
- Thread string or fishing line through the hole and tie a knot to create a loop for hanging.
- Hang your suncatchers in a sunny window and enjoy the colorful display!
- Category: Craft
Keywords: DIY, Bioplastic, Suncatchers, Eco-friendly, Craft, Nature