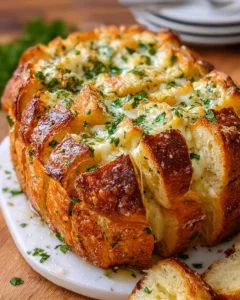
Introduction to Biscoff Stuffed Cruffins
Ah, the delightful world of baking! There’s something magical about the way flour, sugar, and butter come together to create a symphony of flavors and textures. As a passionate home cook, I often find myself experimenting with new recipes, and one of my recent favorites is the Biscoff stuffed cruffin. If you haven’t heard of cruffins yet, let me introduce you to this delightful pastry that’s a cross between a croissant and a muffin. Imagine biting into a flaky, buttery exterior, only to discover a warm, gooey center filled with the rich, caramel-like goodness of Biscoff spread. It’s pure bliss!
My journey with cruffins began on a rainy afternoon when I craved something sweet and comforting. I had some Biscoff spread left over from a previous baking adventure, and I thought, “Why not combine these two delicious treats?” The result was nothing short of heavenly. Each cruffin is like a little hug for your taste buds, and I can’t wait to share this recipe with you.
Whether you’re looking to impress guests at brunch or simply want to indulge in a sweet treat at home, Biscoff stuffed cruffins are the perfect choice. They’re surprisingly easy to make, and the joy of pulling them out of the oven, golden and puffed, is an experience I cherish. So, grab your apron, and let’s dive into the world of Biscoff stuffed cruffins together. Trust me, your kitchen will smell divine, and your taste buds will thank you!
Ingredients for Biscoff Stuffed Cruffins
Before we embark on this delicious journey, let’s gather our ingredients. Having everything ready makes the process smoother and more enjoyable. I always find that using high-quality ingredients elevates the final product, so I recommend sourcing the best you can find. Here’s what you’ll need for these scrumptious Biscoff stuffed cruffins:
Main Ingredients
- 2 cups all-purpose flour
- 1/4 cup granulated sugar
- 1/2 teaspoon salt
- 1 tablespoon instant yeast
- 1/2 cup whole milk, warmed
- 1/4 cup unsalted butter, melted
- 1 large egg
- 1/2 cup Biscoff spread (plus extra for drizzling, if desired)
- 1/4 teaspoon ground cinnamon (optional, but adds a lovely warmth)
When it comes to flour, I prefer using unbleached all-purpose flour for a more natural flavor. The butter should be unsalted to control the saltiness of the dough. And don’t skimp on the Biscoff spread; it’s the star of the show! If you can find it, the crunchy version adds a delightful texture to the filling.
Optional Add-ons
- 1/4 cup chopped nuts (like pecans or walnuts) for added crunch
- 1/4 cup chocolate chips for a sweet twist
- Powdered sugar for dusting before serving
- Caramel sauce for drizzling on top
Feel free to get creative! I often toss in some chocolate chips for a little extra sweetness or sprinkle chopped nuts for a delightful crunch. The beauty of baking is that you can tailor it to your taste. So, gather your ingredients, and let’s get ready to create something truly special!
How to Prepare Biscoff Stuffed Cruffins
Now that we have our ingredients ready, it’s time to roll up our sleeves and get baking! The process of making Biscoff stuffed cruffins is a delightful adventure. Each step brings us closer to that flaky, gooey goodness. Let’s dive into the preparation!
Step 1: Making the Dough
First things first, we need to create a soft and pliable dough. In a large mixing bowl, combine the flour, sugar, salt, and instant yeast. Then, in a separate bowl, whisk together the warm milk, melted butter, and egg. Pour the wet ingredients into the dry ingredients and mix until a dough forms. Knead the dough on a floured surface for about 5-7 minutes until it’s smooth and elastic.
Tips for Step 1
- Make sure your milk is warm, not hot. It should feel like a cozy hug when you touch it!
- If the dough feels too sticky, sprinkle a little more flour as you knead. Just don’t overdo it!
- Let the dough rest in a warm place for about an hour, or until it doubles in size. I like to cover it with a damp cloth to keep it cozy.
Step 2: Rolling and Shaping the Dough
Once your dough has risen, it’s time to roll it out! On a lightly floured surface, roll the dough into a rectangle about 1/4 inch thick. The goal is to create layers, so don’t rush this step. Once rolled, spread a generous layer of Biscoff spread over the dough, leaving a small border around the edges. Then, fold the dough into thirds, like a letter, and roll it out again to the same thickness.
Tips for Step 2
- Use a rolling pin with a non-stick surface to make this step easier.
- Don’t worry if the Biscoff spread oozes out a bit; that just means more deliciousness!
- Keep your work surface floured to prevent sticking, but not too much flour, or the dough will lose its buttery goodness.
Step 3: Filling with Biscoff
Now comes the fun part! Cut the rolled dough into squares, about 4 inches each. Take each square and place a spoonful of Biscoff spread in the center. Fold the corners of the square over the filling, pinching them together to seal. This will create little pockets of joy! Place each filled cruffin seam-side down in a muffin tin.
Tips for Step 3
- Don’t be shy with the Biscoff spread; it’s what makes these cruffins so special!
- Make sure to pinch the seams tightly to prevent any filling from leaking out during baking.
- If you’re feeling adventurous, add a sprinkle of chopped nuts or chocolate chips inside the filling for an extra surprise!
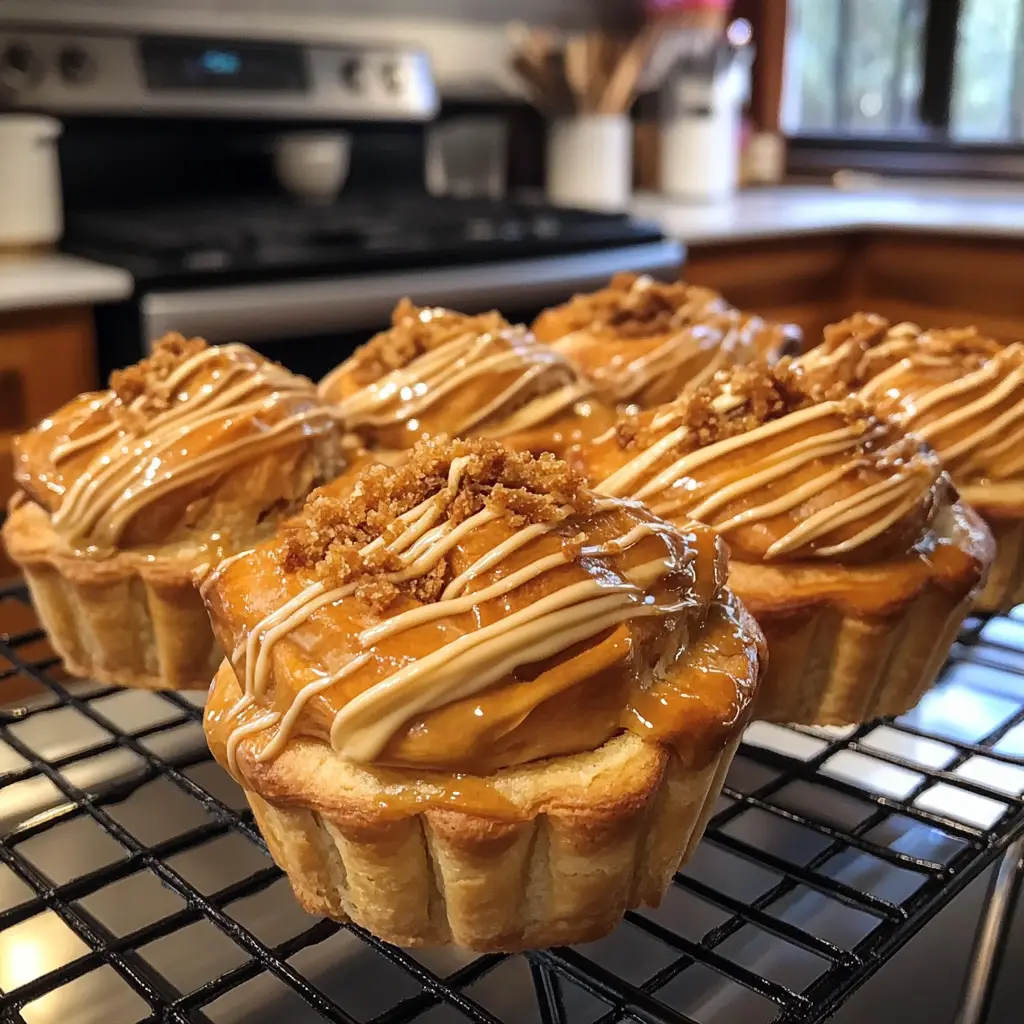
Step 4: Baking the Cruffins
Preheat your oven to 375°F (190°C). Once your cruffins are in the muffin tin, let them rise for another 20-30 minutes. This step is crucial for that fluffy texture. When they’re ready, pop them in the oven and bake for about 20-25 minutes, or until they’re golden brown and puffed up. The aroma will fill your kitchen, and you’ll be counting down the minutes!
Tips for Step 4
- Keep an eye on them towards the end of baking. Ovens can be sneaky, and you don’t want them to over-bake!
- If you want an extra golden top, brush the cruffins with melted butter right before baking.
- Let them cool for a few minutes before removing them from the tin. This helps them hold their shape!
Equipment Needed for Biscoff Stuffed Cruffins
Before we dive into the baking process, let’s gather the essential tools that will help us create these delightful Biscoff stuffed cruffins. Having the right equipment makes everything smoother and more enjoyable. Here’s what you’ll need:
- Mixing Bowls: A large mixing bowl for combining ingredients and a smaller one for whisking wet ingredients.
- Rolling Pin: A good rolling pin is key for rolling out the dough evenly. If you don’t have one, a wine bottle can work in a pinch!
- Muffin Tin: A standard 12-cup muffin tin is perfect for shaping your cruffins. If you don’t have one, you can use a cupcake pan, but the shape may vary slightly.
- Pastry Brush: This is handy for brushing melted butter on top of the cruffins before baking. If you don’t have one, you can use a clean paper towel or your fingers.
- Spatula: A silicone spatula is great for mixing and scraping down the sides of your bowls.
- Kitchen Towel: A damp kitchen towel is perfect for covering the dough while it rises, keeping it cozy and warm.
With these tools in hand, you’re all set to embark on your cruffin-making adventure! Each piece of equipment plays a role in bringing your delicious creation to life. So, let’s get ready to bake some magic!
Variations of Biscoff Stuffed Cruffins
While the classic Biscoff stuffed cruffins are already a treat, there’s always room for creativity in the kitchen! As a passionate home cook, I love to experiment with flavors and textures. Here are a few delightful variations that you can try to make these cruffins even more exciting:
- Chocolate Hazelnut Cruffins: Swap out the Biscoff spread for chocolate hazelnut spread. The combination of flaky pastry and rich chocolate is simply irresistible!
- Spiced Apple Cruffins: Add a layer of spiced apple filling along with the Biscoff spread. The warm spices and sweet apples create a cozy flavor that’s perfect for fall.
- Peanut Butter and Banana Cruffins: Spread a layer of peanut butter and add slices of banana for a delicious twist. The combination of flavors is like a comforting hug!
- Maple Pecan Cruffins: Mix in some chopped pecans with the Biscoff spread for a crunchy texture. Drizzle with maple syrup before serving for an extra touch of sweetness.
Feel free to mix and match these ideas or come up with your own unique combinations! The beauty of baking is that it allows for endless creativity. Each variation brings a new experience, and I can’t wait for you to try them all!
Cooking Notes for Biscoff Stuffed Cruffins
As I’ve journeyed through the delightful process of making Biscoff stuffed cruffins, I’ve gathered a few cooking notes that can help you achieve the best results. These little tips can make a big difference in your baking adventure!
- Temperature Matters: Ensure your ingredients are at room temperature, especially the egg and milk. This helps the dough come together smoothly and rise beautifully.
- Don’t Rush the Rise: Allowing the dough to rise properly is crucial. If you’re in a hurry, find a warm spot in your kitchen, like near the oven, to speed up the process.
- Watch the Oven: Every oven is different! Keep an eye on your cruffins as they bake. If they start to brown too quickly, you can cover them loosely with aluminum foil.
- Cool Before Serving: Let the cruffins cool in the tin for a few minutes before transferring them to a wire rack. This helps them maintain their shape and prevents sogginess.
- Storage Tips: If you have leftovers (which is rare!), store them in an airtight container at room temperature for up to two days. You can also freeze them for later enjoyment!
These cooking notes are like little nuggets of wisdom I’ve picked up along the way. They’ll help you navigate the process with ease and ensure your Biscoff stuffed cruffins turn out perfectly every time. Happy baking!
Serving Suggestions for Biscoff Stuffed Cruffins
Once your Biscoff stuffed cruffins are out of the oven and cooling, the fun of serving them begins! I love to present these delightful pastries in a way that makes them even more tempting. Here are some of my favorite serving suggestions that will elevate your cruffin experience:
- Warm and Fresh: Serve the cruffins warm, right out of the oven. The gooey Biscoff filling will be at its best, and the flaky layers will melt in your mouth!
- Drizzle Delight: For an extra touch of indulgence, drizzle some melted Biscoff spread or caramel sauce over the top. It adds a beautiful shine and an extra layer of flavor.
- Dust with Powdered Sugar: A light dusting of powdered sugar can make these cruffins look like they belong in a bakery. It adds a touch of sweetness and elegance.
- Pair with Coffee or Tea: Enjoy your cruffins with a steaming cup of coffee or a soothing cup of tea. The combination is perfect for a cozy afternoon treat or a delightful brunch.
- Serve with Fresh Fruit: Add a side of fresh berries or sliced bananas for a refreshing contrast. The fruity flavors complement the rich Biscoff filling beautifully.
These serving suggestions not only enhance the presentation but also create a delightful experience for you and your guests. Each bite of a Biscoff stuffed cruffin, paired with these accompaniments, is sure to bring smiles and satisfaction. Enjoy every moment of sharing this delicious treat!
Tips for Perfect Biscoff Stuffed Cruffins
As I’ve baked my fair share of Biscoff stuffed cruffins, I’ve learned a few tips that can help you achieve perfection in every batch. These little nuggets of wisdom can make all the difference, ensuring your cruffins are as delightful as they can be. Here’s what I’ve discovered:
- Patience is Key: Allow the dough to rise fully. Rushing this step can lead to dense cruffins instead of the light, airy texture we crave.
- Flour Wisely: Use just enough flour when rolling out the dough. Too much can make it tough, while too little can lead to sticking. Aim for a happy medium!
- Seal it Well: Make sure to pinch the seams tightly when folding the dough over the filling. This prevents any delicious Biscoff from leaking out during baking.
- Experiment with Temperature: If your kitchen is cool, consider placing the dough in a slightly warm oven (turned off) to help it rise better. A cozy environment works wonders!
- Cool Before Enjoying: Let the cruffins cool for a few minutes after baking. This helps them set and makes them easier to handle without losing their shape.
With these tips in your back pocket, you’ll be well on your way to creating the most scrumptious Biscoff stuffed cruffins. Each bite will be a delightful experience, and I can’t wait for you to share them with family and friends!
Breakdown of Time for Biscoff Stuffed Cruffins
As a passionate home cook, I know that time management is key in the kitchen. When it comes to making Biscoff stuffed cruffins, it’s helpful to have a clear idea of how long each step will take. Here’s a simple breakdown of the time you’ll need to create these delightful pastries:
- Prep Time: 20 minutes – This includes gathering your ingredients, mixing the dough, and letting it rise.
- Cooking Time: 25 minutes – This is the time spent baking your cruffins to golden perfection.
- Total Time: 1 hour 15 minutes – This accounts for both prep and cooking time, plus the dough rising time.
Keep in mind that the rising time can vary depending on the temperature of your kitchen. If it’s a cozy, warm day, your dough might rise faster! So, while the total time gives you a good estimate, always trust your instincts and the dough. Happy baking!
Nutritional Information for Biscoff Stuffed Cruffins
As a passionate home cook, I believe that enjoying delicious treats like Biscoff stuffed cruffins can be part of a balanced lifestyle. While these pastries are undeniably indulgent, it’s always good to know what you’re savoring. Here’s a general breakdown of the nutritional information for one Biscoff stuffed cruffin:
- Calories: Approximately 250-300 calories
- Protein: 4g
- Fat: 12g
- Carbohydrates: 35g
- Sugar: 10g
- Fiber: 1g
Keep in mind that these values can vary based on the specific ingredients you use and any optional add-ons you choose to include. For instance, adding nuts or chocolate chips will increase the calorie count and nutritional content. I always encourage enjoying these cruffins in moderation, especially since they’re best shared with friends and family. After all, the joy of baking is not just in the eating but in the experience of creating something special!
Frequently Asked Questions about Biscoff Stuffed Cruffins
As I’ve shared my love for Biscoff stuffed cruffins, I’ve noticed that many home cooks have similar questions. It’s always great to connect with fellow bakers and share insights! Here are some of the most frequently asked questions I’ve encountered, along with my answers to help you on your cruffin journey:
Can I make the dough ahead of time?
Absolutely! You can prepare the dough a day in advance. Just let it rise, then cover it tightly with plastic wrap and refrigerate. When you’re ready to bake, take it out, let it come to room temperature, and proceed with rolling and shaping. It’s a great time-saver!
What if I don’t have instant yeast?
If you only have active dry yeast, you can still make these cruffins! Just dissolve it in the warm milk with a pinch of sugar and let it sit for about 5-10 minutes until it becomes frothy. Then, mix it into your dry ingredients as you would with instant yeast.
Can I freeze the cruffins after baking?
Yes, you can! Once the cruffins are completely cooled, place them in an airtight container or freezer bag. They can be frozen for up to three months. When you’re ready to enjoy them, simply thaw at room temperature and warm them in the oven for a few minutes to regain that fresh-baked taste.
How do I store leftover cruffins?
Store any leftover cruffins in an airtight container at room temperature for up to two days. If you want to keep them longer, freezing is the best option. Just remember to reheat them for that delightful, warm experience!
Can I use a different filling instead of Biscoff spread?
Of course! The beauty of cruffins is their versatility. You can fill them with chocolate hazelnut spread, fruit preserves, or even a cream cheese mixture. Get creative and experiment with flavors that excite your taste buds!
These questions reflect the curiosity and enthusiasm of fellow bakers, and I hope my answers help you feel more confident in your cruffin-making adventure. Remember, baking is all about having fun and enjoying the process, so don’t hesitate to ask more questions or share your experiences!
Conclusion on Biscoff Stuffed Cruffins
As I wrap up this delightful journey into the world of Biscoff stuffed cruffins, I can’t help but feel a sense of joy and satisfaction. These pastries are not just a treat; they’re an experience that brings warmth and happiness to any kitchen. The combination of flaky layers and gooey Biscoff filling creates a symphony of flavors that dance on your taste buds, making every bite a little celebration.
What I love most about making Biscoff stuffed cruffins is how they can transform an ordinary day into something special. Whether you’re sharing them with friends over coffee or enjoying one as a sweet indulgence after a long day, they have a way of brightening up any moment. Plus, the process of baking them is filled with creativity and love, allowing you to express yourself in the kitchen.
So, if you’re looking for a recipe that’s not only delicious but also brings joy and warmth to your home, I wholeheartedly recommend giving Biscoff stuffed cruffins a try. They’re easy to make, customizable, and oh-so-satisfying. I can’t wait for you to experience the magic of pulling these golden beauties from the oven and sharing them with your loved ones. Happy baking!