Sensory-Rich Introduction with Immediate Craving
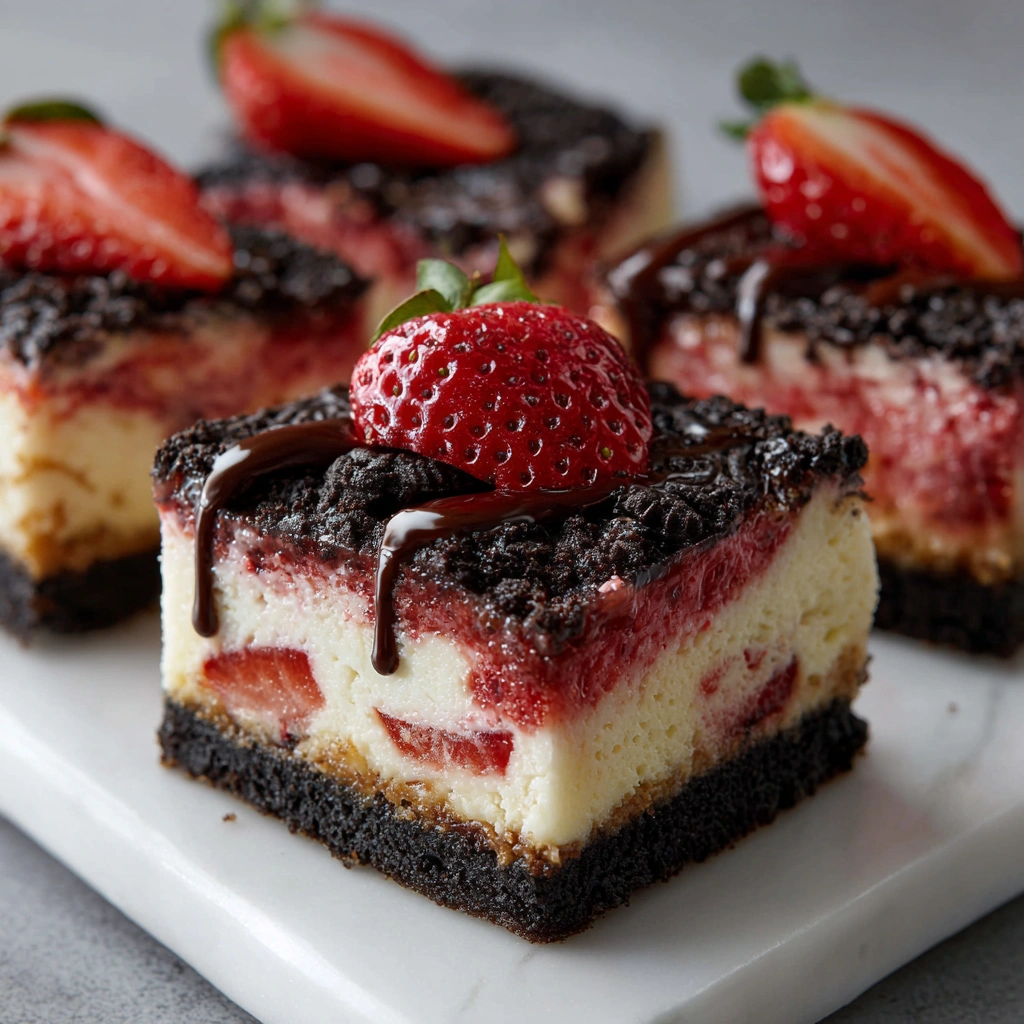
Imagine sinking your fork into a Strawberry Oreo Cheesecake Bar, where the creamy, velvety cheesecake filling meets the crunchy, chocolatey goodness of an Oreo crust. As you take that first bite, the sweet, tangy flavor of fresh strawberries bursts onto your palate, creating a delightful contrast that dances in harmony with the rich, decadent layers. The aroma wafting from the oven as these bars bake is nothing short of intoxicating, filling your kitchen with a warm, inviting scent that beckons everyone to gather around.
I still remember the first time I made these bars for a summer gathering. It was a sunny afternoon, and the laughter of friends filled the air. I had just pulled the bars from the fridge, and as I cut into them, the creamy filling glistened under the sunlight, topped with vibrant slices of strawberries. The joy on my friends’ faces as they took their first bites was priceless. It was a moment of pure happiness, a reminder of how food can bring people together and create lasting memories.
These Strawberry Oreo Cheesecake Bars are perfect for any occasion—birthdays, holidays, or even a casual get-together. They’re not just a dessert; they’re a celebration of flavors and textures that invite everyone to indulge. Whether you’re hosting a picnic or simply enjoying a quiet evening at home, these bars are sure to elevate the moment, making it sweeter and more memorable.
Why You’ll Love This Strawberry Oreo Cheesecake Bars
Let me tell you, there are so many reasons to fall head over heels for these Strawberry Oreo Cheesecake Bars. Each bite is a delightful experience that will have you coming back for more!
- Texture Contrast: The creamy filling juxtaposed with the crunchy Oreo crust creates a delightful mouthfeel. It’s like a party in your mouth, where the smoothness of the cheesecake meets the satisfying crunch of the crust.
- Flavor Balance: The sweetness of fresh strawberries complements the rich, chocolatey flavor of Oreos, making each bite a harmonious experience. It’s a flavor combination that feels both indulgent and refreshing, perfect for any palate.
- Versatility: These bars can be served as a dessert, snack, or even a sweet breakfast treat. Imagine enjoying a slice with your morning coffee or serving them at a summer barbecue—talk about a crowd-pleaser!
- Ease of Preparation: With simple steps and minimal ingredients, this recipe is accessible for bakers of all skill levels. Even if you’re a novice in the kitchen, you’ll feel like a pro whipping up these delicious bars.
- Universal Appeal: Loved by both kids and adults, these bars are a guaranteed hit at any gathering. Whether it’s a birthday party or a casual family dinner, everyone will be reaching for seconds!
So, whether you’re looking to impress guests or simply treat yourself, these Strawberry Oreo Cheesecake Bars are the perfect choice. Trust me, once you try them, you’ll understand why they’re a favorite in my kitchen!
Essential Tools & Preparation Strategy
Before we dive into the deliciousness of Strawberry Oreo Cheesecake Bars, let’s gather our essential tools and set up a smooth preparation strategy. Trust me, having the right equipment makes all the difference in achieving that perfect creamy texture and delightful flavor!
- 9×9 inch baking pan: This is essential for shaping the bars and ensuring even baking. A sturdy pan will help you achieve those perfect edges!
- Mixing bowls: You’ll need a couple of these to combine your ingredients efficiently. I recommend using one large bowl for the cheesecake filling and a smaller one for the crust.
- Electric mixer: This handy tool helps achieve a smooth and creamy cheesecake filling without lumps. If you don’t have one, a good old-fashioned whisk will do, but be prepared for a workout!
- Rubber spatula: A must-have for folding in ingredients gently to maintain airiness. It’s also great for scraping down the sides of your mixing bowl.
- Measuring cups and spoons: Accurate measurements are key to perfect results, so make sure you have these on hand. Trust me, no one wants a cheesecake that’s too sweet or too bland!
- Oven: Required for baking the cheesecake bars to achieve the right texture. Preheating is crucial, so don’t skip this step!
- Parchment paper (optional): Lining the baking pan with parchment paper can make it easier to remove the bars once they’re set. It’s a little trick that saves you from potential heartbreak!
- Cooling rack: Ideal for cooling the bars evenly after baking. This step is important to prevent sogginess and ensure that your bars set perfectly.
With these tools at your disposal, you’re well on your way to creating a batch of Strawberry Oreo Cheesecake Bars that will impress everyone. Let’s get ready to bake!
Ingredients & Their Roles in This Strawberry Oreo Cheesecake Bars
Understanding the ingredients in your Strawberry Oreo Cheesecake Bars is key to mastering this delightful dessert. Each component plays a vital role in creating the perfect balance of flavors and textures. Let’s break it down!
Crust:
- Oreo cookies: These little gems provide a rich, chocolatey base with a satisfying crunch. The contrast between the creamy filling and the crunchy crust is what makes each bite so irresistible.
- Unsalted butter: This ingredient binds the crust together and adds a touch of richness. It’s essential for achieving that perfect texture that holds up under the creamy cheesecake filling.
Cheesecake Filling:
- Cream cheese: The star of the show! This is the main ingredient that gives the cheesecake its creamy texture. Make sure it’s softened to room temperature for easy mixing.
- Granulated sugar: Sweetens the filling and balances the tanginess of the cream cheese. It’s the magic ingredient that transforms the mixture into a luscious treat.
- Vanilla extract: Adds depth of flavor to the cheesecake, enhancing the overall taste. A splash of vanilla is like a warm hug for your taste buds!
- Eggs: Provide structure and stability to the filling. They help the cheesecake set properly, ensuring a smooth and creamy texture.
- Fresh strawberries (pureed): Infuse the cheesecake with fruity flavor and natural sweetness. The vibrant pink color from the strawberries not only looks beautiful but also adds a refreshing twist to the rich filling.
Topping:
- Fresh strawberries (sliced): These add a fresh, vibrant touch and enhance the presentation of your bars. They’re like the cherry on top, making your dessert visually appealing!
- Powdered sugar: Lightly sweetens the topping and adds a decorative finish. A dusting of powdered sugar makes everything look a little more special, don’t you think?
With these ingredients, you’re well on your way to creating a batch of Strawberry Oreo Cheesecake Bars that will not only taste amazing but also look stunning on your dessert table. Let’s get ready to mix and bake!
Step-by-Step Guide to Perfect Strawberry Oreo Cheesecake Bars
Now that you’re ready to dive into the delicious world of Strawberry Oreo Cheesecake Bars, let’s break down the process step-by-step. I promise, it’s easier than it sounds, and the end result is a creamy, dreamy delight that will have everyone asking for seconds!
- Preheat the oven to 350°F (175°C). This is crucial for achieving that perfect bake.
- In a mixing bowl, combine 24 crushed Oreo cookies with 1/4 cup melted unsalted butter until well combined. The mixture should resemble wet sand.
- Press the mixture firmly into the bottom of a greased 9×9 inch baking pan to form the crust. Use the back of a measuring cup to ensure it’s compact and even.
- In a large bowl, beat 16 oz softened cream cheese until smooth. The aroma of the cream cheese will fill your kitchen, and trust me, it’s heavenly!
- Add 1/2 cup granulated sugar and 1 tsp vanilla extract, mixing until well incorporated. The mixture should be creamy and luscious.
- Beat in 2 large eggs one at a time, ensuring each is fully mixed before adding the next. This step is key to a smooth filling.
- Gently fold in 1 cup pureed fresh strawberries until just combined. The vibrant pink color will make your heart sing!
- Pour the cheesecake filling over the crust and smooth the top with a rubber spatula.
- Bake for 30-35 minutes, or until the edges are set and the center is slightly jiggly. Your kitchen will smell like a strawberry dream!
- Remove from the oven and let cool completely before refrigerating for at least 4 hours. Patience is key here; the chilling time allows the flavors to meld beautifully.
And there you have it! A simple yet rewarding process that leads to a dessert that’s sure to impress. Just remember, the key to success is in the details—so take your time and enjoy the journey!
Chef’s Notes & Pro Tips for Flawless Results
As you embark on your journey to create the perfect Strawberry Oreo Cheesecake Bars, I want to share some invaluable tips and tricks that I’ve gathered over the years. These insights will help you achieve a flawless result every time, ensuring that your bars are not only delicious but also visually stunning!
- Make-ahead instructions: These bars can be made a day in advance and stored in the refrigerator for optimal flavor. In fact, I find that letting them sit overnight allows the flavors to meld beautifully, making each bite even more delightful!
- Storage tips: Keep your bars covered in the fridge for up to 5 days to maintain freshness. If you’re like me and love to have a sweet treat on hand, this is a great way to enjoy them throughout the week.
- Equipment recommendations: For the best texture, use a high-quality electric mixer. It makes a world of difference in achieving that smooth, creamy filling without any lumps. Trust me, your arms will thank you!
- Customization options: Don’t be afraid to experiment! Try different fruit purees or flavored extracts for unique variations. For instance, a hint of lemon zest can add a refreshing twist, or you could swap strawberries for raspberries for a berry medley that’s equally delicious.
With these tips in your back pocket, you’re well-equipped to create Strawberry Oreo Cheesecake Bars that will impress your family and friends. Remember, cooking is all about having fun and making it your own, so let your creativity shine!
Avoid These Common Cooking Mistakes
As you embark on your journey to create the perfect Strawberry Oreo Cheesecake Bars, it’s essential to be aware of some common pitfalls that can derail your dessert dreams. Trust me, I’ve made these mistakes myself, and I want to save you from the heartache of a less-than-perfect batch. Here are the key things to watch out for:
- Overmixing the cheesecake filling: This can lead to cracks in your bars. Mix just until combined to keep the filling smooth and creamy.
- Not letting the bars cool completely before refrigerating: If you rush this step, you might end up with a mushy texture. Allow ample cooling time to ensure the bars set properly.
- Using cold cream cheese: Cold cream cheese can create lumps in your filling. Always soften it to room temperature before mixing for a silky-smooth texture.
- Not pressing the crust firmly enough: A crumbly base can ruin the integrity of your bars. Make sure to press the crust mixture firmly into the pan for a solid foundation.
- Baking at too high a temperature: This can cause the cheesecake to crack. Stick to the recommended temperature of 350°F (175°C) for the best results.
- Skipping the chilling time: Chilling is crucial for achieving the right texture. Refrigerate your bars for at least 4 hours to let the flavors meld beautifully.
- Using too many strawberries in the filling: This can make the filling too watery. Stick to the recommended amount of 1 cup pureed strawberries for the perfect balance.
By keeping these common mistakes in mind, you’ll be well on your way to creating Strawberry Oreo Cheesecake Bars that are not only delicious but also visually stunning. Remember, every baking experience is a learning opportunity, so don’t be discouraged if things don’t go perfectly the first time. Happy baking!
Creative Variations & Customizations
One of the best things about Strawberry Oreo Cheesecake Bars is their versatility! You can easily customize this recipe to suit your taste preferences or dietary needs. Here are some creative variations that I’ve tried and loved:
- Gluten-free version: If you’re looking for a gluten-free treat, simply swap out regular Oreos for gluten-free Oreos. You won’t sacrifice any flavor, and everyone can enjoy these delicious bars!
- Chocolate drizzle: For an indulgent twist, add a rich chocolate sauce on top of your cheesecake bars. The combination of chocolate and strawberries is a match made in heaven!
- Berry medley: Want to mix things up? Substitute strawberries with a colorful mix of raspberries and blueberries. This not only adds a vibrant look but also a delightful burst of flavors!
- Lemon zest: Incorporate some lemon zest into the filling for a refreshing citrus flavor that brightens up the dessert. It’s a simple addition that makes a big difference!
- Nutty crust: For an extra crunch and flavor, add crushed nuts (like almonds or pecans) to the Oreo crust. This adds a delightful texture that complements the creamy filling beautifully.
Feel free to experiment with these variations or come up with your own! The beauty of baking is that it allows for creativity, so don’t hesitate to make this recipe your own. Each variation brings a unique twist to the classic Strawberry Oreo Cheesecake Bars, ensuring that there’s always something new to enjoy!
Perfect Pairings: What to Serve With Strawberry Oreo Cheesecake Bars
When it comes to enjoying your Strawberry Oreo Cheesecake Bars, the right accompaniments can elevate the experience to a whole new level. Here are some delightful pairings that I absolutely love:
- Whipped cream: This adds a light, airy texture that beautifully complements the richness of the bars. A dollop on top makes each bite feel like a cloud of sweetness!
- Vanilla ice cream: The creamy contrast of vanilla ice cream enhances the dessert experience, creating a delightful balance of flavors. It’s like a match made in dessert heaven!
- Chocolate sauce: A rich addition that pairs beautifully with the flavors of the bars. Drizzling some chocolate sauce on top takes the indulgence factor up a notch!
- Fresh mint leaves: These offer a refreshing touch that brightens the dish. Not only do they add a pop of color, but they also provide a lovely aromatic experience.
- Cold milk: A classic pairing that balances the sweetness and richness of the cheesecake bars. There’s something so comforting about enjoying a slice with a glass of cold milk!
- Fruit salad: A light, refreshing side that complements the dessert perfectly. The natural sweetness of the fruit enhances the strawberry flavor in the bars.
- Coffee: Perfect for an afternoon treat, coffee enhances the flavors of the bars and provides a delightful contrast to the sweetness. It’s a pairing that feels sophisticated yet comforting.
- Picnic spread: These bars are ideal for serving alongside other desserts for a sweet variety. They’re sure to be the star of the show at any gathering!
With these pairings, your Strawberry Oreo Cheesecake Bars will shine even brighter. Whether you’re hosting a gathering or enjoying a quiet evening at home, these accompaniments will make your dessert experience truly unforgettable!
Storage & Meal Prep Instructions
Now that you’ve created a batch of Strawberry Oreo Cheesecake Bars, it’s important to know how to store them properly to maintain their deliciousness. Trust me, you’ll want to savor every last bite!
- Fridge storage: Keep the bars covered in the refrigerator for up to 5 days. This will help preserve their creamy texture and fresh flavor. I recommend using an airtight container to prevent any odors from seeping in.
- Freezer storage: If you want to enjoy these bars later, wrap individual bars in plastic wrap and store them in an airtight container for up to 3 months. This is a great way to have a sweet treat on hand whenever the craving strikes!
- Reheating methods: When you’re ready to enjoy your frozen bars, simply thaw them in the refrigerator overnight before serving. You can enjoy them chilled straight from the fridge or let them sit at room temperature for a few minutes for a softer texture.
By following these storage and meal prep instructions, you’ll ensure that your Strawberry Oreo Cheesecake Bars remain as delightful as the day you made them. So go ahead, make a double batch, and enjoy the sweet rewards of your baking efforts!
Nutrition Facts & Health Insights
As you indulge in these delightful Strawberry Oreo Cheesecake Bars, it’s always good to know what you’re enjoying. Here’s a closer look at the nutrition facts and some health insights that make this dessert not just delicious, but also a bit nutritious!
| Nutrient | Amount per Serving |
|---|---|
| Serving Size | 1 bar (approximately 2×2 inches) |
| Calories | 250 |
| Sugar | 18 grams |
| Sodium | 200 milligrams |
| Fat | 15 grams |
| Saturated Fat | 8 grams |
| Unsaturated Fat | 5 grams |
| Trans Fat | 0 grams |
| Carbohydrates | 28 grams |
| Fiber | 1 gram |
| Protein | 3 grams |
| Cholesterol | 50 milligrams |
These Strawberry Oreo Cheesecake Bars not only satisfy your sweet tooth but also come with some health benefits. Fresh strawberries are packed with antioxidants and vitamins, particularly vitamin C, which is great for your immune system. Plus, the cream cheese provides a good source of calcium and protein, making this dessert a little more wholesome than your average treat.
So, as you enjoy each creamy, dreamy bite, you can feel good knowing that you’re indulging in something that has a bit of nutritional value. Just remember, moderation is key—after all, it’s all about balance!
Frequently Asked Questions
As you embark on your journey to create the perfect Strawberry Oreo Cheesecake Bars, you might have a few questions along the way. Don’t worry; I’ve got you covered! Here are some of the most common queries I’ve encountered, along with helpful answers to guide you:
- Can I use frozen strawberries instead of fresh?
Yes, you can! Just make sure to thaw and drain them well before pureeing to avoid excess moisture in your filling. Frozen strawberries can still provide that delicious fruity flavor! - How can I make these bars dairy-free?
To make a dairy-free version, substitute the cream cheese with a dairy-free cream cheese alternative and use coconut cream or a non-dairy yogurt for a similar texture. Just be sure to check the labels for any added sugars! - What can I substitute for cream cheese?
If you’re looking for a lighter option, you can use Greek yogurt or ricotta cheese. Keep in mind that the flavor and texture will vary slightly, but they can still create a delicious filling! - How long do these bars need to chill?
For the best results, refrigerate the bars for at least 4 hours after baking. This chilling time allows the flavors to meld and the texture to set perfectly. - Can I double the recipe for a larger batch?
Absolutely! If you want to make a larger batch, simply double the ingredients and use a larger baking pan (like a 9×13 inch). Just keep an eye on the baking time, as it may need a few extra minutes. - What’s the best way to cut the bars for clean edges?
To achieve clean cuts, use a sharp knife and dip it in hot water before slicing. Wipe the knife clean between cuts to prevent the filling from sticking and creating messy edges. - How do I know when the cheesecake is done baking?
The cheesecake is done when the edges are set and the center is slightly jiggly. It will continue to firm up as it cools, so don’t worry if it looks a little soft when you take it out of the oven! - Can I add more strawberries to the filling?
While strawberries add wonderful flavor, adding too many can make the filling watery. Stick to the recommended 1 cup pureed strawberries for the best texture and flavor balance. - What’s the best way to store leftovers?
Store any leftover bars in an airtight container in the refrigerator for up to 5 days. If you want to keep them longer, wrap individual bars in plastic wrap and freeze them for up to 3 months. - How can I make these bars more visually appealing?
To enhance the presentation, consider adding a drizzle of chocolate sauce, a sprinkle of powdered sugar, or a garnish of fresh mint leaves on top. Fresh fruit slices also add a pop of color and freshness!
With these FAQs answered, you’re well-equipped to tackle any challenges that may arise while making your Strawberry Oreo Cheesecake Bars. Remember, baking is all about having fun and experimenting, so don’t hesitate to make this recipe your own!
Final Inspiration & Kitchen Confidence
As you stand in your kitchen, ready to create your very own Strawberry Oreo Cheesecake Bars, I want to take a moment to encourage you. Baking is not just about following a recipe; it’s about the joy of creating something delicious that you can share with your loved ones. Each time you step into the kitchen, you’re not just making a dessert; you’re crafting memories, sparking joy, and bringing people together around the table.
Remember, every baking experience is a step towards becoming a more confident cook. Don’t be afraid to make mistakes along the way; they’re often the best teachers. Embrace the process, savor the aromas wafting through your home, and enjoy the satisfaction of pulling a beautiful batch of bars from the oven. You’ve got this!
Now, I invite you to share your creations and experiences with Strawberry Oreo Cheesecake Bars. Whether it’s a photo of your finished product, a story about your baking journey, or a tip you discovered along the way, I’d love to hear from you! Let’s foster a sense of community and connection through our shared love of baking. Together, we can inspire each other to keep creating and enjoying the sweet moments in life!
Print
Strawberry Oreo Cheesecake Bars: Creamy, Dreamy Delight!
- Total Time: 4 hours 55 minutes
- Yield: 16 bars 1x
- Diet: Vegetarian
Description
Indulge in the luscious layers of Strawberry Oreo Cheesecake Bars, where the creamy, velvety cheesecake meets the crunchy, chocolatey goodness of Oreo crust. Each bite bursts with the sweet, tangy flavor of fresh strawberries, creating a delightful contrast that dances on your palate.
Ingredients
- Crust:
- 24 Oreo cookies, crushed
- 1/4 cup unsalted butter, melted
- Cheesecake Filling:
- 16 oz cream cheese, softened
- 1/2 cup granulated sugar
- 1 tsp vanilla extract
- 2 large eggs
- 1 cup fresh strawberries, pureed
- Topping:
- 1 cup fresh strawberries, sliced
- 2 tbsp powdered sugar
Instructions
- Preheat the oven to 350°F (175°C).
- In a mixing bowl, combine crushed Oreo cookies and melted butter until well combined.
- Press the mixture firmly into the bottom of a greased 9×9 inch baking pan to form the crust.
- In a large bowl, beat the softened cream cheese until smooth.
- Add granulated sugar and vanilla extract, mixing until well incorporated.
- Beat in the eggs one at a time, ensuring each is fully mixed before adding the next.
- Fold in the pureed strawberries gently until just combined.
- Pour the cheesecake filling over the crust and smooth the top.
- Bake for 30-35 minutes, or until the edges are set and the center is slightly jiggly.
- Remove from the oven and let cool completely before refrigerating for at least 4 hours.
Notes
- Make-ahead: These bars can be made a day in advance and stored in the refrigerator.
- Storage: Keep covered in the fridge for up to 5 days.
- Substitutions: Use gluten-free Oreos for a gluten-free version.
- Prep Time: 20 minutes
- Cook Time: 35 minutes
- Category: desserts
- Method: baking
- Cuisine: American
Nutrition
- Serving Size: 1 bar (approximately 2x2 inches)
- Calories: 250
- Sugar: 18 grams
- Sodium: 200 milligrams
- Fat: 15 grams
- Saturated Fat: 8 grams
- Unsaturated Fat: 5 grams
- Trans Fat: 0 grams
- Carbohydrates: 28 grams
- Fiber: 1 gram
- Protein: 3 grams
- Cholesterol: 50 milligrams
Keywords: Strawberry Oreo Cheesecake Bars, cheesecake bars, strawberry dessert, Oreo dessert, no-bake cheesecake, creamy cheesecake, summer dessert, easy dessert recipe, strawberry recipes, Oreo recipes, cheesecake recipe, fruity dessert, sweet treats


