Introduction to Spring Strawberry Cheesecake Cups Recipe
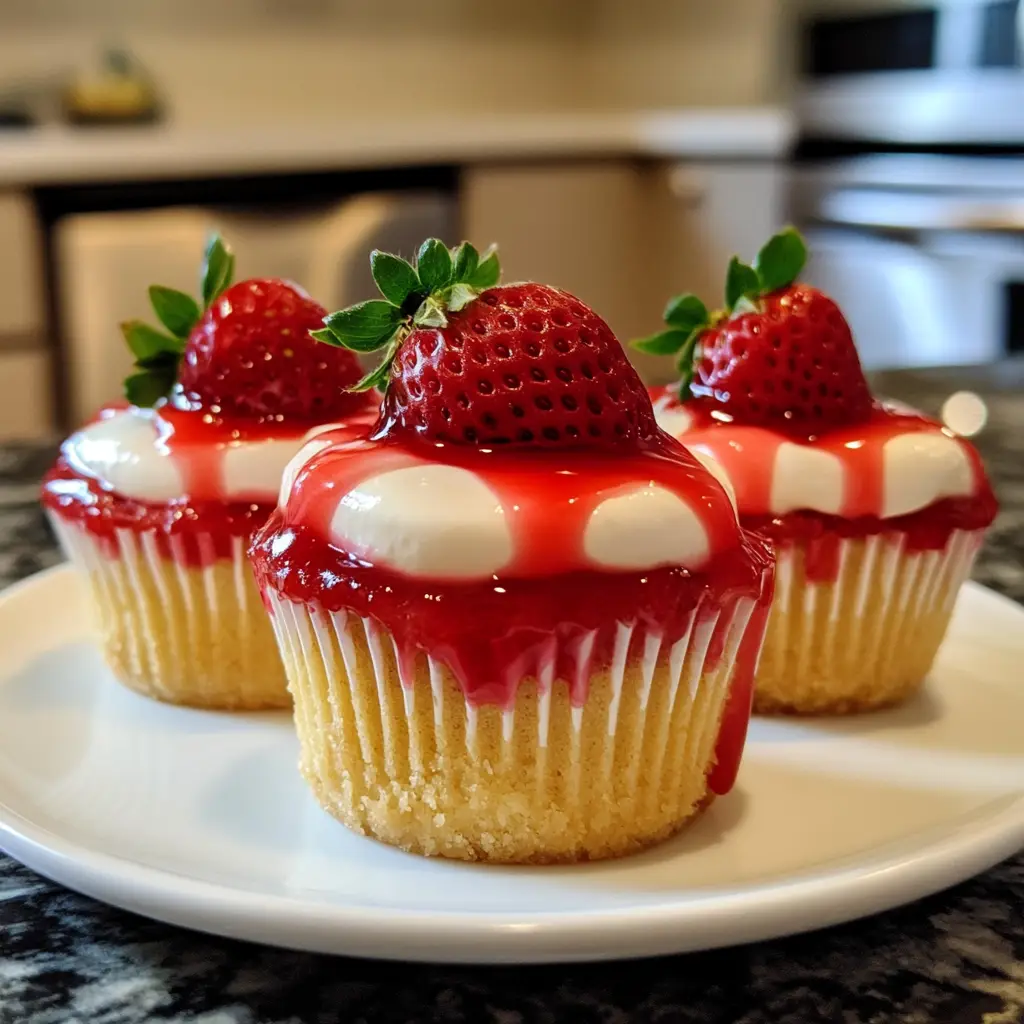
As the first blooms of spring burst forth, I find myself drawn to the vibrant colors and fresh flavors of the season. One of my favorite ways to celebrate this delightful time of year is by whipping up a batch of Spring Strawberry Cheesecake Cups. These little cups of joy are not just a treat for the taste buds; they are a feast for the eyes, too! The bright red strawberries, creamy cheesecake, and crunchy crust come together in a way that feels like a warm hug on a sunny day.
Every spring, I look forward to visiting my local farmers’ market, where the strawberries are plump and bursting with sweetness. I remember the first time I made these cheesecake cups for a picnic with friends. The sun was shining, and laughter filled the air as we enjoyed our treats. Each bite was a reminder of the joy that comes with sharing good food and good company. It’s moments like these that inspire me to create recipes that are not only delicious but also easy to make.
What I love most about this recipe is its simplicity. You don’t need to be a master chef to impress your family and friends. With just a few ingredients and some love, you can create a dessert that looks as stunning as it tastes. Plus, these cheesecake cups are perfect for any occasion—whether it’s a spring gathering, a birthday party, or just a sweet treat for yourself after a long day.
So, grab your apron and let’s dive into this delightful Spring Strawberry Cheesecake Cups Recipe. I promise you, once you take that first bite, you’ll be transported to a sunny spring day, surrounded by laughter and joy!
Ingredients for Spring Strawberry Cheesecake Cups Recipe
Before we get our hands dirty in the kitchen, let’s gather all the ingredients we’ll need for these delightful Spring Strawberry Cheesecake Cups. I always believe that the quality of your ingredients can make a world of difference in the final product. So, let’s make sure we’re using the best!
Main Ingredients
- 1 cup of graham cracker crumbs
- 4 tablespoons of unsalted butter, melted
- 2 cups of cream cheese, softened
- 1 cup of powdered sugar
- 1 teaspoon of vanilla extract
- 1 cup of heavy whipping cream
- 2 cups of fresh strawberries, hulled and sliced
When I make these cheesecake cups, I always opt for fresh strawberries from my local farmers’ market. They’re sweeter and juicier than the ones you find in the grocery store. If you can’t find fresh strawberries, frozen ones can work in a pinch, but be sure to thaw and drain them well to avoid excess moisture.
Optional Add-ons
- 1 tablespoon of lemon juice (for a zesty kick)
- Mint leaves (for garnish)
- Chocolate shavings (for a decadent touch)
- Other berries like blueberries or raspberries (for a mixed berry version)
These optional add-ons can elevate your cheesecake cups to a whole new level! I love adding a splash of lemon juice to the filling for a refreshing twist. And if you’re feeling fancy, a sprinkle of chocolate shavings on top adds a delightful surprise. The beauty of this recipe is that you can customize it to suit your taste or the occasion!
How to Prepare Spring Strawberry Cheesecake Cups Recipe
Now that we have all our ingredients ready, it’s time to roll up our sleeves and get cooking! Making these Spring Strawberry Cheesecake Cups is a fun and rewarding process. I love how each step brings us closer to that delicious moment when we can finally dig in. Let’s break it down step by step!
Step 1: Prepare the Crust
First things first, we need to create a crunchy base for our cheesecake cups. In a mixing bowl, combine the graham cracker crumbs and melted butter. Stir until the crumbs are evenly coated and resemble wet sand. Then, take your mixture and press it firmly into the bottom of your serving cups. I usually use a small glass or the back of a spoon to pack it down nicely.
Tips for Step 1
- For an extra flavor boost, try adding a pinch of cinnamon to the graham cracker mixture.
- Make sure to pack the crust tightly; this will help it hold together when you serve the cups.
- If you want a gluten-free option, you can substitute graham crackers with gluten-free cookies.
Step 2: Make the Cheesecake Filling
Next up is the creamy filling! In a large mixing bowl, beat the softened cream cheese until it’s smooth and fluffy. Gradually add in the powdered sugar and vanilla extract, mixing until well combined. In a separate bowl, whip the heavy cream until stiff peaks form. Gently fold the whipped cream into the cream cheese mixture. This step is crucial for achieving that light and airy texture!
Tips for Step 2
- Make sure your cream cheese is at room temperature; this helps it blend smoothly without lumps.
- Be gentle when folding in the whipped cream to keep the mixture light and fluffy.
- If you’re adding lemon juice, do it at this stage for a zesty flavor.
Step 3: Assemble the Cups
Now comes the fun part—assembling our cheesecake cups! Spoon the cheesecake filling over the prepared crust in each cup. I like to use a piping bag for this step; it makes it easier to get a nice, even layer. Once filled, smooth the tops with a spatula or the back of a spoon. This is where you can get creative with the presentation!
Tips for Step 3
- Leave a little space at the top of each cup for the strawberry topping.
- For a layered look, you can alternate layers of cheesecake filling and strawberries.
- Chill the cups in the fridge for at least an hour to let the flavors meld together.
Step 4: Prepare the Strawberry Topping
Finally, let’s prepare the star of the show—our strawberry topping! In a small bowl, toss the sliced strawberries with a bit of sugar and lemon juice. This will help draw out their natural juices and create a sweet syrup. Let them sit for about 10-15 minutes. Once they’re ready, spoon the strawberries over the cheesecake cups just before serving.
Tips for Step 4
- For a more intense flavor, you can macerate the strawberries in advance and let them sit longer.
- Feel free to mix in other berries for a colorful topping!
- Garnish with mint leaves for a fresh touch right before serving.
And there you have it! With these simple steps, you’ll have beautiful Spring Strawberry Cheesecake Cups ready to impress your family and friends. I can already taste the sweetness and feel the joy of sharing these delightful treats!
Equipment Needed for Spring Strawberry Cheesecake Cups Recipe
Before we dive into the kitchen, let’s make sure we have all the right tools at our fingertips. Having the right equipment can make the process smoother and more enjoyable. Here’s what you’ll need to whip up these delightful Spring Strawberry Cheesecake Cups:
- Mixing Bowls: A couple of medium-sized mixing bowls will do the trick. I love using glass bowls because they’re easy to clean and you can see the ingredients mixing together.
- Electric Mixer: A hand mixer or stand mixer is essential for beating the cream cheese and whipping the cream. If you don’t have one, a whisk will work, but it’ll take a bit more elbow grease!
- Measuring Cups and Spoons: Accurate measurements are key to a successful recipe. I always keep a set of measuring cups and spoons handy.
- Serving Cups: You can use small glass cups, mason jars, or even dessert bowls. The choice is yours! Just make sure they’re clear enough to show off those beautiful layers.
- Piping Bag (Optional): If you want to get fancy with your cheesecake filling, a piping bag makes it easy to create a lovely presentation. If you don’t have one, a zip-top bag with the corner snipped off works just as well.
- Spatula: A rubber spatula is perfect for smoothing out the cheesecake filling and scraping down the sides of your mixing bowls.
- Knife and Cutting Board: You’ll need these for hulling and slicing the strawberries. A sharp knife makes the job quick and easy!
With these tools in hand, you’ll be all set to create your Spring Strawberry Cheesecake Cups. Remember, cooking is all about having fun, so don’t stress if you don’t have every single item on this list. Get creative with what you have, and let’s make some delicious memories together!
Variations of Spring Strawberry Cheesecake Cups Recipe
One of the things I adore about cooking is the endless possibilities for creativity. These Spring Strawberry Cheesecake Cups are no exception! While the classic version is absolutely delightful, I love to switch things up and experiment with different flavors and ingredients. Here are a few variations that I’ve tried and absolutely loved:
- Chocolate Strawberry Cheesecake Cups: Swap out half of the cream cheese for chocolate cream cheese. This adds a rich, chocolatey twist that pairs beautifully with the strawberries. You can even drizzle some melted chocolate on top for an extra indulgence!
- Berry Medley Cups: Instead of just strawberries, mix in other berries like blueberries, raspberries, or blackberries. This not only adds a burst of color but also a delightful mix of flavors. I love the tartness of raspberries against the creamy cheesecake!
- Nutty Crust Variation: For a different texture, try using crushed nuts like almonds or pecans mixed with the graham cracker crumbs. This adds a lovely crunch and a nutty flavor that complements the sweetness of the cheesecake.
- Vegan Strawberry Cheesecake Cups: Substitute the cream cheese with a vegan alternative, like cashew cream or coconut cream. Use maple syrup instead of powdered sugar for sweetness. This way, everyone can enjoy a delicious treat, regardless of dietary preferences!
These variations not only keep things exciting but also allow you to cater to different tastes and occasions. I encourage you to get creative and make this recipe your own. After all, the kitchen is a place for exploration and joy!
Cooking Notes for Spring Strawberry Cheesecake Cups Recipe
As I embark on the delightful journey of making Spring Strawberry Cheesecake Cups, I’ve learned a few cooking notes that can make the process even smoother and more enjoyable. Here are some tips that I always keep in mind:
- Room Temperature Ingredients: Ensure your cream cheese and heavy cream are at room temperature before you start. This helps them blend together seamlessly, creating that luscious, creamy texture we all love.
- Chill Time: Don’t rush the chilling process! Allowing the cheesecake cups to chill for at least an hour helps the flavors meld beautifully. If you can wait longer, even better! Overnight chilling can enhance the taste.
- Fresh Strawberries: Always opt for the freshest strawberries you can find. They not only taste better but also add a vibrant color to your dessert. If you’re using frozen strawberries, make sure to drain them well to avoid a watery topping.
- Presentation Matters: Take a moment to arrange your strawberry topping artfully. A little extra care in presentation can elevate your dessert from simple to stunning!
- Storage Tips: If you have leftovers (which is rare in my house!), store them in an airtight container in the fridge. They’re best enjoyed within a couple of days, but I promise they won’t last long!
These cooking notes are like little nuggets of wisdom I’ve gathered over time. They help me create the best possible version of these cheesecake cups, and I hope they do the same for you. Happy cooking!
Serving Suggestions for Spring Strawberry Cheesecake Cups Recipe
When it comes to serving my Spring Strawberry Cheesecake Cups, I love to get a little creative! Presentation can make all the difference, and these cups are as beautiful as they are delicious. Here are some of my favorite serving suggestions that add a special touch:
- Garnish with Fresh Mint: A sprig of fresh mint on top not only adds a pop of color but also a refreshing aroma. It’s like a little garden on your dessert!
- Serve with a Side of Whipped Cream: A dollop of freshly whipped cream on the side can take these cups to the next level. It’s a delightful way to add extra creaminess!
- Pair with a Fruit Salad: For a light and refreshing contrast, serve the cheesecake cups alongside a colorful fruit salad. The mix of flavors and textures is simply divine!
- Use Decorative Cups: Consider using clear glass cups or mason jars to showcase the beautiful layers of your cheesecake. It makes for an eye-catching display that’s sure to impress your guests.
- Perfect for Picnics: These cheesecake cups are portable and easy to transport, making them an ideal dessert for picnics or outdoor gatherings. Just pack them in a cooler, and you’re ready to go!
With these serving suggestions, you can elevate your Spring Strawberry Cheesecake Cups from delightful to dazzling! I always find that a little extra thought in presentation makes sharing these treats even more enjoyable. So, gather your loved ones, and let’s dig into these sweet, creamy delights together!
Tips for Making Spring Strawberry Cheesecake Cups Recipe
As I’ve spent countless hours perfecting my Spring Strawberry Cheesecake Cups, I’ve gathered a treasure trove of tips that can help you create the best version of this delightful dessert. Here are some of my favorite nuggets of wisdom to ensure your cheesecake cups turn out perfectly every time:
- Prep Ahead: If you’re short on time, you can prepare the crust and cheesecake filling a day in advance. Just assemble the cups right before serving to keep everything fresh!
- Experiment with Sweetness: Taste your cheesecake filling before you add all the sugar. Depending on your strawberries’ sweetness, you might want to adjust the sugar to your liking.
- Use a Food Processor: For a super smooth crust, consider using a food processor to crush the graham crackers. It saves time and gives you a fine crumb that packs beautifully.
- Chill Your Tools: If you want to whip your cream quickly, chill your mixing bowl and beaters in the fridge for about 15 minutes before use. It helps the cream whip up faster!
- Don’t Skip the Lemon Juice: A splash of lemon juice in the filling brightens the flavors and balances the sweetness. It’s a small addition that makes a big difference!
These tips have become my secret weapons in the kitchen, and I hope they help you create your own delicious Spring Strawberry Cheesecake Cups. Remember, cooking is all about having fun and experimenting, so don’t be afraid to make this recipe your own!
Breakdown of Time for Spring Strawberry Cheesecake Cups Recipe
As a passionate home cook, I know that time management is key to a successful cooking experience. When I make my Spring Strawberry Cheesecake Cups, I like to keep track of the time to ensure everything flows smoothly. Here’s a quick breakdown of the time you’ll need for this delightful recipe:
- Prep Time: 30 minutes
- Chill Time: 1 hour (or longer for best results)
- Total Time: 1 hour and 30 minutes (plus additional chilling time if desired)
During the prep time, you’ll be busy gathering ingredients, preparing the crust, making the cheesecake filling, and assembling the cups. The chill time is essential for allowing the flavors to meld and the cheesecake to set properly. I often find that the longer I can let them chill, the better they taste!
So, whether you’re planning for a special occasion or just a sweet treat for yourself, this time breakdown will help you organize your cooking adventure. Trust me, the wait will be worth it when you finally get to enjoy these scrumptious Spring Strawberry Cheesecake Cups!
Nutritional Information for Spring Strawberry Cheesecake Cups Recipe
As a passionate home cook, I always find it helpful to know the nutritional information of the dishes I prepare. It allows me to enjoy my creations while being mindful of what I’m eating. Here’s a general breakdown of the nutritional content for one serving of these delightful Spring Strawberry Cheesecake Cups:
- Calories: Approximately 250 calories
- Protein: 4 grams
- Fat: 18 grams
- Carbohydrates: 22 grams
- Sugar: 10 grams
- Fiber: 1 gram
Keep in mind that these values can vary based on the specific ingredients you use and the portion sizes. For instance, if you opt for a lighter cream cheese or reduce the sugar, you can lower the calorie count. I love to play around with the ingredients to make these cups a bit healthier while still keeping them delicious!
Whether you’re indulging in a special treat or sharing them with friends, knowing the nutritional information can help you enjoy these Spring Strawberry Cheesecake Cups guilt-free. After all, it’s all about balance and savoring the sweet moments in life!
Frequently Asked Questions about Spring Strawberry Cheesecake Cups Recipe
As I’ve shared my Spring Strawberry Cheesecake Cups with friends and family, I’ve noticed a few common questions pop up. It’s always great to clarify any doubts and help fellow home cooks feel confident in their culinary adventures. Here are some frequently asked questions about this delightful recipe:
Can I make these cheesecake cups ahead of time?
Absolutely! In fact, I often prepare them a day in advance. Just make sure to assemble the cups and add the strawberry topping right before serving. This way, they stay fresh and delicious!
What can I use instead of graham crackers for the crust?
If you’re looking for alternatives, you can use crushed cookies like Oreos or digestive biscuits. For a gluten-free option, try using gluten-free cookies or even crushed nuts mixed with a bit of melted butter. The possibilities are endless!
How long do the cheesecake cups last in the fridge?
These cheesecake cups are best enjoyed within 2-3 days. Just store them in an airtight container in the fridge. I can assure you, they rarely last that long in my house!
Can I use frozen strawberries instead of fresh ones?
Yes, you can! Just make sure to thaw and drain them well to avoid excess moisture. While fresh strawberries are my favorite, frozen ones can still work beautifully in this recipe.
Is there a way to make these cheesecake cups healthier?
Definitely! You can use reduced-fat cream cheese, substitute some of the sugar with a natural sweetener like honey or maple syrup, and even add Greek yogurt for extra creaminess. It’s all about finding the right balance that works for you!
These questions are just a few of the many that can arise when making my Spring Strawberry Cheesecake Cups. I hope this section helps clear up any uncertainties and inspires you to dive into this delicious recipe with confidence. Happy cooking!
Conclusion on Spring Strawberry Cheesecake Cups Recipe
As I reflect on my journey of creating these Spring Strawberry Cheesecake Cups, I can’t help but smile at the joy they bring. This recipe is more than just a dessert; it’s a celebration of spring, a canvas for creativity, and a way to share love with family and friends. The combination of creamy cheesecake, crunchy crust, and sweet strawberries creates a symphony of flavors that dance on your palate.
What I adore most about these cheesecake cups is their versatility. Whether you’re hosting a spring gathering, celebrating a birthday, or simply treating yourself after a long day, they fit perfectly into any occasion. Plus, they’re easy to make, allowing even novice cooks to shine in the kitchen. With just a handful of ingredients and a little bit of love, you can create a dessert that looks and tastes like a masterpiece.
So, as you embark on your own culinary adventure with this Spring Strawberry Cheesecake Cups Recipe, remember to savor each moment. Enjoy the process, share the experience, and most importantly, indulge in the delightful flavors that spring has to offer. I can’t wait for you to take that first bite and feel the happiness that comes with it. Happy cooking!