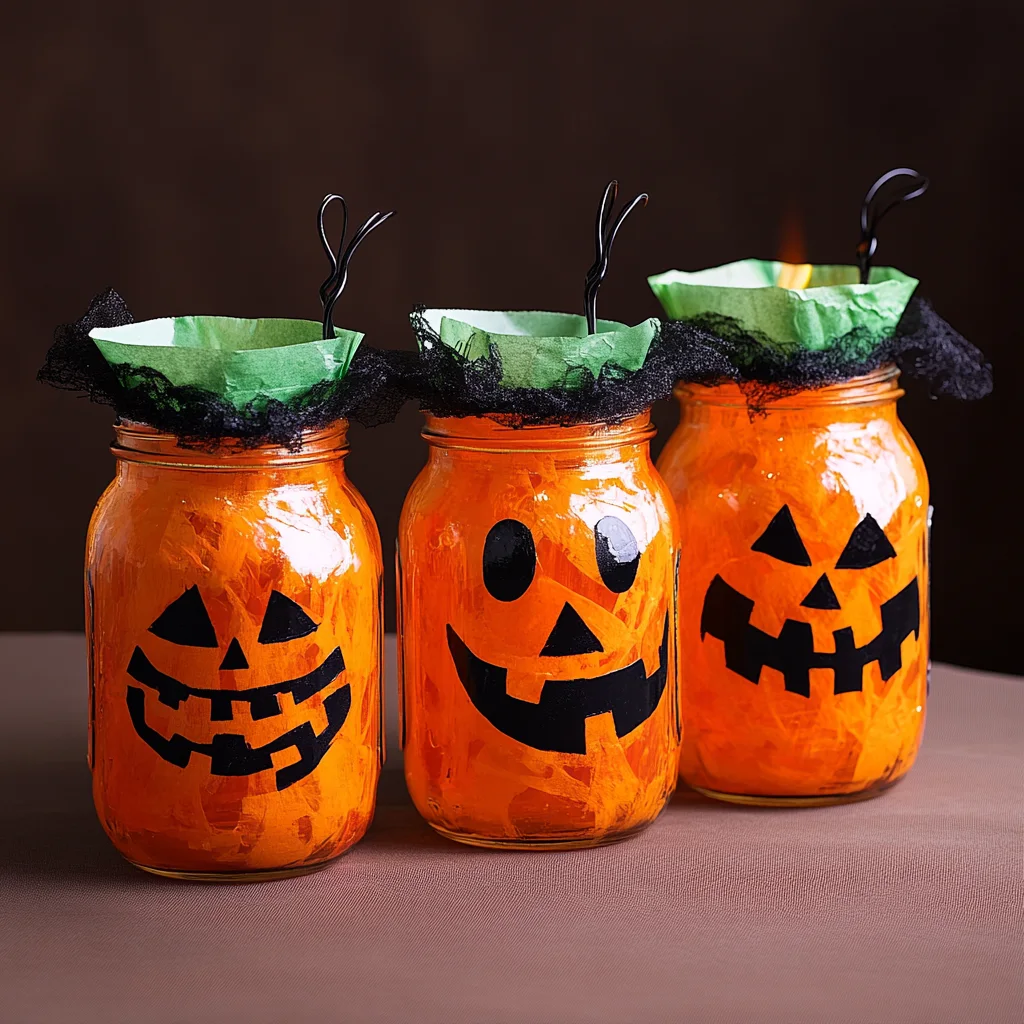
Halloween is the season of creativity, where ordinary items can be transformed into something magical and eerie. One of the most charming and versatile crafts you can make is the spooky mason jar lantern. These glowing decorations are easy to create, inexpensive, and adaptable for any spooky theme you want to achieve. With a little paint, tissue paper, and imagination, a simple mason jar can become a glowing ghost, a grinning jack-o’-lantern, or even a creepy monster.
Spooky mason jar lanterns not only add to your Halloween décor but also bring a warm, flickering light to your space, perfect for parties, trick-or-treat nights, or simply creating a festive atmosphere at home. This craft is ideal for families, teachers, or anyone looking for a fun and creative project that doubles as holiday decoration.
Why You’ll Love This Craft
There are many reasons why spooky mason jar lanterns are a must-try Halloween DIY project:
-
Budget-Friendly – Mason jars are affordable, and you may already have some at home.
-
Creative Flexibility – The design options are endless. You can make pumpkins, ghosts, bats, witches, or even glowing eyeballs.
-
Kid-Friendly Activity – With supervision, children can help paint, glue, or add faces to their jars.
-
Reusable Decoration – Unlike store-bought Halloween décor, these lanterns can be personalized and reused year after year.
-
Festive Glow – Whether you use LED tea lights or battery-operated fairy lights, the soft glow brings instant Halloween charm.
Supplies You’ll Need
Before you begin, gather these materials to ensure a smooth crafting experience:
-
Mason jars (any size; pint-sized works best for table decorations)
-
Acrylic paint (orange, white, black, green, purple, or your chosen colors)
-
Paintbrushes or sponges
-
Tissue paper (orange, white, green, or patterned for layering effects)
-
Mod Podge or watered-down white glue
-
Black construction paper or permanent markers (for making faces)
-
Scissors
-
LED tea lights or battery-operated fairy lights (never use real candles for safety)
-
Optional decorations: glitter, ribbon, twine, googly eyes, or lace for added texture
Step-by-Step Instructions
Step 1: Prepare the Mason Jars
Clean the mason jars thoroughly, removing any labels or residue. Dry them completely before starting. A clean surface ensures that paint and glue stick properly.
Step 2: Apply the Base Layer
You can choose between painting the jar directly or using tissue paper for a textured, glowing effect.
-
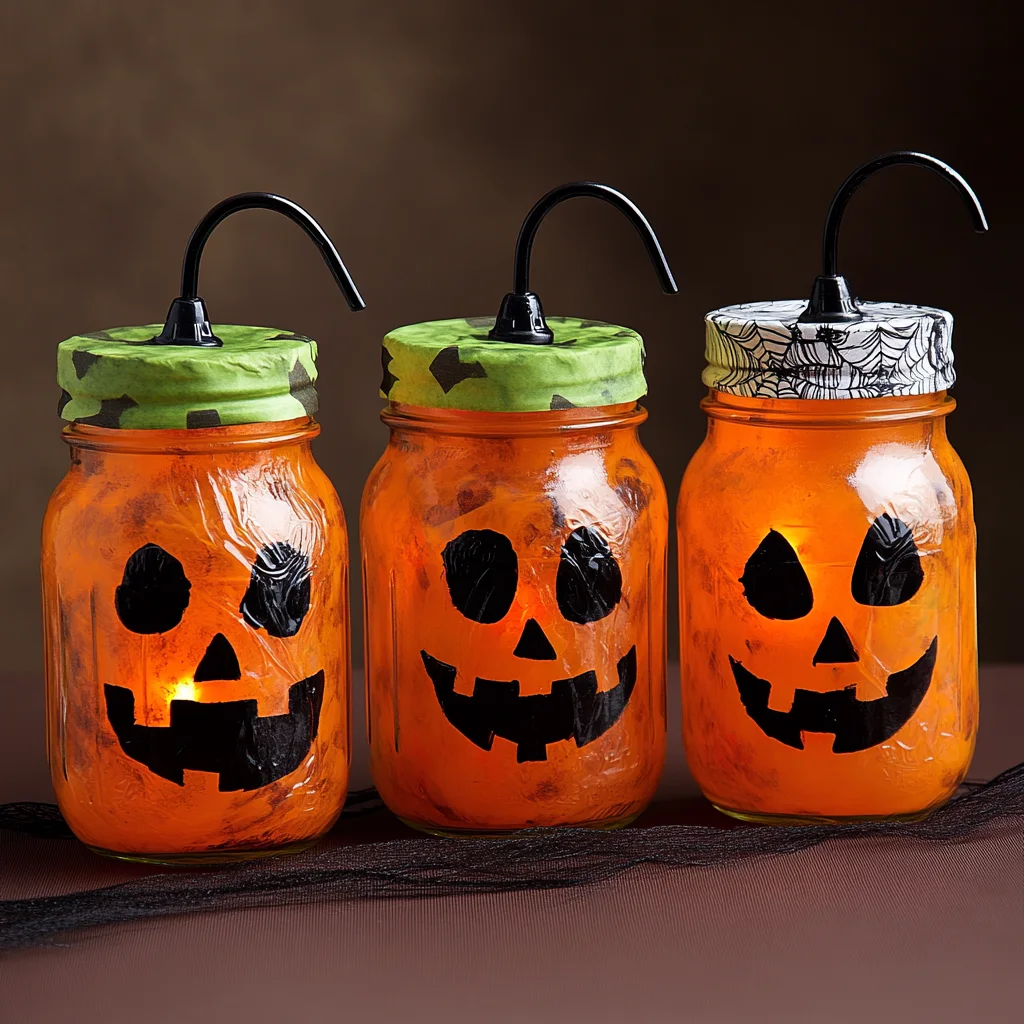
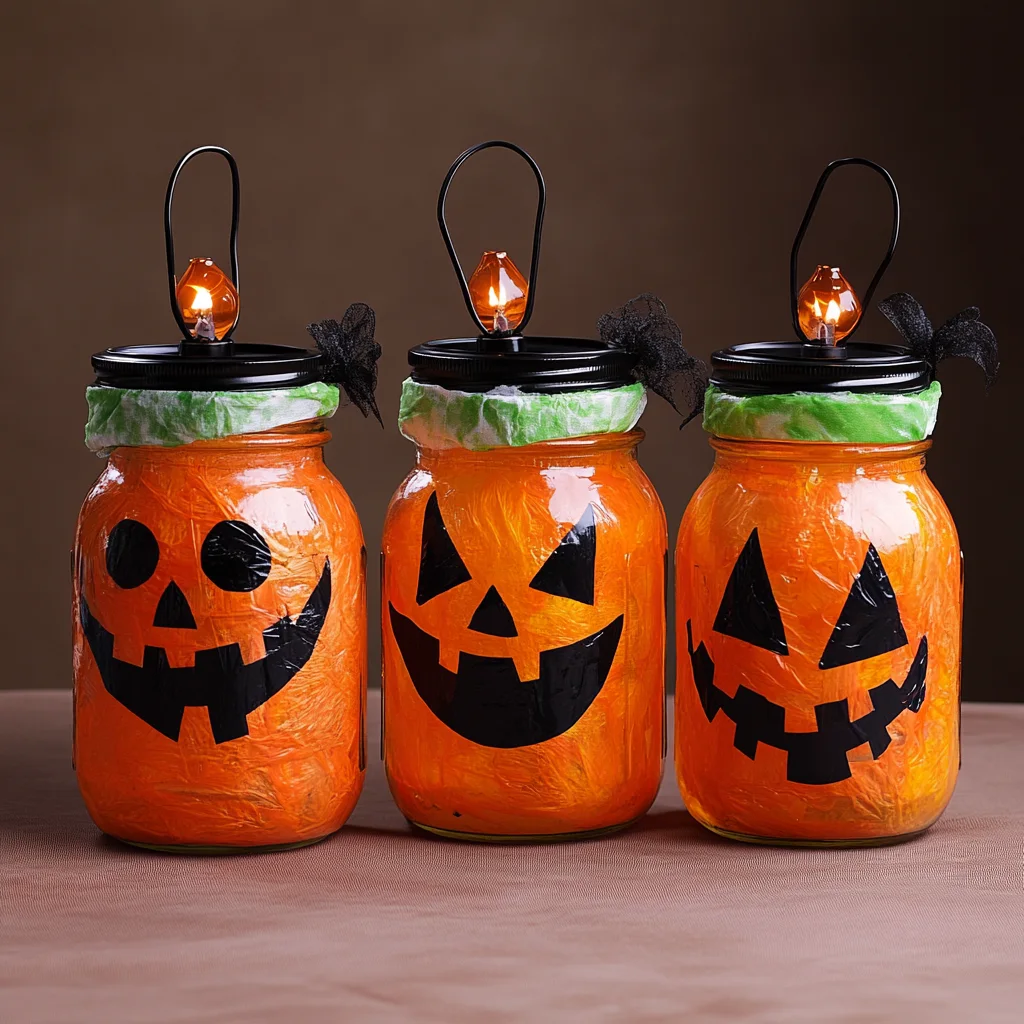
Painted Version: Use acrylic paint to cover the outside of the jar in your desired base color (orange for pumpkins, white for ghosts, green for monsters). Apply 2–3 thin coats, letting each layer dry before adding the next.
-
Tissue Paper Version: Tear tissue paper into small pieces, then brush a layer of Mod Podge onto the jar. Apply tissue paper over the glue, smoothing it down as you go. Add another layer of glue on top to seal it.
Step 3: Create Spooky Faces
Once your base layer is dry, cut out shapes from black construction paper to form spooky faces—triangular eyes, jagged mouths, or eerie smiles. Alternatively, you can paint faces directly onto the jars using black paint or permanent markers.
Popular design ideas include:
-
Jack-o’-Lantern: Triangular eyes and a toothy grin.
-
Ghost: Round, wide eyes with an oval mouth.
-
Frankenstein: Squared-off hairline with stitches drawn across the jar.
-
Vampire: Sharp fangs and dramatic eyebrows.
Step 4: Add Extra Decorations
This is where you can get creative:
-
Add a sprinkle of glitter over wet glue for a sparkling effect.
-
Tie twine, lace, or ribbon around the rim of the jar for added detail.
-
Glue on googly eyes for a fun, cartoonish look.
-
Use glow-in-the-dark paint for an extra creepy nighttime effect.
Step 5: Light It Up
Place an LED tea light or a string of fairy lights inside the jar. When lit, the glow will shine through the paint or tissue paper, bringing your spooky design to life.
Tips for Success
-
Thin Paint Works Best: Multiple thin layers of paint will dry faster and give a smoother finish than one thick coat.
-
Go for LED Lights: Avoid real candles inside jars, as they can overheat the glass and pose a fire hazard.
-
Use Mod Podge Generously: If using tissue paper, make sure to coat both under and over the paper for a smooth, sealed look.
-
Mix and Match Sizes: Create lanterns in various jar sizes for a dynamic display.
-
Get the Family Involved: Let kids design faces or choose colors while adults handle cutting and gluing.
The Science Behind the Glow
Mason jar lanterns may feel like a pure art project, but there’s also a bit of science at play. The glow from the LED lights interacts with the thin layers of paint or tissue paper, creating a diffused light effect. Diffusion softens the harsh brightness of the light, making it look warm and spooky rather than harsh or artificial. This is the same principle behind lampshades, which scatter light for a softer glow.
Spooky Design Variations
Here are some fun design themes you can try:
-
Classic Pumpkin Lanterns – Orange jars with jack-o’-lantern faces.
-
Haunted Ghosts – White jars with spooky oval eyes and mouths.
-
Frankenstein’s Monster – Green jars with black hairlines and painted stitches.
-
Spider Web Jars – White jars with black painted spider webs and plastic spiders glued on.
-
Witch’s Potion Bottles – Purple jars with green accents, decorated with spooky labels.
-
Eyeball Jars – White jars with red veins painted on and a colored iris in the middle.
Creative Uses for Spooky Mason Jar Lanterns
These lanterns aren’t just for decoration; they can be used in many fun ways:
-
Table Centerpieces: Perfect for Halloween dinner parties.
-
Porch Decorations: Line your steps with glowing jars to welcome trick-or-treaters.
-
Party Lighting: Use them instead of regular lights for a haunting atmosphere.
-
Window Displays: Place them on windowsills to create a spooky glow from the street.
-
Craft Fair Projects: These jars are popular handmade items to sell at seasonal markets.
Safety Notes
As with all crafts, safety should come first:
-
Never place real candles inside the jars—always use LED lights.
-
Supervise children when using scissors, paint, or glue.
-
Allow jars to dry completely before inserting lights to avoid smudges or accidents.
Storage and Reuse
One of the best things about mason jar lanterns is that they can be stored and reused year after year. Once Halloween is over:
-
Remove batteries from LED lights before storing.
-
Wipe jars gently with a dry cloth to remove dust.
-
Store them in a cool, dry place wrapped in tissue paper to prevent scratching.
FAQs
1. Can I use glass jars other than mason jars?
Yes. Any clear glass jar will work, such as pickle jars or spaghetti sauce jars.
2. Do I need Mod Podge, or can I use regular glue?
You can use watered-down white glue as an alternative, though Mod Podge gives a smoother finish.
3. How long do the lanterns last?
If stored carefully, they can last for many years. LED lights may need battery replacements.
4. Can kids make these on their own?
Yes, with supervision. Children can help with painting and decorating, but adults should handle cutting faces or using hot glue if needed.
5. What kind of lights work best?
LED tea lights or fairy lights provide the safest and most effective glow.
Conclusion
Spooky mason jar lanterns are a craft that combines creativity, fun, and Halloween spirit. With just a few simple materials, you can transform plain jars into glowing decorations that bring an eerie charm to any space. Whether you design pumpkins, ghosts, or creepy monsters, these lanterns are sure to impress trick-or-treaters and party guests alike.
This project is beginner-friendly, budget-conscious, and endlessly customizable, making it a perfect Halloween craft for families, classrooms, or anyone who loves seasonal DIY projects. With your spooky lanterns glowing brightly, your home will instantly feel like a haunted haven ready for Halloween.