Introduction to Skittles Rainbow Science
In a world where creativity meets science, the Skittles Rainbow Science project stands out as a delightful way to engage both kids and adults alike. This colorful DIY project not only brings a splash of fun but also serves as an educational experience that demonstrates how colors mix and spread. Perfect for busy moms and professionals looking for a quick and engaging activity, this project can be completed in just 15 minutes. Gather your Skittles and let’s dive into the vibrant world of color!
Why You’ll Love This Skittles Rainbow Science
The Skittles Rainbow Science project is a fantastic way to spark creativity while being incredibly affordable and simple. With just a few materials, you can create a stunning visual display that captivates both children and adults. It’s a perfect blend of art and science, making it an ideal activity for busy moms and professionals who want to combine learning with fun.
Materials Needed for Skittles Rainbow Science
To get started with your Skittles Rainbow Science project, you will need the following materials:
- Skittles candies – 1 pack: These colorful candies are the stars of the show, providing the vibrant hues for your rainbow.
- Warm water – 1 cup: The warm water helps dissolve the Skittles, allowing the colors to spread beautifully.
- White plate or shallow dish – 1: A white surface enhances the visibility of the colors as they mix.
For a printable full list of materials, see below.
Tools Required for Skittles Rainbow Science
You will need the following tools to complete your Skittles Rainbow Science project:
- Spoon – 1: A simple spoon is all you need to help pour the warm water and arrange the Skittles. If you don’t have a spoon, you can use any small container to pour the water.
How to Make Skittles Rainbow Science
Follow these easy step-by-step instructions to create your own Skittles Rainbow Science masterpiece:
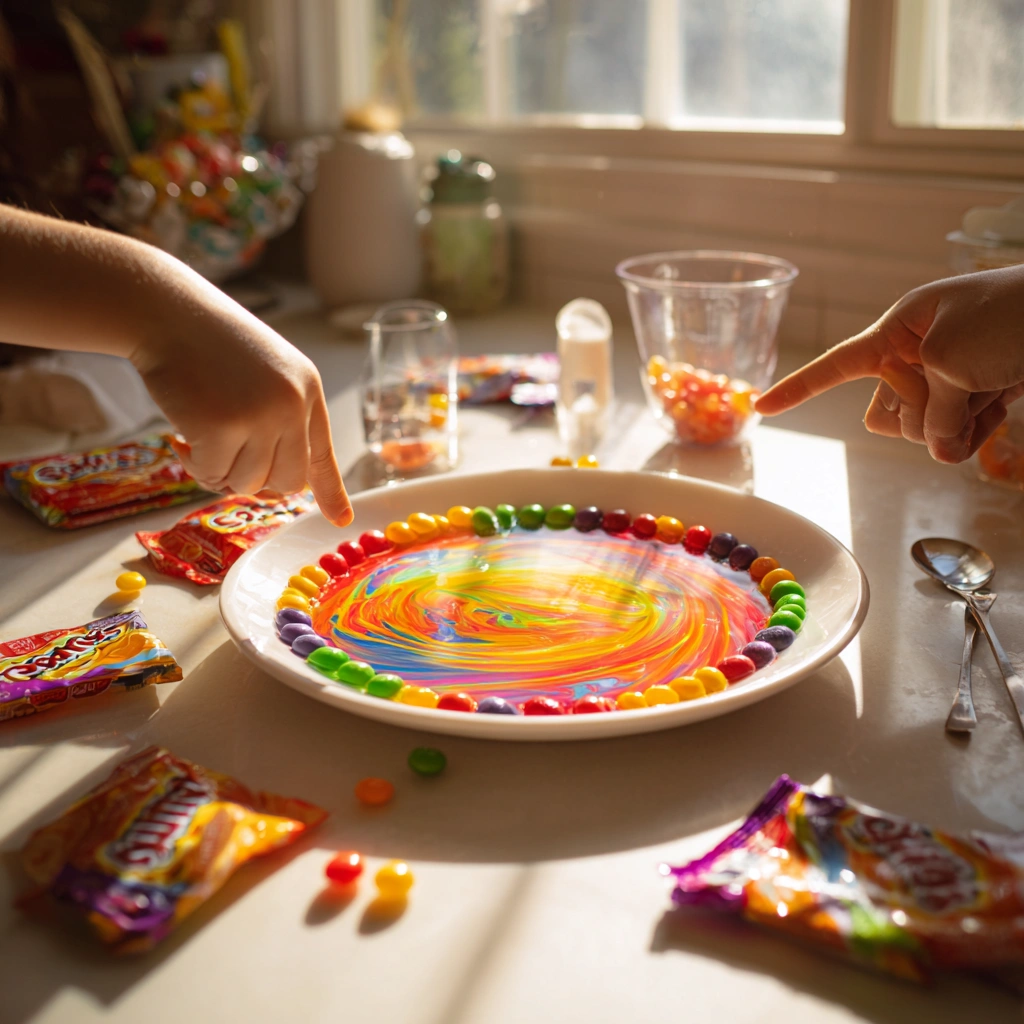
- Arrange the Skittles: Place the Skittles candies in a circle on the white plate or shallow dish. Feel free to create patterns or use different colors to make it more interesting.
- Pour the Warm Water: Carefully pour warm water into the center of the plate, just enough to cover the bottom. Be cautious not to pour too much, as you want the colors to spread outwards.
- Watch the Magic: Observe as the colors begin to dissolve and spread outwards, creating a beautiful rainbow effect. This is where the science comes into play!
- Experiment: Try different arrangements of Skittles to see how the colors mix and create new shades. You can also experiment with different temperatures of water for varied results.
Tips for Best Results
To ensure you get the most vibrant results from your Skittles Rainbow Science project, consider the following tips:
- Use a variety of Skittles flavors for a more colorful display.
- Experiment with different temperatures of water to see how it affects the color spread.
- Take photos of the process to capture the beautiful colors and share your creation with friends and family.
Project Variations
Get creative with your Skittles Rainbow Science project by trying out these fun variations:
- Style Variations: Use different types of candies or even food coloring to create unique color combinations.
- Color Changes: Instead of a circle, arrange the Skittles in a heart shape or any other design that appeals to you.
- Seasonal Adaptations: For holidays, use themed colors (like red and green for Christmas) to make your project festive.
Decoration and Usage Ideas
Once you’ve completed your Skittles Rainbow Science project, consider these ideas for decoration and usage:
- Display it: Place your colorful creation on a table as a centerpiece for a party or family gathering.
- Educational Tool: Use it as a fun science demonstration for kids to learn about color mixing and diffusion.
- Photo Opportunities: Capture the vibrant colors in photos for social media or family albums.
FAQs about Skittles Rainbow Science
Q: Can I use other types of candies?
A: Yes! While Skittles work best for this project, you can experiment with other colorful candies.
Q: Is this project safe for young children?
A: Yes, but ensure that children are supervised while handling Skittles and warm water to avoid any accidents.
Q: How long does the rainbow effect last?
A: The colors will continue to spread for a few minutes, but the effect will fade as the water evaporates.
Final Thoughts
The Skittles Rainbow Science project is not just a fun activity; it’s a wonderful way to bond with your children while exploring the fascinating world of colors. Whether you’re a busy mom looking for a quick craft or a professional seeking a creative outlet, this project is sure to bring joy and inspiration. So gather your materials, unleash your creativity, and enjoy the colorful journey of Skittles Rainbow Science!
Introduction to Skittles Rainbow Science
In a world where creativity meets science, the Skittles Rainbow Science project stands out as a delightful way to engage both kids and adults alike. This colorful DIY project not only brings a splash of fun but also serves as an educational experience that demonstrates how colors mix and spread. Perfect for busy moms and professionals looking for a quick and engaging activity, this project can be completed in just 15 minutes. Gather your Skittles and let’s dive into the vibrant world of color!
Why You’ll Love This Skittles Rainbow Science
The Skittles Rainbow Science project is a fantastic way to spark creativity while being incredibly affordable and simple. I remember the first time I tried this with my kids; their eyes lit up as the colors began to swirl and dance across the plate. With just a few materials, you can create a stunning visual display that captivates both children and adults. It’s like watching a mini science experiment unfold right before your eyes!
As a busy mom, I often find myself juggling multiple tasks, and I know how precious time can be. This project is perfect because it only takes about 15 minutes from start to finish. Plus, it requires minimal cleanup, which is a huge bonus! I love how it combines art and science, making it an ideal activity for those of us who want to blend learning with fun.
One of the best parts? You can easily adapt this project to fit your schedule. Whether you have a few minutes after school or a lazy weekend afternoon, the Skittles Rainbow Science project is always ready to bring a splash of color into your day. Plus, it’s a great way to engage with your kids, encouraging them to explore and experiment with colors. I’ve found that these moments not only create beautiful memories but also foster a love for learning in my children.
So, if you’re looking for a quick, colorful, and educational activity, look no further! Gather your Skittles, and let’s dive into the vibrant world of color together!
Materials Needed for Skittles Rainbow Science
To get started with your Skittles Rainbow Science project, you will need the following materials:
- Skittles candies – 1 pack: These colorful candies are the stars of the show, providing the vibrant hues for your rainbow. I love how each color brings its own personality to the project!
- Warm water – 1 cup: The warm water helps dissolve the Skittles, allowing the colors to spread beautifully. I’ve found that using warm water really enhances the color diffusion, making the experience even more magical.
- White plate or shallow dish – 1: A white surface enhances the visibility of the colors as they mix. Trust me, using a white plate makes the colors pop and creates a stunning visual display that everyone will enjoy.
For a printable full list of materials, see below.
Tools Required for Skittles Rainbow Science
You will need the following tools to complete your Skittles Rainbow Science project:
- Spoon – 1: A simple spoon is all you need to help pour the warm water and arrange the Skittles. I remember the first time I did this project with my kids; we used a colorful spoon that added an extra touch of fun! If you don’t have a spoon, you can use any small container to pour the water.
Having the right tools makes the process smoother and more enjoyable. I’ve learned that even the simplest tools can lead to the most delightful results. So, gather your spoon and get ready to create a vibrant masterpiece with your Skittles!
How to Make Skittles Rainbow Science
Follow these easy step-by-step instructions to create your own Skittles Rainbow Science masterpiece:
- Arrange the Skittles: Place the Skittles candies in a circle on the white plate or shallow dish. I love to mix and match colors, creating patterns that are not only fun but visually stunning. You can even let your kids choose their favorite colors to make it a more personal experience!
- Pour the Warm Water: Carefully pour warm water into the center of the plate, just enough to cover the bottom. Be cautious not to pour too much, as you want the colors to spread outwards. I remember the first time I did this; my kids were on the edge of their seats, waiting to see what would happen next!
- Watch the Magic: Observe as the colors begin to dissolve and spread outwards, creating a beautiful rainbow effect. This is where the science comes into play! It’s like watching a watercolor painting come to life right before your eyes. I always find myself mesmerized by the swirling colors.
- Experiment: Try different arrangements of Skittles to see how the colors mix and create new shades. You can also experiment with different temperatures of water for varied results. I’ve found that using cooler water can slow down the process, allowing for a more gradual reveal of colors, which is equally fascinating!
Each step is not just about creating a colorful display; it’s an opportunity to engage with your kids, encouraging them to ask questions and explore the science behind color mixing. So, gather your materials and let the fun begin!
Tips for Best Results
To ensure you get the most vibrant results from your Skittles Rainbow Science project, consider the following tips:
- Use a variety of Skittles flavors for a more colorful display. I love mixing the classic flavors with the tropical ones; it adds an extra layer of excitement to the project!
- Experiment with different temperatures of water to see how it affects the color spread. I’ve found that warmer water creates a quicker diffusion, while cooler water allows for a more gradual and mesmerizing effect. It’s fun to compare the results!
- Take photos of the process to capture the beautiful colors and share your creation with friends and family. I always make sure to snap a few pictures as the colors swirl together; it’s a great way to document the fun and inspire others to try it!
These tips not only enhance the visual appeal of your Skittles Rainbow Science project but also encourage creativity and experimentation. Remember, the joy of crafting comes from the process, so don’t hesitate to try new things and make it your own!
Project Variations
Get creative with your Skittles Rainbow Science project by trying out these fun variations:
- Style Variations: Use different types of candies or even food coloring to create unique color combinations. I once tried using gummy bears alongside Skittles, and the result was a delightful mix of textures and colors that my kids loved!
- Color Changes: Instead of a circle, arrange the Skittles in a heart shape or any other design that appeals to you. I remember one Valentine’s Day, we made heart-shaped patterns, and it added a sweet touch to our crafting session. It’s a great way to personalize the project!
- Seasonal Adaptations: For holidays, use themed colors (like red and green for Christmas) to make your project festive. I love to adapt this project for different seasons; for Halloween, we used orange and black candies, and it turned out to be a spooky hit!
These variations not only keep the project fresh and exciting but also allow you to explore different themes and occasions. I’ve found that the more you experiment, the more fun you’ll have, and it’s a wonderful way to bond with your kids while sparking their creativity. So, don’t hesitate to mix things up and let your imagination run wild with your Skittles Rainbow Science project!
Decoration and Usage Ideas
Once you’ve completed your Skittles Rainbow Science project, consider these creative ideas for decoration and usage:
- Display it: Place your colorful creation on a table as a centerpiece for a party or family gathering. I remember hosting a birthday party for my daughter, and we used our Skittles masterpiece as a vibrant focal point. It not only sparked conversations but also added a cheerful touch to the decor!
- Educational Tool: Use it as a fun science demonstration for kids to learn about color mixing and diffusion. I’ve found that this project is a fantastic way to introduce basic science concepts in a hands-on manner. My kids loved discussing how the colors spread and mixed, making it a memorable learning experience!
- Photo Opportunities: Capture the vibrant colors in photos for social media or family albums. I always make sure to snap a few pictures as the colors swirl together; it’s a great way to document the fun and inspire others to try it! Plus, the bright colors make for stunning visuals that everyone will love.
These ideas not only enhance the enjoyment of your Skittles Rainbow Science project but also allow you to share the joy with others. Whether you’re using it as a decoration, an educational tool, or simply capturing the moment, this project is sure to bring smiles and spark creativity in everyone who sees it!
FAQs about Skittles Rainbow Science
Q: Can I use other types of candies?
A: Yes! While Skittles work best for this project, you can experiment with other colorful candies. I’ve tried using M&Ms and gummy bears, and they create beautiful effects too! Just keep in mind that different candies may dissolve at different rates, which can lead to unique results.
Q: Is this project safe for young children?
A: Yes, but ensure that children are supervised while handling Skittles and warm water to avoid any accidents. I always make it a point to explain the importance of being careful with warm water, and it’s a great opportunity to teach kids about safety in the kitchen!
Q: How long does the rainbow effect last?
A: The colors will continue to spread for a few minutes, but the effect will fade as the water evaporates. I love to watch the colors dance and swirl, and I usually take photos during this time to capture the magic! If you want to prolong the experience, you can always add more warm water to refresh the colors.
Final Thoughts
The Skittles Rainbow Science project is not just a fun activity; it’s a wonderful way to bond with your children while exploring the fascinating world of colors. I can’t tell you how many times this simple project has turned into a delightful afternoon filled with laughter and learning in my home. Whether you’re a busy mom looking for a quick craft or a professional seeking a creative outlet, this project is sure to bring joy and inspiration.
As I reflect on my experiences with Skittles Rainbow Science, I remember the excitement in my kids’ eyes as they watched the colors swirl and blend together. It’s moments like these that remind me of the beauty of creativity and the joy of spending quality time with family. Plus, it’s a fantastic way to introduce basic science concepts in a hands-on manner, making learning fun and engaging.
So gather your materials, unleash your creativity, and enjoy the colorful journey of Skittles Rainbow Science! Don’t forget to take photos of your vibrant creations and share them with friends and family. You never know who you might inspire to join in on the fun! Happy crafting!
Print
Skittles Rainbow Science: Craft Colorful Fun Today!
Description
Skittles Rainbow Science is a fun and colorful DIY project that demonstrates how colors mix and spread using Skittles candies and water, creating a vibrant rainbow effect.
Instructions
- Arrange the Skittles candies in a circle on the white plate or shallow dish.
- Carefully pour warm water into the center of the plate, just enough to cover the bottom.
- Watch as the colors begin to dissolve and spread outwards, creating a rainbow effect.
- Experiment with different arrangements of Skittles to see how the colors mix.
Keywords: Skittles, Rainbow, Science, DIY, Kids Craft

