Introduction to Reactivated Sourdough Starter Waffles
Welcome to the delightful world of Reactivated Sourdough Starter Waffles! If you’re like me, juggling a busy schedule while trying to whip up something delicious can feel like a high-wire act. These waffles are not just a quick solution for a hectic morning; they’re a tasty twist that will impress your loved ones. Imagine the warm, comforting aroma wafting through your kitchen as you serve up these fluffy delights. With a unique flavor and texture, they’re sure to become a family favorite. Let’s dive into this scrumptious recipe together!
Why You’ll Love This Reactivated Sourdough Starter Waffles
These Reactivated Sourdough Starter Waffles are a game-changer for busy mornings. They come together in just 25 minutes, making them perfect for those rushed days. The unique flavor from the sourdough adds a delightful twist that your family will adore. Plus, they’re versatile! You can customize them with your favorite toppings or mix-ins. Trust me, once you try these, you’ll wonder how you ever lived without them!
Ingredients for Reactivated Sourdough Starter Waffles
Gathering the right ingredients is the first step to creating these delightful Reactivated Sourdough Starter Waffles. Here’s what you’ll need:
- Reactivated sourdough starter: This is the star of the show! It adds a tangy flavor and helps create that perfect fluffy texture.
- All-purpose flour: A staple in most kitchens, it provides the structure for your waffles. You can also use whole wheat flour for a healthier twist.
- Milk: This adds moisture and richness. Feel free to swap it with almond milk or oat milk for a dairy-free option.
- Large eggs: They bind the ingredients together and contribute to the fluffiness. If you’re vegan, consider using flax eggs as a substitute.
- Sugar: Just a touch to balance the flavors. You can use brown sugar for a deeper taste or even honey for a natural sweetener.
- Baking powder: This helps the waffles rise and become light and airy. Make sure it’s fresh for the best results!
- Baking soda: Works in tandem with the sourdough starter to create that perfect lift.
- Salt: A pinch enhances all the flavors, making your waffles taste even better.
- Melted butter: This adds richness and a lovely flavor. You can substitute it with coconut oil for a dairy-free version.
For those who love to experiment, consider adding a splash of vanilla extract or a sprinkle of cinnamon for extra flavor. The exact quantities for each ingredient are listed at the bottom of the article, ready for you to print out and take to the kitchen!

How to Make Reactivated Sourdough Starter Waffles
Now that we have our ingredients ready, let’s dive into the fun part—making these delicious Reactivated Sourdough Starter Waffles! Follow these simple steps, and you’ll be enjoying warm, fluffy waffles in no time.
Step 1: Combine Wet Ingredients
In a large bowl, start by mixing the reactivated sourdough starter, milk, and eggs. Whisk them together until they’re well combined. This mixture is the heart of your waffles, so make sure it’s smooth and creamy. The sourdough starter will give your waffles that unique flavor!
Step 2: Mix Dry Ingredients
In another bowl, whisk together the all-purpose flour, sugar, baking powder, baking soda, and salt. This is where the magic begins! Make sure there are no lumps in your dry ingredients. A good mix ensures that your waffles rise beautifully and have a light texture.
Step 3: Combine Wet and Dry Mixtures
Now, it’s time to bring the two mixtures together. Gradually add the dry ingredients to the wet ingredients. Stir gently until just combined. Don’t overmix! A few lumps are perfectly fine. This will keep your waffles fluffy and tender.
Step 4: Add Melted Butter
Next, stir in the melted butter until the batter is smooth. This step adds richness and flavor to your waffles. If you’re feeling adventurous, you can also add a splash of vanilla extract at this point for an extra layer of deliciousness!
Step 5: Preheat Waffle Iron
While you’re mixing, preheat your waffle iron according to the manufacturer’s instructions. Lightly grease it with cooking spray or a little butter. A hot waffle iron is key to achieving that perfect golden-brown crust!
Step 6: Cook the Waffles
Pour the batter into the preheated waffle iron, using enough to fill it without overflowing. Close the lid and cook according to your waffle iron’s instructions. In just a few minutes, you’ll see those waffles puff up and turn golden brown. The aroma will be irresistible!
Step 7: Serve and Enjoy
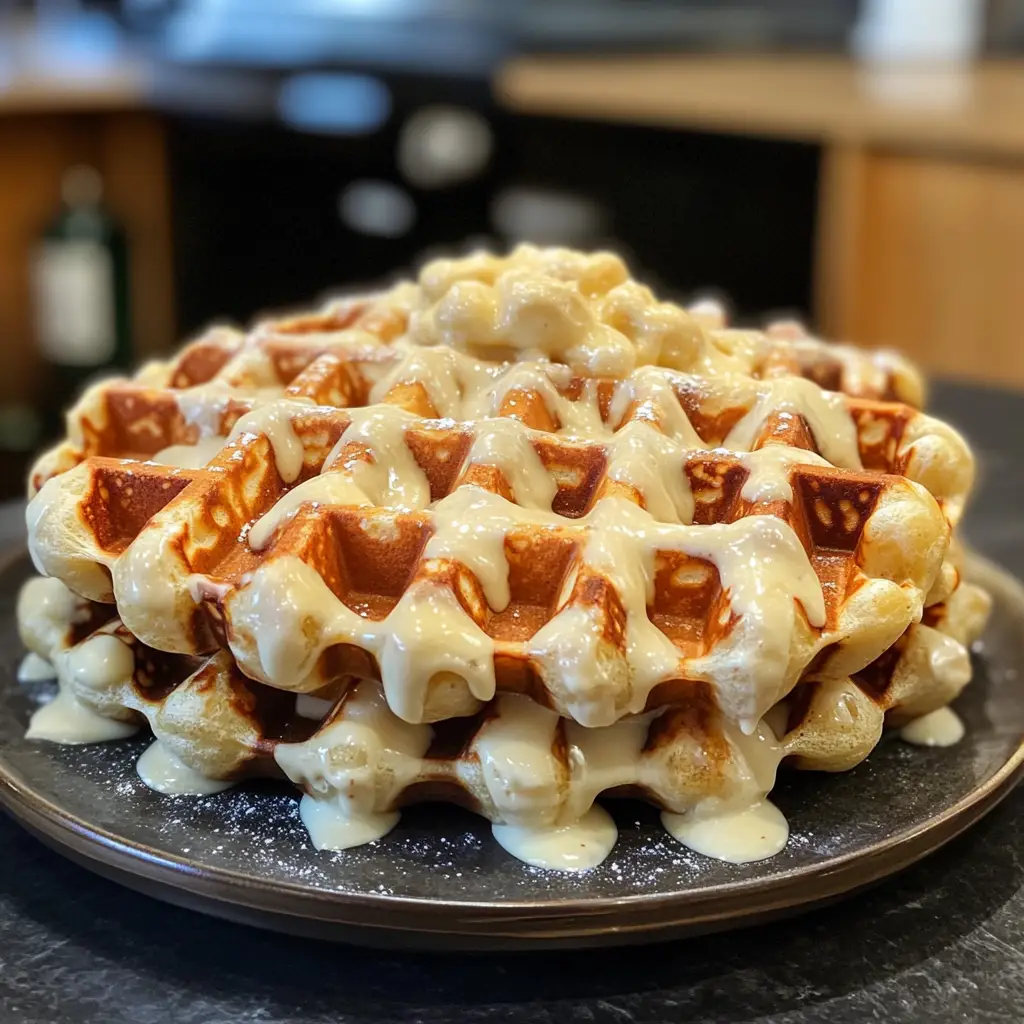
Once cooked, carefully remove the waffles and serve them warm. Top with your favorite toppings—think fresh fruit, maple syrup, or whipped cream. Each bite will be a delightful experience, and you’ll be amazed at how easy it was to create such a treat!
Tips for Success
- Ensure your sourdough starter is active and bubbly for the best flavor.
- Don’t overmix the batter; a few lumps are okay for fluffy waffles.
- Experiment with toppings like yogurt or nut butter for added nutrition.
- For extra crispiness, let the cooked waffles sit in a warm oven for a few minutes.
- Store leftover batter in the fridge for up to two days for a quick breakfast later!
Equipment Needed
- Waffle Iron: Essential for cooking your waffles. A non-stick model works best.
- Mixing Bowls: Use two bowls—one for wet ingredients and one for dry. Any size will do!
- Whisk: Perfect for mixing ingredients smoothly. A fork can work in a pinch.
- Measuring Cups: For accurate ingredient measurements. You can also use a kitchen scale.
Variations
- Whole Wheat Flour: Swap all-purpose flour for whole wheat flour for a heartier, more nutritious option.
- Gluten-Free: Use a gluten-free flour blend to make these waffles suitable for those with gluten sensitivities.
- Fruit Add-Ins: Fold in blueberries, chocolate chips, or chopped nuts for added flavor and texture.
- Spiced Waffles: Add cinnamon, nutmeg, or pumpkin spice to the batter for a seasonal twist.
- Vegan Option: Replace eggs with flax eggs and use plant-based milk and butter for a vegan-friendly version.
Serving Suggestions
- Fresh Fruit: Serve with sliced strawberries, bananas, or blueberries for a burst of flavor.
- Maple Syrup: Drizzle warm maple syrup over the waffles for a classic touch.
- Yogurt: Add a dollop of Greek yogurt for creaminess and protein.
- Presentation: Stack the waffles high and dust with powdered sugar for a beautiful display.
- Hot Beverages: Pair with coffee, tea, or hot chocolate for a cozy breakfast experience.
FAQs about Reactivated Sourdough Starter Waffles
Can I use a regular sourdough starter instead of a reactivated one?
Absolutely! Just make sure your sourdough starter is active and bubbly. This will ensure your waffles have that delightful tang and fluffy texture.
How do I store leftover waffles?
Leftover waffles can be stored in an airtight container in the refrigerator for up to three days. You can also freeze them for up to a month. Just pop them in the toaster for a quick breakfast!
Can I make these waffles ahead of time?
Yes! You can prepare the batter the night before and store it in the fridge. Just give it a gentle stir before cooking in the morning. It’s a great way to save time!
What toppings pair well with Reactivated Sourdough Starter Waffles?
These waffles are incredibly versatile! Try them with fresh fruit, whipped cream, or a drizzle of honey. You can even get creative with nut butters or yogurt for added flavor.
Can I make these waffles gluten-free?
Definitely! Just substitute the all-purpose flour with a gluten-free flour blend. Your waffles will still be delicious and fluffy!
Final Thoughts
Making Reactivated Sourdough Starter Waffles is more than just a breakfast choice; it’s a delightful experience that brings joy to your kitchen. The unique flavor and fluffy texture will have your family asking for seconds, and the ease of preparation means you can whip them up even on the busiest mornings. Whether you’re enjoying them with fresh fruit or a drizzle of syrup, each bite is a reminder of the simple pleasures in life. So, gather your ingredients, fire up that waffle iron, and create a moment of happiness for yourself and your loved ones!
Print
Reactivated Sourdough Starter Waffles: A Tasty Twist!
- Total Time: 25 minutes
- Yield: 4 servings 1x
- Diet: Vegetarian
Description
Delicious waffles made using reactivated sourdough starter, offering a unique flavor and texture.
Ingredients
- 1 cup reactivated sourdough starter
- 1 cup all-purpose flour
- 1 cup milk
- 2 large eggs
- 2 tablespoons sugar
- 1 teaspoon baking powder
- 1/2 teaspoon baking soda
- 1/4 teaspoon salt
- 2 tablespoons melted butter
Instructions
- In a large bowl, combine the reactivated sourdough starter, milk, and eggs.
- In another bowl, whisk together the flour, sugar, baking powder, baking soda, and salt.
- Gradually add the dry ingredients to the wet ingredients, mixing until just combined.
- Stir in the melted butter until the batter is smooth.
- Preheat your waffle iron and lightly grease it.
- Pour the batter into the waffle iron and cook according to the manufacturer’s instructions until golden brown.
- Serve warm with your favorite toppings.
Notes
- Make sure your sourdough starter is active before using.
- Feel free to add vanilla extract or spices for extra flavor.
- Leftover batter can be stored in the refrigerator for up to 2 days.
- Prep Time: 15 minutes
- Cook Time: 10 minutes
- Category: Breakfast
- Method: Waffle Iron
- Cuisine: American
Nutrition
- Serving Size: 1 waffle
- Calories: 250
- Sugar: 5g
- Sodium: 300mg
- Fat: 10g
- Saturated Fat: 5g
- Unsaturated Fat: 3g
- Trans Fat: 0g
- Carbohydrates: 35g
- Fiber: 2g
- Protein: 6g
- Cholesterol: 70mg
Keywords: Reactivated Sourdough Starter Waffles, Sourdough Waffles, Breakfast Recipes