Rainbow in a Jar Density Experiment: Create Stunning Art!
As a craft lover, I can’t tell you how many times I’ve found joy in simple DIY projects that not only spark creativity but also teach valuable lessons. The Rainbow in a Jar Density Experiment is one of those projects that has become a favorite in my home. It’s a delightful blend of art and science, perfect for busy moms like us who want to engage our kids in something educational yet fun.
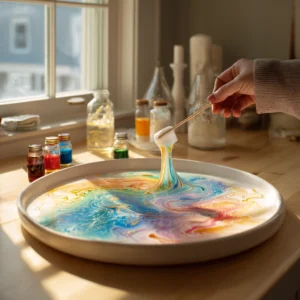
When I first attempted this project, I was amazed at how easy it was to create such a stunning visual display. I remember gathering my kids around the kitchen table, excited to see the colorful layers come to life. The best part? It only took about 25 minutes from start to finish! With a prep time of just 10 minutes, it’s a perfect weekend activity that doesn’t require hours of commitment.
One of the challenges I faced was ensuring that the liquids didn’t mix. I learned that pouring each layer slowly and carefully made all the difference. It was like watching a beautiful sunset unfold in a jar! I also discovered that using different colors of food coloring not only made the layers vibrant but also turned the experiment into a fun guessing game for my kids. They loved trying to predict which color would come next!
As we watched the layers settle, I took the opportunity to explain the concept of density. It was a wonderful moment of learning wrapped in creativity. I encourage you to embrace the little mishaps along the way; they often lead to the most memorable experiences. So, gather your materials, and let’s dive into this colorful adventure together!
Introduction to Rainbow in a Jar Density Experiment
In a world where creativity meets science, the Rainbow in a Jar Density Experiment stands out as a delightful project that combines fun and education. This DIY craft is perfect for busy moms and professionals looking to engage their children in a hands-on activity that not only beautifies their home but also teaches them about the fascinating concept of density.
When I first discovered this project, I was thrilled by how simple it was to create something so visually stunning. With just a few materials, I could transform an ordinary jar into a vibrant masterpiece. It’s like bringing a piece of the rainbow right into your living room! The best part is that it’s not just about the end result; the process itself is filled with laughter, learning, and a little bit of science magic.
As I gathered my supplies, I felt a wave of excitement wash over me. I knew this would be a wonderful way to spend quality time with my kids, allowing them to explore their creativity while learning about density. It’s a project that invites curiosity and encourages questions, making it an ideal educational experience for children of all ages.
So, if you’re looking for a fun and engaging way to introduce your kids to science while creating a beautiful piece of art, look no further! Let’s dive into this colorful adventure and see how we can create our very own rainbow in a jar!
Why You’ll Love This Rainbow in a Jar Density Experiment
The Rainbow in a Jar Density Experiment is not just a craft; it’s a celebration of creativity, affordability, and simplicity. I can’t tell you how many times I’ve found myself in need of a quick, engaging activity that doesn’t break the bank. This project fits the bill perfectly! It allows you to explore the science of density while creating a beautiful piece of art that can brighten up any room.
One of the things I love most about this experiment is how it brings my family together. I remember one Saturday afternoon when my kids and I decided to tackle this project. We gathered around the kitchen table, and I could see their eyes light up as we prepared the materials. It was a wonderful way to spend quality time together, and the excitement in the air was palpable. We laughed, shared stories, and even made a few mistakes along the way, which only added to the fun!
Another great aspect of this project is its accessibility. The materials are inexpensive and easy to find, making it a perfect choice for busy families. I often find myself juggling work and home responsibilities, so having a craft that requires minimal prep time is a huge plus. With just a few simple ingredients, you can create a stunning visual display that captivates both kids and adults alike.
Plus, the educational component is a fantastic bonus! As we layered the liquids, I took the opportunity to explain the concept of density in a way that was engaging and relatable. It’s amazing how a simple craft can spark curiosity and lead to meaningful conversations. So, if you’re looking for a fun and educational way to spend time with your children, this is it! Let’s get started on our colorful adventure!
Materials Needed for Rainbow in a Jar Density Experiment
To create your own Rainbow in a Jar, you will need the following materials:
- Water – 1 cup (serves as the base for the colored layer)
- Vegetable oil – 1/2 cup (creates a distinct layer due to its lower density)
- Food coloring – various colors (for vibrant layers)
- Honey – 1/4 cup (the densest liquid, forms the bottom layer)
- Dish soap – 1/4 cup (adds another layer with a different density)
- Glass jar – 1 (to hold your colorful creation)
As I gathered these materials for our first attempt, I was pleasantly surprised by how easy it was to find everything. Most of these items were already in my kitchen, which made the process even more convenient. I remember feeling a sense of excitement as I laid them out on the table, ready to embark on this colorful journey with my kids.
For a printable full list of materials, see below.
Tools Required for Rainbow in a Jar Density Experiment
To successfully complete the Rainbow in a Jar Density Experiment, you will need the following tools:
- Measuring cups – for accurate measurements of liquids
- Spoon or stirrer – to help layer the liquids without mixing
- Dropper (optional) – for precise application of food coloring
As I prepared for our first attempt at this colorful project, I was pleasantly surprised by how simple the tools were. Most of them were already in my kitchen, which made it easy to gather everything we needed. I remember rummaging through my drawers, feeling a sense of anticipation as I pulled out the measuring cups and spoons. It was like a mini treasure hunt!
The measuring cups were essential for ensuring that each layer was just right. I learned that even a small difference in the amount of liquid could affect how beautifully the layers formed. The spoon or stirrer became my best friend during the layering process, allowing me to gently pour each liquid without causing a mix-up. I can still picture my kids’ faces lighting up as they watched the colors separate and settle into their distinct layers.
And while the dropper was optional, I found it to be a fun addition. It allowed us to add little drops of food coloring to the oil layer, creating even more vibrant effects. My kids loved taking turns with the dropper, giggling as they tried to make the colors pop! So, gather these simple tools, and let’s get ready to create our stunning rainbow in a jar!
How to Make Rainbow in a Jar Density Experiment
Creating your own Rainbow in a Jar Density Experiment is a delightful journey that combines creativity and science. I remember the excitement I felt as I followed these simple steps, and I can’t wait for you to experience it too! Here’s how to make your stunning rainbow:
Step 1: Pour Honey
Start by pouring the honey into the bottom of the glass jar. This will create the densest layer, and watching it settle at the bottom is like laying the foundation for a beautiful masterpiece. I still recall the golden hue glistening as it filled the jar, setting the stage for the colorful layers to come.
Step 2: Add Dish Soap
Next, slowly add the dish soap on top of the honey. Pour it gently to prevent mixing. This step can be a bit tricky, but I found that taking my time made all the difference. It was like watching a delicate dance as the soap floated on top of the honey, creating a beautiful separation.
Step 3: Prepare Colored Water
In a separate container, mix water with your chosen food coloring. Once mixed, gently pour it over the dish soap layer. I remember the thrill of seeing the vibrant colors swirl and settle, creating a stunning visual effect. It felt like I was painting a rainbow right in my jar!
Step 4: Add Vegetable Oil
Carefully add the vegetable oil on top of the colored water. This will create a distinct layer due to its lower density. Watching the oil float above the water was one of my favorite moments. It was like magic, seeing the layers form so beautifully!
Step 5: Enhance with Food Coloring
Finally, use a dropper to add more food coloring to the oil layer for added color and vibrancy. This step is optional, but I found it to be a fun way to enhance the visual appeal. My kids loved taking turns with the dropper, giggling as they created little bursts of color in the oil.
Step 6: Observe and Enjoy
Take a moment to observe the beautiful layers you’ve created. Enjoy your rainbow in a jar! I remember feeling a sense of accomplishment as we admired our creation. It was a wonderful reminder of how simple materials can come together to create something truly spectacular.
Tips for Best Results
To ensure the best results for your Rainbow in a Jar Density Experiment, keep these tips in mind:
- Pour each liquid slowly to prevent mixing. I learned this the hard way during my first attempt! When I rushed, the colors blended together, and I ended up with a muddy mess instead of distinct layers. Taking your time is key to achieving that stunning rainbow effect.
- Use different colors for a more vibrant effect. I found that mixing various shades of food coloring not only made the layers pop but also turned the project into a fun guessing game for my kids. They loved trying to predict which color would come next, and it sparked some great conversations about color mixing!
- Experiment with different liquids to see how they layer. While honey, dish soap, and vegetable oil work beautifully, I encourage you to try other liquids like corn syrup or even flavored oils. Each liquid has its own density, and it’s fascinating to see how they interact. I remember one time we used flavored syrup, and the sweet smell added an extra layer of fun to our crafting session!
These tips not only enhance the visual appeal of your rainbow but also make the process more enjoyable. Embrace the little challenges along the way, and remember that crafting is all about exploration and creativity. So gather your materials, and let’s make some colorful memories together!
Project Variations
One of the most exciting aspects of the Rainbow in a Jar Density Experiment is the opportunity to get creative and make it your own! I love how this project can be easily adapted to suit different tastes and occasions. Here are some fun variations that I’ve tried and enjoyed:
- Style Variations: Add a touch of sparkle by incorporating glitter or small beads into your layers. I remember the first time I sprinkled some glitter into the jar; it transformed our rainbow into a magical wonderland! The way the light caught the glitter made the whole jar shimmer, and my kids were absolutely mesmerized.
- Color Changes: Don’t be afraid to experiment with different food coloring combinations for unique color schemes. I once created a sunset-themed jar using shades of orange, pink, and purple. It was a beautiful reminder of the stunning sunsets we often watch together as a family. My kids loved the idea of creating a jar that reflected something we all enjoy!
- Seasonal Adaptations: Get festive by creating themed jars for holidays! For instance, you can make red and green layers for Christmas or soft pastels for Easter. I remember making a jar filled with pastel colors for spring, and it became a lovely centerpiece on our dining table. It was a simple way to celebrate the season and bring a bit of cheer into our home.
These variations not only add a personal touch to your rainbow but also encourage creativity and exploration. I encourage you to let your imagination run wild and see what unique creations you can come up with. Crafting is all about having fun and making memories, so gather your materials and let’s get started on these exciting variations!
Decoration and Usage Ideas
Once your Rainbow in a Jar Density Experiment is complete, the fun doesn’t have to stop there! I’ve found that these colorful creations can serve multiple purposes beyond just being a beautiful display. Here are some decoration and usage ideas that I’ve enjoyed:
- Home Decor: Place the jar on a shelf or table as a colorful centerpiece. I love showcasing our rainbow jars in different rooms of the house. They add a pop of color and a touch of whimsy to any space. I remember one time I set a jar on our dining table, and it sparked conversations during meals. It became a delightful focal point that everyone admired!
- Educational Tool: Use it to explain density and science concepts to children. This project is not just about aesthetics; it’s a fantastic way to engage kids in learning. I often use our rainbow jars to illustrate how different liquids have varying densities. It’s amazing to see their eyes light up as they grasp these concepts through a hands-on experience!
- Gift Idea: Create a personalized jar for friends or family as a unique gift. I’ve made several rainbow jars for birthdays and special occasions, and they’ve always been a hit! Adding a personal touch, like a favorite color or theme, makes the gift even more special. I remember gifting one to my neighbor, and she was so touched by the thoughtfulness. It’s a simple yet heartfelt way to show you care!
These ideas not only enhance the enjoyment of your rainbow jar but also allow you to share the joy of crafting with others. Whether it’s brightening up your home, sparking curiosity in your children, or giving a thoughtful gift, your rainbow in a jar can bring smiles and inspiration to many. So, let your creativity shine and explore all the wonderful ways to use your colorful creation!
FAQs about Rainbow in a Jar Density Experiment
As I embarked on my Rainbow in a Jar Density Experiment, I found myself filled with questions, just like many of you might be. Here are some frequently asked questions that I encountered along the way, along with the answers that helped me navigate this colorful journey:
Q: Can I use other liquids instead of honey?
A: Yes! You can experiment with other dense liquids like corn syrup. I remember trying corn syrup once, and it created a beautiful, thick layer that added a unique twist to our rainbow. It’s fun to see how different liquids interact, so don’t hesitate to get creative!
Q: How long will the layers last?
A: The layers can last for weeks if left undisturbed. I was pleasantly surprised to see how well our rainbow held up over time. Just be sure to keep it in a safe spot where it won’t be knocked over, and you can enjoy the beauty of your creation for a long time!
Q: Is this project safe for young children?
A: Yes, but adult supervision is recommended, especially with younger kids. While the materials are generally safe, it’s always a good idea to keep an eye on little ones as they explore. I found that being involved in the process not only ensured safety but also made it a wonderful bonding experience!
These FAQs helped me feel more confident as I navigated the Rainbow in a Jar Density Experiment. I encourage you to embrace the questions and enjoy the learning process. Crafting is all about exploration, and every question leads to new discoveries!
Final Thoughts
The Rainbow in a Jar Density Experiment is more than just a craft; it’s an opportunity to bond with your children while exploring the wonders of science. I can’t emphasize enough how rewarding it is to see their faces light up as they watch the colorful layers come together. This project has a magical way of turning a simple afternoon into a memorable experience filled with laughter and learning.
As I reflect on our crafting sessions, I remember the joy of discussing density and colors with my kids. It was a beautiful blend of education and creativity, and I loved how it sparked their curiosity. Each time we created a new jar, it felt like we were embarking on a new adventure together. I encourage you to embrace this journey with your family; the memories you create will be cherished for years to come.
So gather your materials, set aside some time, and embark on this delightful journey of discovery. Whether you’re a busy mom or a professional looking for a fun weekend activity, this project is perfect for you. You’ll not only beautify your space with a stunning piece of art but also ignite a passion for science and creativity in your children. Let’s make some colorful memories together!
PrintRainbow in a Jar Density Experiment: Create Stunning Art!
Description
The Rainbow in a Jar Density Experiment is a fun and educational DIY project that demonstrates the concept of density using colorful liquids to create a beautiful layered effect in a jar.
Instructions
- Start by pouring honey into the bottom of the glass jar.
- Next, slowly add the dish soap on top of the honey.
- In a separate container, mix water with food coloring and gently pour it over the dish soap.
- Carefully add vegetable oil on top of the colored water.
- Finally, use a dropper to add more food coloring to the oil layer for added color.
- Observe the layers and enjoy your rainbow in a jar!
Keywords: Rainbow in a Jar, Density Experiment, DIY Science Project, Colorful Layers, Educational Craft