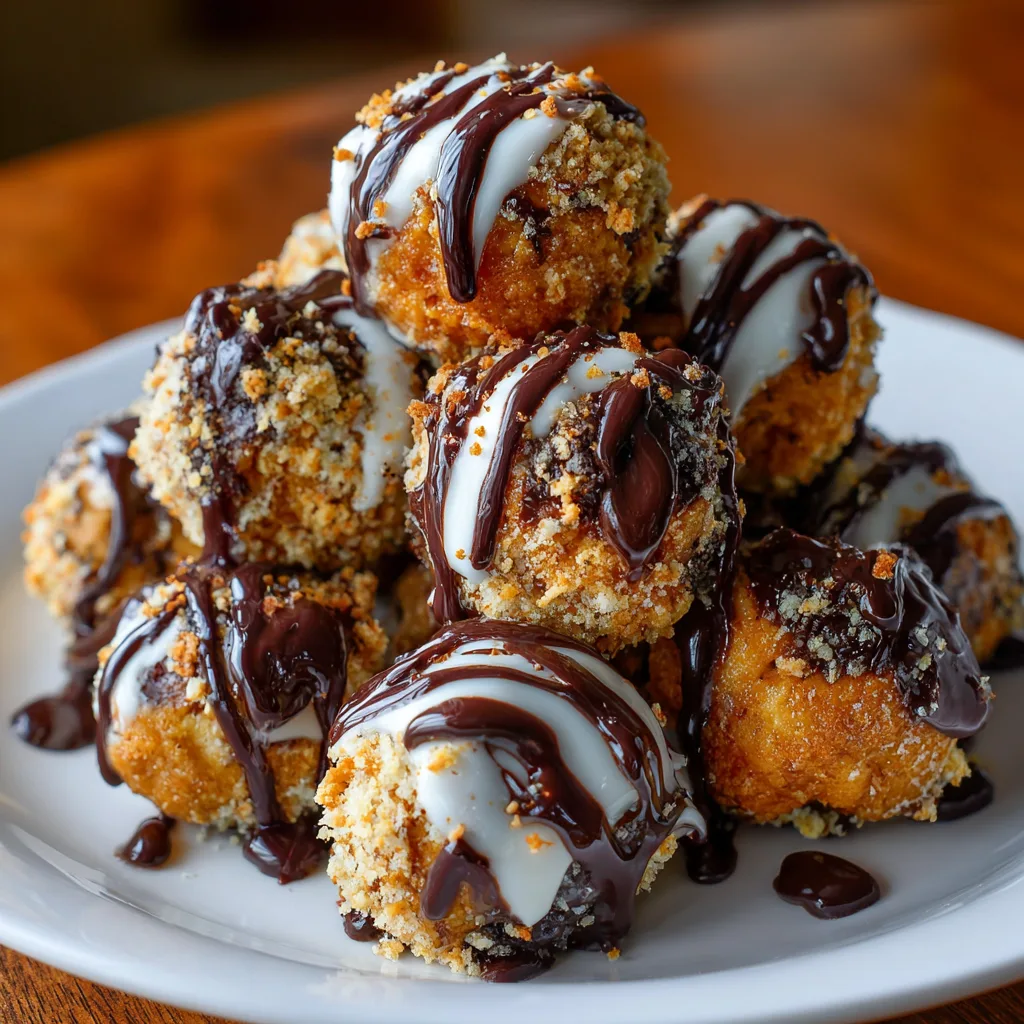
Introduction to Pumpkin Pie Truffles
As the leaves turn golden and the air gets crisp, I find myself craving the warm, cozy flavors of fall. That’s where these delightful Pumpkin Pie Truffles come in! They’re the perfect little bites of autumn, capturing the essence of pumpkin pie in a fun, no-bake treat. Whether you’re a busy mom juggling work and family or a professional looking to impress at your next gathering, these truffles are a quick solution. With just a few simple ingredients, you can whip up a batch that will have everyone asking for seconds!
Why You’ll Love This Pumpkin Pie Truffles
These Pumpkin Pie Truffles are a dream come true for anyone short on time but big on flavor. They come together in just 15 minutes, making them a breeze to whip up. Plus, the creamy pumpkin filling paired with the sweet chocolate coating is a match made in heaven. You’ll love how they satisfy your sweet tooth while bringing the cozy vibes of fall right to your kitchen!
Ingredients for Pumpkin Pie Truffles
Gathering the right ingredients is the first step to creating these delightful Pumpkin Pie Truffles. Here’s what you’ll need:
- Pumpkin puree: This is the star of the show! It gives the truffles their rich flavor and creamy texture. Make sure to use pure pumpkin puree, not pumpkin pie filling.
- Cream cheese: Softened cream cheese adds a luscious creaminess that balances the pumpkin. It’s what makes these truffles so indulgent!
- Graham cracker crumbs: These provide a delightful crunch and a nod to traditional pumpkin pie crust. You can crush your own or buy pre-made crumbs for convenience.
- Pumpkin pie spice: A blend of warm spices like cinnamon, nutmeg, and ginger that brings the essence of fall into every bite. Feel free to adjust the amount to suit your taste!
- Powdered sugar: This sweetens the mixture and helps bind everything together. It also gives the truffles a smooth finish.
- White chocolate chips: These are melted to coat the truffles, adding a sweet, creamy layer that complements the pumpkin flavor beautifully.
- Coconut oil: This helps the chocolate melt smoothly and gives it a nice sheen. You can substitute with vegetable oil if you prefer.
For those looking to get creative, consider rolling the truffles in crushed nuts or extra graham cracker crumbs for added texture. You can find the exact measurements for each ingredient at the bottom of the article, ready for printing!

How to Make Pumpkin Pie Truffles
Step 1: Mix the Base
Let’s get started on these delicious Pumpkin Pie Truffles! In a mixing bowl, combine the pumpkin puree, softened cream cheese, graham cracker crumbs, pumpkin pie spice, and powdered sugar. Use a spatula or a hand mixer to blend everything until it’s smooth and creamy. The mixture should be thick but easy to scoop. This is where the magic begins, as the flavors meld together, creating a delightful base that captures the essence of fall. Trust me, the aroma alone will have your family gathering around!
Step 2: Chill the Mixture
Once your mixture is well blended, it’s time to chill! Cover the bowl with plastic wrap and pop it in the refrigerator for about 30 minutes. This step is crucial as it helps the mixture firm up, making it easier to roll into truffles. While you wait, you can sip on a warm cup of cider or plan how you’ll present these treats!
Step 3: Form the Truffles
After the mixture has chilled, it’s time for some fun! Scoop out small portions of the mixture using a cookie scoop or your hands. Roll each portion into a ball, about the size of a tablespoon. Don’t worry if they aren’t perfect; the charm of homemade treats is in their uniqueness! Place the rolled truffles on a plate or baking sheet lined with parchment paper.
Step 4: Melt the Chocolate
Now, let’s get that chocolate ready! In a microwave-safe bowl, combine the white chocolate chips and coconut oil. Heat in 30-second intervals, stirring in between, until the chocolate is completely melted and smooth. If you prefer, you can use a double boiler for this step. The coconut oil will help the chocolate coat the truffles beautifully, giving them a glossy finish.
Step 5: Coat the Truffles
It’s time to dip! Take each truffle and carefully dip it into the melted chocolate, ensuring it’s fully coated. You can use a fork to help lift it out, letting any excess chocolate drip off. Place the coated truffles back on the parchment-lined baking sheet. This is where they transform into little bites of heaven!
Step 6: Set the Truffles
Finally, let’s set those truffles! Place the baking sheet in the refrigerator for about 30 minutes, or until the chocolate is firm. Once set, they’re ready to be enjoyed! You can serve them as a delightful dessert or a sweet snack. Just be prepared for everyone to ask for more!
Tips for Success
- Make sure your cream cheese is softened for easy mixing.
- Use a cookie scoop for uniform truffle sizes.
- Chill the mixture longer if it’s too soft to roll.
- Experiment with different coatings like crushed nuts or sprinkles.
- Store truffles in an airtight container to keep them fresh.
Equipment Needed
- Mixing bowl: A large bowl for combining ingredients. A sturdy glass or ceramic bowl works well.
- Spatula or hand mixer: For blending the mixture smoothly. A spatula is great for folding, while a hand mixer speeds things up.
- Cookie scoop: Perfect for portioning the truffles. If you don’t have one, your hands will do just fine!
- Baking sheet: To set the truffles on. Line it with parchment paper for easy cleanup.
- Microwave-safe bowl: For melting chocolate. A double boiler is a great alternative if you prefer.
Variations
- Chocolate Coating: Swap white chocolate for dark or milk chocolate for a different flavor profile.
- Nutty Twist: Roll the truffles in crushed pecans or walnuts for added crunch and flavor.
- Spicy Kick: Add a pinch of cayenne pepper or chili powder to the pumpkin mixture for a surprising heat.
- Vegan Option: Use vegan cream cheese and dairy-free chocolate to make these truffles plant-based.
- Flavor Infusion: Incorporate a splash of vanilla extract or maple syrup for an extra layer of sweetness.
Serving Suggestions
- Pair your Pumpkin Pie Truffles with a warm cup of spiced chai or apple cider for a cozy treat.
- Serve them on a festive platter, garnished with a sprinkle of cinnamon or nutmeg for an elegant touch.
- For a fun twist, present them in mini cupcake liners for easy serving at gatherings.
- These truffles also make a delightful addition to a dessert table during fall celebrations.
FAQs about Pumpkin Pie Truffles
As I’ve shared my love for these Pumpkin Pie Truffles, I often get questions from fellow home cooks. Here are some of the most common queries I hear:
Can I make Pumpkin Pie Truffles ahead of time?
Absolutely! These truffles can be made a few days in advance. Just store them in an airtight container in the refrigerator. They’ll stay fresh and delicious, ready to impress your guests!
What can I use instead of white chocolate?
If white chocolate isn’t your thing, feel free to swap it out for dark or milk chocolate. Each option brings a unique flavor that pairs beautifully with the pumpkin filling.
How do I store leftover truffles?
Store any leftover Pumpkin Pie Truffles in an airtight container in the fridge. They’ll keep well for up to a week, but I doubt they’ll last that long!
Can I freeze these truffles?
Yes, you can freeze them! Just place the truffles in a single layer on a baking sheet until frozen, then transfer them to a freezer-safe container. They’ll be good for up to three months.
What’s the best way to serve Pumpkin Pie Truffles?
These truffles shine when served chilled. You can present them on a festive platter or in mini cupcake liners for a charming touch. Pair them with a warm drink for the ultimate fall experience!
Final Thoughts
Making Pumpkin Pie Truffles is more than just a recipe; it’s a delightful experience that brings the warmth of fall into your home. Each bite is a sweet reminder of cozy gatherings and cherished moments with loved ones. I love how these truffles are not only easy to prepare but also a hit at any gathering. Whether you’re enjoying them with a cup of coffee or sharing them at a festive celebration, they’re sure to bring smiles all around. So, roll up your sleeves and indulge in this sweet treat that captures the essence of autumn!
Print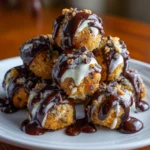
Pumpkin Pie Truffles: Indulge in Fall’s Sweet Delight!
- Total Time: 45 minutes
- Yield: 24 truffles 1x
- Diet: Vegetarian
Description
Pumpkin Pie Truffles are a delightful treat that captures the essence of fall with their rich pumpkin flavor and creamy texture, perfect for satisfying your sweet tooth.
Ingredients
- 1 cup pumpkin puree
- 1 cup cream cheese, softened
- 2 cups graham cracker crumbs
- 1 teaspoon pumpkin pie spice
- 1/2 cup powdered sugar
- 1 cup white chocolate chips
- 1 tablespoon coconut oil
Instructions
- In a mixing bowl, combine pumpkin puree, cream cheese, graham cracker crumbs, pumpkin pie spice, and powdered sugar until well blended.
- Chill the mixture in the refrigerator for about 30 minutes to firm up.
- Once chilled, scoop out small portions and roll them into balls.
- Melt white chocolate chips and coconut oil together in a microwave or double boiler.
- Dip each truffle into the melted chocolate, ensuring they are fully coated.
- Place the coated truffles on a baking sheet lined with parchment paper.
- Refrigerate until the chocolate is set, about 30 minutes.
- Serve and enjoy your delicious Pumpkin Pie Truffles!
Notes
- For a spicier flavor, add more pumpkin pie spice to the mixture.
- Store truffles in an airtight container in the refrigerator for up to a week.
- These truffles can be rolled in crushed nuts or additional graham cracker crumbs for added texture.
- Prep Time: 15 minutes
- Cook Time: 0 minutes
- Category: Dessert
- Method: No-Bake
- Cuisine: American
Nutrition
- Serving Size: 1 truffle
- Calories: 120
- Sugar: 10g
- Sodium: 50mg
- Fat: 7g
- Saturated Fat: 4g
- Unsaturated Fat: 2g
- Trans Fat: 0g
- Carbohydrates: 14g
- Fiber: 1g
- Protein: 2g
- Cholesterol: 15mg
Keywords: Pumpkin Pie Truffles, Fall Desserts, No-Bake Treats