Peanut Butter Chocolate Bliss Balls: Creamy, Indulgent Delights!
Sensory-Rich Introduction with Immediate Craving
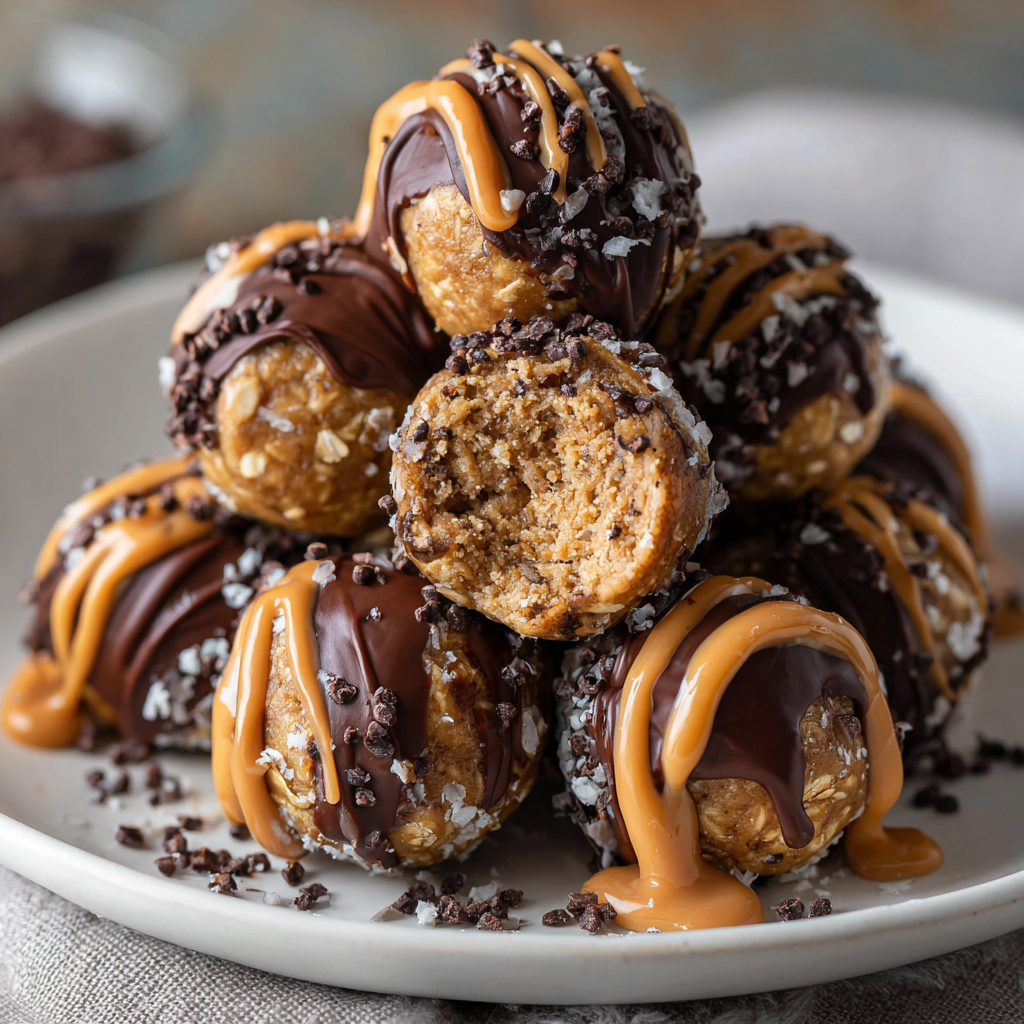
Imagine sinking your teeth into a soft, velvety ball that bursts with the rich, nutty flavor of peanut butter, perfectly balanced by the deep, luscious taste of dark chocolate. Each bite of these Peanut Butter Chocolate Bliss Balls is a delightful experience, evoking memories of childhood treats while offering a healthier twist. Whether you’re enjoying them as a post-workout snack, a midday pick-me-up, or a guilt-free dessert at a gathering, these bliss balls are sure to satisfy your cravings. Picture a cozy afternoon with friends, laughter filling the air, and a platter of these indulgent bites at the center of the table, inviting everyone to indulge.
Why You’ll Love This Peanut Butter Chocolate Bliss Balls
- Texture Contrast: The creamy peanut butter base contrasts beautifully with the smooth chocolate coating, creating a delightful mouthfeel.
- Flavor Balance: The natural sweetness of honey or maple syrup complements the rich cocoa, making each bite a harmonious blend of flavors.
- Versatility: Perfect for various occasions, these bliss balls can be enjoyed as a snack, dessert, or even a breakfast option.
- Ease of Preparation: With no baking required, these bliss balls come together in just 15 minutes, making them a quick and easy treat.
- Universal Appeal: Loved by both kids and adults, these bliss balls cater to various dietary preferences, including gluten-free and vegetarian.
Essential Tools & Preparation Strategy
- Mixing Bowl: A large bowl is essential for combining the peanut butter, honey, and dry ingredients smoothly.
- Spoon or Cookie Scoop: This tool helps in portioning the mixture evenly, ensuring consistent-sized bliss balls.
- Microwave-Safe Bowl: Necessary for melting chocolate without burning it, allowing for a smooth coating.
- Parchment Paper: Prevents sticking when setting the chocolate-coated balls, making cleanup easier.
- Refrigerator: Important for chilling the mixture and setting the chocolate, ensuring the bliss balls hold their shape.
- Measuring Cups and Spoons: Ensures accurate ingredient quantities for consistent results, crucial for flavor and texture.
- Spatula: Useful for scraping down the sides of the bowl and ensuring all ingredients are well combined.
- Food Processor (optional): For those who prefer a finer texture, a food processor can blend the ingredients more thoroughly.
Ingredients & Their Roles in This Peanut Butter Chocolate Bliss Balls
- Base Ingredients:
- Natural Peanut Butter: Provides creaminess and rich flavor.
- Honey or Maple Syrup: Acts as a natural sweetener, binding the ingredients together.
- Vanilla Extract: Enhances the overall flavor profile with a hint of warmth.
- Dry Ingredients:
- Rolled Oats: Adds texture and fiber, making the bliss balls more filling.
- Unsweetened Cocoa Powder: Contributes a rich chocolate flavor without added sugar.
- Ground Flaxseed: Provides nutritional benefits and helps bind the mixture.
- Salt: Balances sweetness and enhances flavors.
- Coating:
- Dark Chocolate Chips: Adds a decadent chocolate layer, making the bliss balls irresistible.
- Coconut Oil: Helps the chocolate melt smoothly and adds a subtle flavor.
Step-by-Step Guide to Perfect Peanut Butter Chocolate Bliss Balls
- In a large mixing bowl, combine 1 cup natural peanut butter, 1/2 cup honey, and 1 teaspoon vanilla extract until smooth.
- In a separate bowl, mix together 1 cup rolled oats, 1/2 cup unsweetened cocoa powder, 1/4 cup ground flaxseed, and 1/4 teaspoon salt.
- Gradually add the dry ingredients to the wet mixture, stirring until fully combined.
- Refrigerate the mixture for 30 minutes to firm up, making it easier to roll into balls.
- Once chilled, scoop out tablespoon-sized portions and roll them into balls using your hands.
- In a microwave-safe bowl, melt 1/2 cup dark chocolate chips and 1 tablespoon coconut oil together in 30-second intervals, stirring until smooth.
- Dip each ball into the melted chocolate, ensuring they are fully coated, and place them on a parchment-lined baking sheet.
- Refrigerate for an additional 15 minutes to set the chocolate before serving.
Chef’s Notes & Pro Tips for Flawless Results
- Make-Ahead Instructions: These bliss balls can be made ahead of time and stored in the refrigerator for up to one week.
- Storage: For longer storage, freeze them in an airtight container for up to three months.
- Equipment Recommendations: A silicone spatula can help scrape down the sides of the bowl effectively.
- Customization Options: Feel free to substitute almond butter or cashew butter for a different flavor profile, or add in extras like shredded coconut or chopped nuts for added texture.
Avoid These Common Cooking Mistakes
- Not Chilling the Mixture: This can make it difficult to roll into balls. Always refrigerate the mixture before rolling.
- Using Sweetened Peanut Butter: This can make the balls overly sweet. Use natural, unsweetened peanut butter for best results.
- Overheating the Chocolate: This can cause it to seize. Melt in short intervals and stir frequently to avoid this.
- Not Measuring Ingredients Accurately: This can affect texture and flavor. Use measuring cups and spoons for precision.
- Skipping the Flaxseed: This adds nutritional value and helps bind the mixture. Always include it or substitute with chia seeds.
- Not Allowing the Chocolate to Set: This can lead to messy handling. Refrigerate until the chocolate is firm.
- Using Too Much Cocoa Powder: This can make the balls dry. Stick to the recommended amount for optimal moisture.
Creative Variations & Customizations
- Nut-Free Version: Substitute peanut butter with sunflower seed butter for a nut-free alternative.
- Protein-Packed: Add a scoop of your favorite protein powder to boost the protein content.
- Seasonal Flavors: Incorporate spices like cinnamon or pumpkin spice for a seasonal twist.
- Fruit-Infused: Mix in dried fruits like cranberries or raisins for added sweetness and texture.
- Chocolate Chip Variation: Fold in mini chocolate chips for an extra chocolatey experience.
Perfect Pairings: What to Serve With Peanut Butter Chocolate Bliss Balls
- Almond Milk: A nutritious drink that complements the flavors of the bliss balls.
- Fresh Fruit: Pair with bananas or strawberries for a balanced treat.
- Coffee or Tea: Enjoy alongside a warm beverage for a delightful afternoon pick-me-up.
- Yogurt: Crush and sprinkle over yogurt for added texture and flavor.
- Oatmeal or Smoothie Bowls: Use as a topping for a nutritious breakfast.
- Dessert Platter: Include in a dessert platter with other healthy snacks for gatherings.
- Vanilla Ice Cream: Serve with a scoop for an indulgent dessert experience.
- Nut Butter Dip: Pair with a nut butter dip for an extra layer of flavor.
Storage & Meal Prep Instructions
- Refrigerator Storage: Store bliss balls in an airtight container in the fridge for up to one week.
- Freezer Storage: For longer storage, freeze in an airtight container for up to three months.
- Reheating Methods: Enjoy straight from the fridge or let them sit at room temperature for a few minutes before serving.
Nutrition Facts & Health Insights
| Nutrient | Per Bliss Ball |
|---|---|
| Calories | 120 |
| Sugar | 6 grams |
| Sodium | 50 milligrams |
| Fat | 7 grams |
| Saturated Fat | 2 grams |
| Unsaturated Fat | 5 grams |
| Trans Fat | 0 grams |
| Carbohydrates | 10 grams |
| Fiber | 2 grams |
| Protein | 4 grams |
| Cholesterol | 0 milligrams |
Health Benefits: Key ingredients like peanut butter provide healthy fats and protein, while flaxseed adds omega-3 fatty acids and fiber, making these bliss balls a nutritious indulgence.
Frequently Asked Questions
- Can I use a different nut butter?Yes, almond butter or cashew butter can be used for a different flavor.
- How long do these bliss balls last?They can be stored in the refrigerator for up to one week or frozen for three months.
- Can I make these vegan?Yes, use maple syrup instead of honey for a vegan option.
- What if I don’t have cocoa powder?You can substitute with carob powder for a different flavor.
- Can I add protein powder?Absolutely! Just adjust the other dry ingredients accordingly.
- What if my mixture is too dry?Add a little more peanut butter or honey to achieve the right consistency.
- How do I prevent the chocolate from seizing?Melt the chocolate in short intervals and stir frequently to avoid overheating.
- Can I add other mix-ins?Yes, feel free to add nuts, seeds, or dried fruits for extra texture and flavor.
Final Inspiration & Kitchen Confidence
As you embark on making these Peanut Butter Chocolate Bliss Balls, remember that cooking is an adventure filled with creativity and joy. Celebrate each step, from mixing the ingredients to rolling the bliss balls, and take pride in your delicious creation. Share them with friends and family, or keep them all to yourself—either way, you’ve crafted a delightful treat that’s both indulgent and nutritious. So roll up your sleeves, trust your instincts, and enjoy the process. Happy cooking!
Print
Peanut Butter Chocolate Bliss Balls: Creamy, Indulgent Delights!
- Total Time: 45 minutes
- Yield: 20 bliss balls 1x
- Diet: Gluten-Free, Vegetarian
Description
Peanut Butter Chocolate Bliss Balls are a decadent treat that combines the rich, creamy texture of peanut butter with the smooth, velvety taste of dark chocolate. Each bite offers a delightful balance of sweetness and nuttiness, leaving you craving more.
Ingredients
- Base:
- 1 cup natural peanut butter
- 1/2 cup honey or maple syrup
- 1 teaspoon vanilla extract
- Dry Ingredients:
- 1 cup rolled oats
- 1/2 cup unsweetened cocoa powder
- 1/4 cup ground flaxseed
- 1/4 teaspoon salt
- Coating:
- 1/2 cup dark chocolate chips
- 1 tablespoon coconut oil
Instructions
- In a large mixing bowl, combine the peanut butter, honey, and vanilla extract until smooth.
- In a separate bowl, mix the rolled oats, cocoa powder, ground flaxseed, and salt.
- Gradually add the dry ingredients to the wet mixture, stirring until fully combined.
- Refrigerate the mixture for 30 minutes to firm up.
- Once chilled, scoop out tablespoon-sized portions and roll them into balls.
- In a microwave-safe bowl, melt the dark chocolate chips and coconut oil together in 30-second intervals, stirring until smooth.
- Dip each ball into the melted chocolate, ensuring they are fully coated, and place them on a parchment-lined baking sheet.
- Refrigerate for an additional 15 minutes to set the chocolate.
Notes
- These bliss balls can be made ahead of time and stored in the refrigerator for up to one week.
- For longer storage, freeze them in an airtight container for up to three months.
- You can substitute almond butter or cashew butter for a different flavor profile.
- Prep Time: 15 minutes
- Cook Time: 0 minutes
- Category: desserts
- Method: no-bake
- Cuisine: American
Nutrition
- Serving Size: 1 bliss ball
- Calories: 120
- Sugar: 6 grams
- Sodium: 50 milligrams
- Fat: 7 grams
- Saturated Fat: 2 grams
- Unsaturated Fat: 5 grams
- Trans Fat: 0 grams
- Carbohydrates: 10 grams
- Fiber: 2 grams
- Protein: 4 grams
- Cholesterol: 0 milligrams
Keywords: Peanut Butter Chocolate Bliss Balls, no-bake dessert, healthy snacks, gluten-free treats, chocolate energy balls, vegan snacks, easy dessert recipes, protein balls, peanut butter recipes, chocolate snacks, healthy indulgence, quick treats, nutritious bites