Introduction to Pastel Dipped Oreo Balls
As a passionate home cook, I find joy in creating treats that not only taste delightful but also bring a smile to the faces of those I share them with. One of my all-time favorite recipes is for Pastel Dipped Oreo Cookie Balls. These little bites of joy are perfect for any occasion, whether it’s a birthday party, a holiday gathering, or just a cozy night in with family. The vibrant pastel colors remind me of springtime, and they add a cheerful touch to any dessert table.
My journey with these cookie balls began on a sunny afternoon when I was looking for a fun and easy dessert to make for a friend’s baby shower. I wanted something that would not only be delicious but also visually appealing. After some experimentation, I discovered the magic of combining crushed Oreos with cream cheese, rolling them into delightful balls, and dipping them in colorful chocolate. The result? A sweet treat that was a hit with everyone!
What I love most about these Pastel Dipped Oreo Cookie Balls is their versatility. You can customize them with different colors and sprinkles to match any theme or celebration. Plus, they’re incredibly simple to make, which means you can whip them up even on a busy day. So, grab your apron, and let’s dive into this delightful recipe that’s sure to become a favorite in your home, just like it is in mine!
Ingredients for Pastel Dipped Oreo Balls
Before we embark on this sweet adventure, let’s gather our ingredients. Having everything ready makes the process smoother and more enjoyable. Here’s what you’ll need to create these delightful Pastel Dipped Oreo Cookie Balls.
Main Ingredients
- 1 package (15.25 oz) of Oreo cookies
- 8 oz cream cheese, softened
- 1 cup of pastel melting chocolate (you can find this at craft stores or online)
- 1 tablespoon of coconut oil (optional, for a smoother chocolate)
When choosing your ingredients, I always recommend going for high-quality cream cheese. It makes a noticeable difference in flavor and texture. I usually opt for the full-fat version, as it gives the cookie balls a rich and creamy taste that pairs perfectly with the Oreos.
Optional Add-ons
- Sprinkles (in various pastel colors)
- Chopped nuts (like almonds or walnuts for a crunchy texture)
- Shredded coconut (for a tropical twist)
- Food coloring (if you want to tint your cream cheese mixture)
These optional add-ons can elevate your Pastel Dipped Oreo Cookie Balls to a whole new level. I love to sprinkle some colorful toppings on mine, especially when I’m making them for a special occasion. It adds a fun and festive touch that everyone loves!
How to Prepare Pastel Dipped Oreo Balls
Now that we have our ingredients ready, it’s time to roll up our sleeves and get to the fun part—preparing our Pastel Dipped Oreo Cookie Balls! This process is not only simple but also incredibly satisfying. Let’s dive into the steps together!
Step 1: Crush the Oreos
The first step is to crush those delicious Oreo cookies into fine crumbs. You can use a food processor for this, or if you prefer a more hands-on approach, place them in a zip-top bag and crush them with a rolling pin. I find that the sound of crunching Oreos is music to my ears!
Tips for Crushing Oreos
- Make sure the cookies are completely crushed to avoid any large chunks. This helps the mixture bind better.
- If using a food processor, pulse the cookies in short bursts to prevent them from turning into powder.
Step 2: Mix with Cream Cheese
Next, it’s time to mix the crushed Oreos with softened cream cheese. In a large bowl, combine the two ingredients until they are well blended. I love using my hands for this part; it feels like I’m creating something special!
Tips for Mixing
- Ensure your cream cheese is at room temperature for easier mixing.
- Mix until the mixture is uniform in color and texture. You want it to be sticky but not too wet.
Step 3: Form the Balls
Now comes the fun part—shaping the mixture into balls! Take about a tablespoon of the mixture and roll it between your palms to form a smooth ball. I like to imagine I’m crafting little edible treasures!
Tips for Shaping
- Keep your hands slightly damp to prevent the mixture from sticking to your palms.
- Try to make the balls uniform in size for even dipping later on.
Step 4: Chill the Balls
Once you’ve shaped all the balls, it’s time to chill them in the refrigerator for about 30 minutes. This step is crucial as it helps the balls firm up, making them easier to dip in chocolate.
Tips for Chilling
- Place the balls on a parchment-lined baking sheet to prevent sticking.
- If you’re short on time, you can pop them in the freezer for about 15 minutes instead.
Step 5: Melt the Chocolate
While the balls are chilling, let’s melt the pastel chocolate. You can do this in a microwave-safe bowl, heating it in 30-second intervals, stirring in between. The aroma of melting chocolate is simply heavenly!
Tips for Melting Chocolate
- Add a tablespoon of coconut oil to the chocolate for a smoother consistency.
- Be careful not to overheat the chocolate, as it can seize up. If it does, a splash of vegetable oil can help bring it back!
Step 6: Dip the Balls in Chocolate
Now, it’s time to dip! Using a fork or a toothpick, dip each ball into the melted chocolate, ensuring it’s fully coated. Let the excess chocolate drip off before placing it back on the parchment paper.
Tips for Dipping
- Work quickly, as the chocolate can start to harden if it cools down too much.
- For a smoother finish, gently tap the fork against the bowl to remove excess chocolate.
Step 7: Decorate with Sprinkles
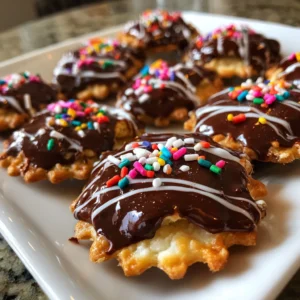
Finally, let’s add some pizzazz! While the chocolate is still wet, sprinkle your favorite pastel sprinkles on top. This is where you can get creative and make each ball unique!
Tips for Decorating
- Use a variety of sprinkles for a fun and colorful look.
- For a more elegant touch, consider drizzling some contrasting chocolate over the top after the first layer has set.
And there you have it! Your Pastel Dipped Oreo Cookie Balls are ready to impress. I can’t wait for you to taste these delightful treats. They’re sure to be a hit at your next gathering!
Equipment Needed for Pastel Dipped Oreo Balls
Before we dive into the kitchen, let’s make sure we have all the right tools at our fingertips. Having the right equipment can make the process of creating Pastel Dipped Oreo Cookie Balls even more enjoyable. Here’s a quick list of what you’ll need:
- Mixing Bowl: A large bowl is essential for mixing the crushed Oreos and cream cheese. I love using a glass bowl because it’s easy to clean and lets me see the mixture as I combine the ingredients.
- Food Processor or Rolling Pin: You can use a food processor to crush the Oreos quickly. If you don’t have one, a rolling pin and a zip-top bag work just as well!
- Cookie Scoop or Tablespoon: This helps in measuring out the mixture for uniform ball sizes. A cookie scoop is my go-to for this task!
- Parchment Paper: Line your baking sheet with parchment paper to prevent the cookie balls from sticking. It makes cleanup a breeze!
- Microwave-Safe Bowl: For melting the chocolate, a microwave-safe bowl is a must. If you prefer, you can also use a double boiler on the stove.
- Fork or Toothpick: These are handy for dipping the cookie balls into the melted chocolate. I often use a fork for a better grip!
Don’t worry if you don’t have all the exact tools. You can always improvise! For instance, if you don’t have a cookie scoop, a regular tablespoon will do just fine. The most important thing is to have fun while making these delightful Pastel Dipped Oreo Cookie Balls!
Variations of Pastel Dipped Oreo Balls
One of the best things about Pastel Dipped Oreo Cookie Balls is their versatility. You can easily switch things up to suit your taste or the occasion. Here are a few fun variations I’ve tried that you might enjoy:
- Chocolate Dipped Oreo Balls: Instead of pastel chocolate, use dark or milk chocolate for a richer flavor. The contrast of the dark chocolate with the creamy filling is simply divine!
- Mint Oreo Balls: Swap regular Oreos for mint-flavored Oreos. The refreshing minty taste adds a delightful twist that’s perfect for the holidays.
- Peanut Butter Oreo Balls: Mix in some creamy peanut butter with the cream cheese for a nutty flavor. You can even use peanut butter chips for dipping!
- Rainbow Oreo Balls: Use a mix of different colored melting chocolates to create a vibrant, rainbow effect. This is especially fun for kids’ parties!
- Cookie Dough Oreo Balls: Add mini chocolate chips to the cream cheese mixture for a cookie dough-inspired treat. It’s like having two desserts in one!
These variations not only keep things exciting but also allow you to cater to different tastes and preferences. I love experimenting with new flavors, and I encourage you to do the same! The possibilities are endless when it comes to creating your own unique Pastel Dipped Oreo Cookie Balls.
Cooking Notes for Pastel Dipped Oreo Balls
As I’ve whipped up countless batches of Pastel Dipped Oreo Cookie Balls, I’ve gathered a few cooking notes that can help you achieve the best results. These little tips can make a big difference in your baking adventure!
- Room Temperature Ingredients: Always ensure your cream cheese is softened to room temperature. This makes mixing easier and helps create a smooth, creamy texture.
- Chilling Time: Don’t skip the chilling step! It’s essential for firming up the cookie balls, making them easier to dip in chocolate. If you’re in a hurry, the freezer works wonders too!
- Chocolate Consistency: If your melted chocolate is too thick, add a little more coconut oil or vegetable oil. This will help it coat the cookie balls evenly and give them a beautiful finish.
- Storage: Store your finished Pastel Dipped Oreo Cookie Balls in an airtight container in the fridge. They can last up to a week, but I doubt they’ll last that long—they’re just too delicious!
- Experiment with Flavors: Don’t hesitate to try different flavors of Oreos or chocolate. Each variation can lead to a delightful surprise!
These cooking notes are like little nuggets of wisdom I’ve picked up along the way. They’ll help you create the most scrumptious Pastel Dipped Oreo Cookie Balls that will leave everyone asking for seconds!
Serving Suggestions for Pastel Dipped Oreo Balls
Now that your Pastel Dipped Oreo Cookie Balls are ready, it’s time to think about how to present them! Serving these delightful treats can be just as fun as making them. Here are a few ideas that I love to use when showcasing my cookie balls:
- On a Decorative Platter: Arrange the cookie balls on a colorful platter. You can mix and match different flavors and colors for a vibrant display. It’s like a rainbow of sweetness!
- In Mini Cupcake Liners: Place each cookie ball in a mini cupcake liner. This not only adds a cute touch but also makes them easy to grab and enjoy. Perfect for parties!
- With Fresh Fruit: Serve your cookie balls alongside fresh fruit like strawberries or blueberries. The fruity freshness complements the rich flavors of the cookie balls beautifully.
- As Party Favors: Package a few cookie balls in clear bags tied with pastel ribbons. They make adorable party favors that guests can take home and enjoy later.
- On a Dessert Table: If you’re hosting a gathering, include your cookie balls on a dessert table filled with other sweet treats. They’ll stand out and be a crowd favorite!
These serving suggestions not only enhance the visual appeal of your Pastel Dipped Oreo Cookie Balls but also make them more enjoyable for your guests. I always find that a little creativity in presentation goes a long way in making any dessert feel extra special!
Tips for Making Perfect Pastel Dipped Oreo Balls
As I’ve crafted my fair share of Pastel Dipped Oreo Cookie Balls, I’ve gathered some golden tips that can elevate your cookie ball game to the next level. These little nuggets of wisdom will help ensure your treats turn out perfectly every time!
- Use Fresh Ingredients: Always check the expiration dates on your cream cheese and chocolate. Fresh ingredients make a world of difference in flavor and texture.
- Don’t Rush the Chilling: Allow the cookie balls to chill thoroughly before dipping. This helps them hold their shape and makes dipping a breeze.
- Experiment with Chocolate: Try different types of melting chocolate, like white chocolate or colored candy melts. Each type brings its own unique flavor and look!
- Keep It Clean: Use a fork or toothpick to dip, but keep a paper towel handy to wipe off excess chocolate. This keeps your presentation neat and tidy.
- Have Fun with Toppings: Get creative with your sprinkles and toppings! Mix and match colors, or even add a drizzle of contrasting chocolate for a fancy touch.
These tips are like little secrets I’ve learned through trial and error. They’ll help you create Pastel Dipped Oreo Cookie Balls that not only look stunning but taste absolutely divine. Happy baking!
Breakdown of Time for Pastel Dipped Oreo Balls
When it comes to making Pastel Dipped Oreo Cookie Balls, timing is everything! I love how this recipe is not only delicious but also quick to whip up. Here’s a simple breakdown of the time you’ll need to create these delightful treats:
- Prep Time: 20 minutes – This includes gathering your ingredients, crushing the Oreos, and mixing everything together. It’s a fun and engaging process that flies by!
- Chilling Time: 30 minutes – This step is crucial for firming up the cookie balls. You can use this time to clean up your workspace or prepare your toppings.
- Cooking Time: 10 minutes – Melting the chocolate and dipping the cookie balls is a quick process. Just be sure to work efficiently to keep the chocolate from hardening!
- Total Time: 1 hour – In just one hour, you’ll have a batch of scrumptious Pastel Dipped Oreo Cookie Balls ready to impress your family and friends!
With this time breakdown, you can easily fit this delightful recipe into your day. Whether you’re preparing for a special occasion or just treating yourself, these cookie balls are worth every minute spent in the kitchen!
Nutritional Information for Pastel Dipped Oreo Balls
As a passionate home cook, I always find it helpful to know the nutritional content of the treats I make. While Pastel Dipped Oreo Cookie Balls are undeniably a sweet indulgence, they can still fit into a balanced diet when enjoyed in moderation. Here’s a general breakdown of the nutritional information for one cookie ball, assuming you make about 24 balls from the recipe:
- Calories: Approximately 120 calories
- Fat: 7g (Saturated Fat: 4g)
- Carbohydrates: 14g (Sugars: 10g)
- Protein: 1g
- Fiber: 0g
Keep in mind that these values can vary based on the specific ingredients you use, especially if you opt for different types of chocolate or add-ins. I always recommend enjoying these delightful Pastel Dipped Oreo Cookie Balls as a special treat rather than a daily snack. They’re perfect for celebrations or when you want to share a little sweetness with loved ones!
Frequently Asked Questions about Pastel Dipped Oreo Balls
As I’ve shared my love for Pastel Dipped Oreo Cookie Balls, I’ve often received questions from fellow home cooks eager to try this delightful treat. Here are some of the most common questions I’ve encountered, along with my answers to help you on your baking journey!
Can I use different types of cookies instead of Oreos?
Absolutely! While Oreos are a classic choice, you can experiment with other cookies like chocolate sandwich cookies or even graham crackers. Just keep in mind that the flavor and texture may vary, but that’s part of the fun!
How long do these cookie balls last?
When stored in an airtight container in the refrigerator, your Pastel Dipped Oreo Cookie Balls can last up to a week. However, I doubt they’ll stick around that long—they’re just too delicious!
Can I freeze the cookie balls?
Yes, you can freeze them! Just make sure to place them in a single layer on a baking sheet until they’re firm, then transfer them to an airtight container. They can last for up to three months in the freezer. When you’re ready to enjoy them, simply let them thaw in the fridge.
What if my chocolate is too thick for dipping?
If your melted chocolate is too thick, don’t worry! You can add a little coconut oil or vegetable oil to thin it out. Just stir it in gradually until you reach your desired consistency. This will help your cookie balls get that smooth, shiny finish!
Can I make these cookie balls ahead of time?
Definitely! You can prepare the cookie balls a day or two in advance. Just make sure to keep them chilled until you’re ready to dip them in chocolate. This way, you can save time on the day of your event and still impress your guests!
These FAQs are just a glimpse into the wonderful world of Pastel Dipped Oreo Cookie Balls. I hope they help you feel more confident as you embark on your own baking adventure. Remember, the most important ingredient is the joy you bring to the kitchen!
Conclusion on Pastel Dipped Oreo Balls
In conclusion, Pastel Dipped Oreo Cookie Balls are not just a treat; they are a celebration of creativity and joy in the kitchen. With their delightful combination of flavors and textures, these cookie balls are sure to bring smiles to everyone who tries them. Whether you’re making them for a special occasion or just to indulge yourself, they are incredibly easy to whip up and can be customized to fit any theme or taste.
What I love most about this recipe is its versatility. You can play with different flavors, colors, and toppings, making each batch uniquely yours. Plus, they’re perfect for sharing with friends and family, creating sweet memories that last long after the last bite. So, gather your ingredients, roll up your sleeves, and dive into the delightful world of Pastel Dipped Oreo Cookie Balls. I promise you won’t regret it!


