Oil & Water Density Tower: Create a Stunning DIY Project
Introduction to Oil & Water Density Tower
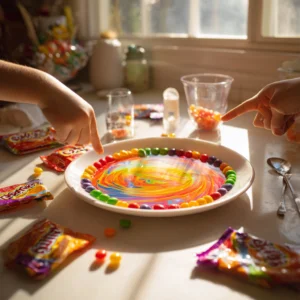
Creating a stunning oil & water density tower is not just a fun DIY project; it’s also an engaging way to explore the fascinating world of science right from your home. This project is perfect for busy moms and professionals looking to spark creativity in their children or simply enjoy a moment of relaxation through crafting. With just a few household materials, you can create a colorful display that visually demonstrates the concept of density. Let’s dive into this easy and educational craft that will captivate both kids and adults alike!
Why You’ll Love This Oil & Water Density Tower
The oil & water density tower is a fantastic project that combines creativity, affordability, and simplicity. It’s a great way to introduce scientific concepts to children while also providing a visually appealing decoration for your home. Plus, it’s a quick project that can be completed in just 15 minutes, making it perfect for busy schedules. You’ll love how easy it is to create something beautiful and educational at the same time!
Materials Needed for Oil & Water Density Tower
To create your oil & water density tower, you will need the following materials:
- Water – 1 cup: The base of your density tower.
- Vegetable oil – 1/2 cup: This will float on top of the water due to its lower density.
- Food coloring – a few drops: To add vibrant colors to your water layer.
- Clear glass or plastic container – 1: This will hold your density tower.
- Salt – 1 tablespoon: This will help demonstrate how density affects the behavior of liquids.
*For a printable full list of materials, see below.*
Tools Required for Oil & Water Density Tower
To successfully create your oil & water density tower, you will need the following tools:
- Spoon: For stirring the food coloring into the water.
- Measuring cups: To ensure accurate measurements of your liquids.
- Dropper (optional): For adding food coloring if you want more precision.
These tools are commonly found in most kitchens, making this project accessible for everyone.
How to Make Oil & Water Density Tower
Follow these simple step-by-step instructions to create your oil & water density tower:
- Pour Water: Start by pouring 1 cup of water into your clear container.
- Add Food Coloring: Add a few drops of food coloring to the water and stir well with a spoon until the color is evenly distributed.
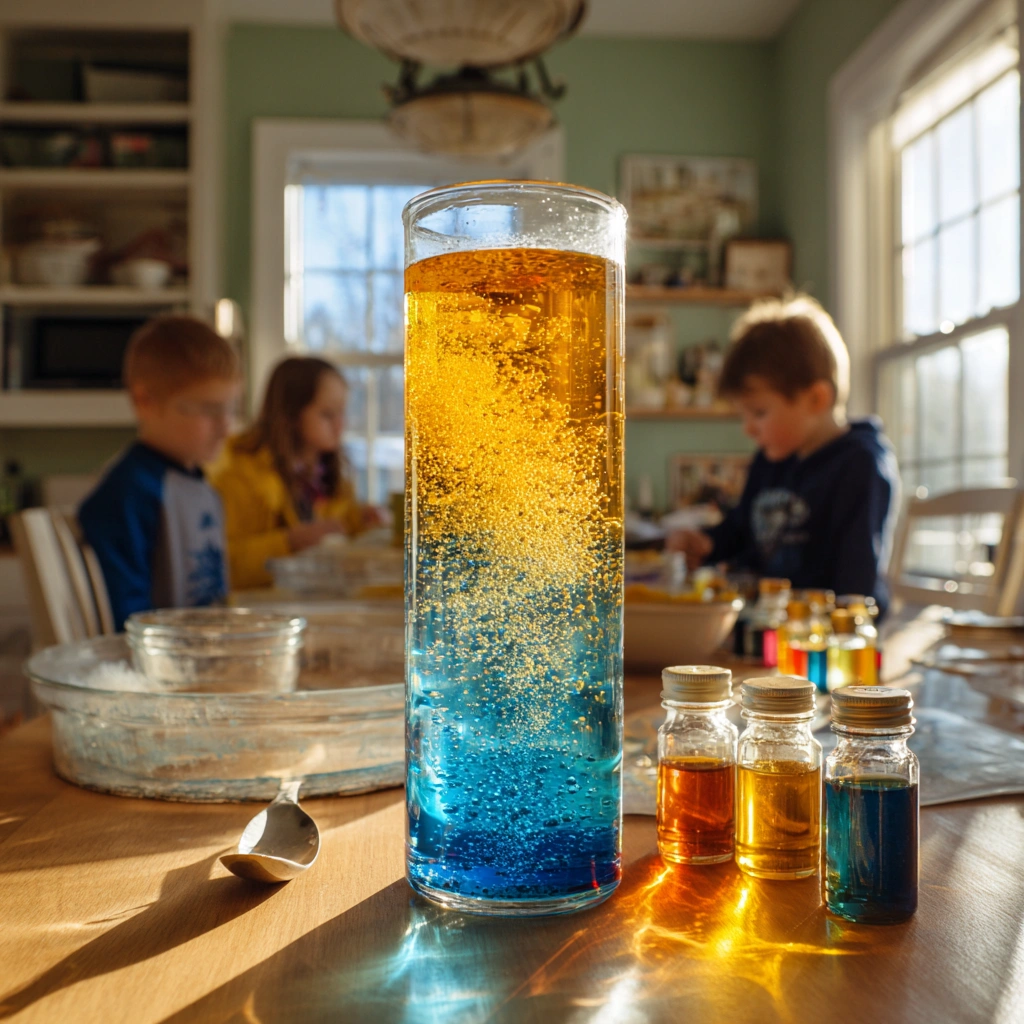
- Pour Oil: Slowly pour 1/2 cup of vegetable oil into the container. Watch as it floats on top of the colored water.
- Add Salt: Carefully add 1 tablespoon of salt to the water. Observe how the salt sinks through the oil, creating a beautiful layered effect.
- Observe: Take a moment to observe the distinct layers created by the different densities of the liquids.
Tips for Best Results
To ensure your oil & water density tower turns out beautifully, consider the following tips:
- Use different colors of food coloring for a more vibrant effect.
- Experiment with different types of oils to see how they behave in the tower.
- Pour the oil slowly to maintain distinct layers and prevent mixing.
Project Variations
Get creative with your oil & water density tower by trying out these variations:
- Color Combinations: Use multiple colors of food coloring to create a rainbow effect.
- Seasonal Themes: Adapt the colors to match seasonal themes, such as red and green for Christmas or pastels for spring.
- Container Styles: Experiment with different shapes and sizes of containers for unique displays.
Decoration and Usage Ideas
Once your oil & water density tower is complete, consider these decoration and usage ideas:
- Educational Display: Use it as a teaching tool to explain density to children.
- Home Decor: Place it on a shelf or table as a colorful decoration.
- Party Centerpiece: Use it as a fun centerpiece for kids’ parties or science-themed events.
FAQs about Oil & Water Density Tower
Q: Can I use other types of liquids instead of vegetable oil?
A: Yes! You can experiment with different oils like olive oil or coconut oil to see how they behave.
Q: How long will the density tower last?
A: The tower can last for several days, but it’s best to keep it in a cool place to prevent any separation.
Q: Is this project safe for children?
A: Yes, but adult supervision is recommended, especially when handling salt and food coloring.
Final Thoughts
Creating an oil & water density tower is not only a fun and educational project but also a wonderful way to spend quality time with your family. It encourages curiosity and creativity while providing a beautiful display for your home. So gather your materials, set aside a few minutes, and enjoy the process of crafting something unique. Remember, the joy of DIY lies in the journey, so embrace the mess and have fun with it!
Introduction to Oil & Water Density Tower
Creating a stunning oil & water density tower is not just a fun DIY project; it’s also an engaging way to explore the fascinating world of science right from your home. I remember the first time I made one with my kids; their eyes lit up as they watched the colorful layers form. This project is perfect for busy moms and professionals looking to spark creativity in their children or simply enjoy a moment of relaxation through crafting.
With just a few household materials, you can create a colorful display that visually demonstrates the concept of density. It’s amazing how something so simple can lead to such profound learning moments. I often find that these hands-on activities not only teach scientific principles but also provide a wonderful opportunity for bonding.
Let’s dive into this easy and educational craft that will captivate both kids and adults alike! Whether you’re a seasoned crafter or just starting out, this project is designed to be accessible and enjoyable. So, gather your materials, and let’s get started on this delightful journey of discovery!
Why You’ll Love This Oil & Water Density Tower
The oil & water density tower is a fantastic project that combines creativity, affordability, and simplicity. I can’t tell you how many times I’ve turned to this project when I needed a quick and engaging activity for my kids. It’s not just about the science; it’s about the joy of creating something together.
This project is a wonderful way to introduce scientific concepts to children. I remember explaining density to my kids while we watched the oil float on top of the water. Their eyes widened with curiosity, and it sparked so many questions! It’s amazing how a simple DIY project can lead to such profound learning moments.
Plus, it’s a visually appealing decoration for your home. Once completed, the colorful layers of the density tower can brighten up any room. I often place ours on the kitchen counter, and it never fails to catch the attention of guests. It’s a conversation starter and a beautiful reminder of the fun we had creating it together.
And let’s not forget the time factor! This is a quick project that can be completed in just 15 minutes, making it perfect for busy schedules. As a mom juggling work and family, I appreciate how easy it is to set up. You’ll love how simple it is to create something beautiful and educational at the same time!
Materials Needed for Oil & Water Density Tower
To create your oil & water density tower, you will need the following materials:
- Water – 1 cup: The base of your density tower. It’s amazing how something so simple can serve as the foundation for such a colorful display!
- Vegetable oil – 1/2 cup: This will float on top of the water due to its lower density. Watching it glide over the water is truly mesmerizing.
- Food coloring – a few drops: To add vibrant colors to your water layer. I love experimenting with different colors to see how they mix and create new shades.
- Clear glass or plastic container – 1: This will hold your density tower. A clear container allows you to fully appreciate the beautiful layers you create.
- Salt – 1 tablespoon: This will help demonstrate how density affects the behavior of liquids. It’s fascinating to see how the salt interacts with the oil and water!
*For a printable full list of materials, see below.*
Tools Required for Oil & Water Density Tower
To successfully create your oil & water density tower, you will need the following tools:
- Spoon: This handy tool is essential for stirring the food coloring into the water. I always keep a few spoons on hand for crafting; they’re so versatile!
- Measuring cups: Accurate measurements are key to achieving the perfect layers in your density tower. I love using my colorful measuring cups; they add a bit of fun to the process!
- Dropper (optional): If you want to add food coloring with more precision, a dropper can be a great addition. It allows you to control the amount of color you add, which can lead to some beautiful effects.
These tools are commonly found in most kitchens, making this project accessible for everyone. I remember the first time I gathered my supplies; it felt like a mini adventure! The best part is that you don’t need to invest in fancy equipment—just use what you have at home. So, gather your tools, and let’s get ready to create something magical together!
How to Make Oil & Water Density Tower
Follow these simple step-by-step instructions to create your oil & water density tower. I remember the excitement my kids felt as we went through each step together, and I hope you experience the same joy!
- Pour Water: Start by pouring 1 cup of water into your clear container. This will be the base of your density tower, and it’s always satisfying to see the water fill the container.
- Add Food Coloring: Add a few drops of food coloring to the water and stir well with a spoon until the color is evenly distributed. I love watching the color swirl and mix; it’s like a mini science experiment right in your kitchen!
- Pour Oil: Slowly pour 1/2 cup of vegetable oil into the container. Watch as it floats on top of the colored water. It’s such a magical moment when the oil glides over the water, creating that beautiful separation.
- Add Salt: Carefully add 1 tablespoon of salt to the water. Observe how the salt sinks through the oil, creating a beautiful layered effect. This part always amazes my kids; they can’t believe how the salt behaves differently than the liquids!
- Observe: Take a moment to observe the distinct layers created by the different densities of the liquids. I encourage you to talk about what you see with your kids; it’s a great way to spark curiosity and discussion about science!
Enjoy the process and don’t worry if things don’t turn out perfectly the first time. Crafting is all about exploration and learning, and every attempt is a step towards mastering the art of DIY!
Tips for Best Results
To ensure your oil & water density tower turns out beautifully, consider the following tips:
- Use different colors of food coloring for a more vibrant effect. I love mixing colors to create stunning gradients that catch the eye. It’s like painting with science!
- Experiment with different types of oils to see how they behave in the tower. Each oil has its own unique density, and it’s fascinating to observe how they layer differently. I once tried coconut oil, and the results were surprisingly beautiful!
- Pour the oil slowly to maintain distinct layers and prevent mixing. This step is crucial for achieving that stunning separation. I often remind my kids to take their time during this part; the anticipation makes it even more exciting!
Remember, crafting is all about exploration and creativity. Don’t be afraid to try new things and make adjustments as you go. Each attempt is a learning experience, and the joy of DIY lies in the journey. So, gather your materials, embrace the process, and have fun creating your oil & water density tower!
Project Variations
Get creative with your oil & water density tower by trying out these fun variations! I love how this project can be customized to fit different themes and occasions, making it even more special. Here are some ideas to inspire your creativity:
- Color Combinations: Use multiple colors of food coloring to create a rainbow effect. I remember the first time we tried this; the vibrant layers were absolutely stunning! It’s a great way to engage kids and let them choose their favorite colors.
- Seasonal Themes: Adapt the colors to match seasonal themes, such as red and green for Christmas or pastels for spring. This not only makes the project festive but also allows for a fun discussion about the seasons and celebrations. I often change our density tower to reflect the holidays, and it adds a lovely touch to our home decor.
- Container Styles: Experiment with different shapes and sizes of containers for unique displays. I’ve used everything from mason jars to tall vases, and each one creates a different visual effect. It’s fascinating to see how the shape of the container can change the way the layers appear!
These variations not only enhance the visual appeal of your oil & water density tower but also provide an opportunity for learning and creativity. Don’t hesitate to let your imagination run wild! Each variation can lead to new discoveries and fun moments with your family. So gather your materials, try out these ideas, and enjoy the process of crafting something truly unique!
Decoration and Usage Ideas
Once your oil & water density tower is complete, you’ll find it not only serves as a beautiful craft but also has various practical uses around your home. I love how this project can transition from a fun activity to a delightful decoration or educational tool. Here are some ideas to inspire you:
- Educational Display: Use it as a teaching tool to explain density to children. I often set it up on the kitchen table during science lessons, and it sparks so many questions! Kids are naturally curious, and this visual aid makes learning about density engaging and fun.
- Home Decor: Place it on a shelf or table as a colorful decoration. The vibrant layers can brighten up any room, and it’s a great conversation starter when guests come over. I love how it adds a touch of creativity to our home, reminding us of the fun we had making it together.
- Party Centerpiece: Use it as a fun centerpiece for kids’ parties or science-themed events. Imagine the delight on your child’s face when they see their very own density tower as the focal point of the party! It’s not only visually appealing but also a great way to introduce guests to a little science.
These ideas not only enhance the enjoyment of your oil & water density tower but also allow you to share the joy of crafting and learning with others. I encourage you to think outside the box and find new ways to incorporate your creation into your daily life. Whether it’s for education, decoration, or celebration, your density tower is sure to bring smiles and spark curiosity!
FAQs about Oil & Water Density Tower
Q: Can I use other types of liquids instead of vegetable oil?
A: Yes! You can experiment with different oils like olive oil or coconut oil to see how they behave. Each type of oil has its own unique density, which can lead to fascinating results. I remember trying out avocado oil once, and it created a lovely layered effect that surprised us all!
Q: How long will the density tower last?
A: The tower can last for several days, but it’s best to keep it in a cool place to prevent any separation. I’ve found that if you keep it out of direct sunlight, the layers stay vibrant and distinct for longer. Just be sure to handle it gently, as too much movement can mix the layers.
Q: Is this project safe for children?
A: Yes, but adult supervision is recommended, especially when handling salt and food coloring. I always make sure to supervise my kids during the project, not just for safety but also to share in the excitement of watching the layers form. It’s a great opportunity to teach them about safety in the kitchen while having fun!
Final Thoughts
Creating an oil & water density tower is not only a fun and educational project but also a wonderful way to spend quality time with your family. I cherish the moments spent crafting with my kids, watching their faces light up as they see science come to life right before their eyes. This project encourages curiosity and creativity, making it a perfect blend of learning and fun.
As you gather your materials and set aside a few minutes, remember that the process is just as important as the final product. Embrace the mess, the laughter, and the little surprises that come along the way. I’ve learned that some of the best memories are made when things don’t go exactly as planned. Each attempt is a step towards mastering the art of DIY, and every layer in your density tower tells a story of exploration and discovery.
So, whether you’re a busy mom looking to engage your children or a professional seeking a creative outlet, this oil & water density tower project is a fantastic choice. Enjoy the journey, celebrate your creativity, and most importantly, have fun with it! Your unique creation will not only beautify your home but also serve as a reminder of the joy of crafting together.
Print
Oil & Water Density Tower: Create a Stunning DIY Project
Description
Create a stunning oil and water density tower that visually demonstrates the concept of density using simple household materials.
Instructions
- Pour 1 cup of water into the clear container.
- Add a few drops of food coloring to the water and stir well.
- Slowly pour 1/2 cup of vegetable oil into the container. Observe how it floats on top of the water.
- Carefully add 1 tablespoon of salt to the water and watch as it sinks through the oil.
- Observe the layers created by the different densities of the liquids.
Keywords: Oil Density Tower, Water Density Tower, DIY Science Project, Educational Craft