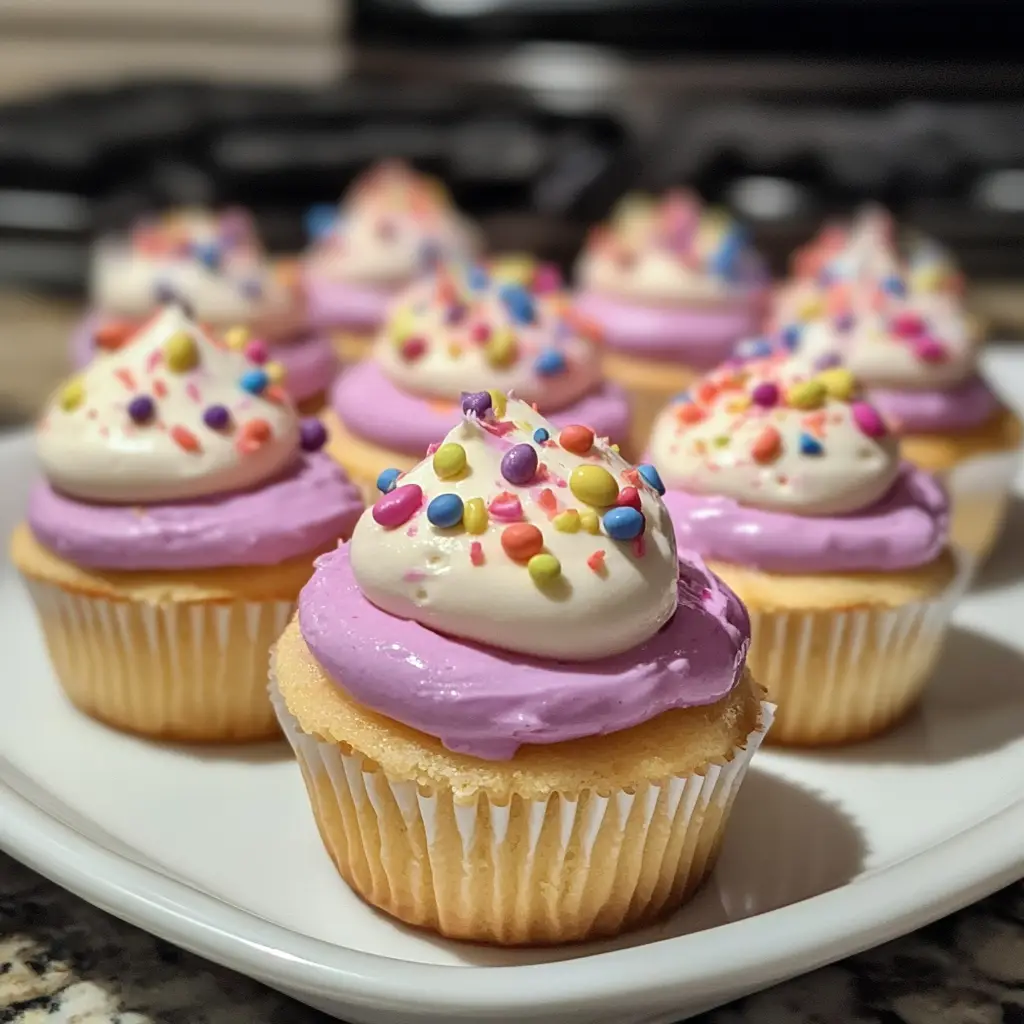
Introduction to Mini Easter Cheesecakes Recipe
As a passionate home cook, I find joy in creating delightful treats that bring smiles to my family and friends. Easter is one of those special times when I love to whip up something sweet and festive. This year, I decided to try my hand at Mini Easter Cheesecakes, and let me tell you, they were a hit! These little bites of creamy goodness are not only adorable but also bursting with flavor.
Picture this: a sunny spring afternoon, the scent of blooming flowers wafting through the air, and a table adorned with colorful decorations. I wanted to create a dessert that matched the vibrant spirit of the season. Mini Easter Cheesecakes fit the bill perfectly! They are easy to make, and their individual portions make them perfect for sharing during family gatherings or Easter brunch.
What I love most about this recipe is its versatility. You can customize the toppings to suit your taste or even let the kids get creative with their decorations. Whether you choose to top them with fresh berries, chocolate eggs, or a drizzle of caramel, each mini cheesecake becomes a canvas for your culinary imagination.
In this article, I’ll guide you through the process of making these delightful treats, sharing tips and tricks I’ve learned along the way. So, roll up your sleeves, and let’s dive into the world of Mini Easter Cheesecakes. Trust me, your taste buds will thank you!
Ingredients for Mini Easter Cheesecakes Recipe
Before we embark on this delicious journey, let’s gather our ingredients. Having everything ready makes the cooking process smoother and more enjoyable. I always find that using high-quality ingredients elevates the flavor of my dishes, and these Mini Easter Cheesecakes are no exception. Here’s what you’ll need:
Main Ingredients
- 1 ½ cups of graham cracker crumbs
- ½ cup of unsalted butter, melted
- 2 cups of cream cheese, softened
- ¾ cup of granulated sugar
- 2 large eggs
- 1 teaspoon of vanilla extract
- ½ cup of sour cream
- 1 tablespoon of lemon juice
When I make these cheesecakes, I always opt for full-fat cream cheese. It gives the filling that rich, creamy texture that makes each bite feel like a hug. Also, using fresh lemon juice adds a lovely brightness that balances the sweetness perfectly.
Optional Add-ons
- Fresh berries (strawberries, blueberries, or raspberries)
- Chocolate eggs or mini candies for decoration
- Whipped cream for topping
- Caramel or chocolate sauce for drizzling
- Shredded coconut for a festive touch
These optional add-ons are where the fun really begins! I love to let my kids choose their toppings. Sometimes, we even have a mini decorating contest! You can mix and match to create your own unique flavor combinations. The possibilities are endless, and that’s what makes this recipe so special.
Now that we have our ingredients ready, let’s move on to the next step: preparing these delightful Mini Easter Cheesecakes!
How to Prepare Mini Easter Cheesecakes Recipe
Now that we have our ingredients all lined up, it’s time to roll up our sleeves and get cooking! Making Mini Easter Cheesecakes is a fun and rewarding process. I love how each step brings us closer to those creamy, dreamy bites of joy. Let’s dive into the preparation!
Step 1: Prepare the Crust
First things first, we need to create a delicious crust that will hold all that cheesecake goodness. In a mixing bowl, combine the graham cracker crumbs and melted butter. Stir until the crumbs are evenly coated and resemble wet sand.
Tips for Step 1
- For an extra flavor boost, consider adding a pinch of cinnamon to the crumb mixture.
- Press the mixture firmly into the bottom of your muffin tin to create a sturdy base.
- If you don’t have graham crackers, crushed cookies or even pretzels can work as a fun alternative!
Step 2: Make the Cheesecake Filling
Next up, let’s whip up that luscious cheesecake filling! In a large mixing bowl, beat the softened cream cheese until it’s smooth and creamy. Gradually add in the sugar, mixing until well combined. Then, add the eggs, one at a time, followed by the vanilla extract, sour cream, and lemon juice. Mix until everything is just combined.
Tips for Step 2
- Make sure your cream cheese is at room temperature for a smooth filling.
- Don’t overmix the batter; just mix until everything is combined to avoid cracks in your cheesecakes.
- Feel free to experiment with flavors! A splash of almond extract can add a lovely twist.
Step 3: Assemble the Mini Cheesecakes
Now comes the fun part—assembling our mini cheesecakes! Spoon the cheesecake filling over the prepared crusts in the muffin tin, filling each cup about ¾ full. This allows room for the cheesecakes to rise slightly while baking.
Tips for Step 3
- Use a cookie scoop for even portions; it makes the process quick and easy!
- Tap the muffin tin gently on the counter to release any air bubbles in the filling.
Step 4: Bake the Mini Cheesecakes
It’s time to bake! Preheat your oven to 325°F (160°C). Place the muffin tin in the oven and bake for about 20-25 minutes, or until the edges are set but the center still has a slight jiggle. This ensures a creamy texture.
Tips for Step 4
- To prevent cracking, you can place a shallow pan of water in the oven while baking. This creates steam and keeps the cheesecakes moist.
- Keep an eye on them! Ovens can vary, so check a few minutes before the timer goes off.
Step 5: Cool and Decorate
Once baked, remove the cheesecakes from the oven and let them cool in the pan for about 10 minutes. Then, transfer them to a wire rack to cool completely. Once cooled, it’s time to decorate! Top with your favorite add-ons, like fresh berries or a drizzle of chocolate sauce.
Tips for Step 5
- Chill the cheesecakes in the fridge for at least an hour before serving for the best texture.
- Get creative with your toppings! A sprinkle of shredded coconut can add a festive touch.
And there you have it! Each step brings us closer to those delightful Mini Easter Cheesecakes. I can already imagine the smiles on my family’s faces when they take their first bite. Let’s keep the momentum going and move on to the next section!
Equipment Needed for Mini Easter Cheesecakes Recipe
Before we dive into the kitchen, let’s gather the essential tools for making these delightful Mini Easter Cheesecakes. Having the right equipment on hand makes the process smoother and more enjoyable. Here’s what you’ll need:
- Muffin Tin: A standard 12-cup muffin tin is perfect for baking these mini cheesecakes. If you don’t have one, you can use a silicone muffin mold, which makes for easy removal.
- Mixing Bowls: A couple of mixing bowls in different sizes will help you combine the crust and filling without any fuss.
- Electric Mixer: An electric mixer or a hand whisk will make beating the cream cheese and mixing the filling a breeze. If you’re feeling adventurous, you can use a sturdy whisk, but be prepared for a workout!
- Measuring Cups and Spoons: Accurate measurements are key to achieving the perfect cheesecake. Make sure you have these handy.
- Rubber Spatula: A rubber spatula is great for scraping down the sides of the bowl and ensuring everything is well mixed.
- Wire Rack: A wire rack is essential for cooling the cheesecakes evenly after baking. If you don’t have one, a plate will work in a pinch.
With these tools at your disposal, you’ll be well-equipped to create your Mini Easter Cheesecakes. I always find that having everything organized before I start cooking makes the experience more enjoyable. So, let’s get ready to bake some deliciousness!
Variations of Mini Easter Cheesecakes Recipe
One of the things I adore about Mini Easter Cheesecakes is their versatility. You can easily switch things up to suit your taste or the occasion. Here are a few fun variations that I’ve tried and loved:
- Chocolate Mini Cheesecakes: For a rich twist, add melted chocolate to the cheesecake filling. You can also use chocolate cookie crumbs for the crust. It’s like a chocolate lover’s dream!
- Fruit Swirl Cheesecakes: Before baking, swirl in some fruit puree, like raspberry or strawberry, into the filling. This not only adds flavor but also creates a beautiful marbled effect.
- Carrot Cake Cheesecakes: Mix in some grated carrots and spices like cinnamon and nutmeg into the filling for a delightful carrot cake flavor. Top with cream cheese frosting for an extra treat!
- Nutty Cheesecakes: Incorporate crushed nuts, such as pecans or walnuts, into the crust for added texture. You can also sprinkle some on top for a crunchy finish.
- Mini Lemon Cheesecakes: Increase the lemon juice and zest in the filling for a refreshing citrus flavor. It’s perfect for springtime gatherings!
These variations not only keep things exciting but also allow you to cater to different tastes. I love experimenting with new flavors, and I encourage you to get creative in your kitchen! Each variation brings its own unique charm to the table, making every batch of Mini Easter Cheesecakes a delightful surprise.
Cooking Notes for Mini Easter Cheesecakes Recipe
As I’ve learned through my culinary adventures, a few cooking notes can make all the difference when preparing Mini Easter Cheesecakes. Here are some tips that I always keep in mind to ensure my cheesecakes turn out perfectly every time:
- Room Temperature Ingredients: Make sure your cream cheese, eggs, and sour cream are at room temperature. This helps create a smooth filling without lumps.
- Don’t Overbake: Keep an eye on your cheesecakes while they bake. They should be set around the edges but still slightly jiggly in the center. Overbaking can lead to a dry texture.
- Chill Time: Patience is key! Allow the cheesecakes to cool completely before chilling them in the fridge. This helps them firm up and enhances the flavors.
- Use a Water Bath: If you want to take it a step further, consider using a water bath while baking. It helps maintain moisture and prevents cracking.
- Storage: These mini cheesecakes can be stored in an airtight container in the fridge for up to a week. They also freeze well, making them a great make-ahead dessert!
By keeping these cooking notes in mind, I’ve found that my Mini Easter Cheesecakes come out consistently delicious. Each bite is a creamy, dreamy delight that my family can’t resist. Now, let’s move on to how to serve these delightful treats!
Serving Suggestions for Mini Easter Cheesecakes Recipe
When it comes to serving my Mini Easter Cheesecakes, I love to get a little creative! Presentation can elevate the experience, making these treats even more delightful. Here are some of my favorite serving suggestions that always impress my family and friends:
- Festive Platter: Arrange the mini cheesecakes on a colorful platter, garnished with fresh mint leaves or edible flowers. It adds a touch of spring and makes for a beautiful centerpiece.
- Individual Cups: Serve each cheesecake in its own decorative cupcake liner. This not only looks charming but also makes it easy for guests to grab and enjoy!
- Drizzle and Dazzle: Just before serving, drizzle some chocolate or caramel sauce over the top. It adds a delicious touch and makes them look extra tempting.
- Berry Bliss: Top each cheesecake with a mix of fresh berries. Strawberries, blueberries, and raspberries not only add a pop of color but also a burst of flavor!
- Whipped Cream Clouds: A dollop of whipped cream on top can take these mini cheesecakes to the next level. It’s like a fluffy cloud of sweetness!
These serving suggestions not only enhance the visual appeal but also add layers of flavor and texture. I always find that a little extra effort in presentation makes my desserts feel even more special. So, whether it’s for an Easter gathering or a simple family dinner, these Mini Easter Cheesecakes are sure to steal the show!
Tips for Perfect Mini Easter Cheesecakes Recipe
As I’ve baked my fair share of Mini Easter Cheesecakes, I’ve gathered a treasure trove of tips that can help you achieve cheesecake perfection. These little nuggets of wisdom can make all the difference in your baking journey. Here’s what I’ve learned:
- Preheat Your Oven: Always preheat your oven before baking. This ensures even cooking and helps your cheesecakes rise beautifully.
- Use a Toothpick Test: To check for doneness, gently insert a toothpick into the center. If it comes out clean or with a few moist crumbs, they’re ready!
- Don’t Rush the Cooling: Allow your cheesecakes to cool gradually. Rapid temperature changes can cause cracks, so patience is key!
- Experiment with Flavors: Don’t hesitate to try different flavorings in your filling. A hint of orange zest or a splash of vanilla can elevate the taste.
- Chill Before Serving: For the best texture, chill your cheesecakes for at least an hour before serving. This allows the flavors to meld and the filling to firm up.
With these tips in your back pocket, you’ll be well on your way to creating Mini Easter Cheesecakes that are not only delicious but also visually stunning. I can’t wait for you to experience the joy of sharing these delightful treats with your loved ones!
Breakdown of Time for Mini Easter Cheesecakes Recipe
As a home cook, I know that time management is key in the kitchen. When I’m whipping up my Mini Easter Cheesecakes, I like to keep track of how long each step takes. This way, I can plan my day better and ensure everything runs smoothly. Here’s a quick breakdown of the time you’ll need:
- Prep Time: Approximately 20 minutes. This includes gathering your ingredients, preparing the crust, and mixing the cheesecake filling. It’s a great time to get the kids involved, too!
- Cooking Time: About 20-25 minutes. While the cheesecakes are baking, you can tidy up the kitchen or prepare your toppings. It’s a win-win!
- Total Time: Roughly 1 hour. This includes cooling time before you can decorate and serve. Patience is key, but trust me, it’s worth the wait!
By keeping this timeline in mind, you can plan your baking session more effectively. I always find that knowing how long each step takes helps me enjoy the process even more. So, let’s get ready to create some delicious Mini Easter Cheesecakes!
Nutritional Information for Mini Easter Cheesecakes Recipe
As a passionate home cook, I believe that enjoying delicious treats like Mini Easter Cheesecakes can be part of a balanced lifestyle. While these little delights are certainly indulgent, it’s always good to know what we’re putting into our bodies. Here’s a general breakdown of the nutritional information for one Mini Easter Cheesecake, assuming the recipe yields 12 servings:
- Calories: Approximately 180 calories
- Protein: 3 grams
- Fat: 12 grams
- Carbohydrates: 15 grams
- Sugar: 8 grams
- Fiber: 0.5 grams
Keep in mind that these values can vary based on the specific ingredients you use and any optional add-ons you choose to include. For instance, if you top your cheesecakes with fresh berries or whipped cream, the nutritional content will change slightly. I always encourage my family to enjoy these treats in moderation, savoring each bite while celebrating the joy of cooking together.
So, as you whip up your Mini Easter Cheesecakes, remember that it’s not just about the numbers; it’s about the love and creativity you put into each delicious bite!
Frequently Asked Questions about Mini Easter Cheesecakes Recipe
As I’ve shared my Mini Easter Cheesecakes with friends and family, I’ve noticed a few common questions pop up. It’s always great to clarify any doubts, especially when it comes to baking these delightful treats. Here are some frequently asked questions that I hope will help you on your cheesecake journey!
Can I make Mini Easter Cheesecakes ahead of time?
Absolutely! In fact, I often make them a day in advance. Once they’re baked and cooled, just store them in an airtight container in the fridge. This allows the flavors to meld beautifully, and they’ll be ready to serve when you need them!
Can I freeze Mini Easter Cheesecakes?
Yes, you can! I love to freeze them for a quick dessert option later. Just wrap each cheesecake tightly in plastic wrap and place them in a freezer-safe container. They can last up to three months in the freezer. When you’re ready to enjoy, simply thaw them in the fridge overnight.
What can I use instead of graham crackers for the crust?
If you’re out of graham crackers, don’t worry! I’ve used crushed cookies like Oreos or even vanilla wafers with great success. You can also try crushed pretzels for a salty-sweet twist. The key is to find something that holds together well when mixed with butter.
How do I know when the cheesecakes are done baking?
Great question! The edges should be set, while the center will still have a slight jiggle. This ensures a creamy texture. If you insert a toothpick, it should come out clean or with a few moist crumbs. Just remember, they will continue to firm up as they cool!
Can I use low-fat cream cheese or sour cream?
Yes, you can! While I personally prefer full-fat cream cheese for that rich, creamy texture, using low-fat options can still yield delicious results. Just keep in mind that the texture may be slightly different, but they’ll still taste great!
What toppings do you recommend for Mini Easter Cheesecakes?
The sky’s the limit! I love to top mine with fresh berries, chocolate eggs, or a drizzle of caramel sauce. Whipped cream and shredded coconut also add a lovely touch. Feel free to get creative and let your taste buds guide you!
These questions are just a few of the many that can arise when making Mini Easter Cheesecakes. I hope my answers help you feel more confident in your baking adventure. Remember, the most important ingredient is the love you put into each cheesecake. Happy baking!
Conclusion on Mini Easter Cheesecakes Recipe
As I wrap up this delightful journey of creating Mini Easter Cheesecakes, I can’t help but reflect on the joy they bring to my family and friends. These little treats are not just desserts; they are a celebration of creativity, love, and the spirit of togetherness. With their creamy texture and endless topping possibilities, they cater to every palate and occasion.
What I love most about this recipe is its simplicity. Even if you’re a beginner in the kitchen, you can whip up these cheesecakes with ease. Plus, the fun of decorating them allows for a personal touch that makes each cheesecake unique. Whether you’re hosting an Easter brunch or simply looking to brighten up a spring day, these mini cheesecakes are sure to impress.
So, gather your ingredients, invite your loved ones into the kitchen, and let the laughter and creativity flow. I promise that the smiles and compliments you receive will make every moment spent baking worthwhile. Happy baking, and may your Mini Easter Cheesecakes bring as much joy to your table as they do to mine!


