Introduction to Midnight Toast Glow Foam
Welcome to the magical world of Midnight Toast Glow Foam! This enchanting DIY project is perfect for adding a whimsical touch to your home decor, especially as the nights grow longer. I love how simple and fun it is to create glowing shapes that light up the dark, making it a fantastic activity for families, teachers, or anyone looking to spark their creativity. With just a few materials and a sprinkle of imagination, you can transform your space into a cozy haven filled with glowing stars and moons. Let’s embark on this delightful crafting adventure together!
Why You’ll Love This Midnight Toast Glow Foam
There’s something truly special about crafting with Midnight Toast Glow Foam. It’s not just easy and affordable; it’s a wonderful way to unleash your creativity while spending quality time with your kids. I cherish those moments when we gather around the table, paintbrushes in hand, laughing and sharing ideas. Plus, the satisfaction of seeing our glowing creations light up the night brings a sense of joy and relaxation that’s simply magical!
Materials and Tools Needed for Midnight Toast Glow Foam
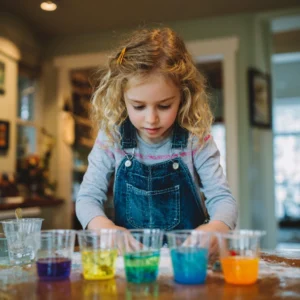
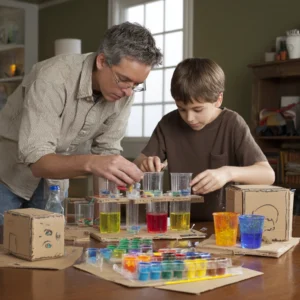
To create your enchanting nighttime decor with Midnight Toast Glow Foam, you’ll need a few essential materials and tools. Here’s what you’ll gather:
- Midnight Toast Glow Foam: This is the star of the show! Its soft texture and glow-in-the-dark properties make it perfect for crafting.
- Craft knife or scissors: These will help you cut the foam into your desired shapes. Safety is key, so choose what you’re most comfortable with!
- Hot glue gun and glue sticks: A must-have for securely attaching your LED lights to the foam. Just be careful with the hot glue!
- LED fairy lights: These will illuminate your creations beautifully, adding that magical glow at night.
- Paint (optional): If you want to add some color, acrylic paint is a great choice. It’s vibrant and easy to work with.
- Paintbrush (optional): For applying paint to your foam shapes, a simple brush will do the trick.
- Protective gloves: Always a good idea when working with hot glue and sharp tools to keep your hands safe.
- Cutting mat: This will protect your surfaces while you cut and craft, making cleanup a breeze.
These materials are not only easy to find but can also be budget-friendly. You can often find eco-friendly alternatives, like using recycled materials for your foam shapes. Let your creativity shine while keeping it safe and sustainable!
How to Make Midnight Toast Glow Foam
Creating enchanting nighttime decor with Midnight Toast Glow Foam is a delightful journey that sparks creativity and brings a touch of magic to your home. Let’s dive into the steps to craft your glowing masterpieces!
Step 1: Prepare Your Workspace
First things first, let’s set the stage for our crafting adventure! Lay down a cutting mat to protect your surfaces and keep everything organized. A clean workspace not only helps you find your materials easily but also keeps the crafting chaos to a minimum. Trust me, a tidy area makes for a much more enjoyable experience! Plus, it’s a great way to get the kids involved in setting up their crafting zone.
Step 2: Cut the Midnight Toast Glow Foam
Now, grab your craft knife or scissors and let’s get cutting! Carefully slice the Midnight Toast Glow Foam into shapes that inspire you—think stars, moons, or fluffy clouds. If you’re using a craft knife, remember to keep your fingers clear of the blade. Safety first! I always remind my kids to take their time and enjoy the process. The shapes you create will be the stars of your nighttime decor!
Step 3: Optional Painting
If you want to add a splash of color to your foam shapes, now’s the time to break out the acrylic paint! Use a paintbrush to apply your favorite hues, and let your imagination run wild. Once painted, allow the shapes to dry completely. The soft shimmer of the glow paint under the lamp felt magical when I did this with my kids, and it’s a great way to bond over creativity! Remember, the more vibrant the colors, the more enchanting your decor will look at night.
Step 4: Attach LED Fairy Lights
Next, it’s time to bring your creations to life! Using a hot glue gun, carefully attach LED fairy lights to the back of your foam shapes. Make sure the lights are secure, but be cautious—hot glue can be tricky! I always wear protective gloves during this step to avoid any mishaps. The glow from the lights will soon transform your decor into a whimsical wonderland! If you want to get extra creative, you can even wrap the lights around the shapes for a more dynamic look.
Step 5: Arrange Your Decor
Now comes the fun part—arranging your glowing shapes! Decide where you want to display them, whether on a wall or ceiling. Use additional glue if needed to hold them in place. I love to create a little scene, like a starry night sky, and watching my kids’ faces light up with excitement is priceless. Get creative with the layout; there are no rules here! You can even mix and match sizes for a more dynamic display.
Step 6: Enjoy the Glow!
Finally, it’s time for the grand reveal! Turn on the LED lights at night and watch as your enchanting decor glows beautifully. The soft illumination creates a cozy atmosphere that’s perfect for family gatherings or a spooky Halloween night. I can’t help but smile every time I see our creations lighting up the room. It’s a simple joy that brings everyone together! So gather your family, turn off the lights, and let the magic unfold!
Tips for Best Results
- Always test your hot glue gun on a scrap piece of foam first to avoid any mishaps.
- If your shapes don’t stick well, try using a stronger adhesive or additional glue dots.
- For a more dynamic display, mix different sizes and colors of foam shapes.
- Involve your kids in the design process to keep them engaged and excited!
- Remember to supervise younger children when using sharp tools and hot glue.
Theme and Design Variations
- Seasonal Themes: Create autumn leaves and pumpkins for Halloween, or snowflakes and stars for winter.
- Color Schemes: Use pastel colors for a soft, dreamy look or vibrant hues for a lively atmosphere.
- Kid-Friendly Versions: Let kids design their own shapes, like animals or favorite characters, to personalize their decor.
- Glow-in-the-Dark Paint: Add glow-in-the-dark paint over the foam for an extra magical effect!
- Nature-Inspired: Craft shapes like flowers, butterflies, or trees for a whimsical garden theme.
Display and Use Ideas
Your enchanting Midnight Toast Glow Foam creations can brighten up any space! Here are some fun ways to display and use them:
- Home Decor: Hang them in children’s bedrooms or playrooms for a magical nighttime ambiance.
- School Crafts: Use them as a creative project for classroom decorations during Halloween or themed events.
- Holiday Displays: Incorporate them into your seasonal decor, like a glowing starry sky for winter holidays.
- Gifts: Package them as unique, handmade gifts for friends and family to share the glow!
FAQs about Midnight Toast Glow Foam
Q: Is Midnight Toast Glow Foam safe for kids to use?
A: Absolutely! Midnight Toast Glow Foam is a safe material for kids aged 8 and up, especially when supervised by an adult. Just be sure to help them with sharp tools and hot glue to keep the crafting experience fun and safe!
Q: How long does the glow last after charging?
A: The glow from your Midnight Toast Glow Foam creations can last for several hours after being charged by light. For the best results, place them under a bright light source before turning off the lights at night!
Q: Can I use regular lights instead of LED fairy lights?
A: While you can use regular lights, I highly recommend LED fairy lights. They are safer, cooler, and won’t damage the foam. Plus, they create a lovely, soft glow that enhances the magical effect!
Q: What if my foam shapes don’t stick well?
A: If your foam shapes aren’t sticking, try using a stronger adhesive or additional glue dots. You can also ensure the surfaces are clean and dry before applying glue for better adhesion.
Q: Can I paint the foam shapes after they are glued to the lights?
A: It’s best to paint the foam shapes before gluing them to the lights. This way, you can avoid getting paint on the lights and ensure a clean, vibrant finish. Enjoy the creative process!
Final Thoughts
Creating enchanting decor with Midnight Toast Glow Foam is not just a craft; it’s a joyful experience that brings families together. The satisfaction of seeing your glowing creations light up the night is truly magical! I encourage you to gather your loved ones, unleash your creativity, and dive into this fun project. Don’t forget to share your results and inspire others with your glowing masterpieces! Whether it’s for Halloween or just to brighten up your home, these glowing shapes will surely add a sprinkle of enchantment to your nights!
Print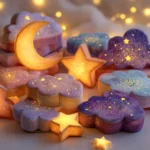
Midnight Toast Glow Foam: Create Enchanting Nighttime Decor!
Description
Create enchanting nighttime decor using Midnight Toast Glow Foam to add a magical touch to your home.
Instructions
- Prepare your workspace by laying down a cutting mat.
- Using a craft knife or scissors, cut the Midnight Toast Glow Foam into desired shapes (e.g., stars, moons, or clouds).
- If desired, paint the foam shapes with acrylic paint and let them dry completely.
- Attach LED fairy lights to the back of the foam shapes using a hot glue gun, ensuring the lights are secure.
- Arrange the foam shapes on a wall or ceiling, using additional glue if necessary to hold them in place.
- Turn on the LED lights at night to see your enchanting decor glow!
- Category: Home Decor
Keywords: Midnight Toast Glow Foam, nighttime decor, LED lights, DIY craft