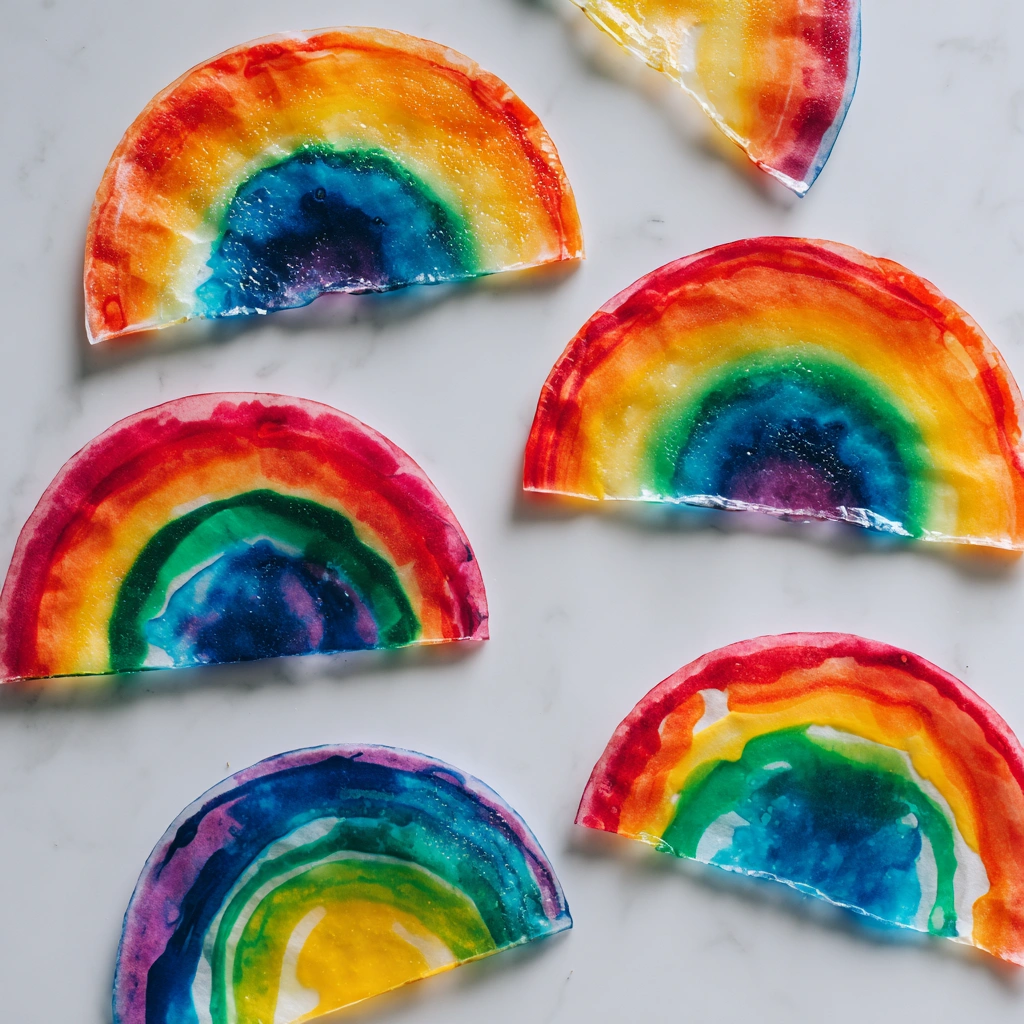
Introduction to Melted Rainbow Crayon Suncatchers
Welcome to the colorful world of Melted Rainbow Crayon Suncatchers! This delightful DIY project is not only a fantastic way to brighten up your home but also a wonderful opportunity to bond with your kids. Imagine the joy of watching vibrant colors dance in the sunlight, creating magical patterns on your walls. It’s simple, fun, and incredibly rewarding! Plus, it’s a great way to repurpose those broken crayons lying around. So, gather your little ones, roll up your sleeves, and let’s create some colorful sunlit magic together!
Why You’ll Love This Melted Rainbow Crayon Suncatcher
This Melted Rainbow Crayon Suncatcher project is a delightful blend of creativity and simplicity! It’s an affordable way to spend quality time with your kids, allowing you to bond while exploring color and design. Plus, the satisfaction of creating something beautiful together is priceless. As you watch the sunlight illuminate your suncatcher, you’ll feel a sense of relaxation and joy, making it a perfect family-friendly craft for any season!
Materials and Tools Needed for Melted Rainbow Crayon Suncatchers
Before we dive into the colorful fun, let’s gather our materials! Each item plays a crucial role in creating your stunning Melted Rainbow Crayon Suncatchers. You probably have most of these at home, making this project not only enjoyable but also budget-friendly. If you’re looking for eco-friendly options, consider using natural wax paper or repurposing old newspapers. Let’s take a closer look at what you’ll need!
Essential Materials
- Crayons (various colors): The star of the show! Use a mix of colors to create vibrant patterns. Don’t worry if they’re broken; that just adds to the charm!
- Wax paper or parchment paper: This is essential for melting the crayons without making a mess. Wax paper gives a smooth surface for the crayons to melt evenly.
- Iron: A low-heat iron is necessary to melt the crayons. Make sure to supervise the kids during this step!
- Scissors: You’ll need these to cut your melted crayon creation into fun shapes. Safety scissors work great for little hands!
- String or fishing line: This is what you’ll use to hang your suncatcher. Choose something sturdy to ensure it stays in place.
- Cookie sheet (optional): If you want to catch any drips while melting, a cookie sheet is a handy addition.
- Old newspaper (for protection): Lay this down to protect your workspace from any crayon spills or drips.
How to Make Melted Rainbow Crayon Suncatchers
Creating your own Melted Rainbow Crayon Suncatchers is a delightful adventure that brings color and creativity into your home! Let’s dive into the steps that will transform simple crayons into vibrant pieces of art that dance with sunlight. Remember, this project is perfect for kids aged 5 and up, but adult supervision is a must when using the iron. So, gather your materials, and let’s get started!
Step 1: Prepare Your Workspace
First things first, let’s set the stage for our colorful adventure! Find a clean, flat surface where you can work comfortably. Lay down some old newspaper to protect your table from any crayon drips. This is also a great time to talk to your kids about safety—explain that the iron can get really hot, so they should keep their fingers away from it. A little preparation goes a long way in making this a fun and safe experience!
Step 2: Crayon Preparation
Now, it’s time to unleash your inner artist! Start by peeling the wrappers off your crayons. This can be a fun task for the kids—watch their little fingers work to get those wrappers off! Once you have a colorful pile, break the crayons into small pieces. The smaller the pieces, the better they will melt and blend together. Encourage your kids to think about color combinations; maybe they want to create a sunset or a rainbow. The possibilities are endless!
Step 3: Arrange the Crayons
With your crayon pieces ready, it’s time to get creative! Lay a piece of wax paper on your workspace and start arranging the crayon bits in a colorful pattern. This is where the magic happens! Let your kids express themselves—maybe they want to create a heart shape or a starburst pattern. The soft shimmer of the crayon pieces against the wax paper is already a sight to behold!
Step 4: Melting the Crayons
Once you’re happy with your arrangement, it’s time to melt those crayons! Carefully cover the crayon pieces with another piece of wax paper. Then, place a piece of old newspaper on top to protect your surface. Now, here’s where you need to be extra cautious: with the iron set to a low setting, gently press it over the newspaper for a few seconds. Keep the iron moving to avoid burning the wax paper. As the crayons melt, you’ll see the colors blend beautifully—it’s like watching a mini rainbow come to life!
Step 5: Cooling and Cutting
After a few moments, carefully lift the iron and let your creation cool for about a minute. Once it’s cool enough to handle, peel off the top layer of wax paper. You’ll be greeted with a stunning, colorful masterpiece! Now, grab your scissors and cut the melted crayon into your desired shapes. Whether you choose circles, hearts, or even fun animal shapes, each piece will be unique and bursting with color!
Step 6: Finishing Touches
To make your suncatcher ready for display, use a hole punch to create a hole at the top. This is where you’ll thread your string or fishing line through for hanging. It’s a simple step, but it adds that perfect finishing touch to your beautiful creation!
Step 7: Display Your Creation
Finally, it’s time to hang your suncatcher in a sunny window! Watch as the sunlight streams through, casting colorful patterns all around your room. It’s a magical sight that will brighten up any space. Plus, every time you see it, you’ll be reminded of the fun you had creating it together!
Tips for Best Results
- Experiment with different color combinations for unique designs—mix warm and cool colors for a stunning effect!
- Use a cookie sheet to catch any drips while melting; it makes cleanup a breeze!
- Keep the iron moving to avoid burning the wax paper; a gentle touch goes a long way.
- Consider adding glitter or other embellishments for extra sparkle—who doesn’t love a little bling?
Theme and Design Variations
One of the best parts about creating Melted Rainbow Crayon Suncatchers is the endless possibilities for themes and designs! You can tailor your suncatchers to match the seasons, holidays, or even your child’s favorite colors. Here are some fun ideas to inspire your creativity:
- Bright summer colors: Use vibrant hues like yellow, pink, and turquoise for a cheerful vibe that captures the essence of sunny days.
- Pastel shades: Soft colors like lavender, mint, and peach create a gentle, spring look that’s perfect for welcoming warmer weather.
- Holiday-themed colors: Get festive with red and green for Christmas, or orange and black for Halloween—these suncatchers can double as seasonal decor!
- Kid-friendly versions: Encourage your little ones to create fun shapes like stars, animals, or even their initials for a personal touch.
Display and Use Ideas
Now that you’ve created your beautiful Melted Rainbow Crayon Suncatchers, it’s time to showcase your colorful creations! Here are some fun and creative ways to display or use your suncatchers:
- Hang them in windows to create stunning colorful light patterns that dance across your walls.
- Gift them to friends or family as unique, handmade treasures that brighten their day.
- Create a mobile by stringing multiple suncatchers together for a breathtaking display that sways gently in the breeze.
- Incorporate them into classroom decorations, adding a vibrant touch to your learning environment.
FAQs about Melted Rainbow Crayon Suncatchers
Can I use any type of crayon?
Absolutely! You can use any regular crayons you have on hand. However, it’s best to avoid specialty crayons like glitter or metallic ones, as they may not melt as well and could affect the final look of your suncatcher.
How do I clean up after the project?
Cleanup is a breeze! Lay down old newspaper to catch any drips during the melting process. Once you’re done, simply wipe away any melted crayon residue with a damp cloth. Easy peasy!
Is this project safe for kids?
Yes, this project is safe for kids, but adult supervision is essential when using the iron. Make sure to explain the importance of safety and keep little fingers away from the hot iron!
How long will the suncatchers last?
With proper care, your Melted Rainbow Crayon Suncatchers can last for years! Just be mindful to avoid direct sunlight for extended periods, as this can cause the colors to fade over time.
Final Thoughts
Creating Melted Rainbow Crayon Suncatchers is not just a craft; it’s a joyful experience filled with laughter, creativity, and colorful memories! As you hang your beautiful creations in the sunlight, you’ll feel a sense of pride knowing you made something special together. I encourage you to gather your kids, dive into this fun project, and let your imaginations run wild! Don’t forget to share your results with friends and family—after all, who wouldn’t want to see the magic of your colorful suncatchers lighting up their day?
Print
Melted Rainbow Crayon Suncatchers: Create Colorful Sunlit Magic!
Description
Create beautiful melted rainbow crayon suncatchers that will brighten up any window with colorful light patterns.
Instructions
- Preheat your iron to a low setting.
- Peel the wrappers off the crayons and break them into small pieces.
- Lay a piece of wax paper on a flat surface and arrange the crayon pieces in a colorful pattern.
- Cover the crayon pieces with another piece of wax paper.
- Place a piece of old newspaper on top to protect your surface.
- Carefully press the iron over the newspaper for a few seconds until the crayons melt and fuse together.
- Let it cool for a minute, then carefully peel off the top layer of wax paper.
- Cut the melted crayon shape into your desired design (like circles or hearts).
- Use a hole punch to make a hole at the top and thread string or fishing line through it for hanging.
- Hang your suncatcher in a sunny window and enjoy the colorful light display!
- Category: Crafts
Keywords: Melted Rainbow Crayon Suncatchers, DIY crafts, colorful decor, kids crafts