Introduction to Magic Milk Color Explosion
Creativity is a wonderful outlet, especially for busy moms and professionals looking to unwind. The Magic Milk Color Explosion is a delightful DIY project that combines art and science, making it perfect for a fun afternoon with your kids or a relaxing evening by yourself. I remember the first time I introduced this project to my children; their eyes lit up with excitement as they watched the colors burst and swirl in the milk!
This simple yet captivating activity not only results in stunning visual art but also teaches valuable lessons about color mixing and surface tension. As a mom, I appreciate how this project engages my kids’ minds while allowing us to bond over something creative. It’s amazing how a few drops of food coloring can turn an ordinary cup of milk into a vibrant masterpiece!
Let’s dive into this colorful adventure that will brighten your day and your home! Whether you’re looking to create a unique piece of art or simply want to enjoy some quality time with your little ones, the Magic Milk Color Explosion is sure to deliver joy and inspiration. So, gather your materials, and let’s get started on this fun-filled journey!
Why You’ll Love This Magic Milk Color Explosion
The Magic Milk Color Explosion is a fantastic way to unleash your creativity without breaking the bank. I can’t tell you how many times I’ve turned to this project when I need a quick and engaging activity that fits into my busy schedule. With just a few household ingredients, I can create vibrant art that never fails to impress my family and friends.
What I love most about this project is its simplicity. As a busy mom, I often find myself juggling work, chores, and family time. The Magic Milk Color Explosion takes only about 20 minutes from start to finish, making it the perfect solution for those afternoons when I want to do something fun but don’t have hours to spare. It’s a low-effort, high-reward activity that brings joy to our home.
Not only is it affordable, but it also encourages creativity and curiosity in my kids. I remember one afternoon when we experimented with different colors and watched in awe as they mixed and swirled together. It was a beautiful reminder of how art can be a powerful tool for learning. My children were not just having fun; they were discovering the science behind color mixing and surface tension in a hands-on way!
Plus, this project is a wonderful opportunity to bond with my children. We laugh, share ideas, and create together, making memories that I cherish. The Magic Milk Color Explosion is more than just a craft; it’s a chance to connect and explore our creativity as a family. I encourage you to give it a try—you might just find that it becomes a favorite activity in your household too!
Materials Needed for Magic Milk Color Explosion
To get started on your Magic Milk Color Explosion, gather the following materials:
- Milk (1 cup): The base for your colorful creation. I find that whole milk works best due to its higher fat content, which enhances the color reaction.
- Food coloring (various colors): To add vibrant hues to your milk. Feel free to choose your favorite colors or even experiment with new combinations!
- Dish soap (1 tablespoon): This is the secret ingredient that creates the color explosion. Just a little bit goes a long way!
- Shallow dish or plate: To hold the milk and allow for easy mixing. A wide, shallow dish works best to showcase the colors.
Gathering these materials is part of the fun! I love involving my kids in the preparation process, as it builds excitement for the project ahead. Plus, it’s a great way to teach them about the importance of being organized before diving into a craft.
*For a printable full list of materials, see below.*
Tools Required for Magic Milk Color Explosion
To create your stunning Magic Milk Color Explosion, you will need a few simple tools that are likely already in your kitchen. I love how accessible this project is, making it perfect for busy moms like us!
- Toothpick or cotton swab: This handy tool is essential for applying the dish soap to the milk. I often use a toothpick because it allows for a precise touch, which is crucial for creating that mesmerizing color reaction. Plus, it’s fun to see how just a little dab can create such a big impact!
- Dropper (optional): If you want to get a bit more creative with your food coloring application, a dropper can be a great addition. It allows for more precise placement of the colors, which can lead to even more stunning effects. I’ve found that using a dropper can help me control the amount of color I add, preventing any overwhelming mess!
These tools are easy to find around the house, making this project even more convenient! I often involve my kids in gathering the materials, which adds to the excitement of our crafting adventure. It’s a wonderful way to teach them about preparation and organization before diving into the fun!
How to Make Magic Milk Color Explosion
Creating your own Magic Milk Color Explosion is a delightful experience that I can’t wait to share with you! Follow these step-by-step instructions to embark on this colorful adventure:
- Pour the milk: Start by pouring the milk into the shallow dish until it covers the bottom. I love using a wide dish because it gives the colors plenty of room to dance and swirl!
- Add food coloring: Drop small amounts of food coloring in different spots on the milk’s surface. Feel free to use multiple colors for a more vibrant effect! I often let my kids choose their favorite colors, and it’s always exciting to see how they mix together.
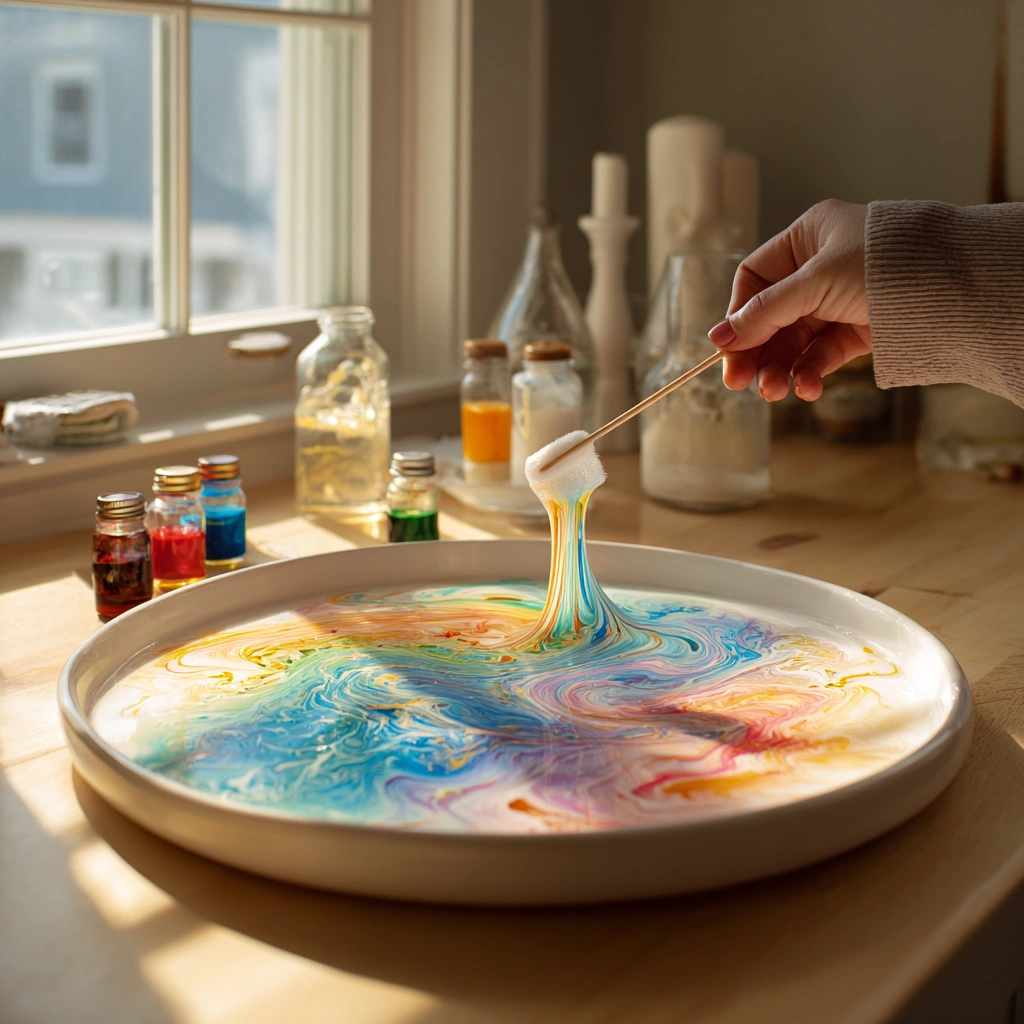
- Prepare the soap: Dip the toothpick or cotton swab into the dish soap. This is where the magic begins! Just a little bit of soap is all you need to create that stunning explosion of colors.
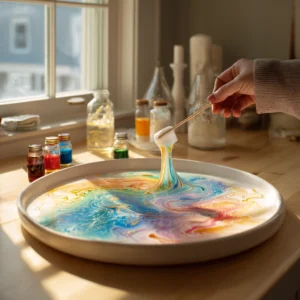
- Create the explosion: Touch the soap-covered toothpick to the milk’s surface and watch the colors explode and swirl in a mesmerizing display. It’s like a mini fireworks show right in your kitchen! I remember the first time we did this; my kids were in awe, and I couldn’t help but join in their excitement.
- Experiment: Try adding more food coloring or soap to see how the colors interact and change. This is the best part! I encourage my kids to explore different combinations and patterns, and it’s amazing to see their creativity shine through.
As you follow these steps, don’t forget to embrace the joy of the process. Crafting is all about having fun, and the Magic Milk Color Explosion is a perfect way to do just that! Enjoy the colorful journey ahead!
Tips for Best Results
To ensure you get the most out of your Magic Milk Color Explosion, I’ve gathered some practical tips that I’ve learned through my own crafting adventures. These little nuggets of wisdom can make a big difference in your experience!
- Use whole milk for the best results: I’ve found that whole milk works wonders because of its higher fat content. The fat helps the colors spread and swirl beautifully, creating that stunning explosion effect we all love!
- Experiment with different types of milk: Don’t be afraid to try out other types of milk, like skim or almond. Each type can produce different reactions, and it’s fascinating to see how the colors behave. I remember one time we used almond milk, and the colors didn’t swirl as much, but it was still a fun experiment!
- Encourage kids to explore color mixing: This project is a fantastic opportunity to teach kids about color mixing. I often start with primary colors and let my children observe how they blend to create new shades. It’s amazing to see their excitement when they discover a new color combination!
These tips have helped me enhance our Magic Milk Color Explosion experience, and I hope they do the same for you! Remember, crafting is all about exploration and fun, so don’t hesitate to try new things and enjoy the process!
Project Variations
Get creative with your Magic Milk Color Explosion by trying out these fun variations! I love how this project can be adapted to fit different themes and styles, making it even more exciting for my kids and me.
- Style variations: Experiment with different color palettes to achieve unique looks. For a softer, more calming effect, try using pastels. On the other hand, if you want to create a vibrant and energetic display, neon colors can really make your artwork pop! I remember one afternoon when we used pastel colors, and the result was a beautiful, dreamy swirl that we proudly displayed in our living room.
- Seasonal adaptations: The Magic Milk Color Explosion is perfect for creating themed explosions for various holidays. For instance, you can use red and green for Christmas, or orange and black for Halloween. I love incorporating seasonal themes into our crafts, as it adds an extra layer of fun and excitement. Last Halloween, we created a spooky explosion that was a hit at our family gathering!
- Artistic techniques: Don’t hesitate to get a bit more artistic with your creations! Try swirling the colors with a toothpick for a marbled effect, or layer colors to add depth to your artwork. I often encourage my kids to experiment with different techniques, and it’s amazing to see how their creativity flourishes. One time, my daughter created a stunning layered effect that looked like a sunset, and it was a proud moment for us all!
These variations not only keep the Magic Milk Color Explosion fresh and exciting but also allow for endless creativity. I encourage you to explore these ideas and make this project your own. The possibilities are truly limitless, and I can’t wait to see what you create!
Decoration and Usage Ideas
Once you’ve created your stunning Magic Milk Color Explosion, it’s time to think about how to display and use your beautiful artwork! I love finding creative ways to showcase our crafts, and this project offers plenty of opportunities to do just that. Here are some ideas that I’ve tried and enjoyed:
- Frame your artwork: One of the simplest yet most effective ways to display your colorful creation is by framing it. I often use a simple frame to showcase our best pieces on a wall or shelf. It adds a touch of elegance to our home decor and makes the artwork feel special. Plus, every time I walk by, I’m reminded of the fun we had creating it!
- Gift it: Sharing your art with friends and family is a wonderful way to spread joy. I’ve given our Magic Milk Color Explosion pieces as unique and personal gifts for birthdays or holidays. It’s a heartfelt gesture that shows you care, and the recipients always appreciate the thoughtfulness behind it. I remember gifting one to my sister, and she proudly displayed it in her living room!
- Use as a teaching tool: This project is not just about creating art; it’s also a fantastic educational opportunity. I often display our artwork in my children’s rooms or even in their classrooms to spark discussions about science and creativity. It’s a great way to encourage curiosity and learning, and I love seeing how excited their friends get when they learn about the science behind the colors!
These decoration and usage ideas not only help you enjoy your Magic Milk Color Explosion creations but also allow you to share the joy of crafting with others. I encourage you to get creative with how you display your art, and don’t hesitate to think outside the box. After all, crafting is all about expressing yourself and having fun!
FAQs about Magic Milk Color Explosion
As I’ve shared my love for the Magic Milk Color Explosion, I often get questions from fellow moms and craft enthusiasts. Here are some of the most common FAQs that I’ve encountered, along with my personal insights:
Q: Can I use any type of milk?
A: While I’ve found that whole milk works best due to its higher fat content, you can absolutely experiment with other types of milk! Skim milk, almond milk, or even oat milk can yield different reactions, and it’s fascinating to see how the colors behave. I remember one time we used almond milk, and while the colors didn’t swirl as much, it was still a fun experiment that sparked curiosity!
Q: Is this project safe for kids?
A: Yes, the Magic Milk Color Explosion is generally safe for kids, but it’s important to supervise them while using food coloring to avoid any staining mishaps. I always make sure to have aprons on hand and remind my kids to wash their hands after handling food coloring and dish soap. It’s a great opportunity to teach them about cleanliness while having fun!
Q: How long does the project take?
A: The total time for the Magic Milk Color Explosion is about 20 minutes, which includes both prep and craft time. I love how quick and engaging this project is, making it perfect for those busy afternoons when I want to squeeze in some creative fun with my kids. It’s a low-effort, high-reward activity that brings joy to our home!
These FAQs reflect some of the common concerns and curiosities that arise when diving into the Magic Milk Color Explosion. I hope my answers help you feel more confident in trying out this colorful project with your family!
Final Thoughts
The Magic Milk Color Explosion is more than just a fun craft; it’s an opportunity to bond with your children, explore creativity, and learn about science in a hands-on way. I can’t tell you how many precious moments I’ve shared with my kids while watching the colors swirl and dance in the milk. Each explosion of color is a reminder of the beauty of creativity and the joy of spending time together.
As a busy mom, I cherish these moments where we can step away from our hectic schedules and dive into a world of imagination and fun. The Magic Milk Color Explosion not only provides a creative outlet but also sparks curiosity and learning. It’s amazing how a simple project can turn into a delightful science lesson about color mixing and surface tension!
So, gather your materials, unleash your inner artist, and enjoy the colorful journey ahead! Don’t be afraid to experiment and make this project your own. Whether you’re creating vibrant art with your kids or enjoying a quiet moment of creativity by yourself, the Magic Milk Color Explosion is sure to bring joy and inspiration into your home. I can’t wait to hear about your colorful adventures!
Print
Magic Milk Color Explosion: Create Stunning Art Today!
Description
The Magic Milk Color Explosion project creates stunning and vibrant art using milk, food coloring, and dish soap. This fun and educational activity demonstrates the science of surface tension and color mixing.
Instructions
- Pour the milk into the shallow dish until it covers the bottom.
- Drop small amounts of food coloring in different spots on the milk’s surface.
- Dip the toothpick or cotton swab into the dish soap.
- Touch the soap-covered toothpick to the milk’s surface and watch the colors explode and swirl.
- Experiment with different colors and patterns by adding more food coloring or soap.
Keywords: Magic Milk, Color Explosion, Kids Craft, Science Experiment, Art Project