Sensory-Rich Introduction with Immediate Craving
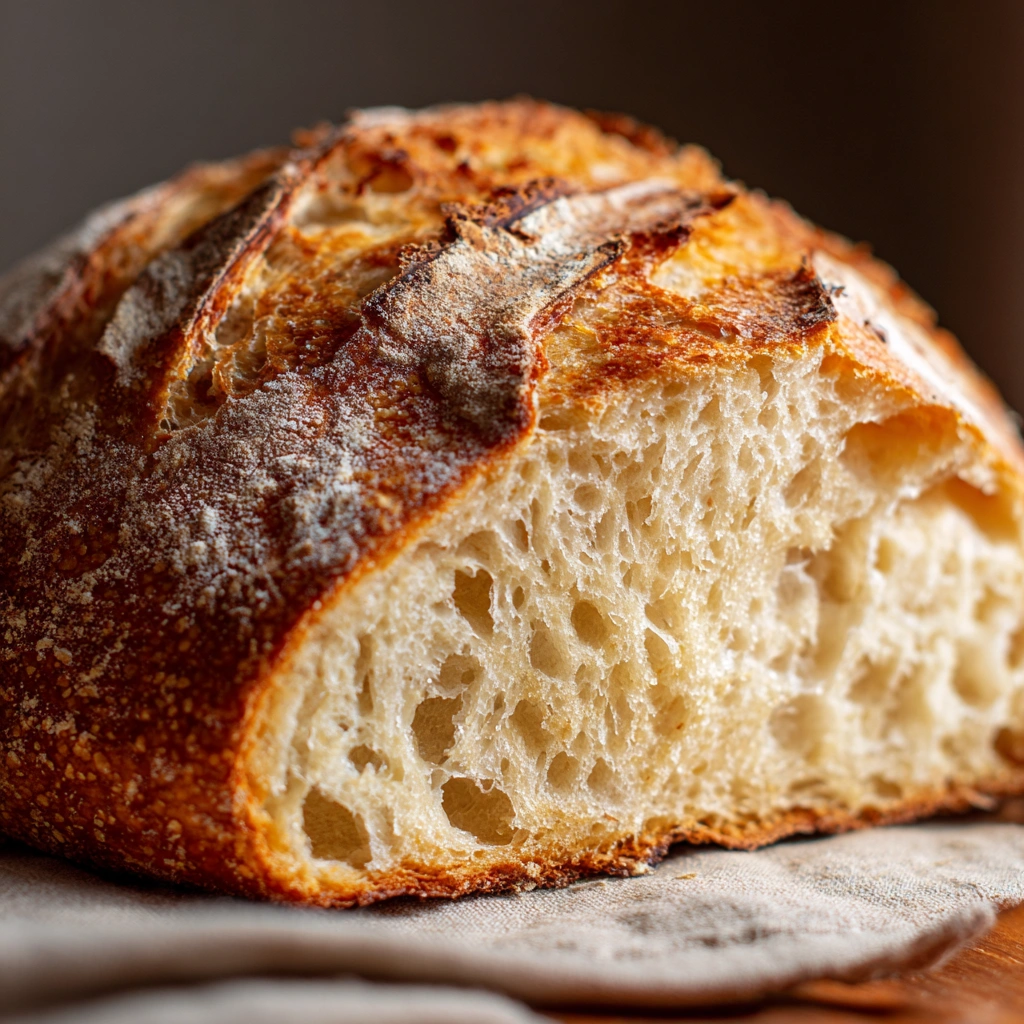
Imagine walking into a kitchen filled with the warm, inviting aroma of homemade bread baking in the oven. As the timer dings, you pull out a loaf with a beautifully golden crust that crackles enticingly as you slice into it. The moment the knife meets the crust, a satisfying crunch fills the air, revealing a creamy soft interior that practically melts in your mouth. Each bite is a delightful contrast of textures, with the crisp exterior giving way to a tender, airy crumb that is simply irresistible.
For me, baking bread is more than just a culinary task; it’s a cherished memory from my childhood. I can still picture my grandmother, flour dusting her apron, guiding my small hands as we kneaded the dough together. The kitchen was always warm, filled with laughter and the comforting scent of yeast and sugar. Those moments were not just about making bread; they were about creating connections, sharing stories, and savoring the simple joys of life. It’s this nostalgia that drives me to bake bread today, hoping to recreate that same warmth and love in my own home.
Homemade bread is perfect for any occasion—whether it’s a cozy evening spent with family, a festive holiday meal, or a simple breakfast shared with loved ones. It brings people together, inviting them to gather around the table and enjoy the fruits of your labor. So, let’s roll up our sleeves and embark on this delightful journey of baking, where every loaf tells a story and every slice is a reminder of the love that goes into making it.
Why You’ll Love This Homemade Bread
Let me tell you, there’s something truly magical about homemade bread. It’s not just about the end product; it’s the entire experience that makes it so special. Here’s why you’ll fall head over heels for this recipe:
- Texture Contrast: Picture this: you take a bite and experience the delightful crunch of the golden crust, followed by the soft, airy inside that practically melts in your mouth. It’s a textural symphony that keeps you coming back for more!
- Flavor Balance: The subtle sweetness from the sugar, combined with the savory touch of salt, creates a harmonious flavor profile that enhances every bite. It’s not overly sweet, but just enough to make your taste buds dance.
- Versatility: This bread is a true chameleon in the kitchen! Whether you’re crafting a hearty sandwich, toasting it for breakfast, or serving it alongside a comforting bowl of soup, it adapts beautifully to any meal.
- Ease: With simple ingredients and straightforward steps, this recipe is accessible for all skill levels. Even if you’re a novice baker, you’ll find that the process is straightforward and rewarding.
- Universal Appeal: Let’s face it—who doesn’t love fresh bread? This recipe is loved by both children and adults alike, making it a family favorite that brings everyone together around the table.
So, whether you’re a seasoned baker or just starting out, this homemade bread recipe is sure to become a staple in your kitchen. The joy of baking and the satisfaction of sharing a warm loaf with loved ones is an experience you won’t want to miss!
Essential Tools & Preparation Strategy
Before diving into the delightful world of homemade bread, let’s gather our tools and set the stage for success. Having the right equipment not only makes the process smoother but also enhances your baking experience. Trust me, a well-prepared kitchen is half the battle won!
- Mixing Bowl: A large bowl is essential for combining ingredients and allowing the dough to rise. I always opt for a glass or stainless steel bowl, as they are easy to clean and won’t retain odors.
- Measuring Cups and Spoons: Accurate measurements are crucial for the perfect bread texture. I recommend using dry measuring cups for flour and liquid measuring cups for water to ensure precision.
- Loaf Pan: This shapes the bread during baking, giving it that classic loaf appearance. A non-stick pan is my go-to, but if you have a glass or metal one, they work just as well!
- Kitchen Towel: A simple kitchen towel is used to cover the dough during rising to retain moisture. I love using a colorful one that adds a bit of cheer to my kitchen.
- Oven: The heart of the baking process! Preheating your oven to 375°F is essential for achieving that golden crust.
- Rolling Pin: While not necessary for this recipe, a rolling pin can be helpful if you decide to flatten the dough for any creative variations.
- Wire Rack: After baking, a wire rack is crucial for cooling the bread. This prevents sogginess and allows air to circulate around the loaf.
With these tools at your disposal, you’re well on your way to creating a loaf of bread that will fill your home with warmth and the irresistible aroma of freshly baked goodness. Remember, the journey of baking is just as rewarding as the final product, so enjoy every moment!
Ingredients & Their Roles in This Homemade Bread
Understanding the ingredients in your homemade bread is key to mastering the art of bread-making. Each component plays a vital role in creating that perfect loaf, and knowing their functions can help you troubleshoot and customize your recipe. Let’s break it down:
- Flour: The backbone of any bread, flour provides the necessary structure. In this recipe, all-purpose flour is the base, giving the bread a light and airy texture. If you’re feeling adventurous, you can experiment with bread flour for a chewier crust or whole wheat flour for added nutrition.
- Yeast: This little powerhouse is the leavening agent that helps the bread rise. Active dry yeast is commonly used, and it works its magic by fermenting the sugars in the dough, producing carbon dioxide that creates those delightful air pockets. Just remember, patience is key—give it time to froth and activate!
- Water: Often overlooked, water is crucial as it activates the yeast and hydrates the flour. The ideal temperature is around 110°F; too hot, and you risk killing the yeast, too cold, and it won’t activate properly. Think of water as the glue that brings all the ingredients together.
- Salt: Not just for flavor, salt enhances the overall taste and strengthens the gluten structure, which is essential for a good rise. It also helps control the fermentation process, ensuring that your bread doesn’t over-proof. A little salt goes a long way in elevating the flavor!
- Sugar: This ingredient does more than just sweeten your bread; it feeds the yeast, helping it to grow and produce carbon dioxide. It also contributes to the browning of the crust, giving you that beautiful golden finish. Just a tablespoon is all you need to achieve the perfect balance.
- Olive Oil: Adding moisture and richness, olive oil enhances the texture of the bread, making it soft and tender. If you prefer, you can substitute it with melted butter for a different flavor profile. Either way, this fat is essential for a deliciously soft crumb.
By understanding the roles of these ingredients, you’ll not only improve your baking skills but also gain the confidence to make adjustments based on your preferences. So, gather your ingredients and let’s get ready to create a loaf that’s not just bread, but a warm hug in every slice!
Step-by-Step Guide to Perfect Homemade Bread
Now that we’ve gathered our ingredients and tools, it’s time to roll up our sleeves and dive into the delightful process of making homemade bread. Follow these steps closely, and you’ll be rewarded with a loaf that not only looks beautiful but tastes heavenly!
- Combine warm water, sugar, and yeast: In a large bowl, mix together 1 1/2 cups of warm water (around 110°F), 1 tablespoon of granulated sugar, and 2 1/4 teaspoons of active dry yeast. Let this mixture sit for 5-10 minutes until it becomes frothy. This is your yeast activating, and it’s a crucial step—don’t skip it!
- Stir in olive oil and salt: Once your yeast mixture is frothy, gently stir in 2 tablespoons of extra virgin olive oil and 2 teaspoons of sea salt. This adds flavor and moisture to your dough, making it rich and delicious.
- Add flour gradually: Now, it’s time to incorporate the flour. Gradually add 4 cups of all-purpose flour, one cup at a time, mixing until a dough forms. I like to use a wooden spoon for this part, but you can also use a stand mixer with a dough hook if you prefer.
- Knead the dough: Transfer the dough to a floured surface and knead it for about 10 minutes. You want the dough to become smooth and elastic. This is where the magic happens—kneading develops the gluten, which gives your bread its structure. If the dough is too sticky, sprinkle a little more flour as needed.
- First rise: Place the kneaded dough in a greased bowl, cover it with a damp cloth, and let it rise in a warm place for 1-2 hours, or until it has doubled in size. This is the perfect time to clean up your kitchen and maybe enjoy a cup of tea while you wait!
- Punch down and shape: Once the dough has risen, gently punch it down to release the air. Shape it into a loaf and place it in a greased loaf pan. This step is satisfying—trust me, you’ll feel like a pro!
- Second rise: Cover the loaf again and let it rise for another 30-45 minutes, or until it rises above the pan. This second rise is essential for achieving that light, airy texture.
- Bake the bread: Preheat your oven to 375°F. Bake the loaf for 30-35 minutes, or until the crust is golden brown and sounds hollow when tapped. The aroma wafting through your kitchen will be irresistible, and you’ll know you’re on the right track!
Once baked, let the bread cool on a wire rack before slicing. This is the hardest part—waiting! But trust me, allowing it to cool will prevent a gummy texture. Enjoy the fruits of your labor, and don’t forget to share a slice with someone you love!
Chef’s Notes & Pro Tips for Flawless Results
As you embark on your journey of baking homemade bread, I want to share some invaluable tips that I’ve gathered over the years. These insights will help you achieve a loaf that not only looks stunning but also tastes divine. Trust me, a little extra care can make all the difference!
- Make-ahead instructions: If you’re short on time, consider preparing the dough ahead of time. You can refrigerate it overnight, which allows the flavors to develop more deeply. Just remember to let it come to room temperature before shaping and baking!
- Storage: To keep your bread fresh, store it in an airtight container at room temperature for up to 3 days. If you want to enjoy it later, wrap it tightly in plastic wrap and freeze for up to 3 months. When you’re ready to enjoy, simply thaw it at room temperature or warm it in the oven at 350°F for a few minutes.
- Equipment recommendations: While kneading by hand is a great workout, using a stand mixer with a dough hook can make the process much easier and quicker. If you have one, I highly recommend giving it a try—it’s a game changer!
- Customization options: Don’t be afraid to get creative! You can add dried herbs like rosemary or thyme for a fragrant twist, incorporate shredded cheese for a savory flavor, or even mix in seeds for added texture. The possibilities are endless, and each variation can bring a new dimension to your bread!
With these pro tips in your back pocket, you’re well-equipped to tackle any challenges that may arise during your baking adventure. Remember, every loaf is a learning experience, so embrace the process and enjoy the delicious results!
Avoid These Common Cooking Mistakes
Baking homemade bread can be a rewarding experience, but it’s easy to make mistakes that can lead to disappointing results. Here are some common pitfalls to watch out for, along with tips to ensure your bread turns out perfectly every time:
- Using water that is too hot: This can kill the yeast, preventing your bread from rising. Always use warm water around 110°F—think of it as a cozy bath for your yeast!
- Not kneading the dough enough: Insufficient kneading can result in dense bread. Knead until the dough is smooth and elastic; it should spring back when poked. Trust me, your arms will thank you later!
- Skipping the second rise: This crucial step allows the dough to develop flavor and texture. Always allow the dough to rise twice for a light and airy loaf.
- Not measuring ingredients accurately: Baking is a science, and precise measurements are key to achieving the right texture. Use proper measuring tools to ensure success—your future self will appreciate it!
- Baking at the wrong temperature: Always preheat your oven to 375°F. Baking at the wrong temperature can burn the crust or leave the inside undercooked. A well-preheated oven is your best friend!
- Opening the oven door too early: This can cause the bread to collapse. Wait until the last 10 minutes to check on your loaf—patience is a virtue in baking!
- Not letting the bread cool before slicing: Cutting into hot bread can make it gummy. Allow it to cool on a wire rack to let the steam escape and achieve that perfect texture.
By avoiding these common mistakes, you’ll be well on your way to mastering the art of homemade bread. Remember, every baking experience is a learning opportunity, so don’t be discouraged by setbacks. Embrace the journey, and soon you’ll be creating loaves that are not just good, but truly exceptional!
Creative Variations & Customizations
One of the most delightful aspects of baking homemade bread is the ability to customize it to suit your taste and dietary preferences. Here are some creative variations that can elevate your bread-making game and add a personal touch to your loaves:
- Whole Wheat Bread: For a healthier option, substitute half of the all-purpose flour with whole wheat flour. This not only adds a nutty flavor but also increases the fiber content, making your bread more nutritious. Just be aware that whole wheat flour can absorb more liquid, so you may need to adjust the water slightly.
- Herb-Infused Bread: If you’re looking to add a fragrant twist, consider incorporating dried herbs like rosemary, thyme, or oregano into the dough. About 1-2 tablespoons of your favorite herbs will infuse the bread with a delightful aroma and flavor that pairs beautifully with soups and salads.
- Cheese Bread: For a savory treat, mix in shredded cheese—cheddar, mozzarella, or even feta work wonderfully. About 1 cup of cheese added to the dough will create a rich, cheesy flavor that’s perfect for sandwiches or as a standalone snack.
- Sweet Bread: If you have a sweet tooth, why not turn your loaf into a delightful breakfast treat? Mix in 1 teaspoon of cinnamon and 1/2 cup of raisins or dried cranberries for a sweet, aromatic bread that’s perfect for toasting and slathering with butter.
- Gluten-Free Option: For those with dietary restrictions, you can easily make a gluten-free version of this bread. Use a gluten-free flour blend that includes xanthan gum to help mimic the elasticity of traditional bread. Just follow the same measurements and steps, and you’ll have a delicious gluten-free loaf!
These variations not only allow you to experiment with flavors but also make your homemade bread uniquely yours. Don’t hesitate to get creative and try different combinations—after all, the kitchen is your playground! Happy baking!
Perfect Pairings: What to Serve With Homemade Bread
Now that you’ve mastered the art of baking homemade bread, it’s time to explore the delightful ways to enjoy your creation! This bread is incredibly versatile and pairs beautifully with a variety of dishes. Here are some of my favorite pairings that will elevate your bread experience:
- Butter and Jam: There’s nothing quite like a warm slice of bread slathered with creamy butter and your favorite jam. It’s a classic combination that makes for a perfect breakfast or a delightful afternoon snack. I personally love raspberry jam—it adds a lovely tartness that complements the bread beautifully!
- Homemade Soups: A warm bowl of soup and a slice of freshly baked bread is the ultimate comfort food. Whether it’s a hearty tomato basil soup or a creamy potato leek, the bread serves as the perfect vessel for soaking up every last drop. Trust me, your taste buds will thank you!
- Deli Sandwiches: This bread is ideal for crafting delicious sandwiches filled with your favorite deli meats, cheeses, and fresh veggies. The sturdy yet soft texture holds up well to all the fillings, making it a go-to choice for lunch. Try a classic turkey and Swiss or a veggie-packed delight!
- Avocado Toast: For a nutritious brunch option, top your bread with smashed avocado, a sprinkle of salt, and a perfectly poached egg. The creamy avocado paired with the soft bread creates a delightful contrast that’s both satisfying and healthy. Add a dash of chili flakes for a little kick!
- Fresh Salads: Serve your homemade bread alongside a fresh salad for a light and refreshing lunch. The bread adds substance to the meal, making it more filling. I love pairing it with a simple mixed greens salad drizzled with a tangy vinaigrette.
- Garlic Bread: Transform your loaf into a delicious garlic bread by spreading softened butter mixed with minced garlic and parsley on slices, then toasting them until golden. It’s a fantastic side for pasta dishes or as an appetizer for gatherings!
- Bruschetta: Use your bread as a base for bruschetta topped with fresh tomatoes, basil, and a drizzle of balsamic glaze. This makes for a vibrant and flavorful appetizer that’s sure to impress your guests. Plus, it’s a great way to showcase seasonal produce!
- Cheese Platter: Serve slices of your homemade bread with a variety of cheeses for a delightful appetizer. Pair it with some olives, nuts, and fruits for a beautiful cheese board that’s perfect for entertaining. It’s a simple yet elegant way to enjoy your bread!
With these pairings, your homemade bread will shine in any meal. Whether you’re enjoying it solo or sharing it with loved ones, each bite will be a reminder of the love and effort you put into baking. So, gather your favorite accompaniments and dig in!
Storage & Meal Prep Instructions
Once you’ve baked your delicious homemade bread, it’s important to know how to store it properly to maintain its freshness and flavor. Here are some simple yet effective storage and meal prep instructions to ensure your bread stays delightful for days to come:
- Fridge Storage: If you plan to enjoy your bread over a few days, keep it in an airtight container at room temperature for up to 3 days. This will help retain its moisture and prevent it from becoming stale. Just be sure to keep it away from direct sunlight or heat sources!
- Freezer Storage: For longer storage, wrap your bread tightly in plastic wrap and place it in a freezer-safe bag. This will protect it from freezer burn and keep it fresh for up to 3 months. When you’re ready to enjoy it, simply remove it from the freezer and let it thaw at room temperature.
- Reheating Methods: To bring back that fresh-baked taste, you can warm your bread in the oven. Preheat your oven to 350°F and place the slices on a baking sheet for a few minutes until they’re heated through. This will revive the crust and make it wonderfully crispy again!
By following these storage and meal prep instructions, you can savor the delightful taste of your homemade bread for days, making it a convenient and delicious addition to your meals. Enjoy every slice, and don’t forget to share with family and friends!
Nutrition Facts & Health Insights
Understanding the nutritional profile of your homemade bread is essential, especially if you’re looking to make healthier choices. This bread not only satisfies your cravings but also provides a range of nutrients that can contribute to a balanced diet. Here’s a closer look at the nutrition facts:
| Nutrient | Amount per Serving (1 slice, about 1 oz) |
|---|---|
| Calories | 80 |
| Sugar | 1 gram |
| Sodium | 150 milligrams |
| Fat | 1 gram |
| Saturated Fat | 0 grams |
| Unsaturated Fat | 1 gram |
| Trans Fat | 0 grams |
| Carbohydrates | 15 grams |
| Fiber | 1 gram |
| Protein | 3 grams |
| Cholesterol | 0 milligrams |
In addition to being delicious, this homemade bread can also offer some health benefits, especially if you choose to incorporate whole wheat flour. Whole grains are known for their high fiber content, which aids in digestion and helps keep you feeling full longer. They also provide essential nutrients such as B vitamins, iron, and magnesium, contributing to overall health.
So, whether you’re enjoying a slice with your morning coffee or using it as a base for a hearty sandwich, you can feel good about indulging in this wholesome homemade bread. Remember, balance is key, and this bread can be a delightful part of a nutritious diet!
Frequently Asked Questions
As you embark on your journey of baking homemade bread, you may have some questions along the way. Don’t worry; I’ve got you covered! Here are some frequently asked questions that can help guide you through the process:
- Can I use instant yeast instead of active dry yeast?
Absolutely! Instant yeast can be used in place of active dry yeast without any adjustments to the recipe. Just mix it directly with the dry ingredients, and you can skip the proofing step. It’s a great time-saver! - How can I tell if my bread is done baking?
A good indicator that your bread is done is the golden-brown crust and a hollow sound when you tap the bottom of the loaf. You can also use a thermometer; the internal temperature should reach about 190°F for a fully baked loaf. - What can I substitute for olive oil?
If you don’t have olive oil on hand, you can substitute it with melted butter, vegetable oil, or even coconut oil. Each will impart a slightly different flavor, but they all work well in this recipe! - How do I know if my dough has risen enough?
Your dough has risen enough when it has doubled in size and feels light and airy. You can also perform the “poke test”—gently poke the dough with your finger; if the indentation remains, it’s ready for the next step! - Can I add seeds or nuts to the dough?
Yes! Adding seeds (like sunflower or sesame) or nuts (like walnuts or pecans) can enhance the flavor and texture of your bread. Just fold them into the dough during the last few minutes of kneading for the best results. - What should I do if my dough doesn’t rise?
If your dough doesn’t rise, it could be due to inactive yeast. Make sure your yeast is fresh and that you used warm water (around 110°F). If it still doesn’t rise, try placing it in a warmer spot or giving it more time. Sometimes, patience is key! - How can I make this bread dairy-free?
This recipe is already dairy-free, but if you want to ensure it remains so, just stick to using olive oil instead of butter. You can also check any additional toppings or spreads you plan to use to keep everything dairy-free! - Can I use bread flour instead of all-purpose flour?
Yes, you can use bread flour instead of all-purpose flour! Bread flour has a higher protein content, which can result in a chewier texture and a better rise. Just keep in mind that you may need to adjust the water slightly, as bread flour can absorb more liquid.
With these answers in hand, you’re well-equipped to tackle any challenges that may arise during your bread-making adventure. Remember, every loaf is a learning experience, so embrace the process and enjoy the delicious results!
Final Inspiration & Kitchen Confidence
As you stand in your kitchen, surrounded by the delightful aroma of homemade bread, take a moment to celebrate the joy of baking. There’s something truly magical about creating something from scratch, transforming simple ingredients into a warm, comforting loaf that brings smiles to faces and fills hearts with happiness. Each time you bake, you’re not just making bread; you’re crafting memories, sharing love, and embracing the art of cooking.
Remember, every loaf you create is a step towards mastering the art of bread-making. Whether it’s your first attempt or your hundredth, each experience teaches you something new. Don’t be discouraged by the occasional mishap; even the best bakers have their off days! Embrace the journey, learn from your challenges, and take pride in your achievements. You’re building a skill that connects you to generations of bakers before you, and that’s something to be proud of.
So, I encourage you to roll up your sleeves, gather your ingredients, and dive into this homemade bread recipe. Share your results with friends and family, and don’t forget to snap a picture of your beautiful loaf! Whether it’s a perfect golden crust or a slightly lopsided shape, every loaf tells a story. Enjoy the process, savor the moments, and let the warmth of your kitchen fill your home with love. Happy baking!
Print
Homemade Bread: Golden Crust with Creamy Softness Inside!
- Total Time: 2 hours 55 minutes
- Yield: 1 loaf (about 12 slices)
- Diet: Vegetarian
Description
This homemade bread features a beautifully golden crust that crackles when you slice into it, revealing a soft, creamy interior that melts in your mouth. The aroma of freshly baked bread fills the air, inviting you to enjoy its warm, comforting flavor with every bite.
Ingredients
- Flour: 4 cups all-purpose flour
- Yeast: 2 1/4 teaspoons active dry yeast
- Water: 1 1/2 cups warm water (110°F)
- Salt: 2 teaspoons sea salt
- Sugar: 1 tablespoon granulated sugar
- Olive Oil: 2 tablespoons extra virgin olive oil
Instructions
- In a large bowl, combine warm water, sugar, and yeast. Let it sit for 5-10 minutes until frothy.
- Add olive oil and salt to the yeast mixture, stirring gently.
- Gradually add flour, one cup at a time, mixing until a dough forms.
- Knead the dough on a floured surface for about 10 minutes until smooth and elastic.
- Place the dough in a greased bowl, cover with a damp cloth, and let it rise in a warm place for 1-2 hours, or until doubled in size.
- Punch down the dough and shape it into a loaf. Place it in a greased loaf pan.
- Cover and let it rise again for 30-45 minutes until it rises above the pan.
- Bake in a preheated oven at 375°F for 30-35 minutes, or until the crust is golden brown and sounds hollow when tapped.
Notes
- This bread can be made ahead and stored in an airtight container for up to 3 days.
- For longer storage, freeze the bread wrapped tightly in plastic wrap for up to 3 months.
- Substitute whole wheat flour for half of the all-purpose flour for a healthier option.
- Prep Time: 20 minutes
- Cook Time: 35 minutes
- Category: breads
- Method: baking
- Cuisine: American
Nutrition
- Serving Size: 1 slice (about 1 oz)
- Calories: 80
- Sugar: 1 gram
- Sodium: 150 milligrams
- Fat: 1 gram
- Saturated Fat: 0 grams
- Unsaturated Fat: 1 gram
- Trans Fat: 0 grams
- Carbohydrates: 15 grams
- Fiber: 1 gram
- Protein: 3 grams
- Cholesterol: 0 milligrams
Keywords: Homemade Bread, Easy Bread Recipe, Freshly Baked Bread, Golden Crust Bread, Soft Bread, Yeast Bread, Artisan Bread, Bread Baking, Comfort Food, Homemade Loaf, Baking at Home, Simple Bread Recipe, Bread for Sandwiches, Classic Bread Recipe


