Desserts have always been more than just sweet endings to a meal—they are often conversation starters, centerpieces at parties, and a way to bring people together over something fun and delightful. Few desserts capture the essence of both nostalgia and creativity as well as Rice Krispies Treats. These chewy, crunchy squares remind many of childhood afternoons, bake sales, and simple family joys. But what if we could take this classic treat and transform it into something extraordinary—something that surprises, amazes, and adds a dash of science to the mix?
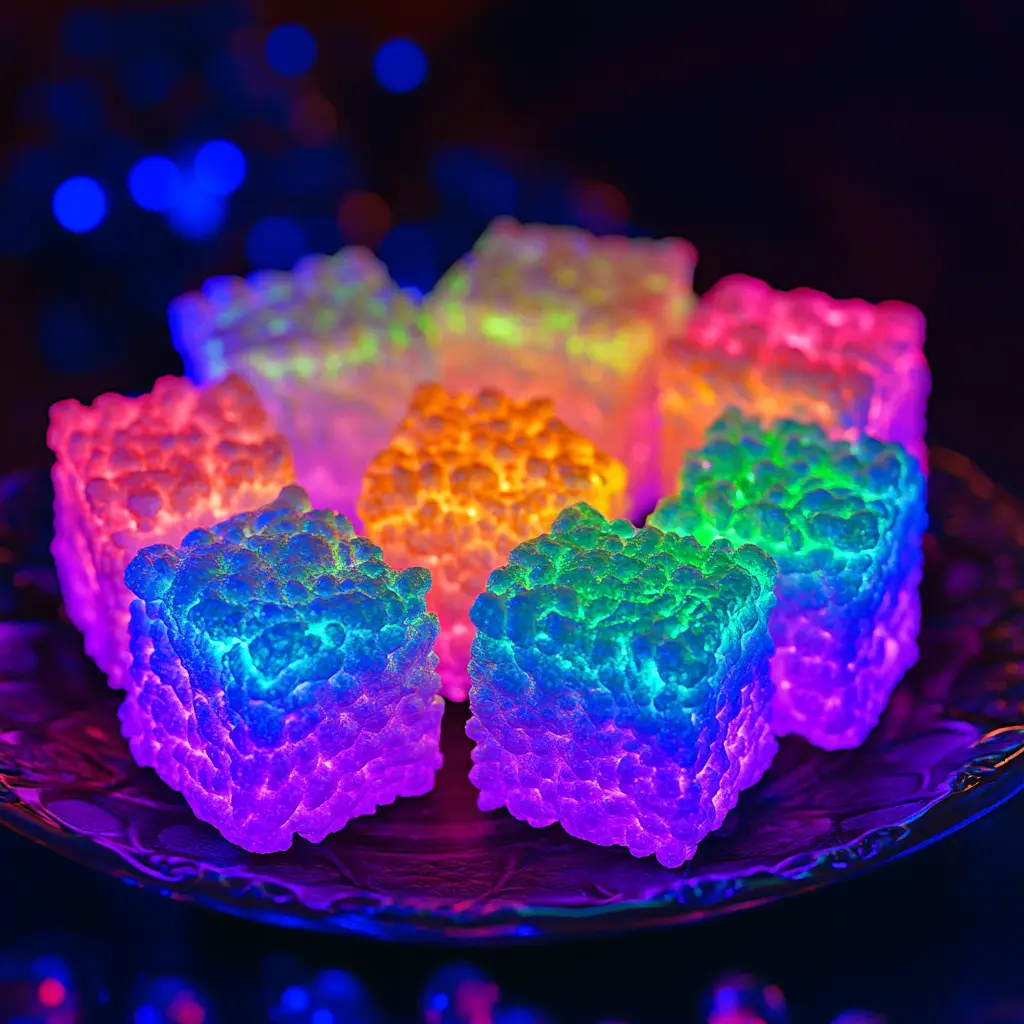
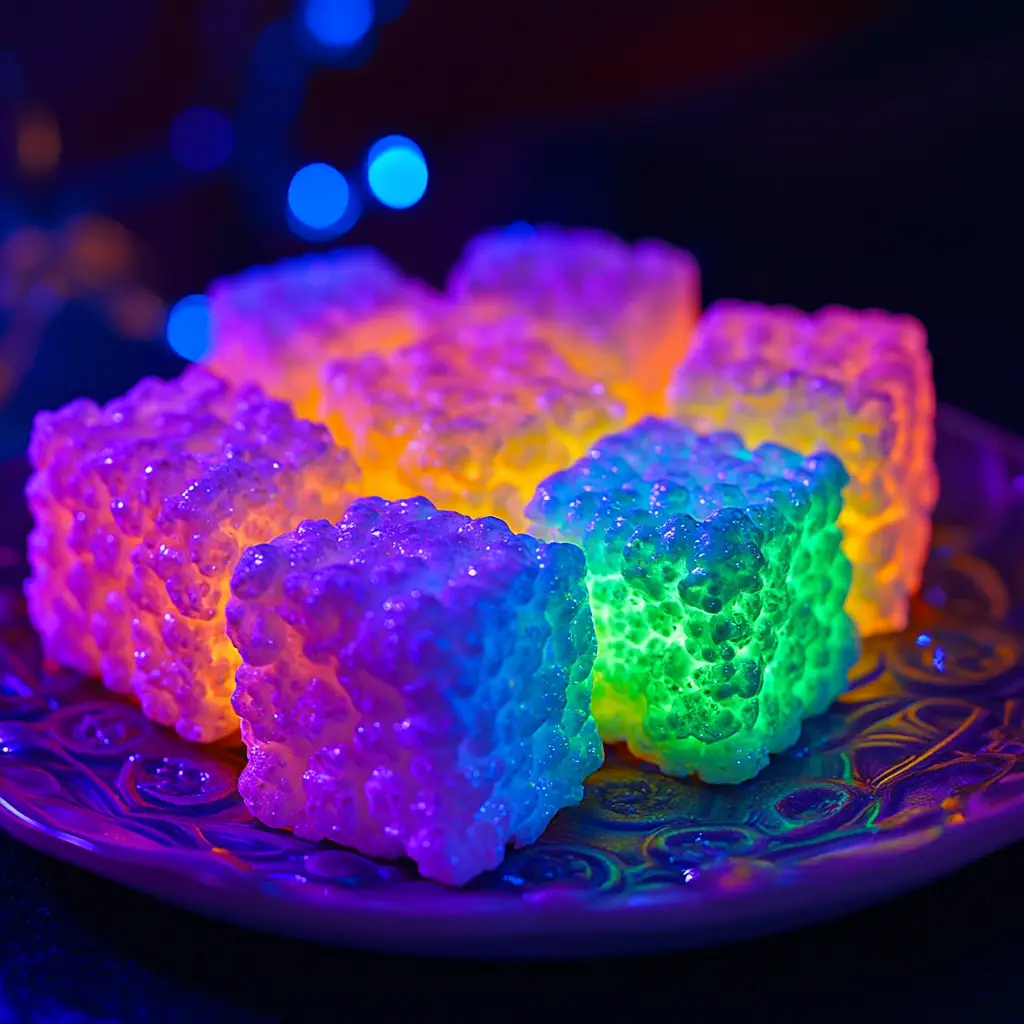
That’s where Glow in the Dark Rice Krispies Treats come in. Imagine walking into a room, lights dimmed, a blacklight glowing in the corner, and a tray of vibrant treats shining with an eerie but fascinating glow. They don’t just taste great—they become an entire experience. Combining the comfort of marshmallow-coated Rice Krispies cereal with the luminous magic of tonic water and neon food coloring, these treats turn a beloved snack into an edible science experiment.
Perfect for Halloween parties, glow-themed birthdays, science fairs, or even just a fun family project on a rainy night, Glow in the Dark Rice Krispies Treats are as enjoyable to make as they are to eat. This article will explore not only the recipe itself but also the fascinating science behind the glow, serving ideas, variations, and tips to make your treats truly unforgettable.
Why You’ll Love This Recipe
-
Science Meets Dessert – These aren’t just treats; they’re edible experiments. Kids will love seeing the glow effect and learning that it comes from real science, not just artificial tricks.
-
Show-Stopping Party Snack – Whether you’re planning a spooky Halloween buffet or a neon glow party, these treats will instantly become the highlight of the dessert table.
-
Simple and Quick – Despite their magical effect, Glow in the Dark Rice Krispies Treats don’t require complicated steps. You can prepare them in under 30 minutes before letting them set.
-
Customizable and Creative – Neon food coloring, fun molds, sprinkles, and layers can all add to the dramatic look of your treats.
-
Kid-Friendly Fun – This recipe provides an opportunity to involve children in the kitchen, teaching them about both cooking and science in a hands-on way.
The Science Behind the Glow
Before diving into the recipe, let’s uncover the secret ingredient: tonic water. Tonic water contains quinine, a natural compound originally derived from the bark of the cinchona tree. Quinine has a unique property—it fluoresces under ultraviolet (UV) light. When exposed to a blacklight, quinine absorbs the UV rays and emits a bluish glow, which creates the magical effect in your treats.
This means the glow isn’t an artificial illusion; it’s a real chemical reaction at play. While neon food coloring enhances the visual drama, it’s the quinine in tonic water that gives your treats their signature glow under UV lighting. Understanding this not only makes the experience fun but also educational, turning dessert into a live demonstration of science in action.
Ingredients
To create your glowing treats, you’ll need:
-
6 cups Rice Krispies cereal
-
4 cups mini marshmallows
-
3 tablespoons unsalted butter
-
1/4 cup tonic water (must contain quinine for the glow effect)
-
Neon food coloring (optional, but highly recommended for maximum visual impact)
Preparation Method
Step 1: Prepare Your Pan
Lightly grease a 9×13-inch baking pan with butter or non-stick spray. Alternatively, if you want shapes such as stars, pumpkins, or circles, silicone molds work beautifully. Set the pan or molds aside while you make the marshmallow mixture.
Step 2: Melt the Butter and Marshmallows
In a large saucepan, melt the butter over low heat. Once melted, add in the mini marshmallows. Stir continuously with a spatula until the marshmallows become smooth and completely melted.
Step 3: The Magic Step – Add Tonic Water
Remove the saucepan from the heat. Quickly pour in 1/4 cup tonic water and stir vigorously. The marshmallow mixture may become slightly frothy, which is perfectly normal. This is the step that infuses quinine into the mixture, setting the stage for the glow.
Step 4: Add Food Coloring (Optional)
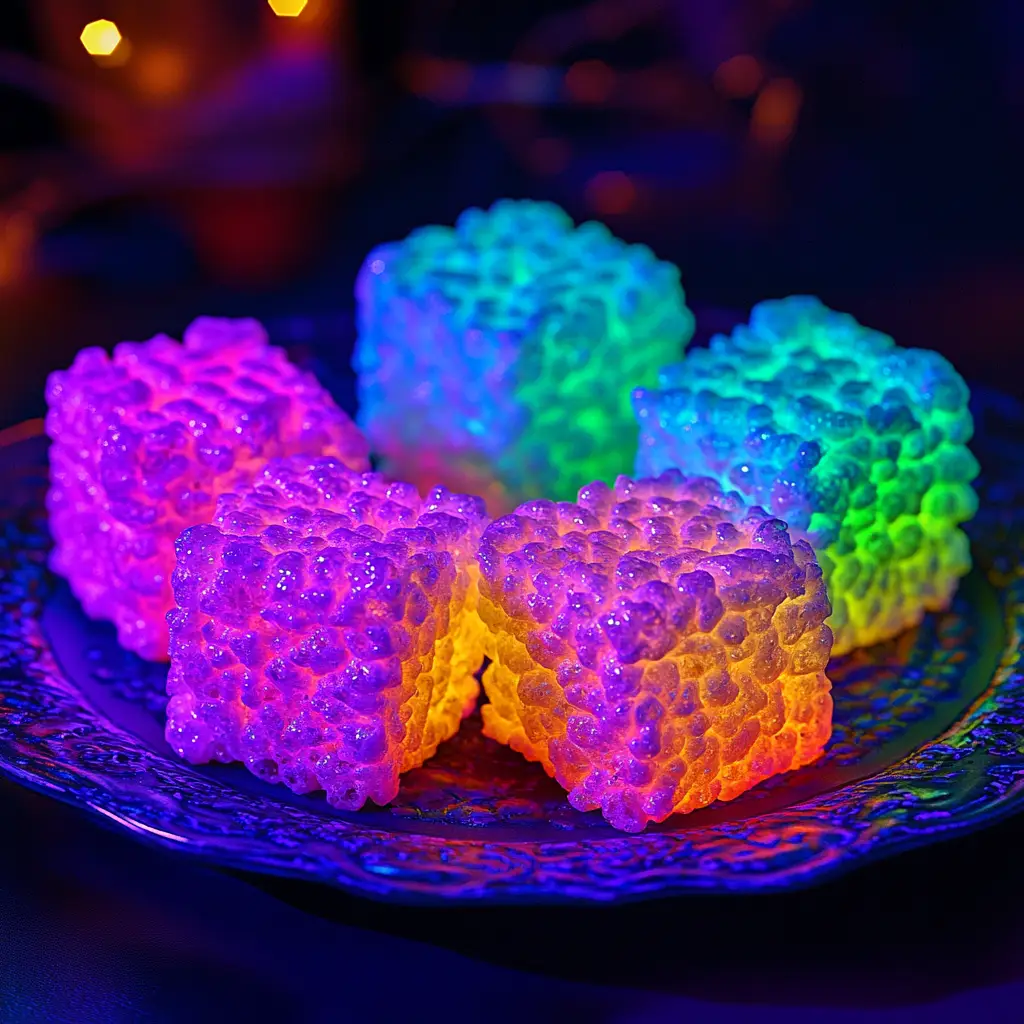
For an extra punch of visual excitement, divide the mixture into different bowls and add drops of neon food coloring. Electric greens, bright oranges, and intense blues all shine beautifully under blacklight. Stir until the colors are evenly distributed.
Step 5: Combine with Rice Krispies
Add the Rice Krispies cereal to the marshmallow mixture. Stir gently but thoroughly until every piece of cereal is coated with the sticky, glowing mixture. If using multiple colors, repeat this step with each bowl.
Step 6: Transfer and Press
Spoon the coated cereal mixture into your prepared pan or molds. Use a piece of greased parchment paper or a buttered spatula to press the mixture evenly and firmly into place. This ensures the bars set properly.
Step 7: Let Them Set
Allow the mixture to cool at room temperature for 1–2 hours. Once firm, cut into squares or pop them from the molds. Now comes the most exciting part: turn off the lights, switch on a blacklight, and watch your dessert glow with an otherworldly brightness.
Variations
-
Spooky Halloween Shapes – Use cookie cutters or silicone molds shaped like ghosts, pumpkins, bats, or skulls. Glow-in-the-dark ghost treats will thrill any Halloween crowd.
-
Galaxy Effect – Mix in different neon colors and swirl them together before pressing into the pan to create a galaxy-inspired design.
-
Layered Colors – Prepare multiple batches of differently colored mixtures and press them into the pan in layers to achieve a rainbow or candy corn look.
-
Extra Crunch – Add glow-themed sprinkles, popping candy, or even colorful cereal like Fruity Pebbles for added texture and fun.
-
Adult Version – If serving adults, swap tonic water for citrus-flavored sparkling water and add a drop of lemon or orange extract. Keep in mind this will not glow, but the flavor upgrade is delightful.
Cooking Note
The glow effect only appears under a blacklight. Don’t expect the treats to glow in the dark naturally without UV light. To guarantee the best results, always check that your tonic water lists quinine as an ingredient. Not all flavored sparkling waters will contain quinine, and without it, the glow effect won’t work.
Serving Suggestions
-
Halloween Party Centerpiece – Arrange your glowing treats on a platter near a blacklight for maximum spook factor.
-
Glow-in-the-Dark Birthday Party – Serve them with neon cups, plates, and glow sticks to create an immersive theme.
-
Science-Themed Classroom Demonstration – Teachers can incorporate this recipe into a lesson about fluorescence. Kids can enjoy the science lesson and then eat the results.
-
Movie Night Surprise – For a family movie marathon under dimmed lights, these glowing treats bring an element of fun and surprise.
Tips for Success
-
Grease Everything – From spatulas to your hands, applying a little butter or spray prevents sticky frustrations when pressing the mixture.
-
Don’t Overheat Marshmallows – Keep the heat low and stir constantly to avoid burning or hardening the mixture.
-
Work Quickly – The marshmallow mixture sets fast, so mix in the cereal and press it into the pan without delay.
-
Use Fresh Marshmallows – Stale marshmallows won’t melt as smoothly and can result in a lumpy texture.
-
Store Properly – Keep treats in an airtight container at room temperature. They taste best within 48 hours.
Prep and Cooking Time
-
Prep Time: 10 minutes
-
Setting Time: 1–2 hours
-
Total Time: Approximately 2 hours and 15 minutes
Nutritional Information (Per Serving, Approx. 1 Square)
-
Calories: 150
-
Protein: 1 g
-
Sodium: 80 mg
Values may vary depending on the size of your portions, additional mix-ins, or food coloring used.
Frequently Asked Questions
Q: Do these treats glow without a blacklight?
A: No. The glow effect requires UV lighting because quinine fluoresces only under a blacklight.
Q: Does tonic water change the flavor?
A: Tonic water adds a slight bitterness, but the marshmallows’ sweetness balances it out. Most people barely notice the difference.
Q: Can I make them without tonic water?
A: Yes, but they won’t glow. You can still use neon food coloring for a bright, fun look.
Q: Can I use diet tonic water?
A: Absolutely. As long as it contains quinine, the glow will still work.
Q: How long do these treats stay fresh?
A: They’re best eaten within two days. After that, they tend to lose their chewy texture.
Q: Can I freeze Glow in the Dark Rice Krispies Treats?
A: Freezing isn’t recommended, as it ruins both the texture and glow effect.
Conclusion
Glow in the Dark Rice Krispies Treats take a classic childhood snack and elevate it into an unforgettable culinary adventure. With their luminous glow, playful colors, and familiar taste, these treats bring together the best of science, creativity, and nostalgia. They’re perfect for parties, classroom experiments, or simply a fun night at home with family.
The secret lies in a simple, science-backed ingredient—tonic water with quinine—that transforms ordinary marshmallow squares into glowing works of edible art under a blacklight. Combined with neon food coloring, clever shapes, and imaginative presentation, these treats are guaranteed to make a lasting impression.
Whether you’re hosting a Halloween bash, organizing a glow party, or just looking for a unique recipe to impress friends and family, Glow in the Dark Rice Krispies Treats deliver flavor, fun, and a fascinating touch of science all in one bite. Dessert doesn’t just have to taste good—it can amaze, delight, and shine brightly too.