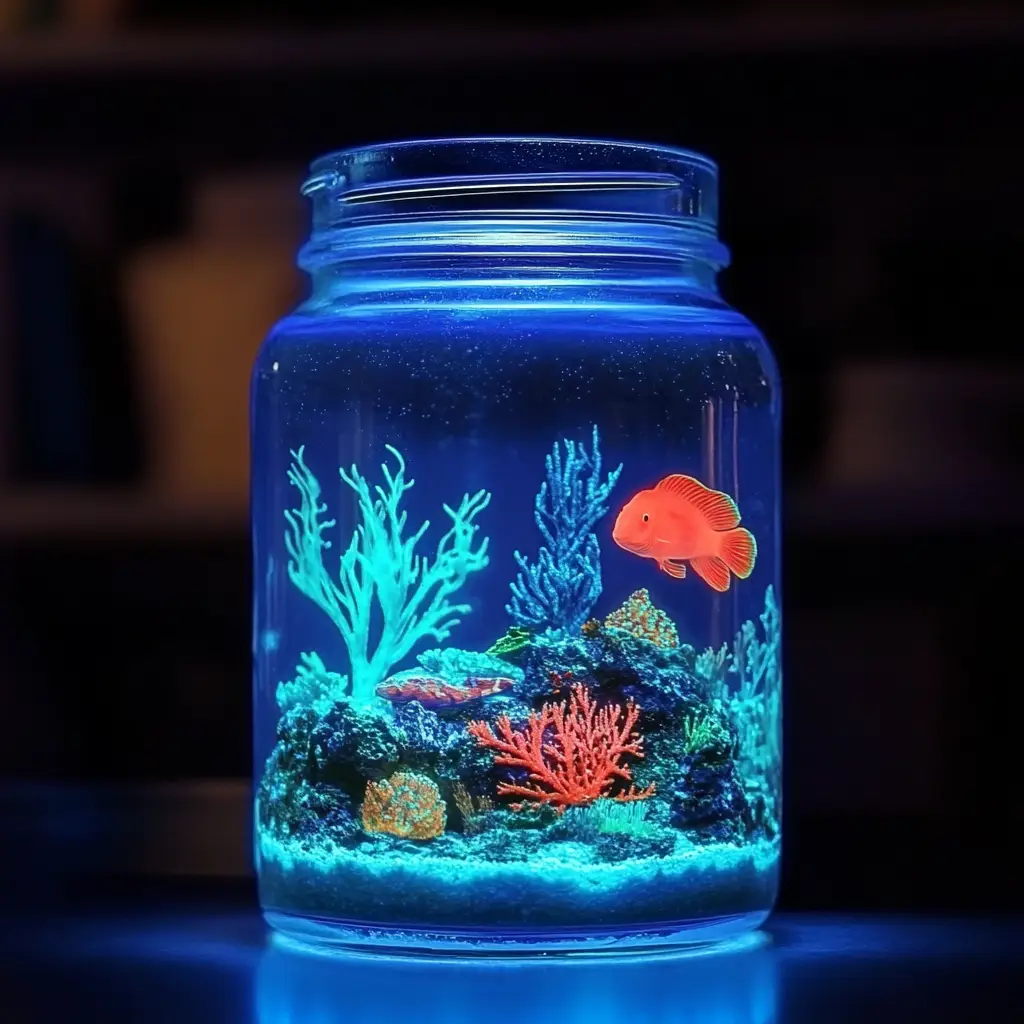
There’s something undeniably captivating about the ocean. Its depths are filled with mystery, movement, and life—and now, you can capture that wonder in the palm of your hand with this DIY Glow-in-the-Dark Ocean Jar. Part science experiment, part sensory activity, and part nightlight, this craft invites both children and adults to create a glowing underwater world filled with twinkling lights, drifting creatures, and peaceful swirling currents.
In an age of screens and overstimulation, hands-on projects like this offer a welcome return to tactile learning and creativity. Whether you’re homeschooling, crafting with kids on a rainy day, or looking for a calming desk companion, this jar is not only beautiful but also educational, engaging, and relaxing.
This guide will walk you through everything you need to know to make your own mesmerizing glow-in-the-dark ocean jar, from ingredients and preparation to creative variations, educational benefits, safety tips, and beyond.
Why You’ll Love This Project
Here’s why this simple jar craft has become so popular among parents, educators, and craft enthusiasts:
-
🧠 Stimulates Curiosity – It’s an imaginative way to explore scientific concepts like viscosity, density, and light refraction.
-
💙 Therapeutic Benefits – The slow, rhythmic motion of glitter and beads floating in thickened water can be incredibly calming, making this a perfect sensory tool.
-
🧴 Budget-Friendly – Most materials are inexpensive and easily found at home or at any local store.
-
✨ Endlessly Customizable – You can theme your jar around anything: ocean, galaxy, fairy lights, or even a holiday like Halloween or Christmas.
-
🌙 Nightlight Alternative – When charged under a blacklight or sunlight, it glows in the dark beautifully, creating a soft nighttime ambiance.
-
👨👩👧 Great for All Ages – Safe and fun for children with adult supervision, and just as enjoyable for teens or adults seeking a mindful break.
Materials You’ll Need
Gather your ingredients before you begin. Here’s a list of what you’ll need to create your glowing marine world:
Essentials
-
1 clear jar with a tight-fitting lid – Choose glass or thick plastic. A mason jar, baby food jar, or plastic water bottle works great.
-
Warm water – Helps dissolve glue and blend materials better.
-
1–2 tablespoons of clear glue or baby oil – Acts as a thickener to slow the movement inside.
-
Blue food coloring or non-toxic glow-in-the-dark paint – For your ocean color and glowing effect.
-
Glow-in-the-dark beads, glitter, or sequins – These catch and reflect light, providing the magical glow.
-
Small plastic sea creatures – Turtles, fish, sharks, jellyfish—any tiny ocean animal works.
Optional Additions
-
Mini aquarium plants or tiny seashells – Adds realistic ocean detail.
-
Glycerin (a few drops) – Slows movement even more for a calming effect.
-
UV blacklight flashlight or sunlight – For activating the glow-in-the-dark elements.
Step-by-Step Instructions
Let’s walk through each step of making your own glowing ocean in a jar.
Step 1: Fill the Jar
Begin by filling the jar with warm water. Leave about 1 inch of space at the top to allow for movement. Warm water makes it easier to mix glue or paint evenly.
Step 2: Add the Thickener
Stir in 1–2 tablespoons of clear glue (or baby oil). This creates viscosity, which slows the motion of your floating items and makes the visual experience more dreamy and relaxing.
-
More glue = slower movement.
-
Less glue = faster, more energetic swirls.
If you’re using baby oil instead, you’ll get a slightly different effect—it creates a layered look with less cloudy texture.
Step 3: Add Color and Glow
Add a few drops of blue food coloring to simulate ocean water. If you’re using glow-in-the-dark paint, this is the time to mix it in too. Be sure to use non-toxic glow paint designed for crafts.
Pro tip: Add color gradually and mix well. You want a light, oceanic tint that still allows the glowing elements inside to shine.
Step 4: Decorate the Ocean
Now, the fun really begins—bring your ocean to life!
-
Add glow-in-the-dark beads (available online or at craft stores).
-
Sprinkle in glitter or holographic sequins for sparkle and light reflection.
-
Drop in small plastic sea creatures for realism and play value.
-
Add mini plants or shells to make the scene even more realistic.
All these pieces will move, swirl, and catch the light when you shake or tilt the jar.
Step 5: Optional Glycerin
If you want to slow down the movement inside the jar even more, add a few drops of glycerin. This is especially helpful for creating a meditative or sensory bottle effect, which is soothing for both children and adults.
Step 6: Seal the Jar
Once your ocean is built, it’s time to secure it.
-
Screw the lid on tightly.
-
For extra security (especially for young children), glue the lid shut using hot glue or super glue.
-
Wipe off any excess glue and let it dry before use.
Step 7: Charge It Up
To make the ocean glow, it needs to “charge” under light.
-
Blacklight: The most effective and instant method.
-
Sunlight: Takes longer, but still works well.
After charging, turn off the lights and watch the magic happen. Your ocean jar will glow, shimmer, and swirl like a real bioluminescent bay!
Creative Variations
You’re not limited to just one kind of ocean jar. Here are some ideas to mix it up:
🧜♀️ Mermaid Jar
Add pastel-colored glitter, a mini mermaid figurine, and pink or aqua glow beads. Top it off with iridescent sequins.
🌌 Galaxy in a Jar
Use purple, black, and blue food coloring with star-shaped sequins and neon paint to create a galactic version of this jar.
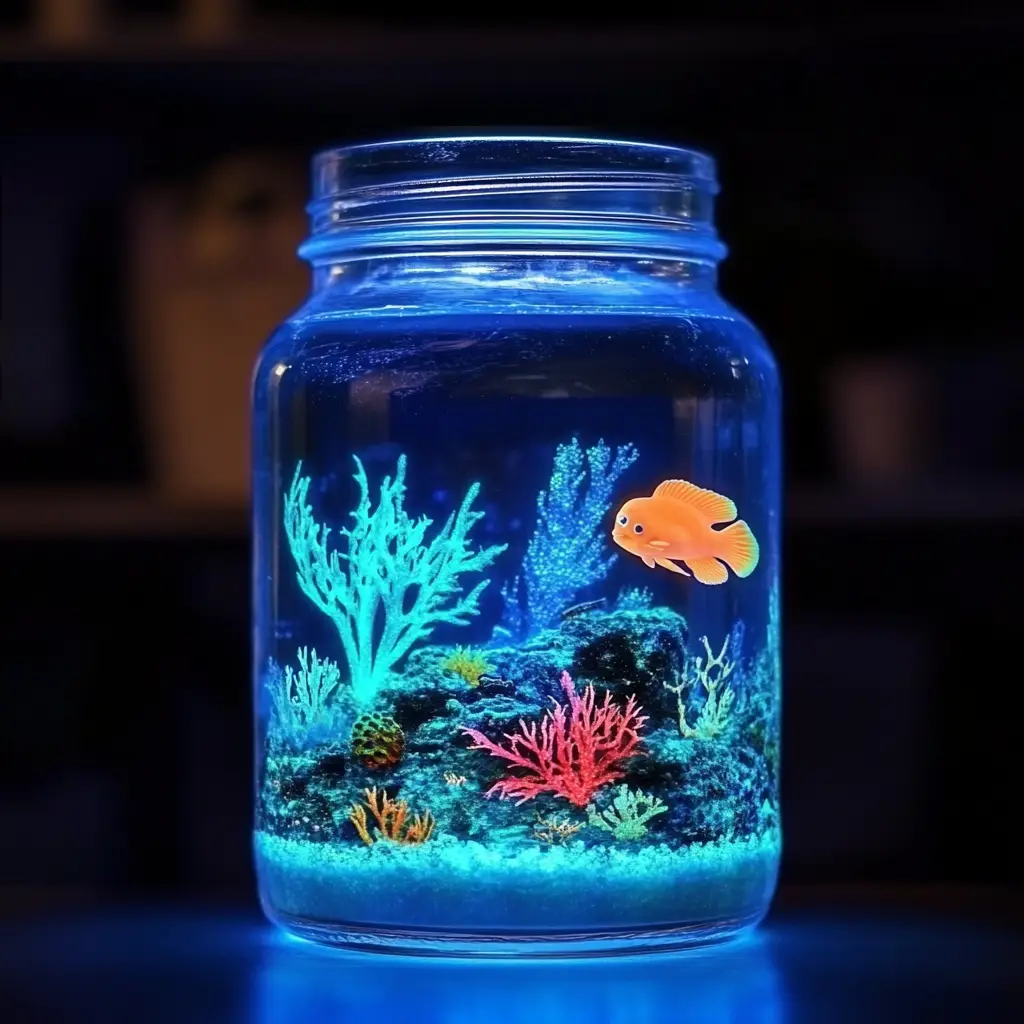
🐠 Finding Nemo-Themed Jar
Use orange glitter, a small clownfish toy, and vibrant coral-colored beads.
🎃 Spooky Sea Jar
Black water, glow paint, mini skeletons or fake spiders, and green glitter for Halloween vibes.
❄️ Frozen Sea Jar
Light blue coloring, silver glitter, and white beads make this look like an arctic sea. Add a mini polar bear or seal toy for effect.
Each version provides a new way to explore creativity while reusing the same basic structure.
The Science Behind the Magic
This project isn’t just fun—it’s also a great opportunity to explore science!
Density
Heavier items sink, lighter items float. The glue changes the density of the water, affecting how quickly items move through it.
Light & Refraction
The glow-in-the-dark elements absorb light and emit it when the environment is dark. This is phosphorescence, a cool phenomenon you can explain while crafting.
Viscosity
Glue and glycerin increase the viscosity of water, which slows down motion and creates smoother swirls.
This project can easily be tied into STEM lessons on matter, light, or energy, making it perfect for teachers and homeschoolers.
Sensory & Educational Benefits
The Glow-in-the-Dark Ocean Jar doubles as a sensory tool and educational activity. Here’s how:
-
🧠 Visual Stimulation: The swirling glitter and glowing lights engage children with visual sensory needs.
-
✋ Fine Motor Development: Pouring, stirring, and assembling the jar helps kids develop coordination.
-
🧘 Calming Effect: Shaking and watching the jar can soothe anxiety and promote mindfulness.
-
🧪 Hands-on Science: Kids learn scientific concepts through play—without even realizing they’re learning!
Many educators and therapists use similar “calm-down jars” in classrooms and therapy sessions.
Storage, Lifespan & Maintenance
-
Store the jar upright in a cool place away from sunlight to preserve the contents.
-
Over time, some glitter may settle, and color may fade—just give it a shake and recharge the glow elements.
-
With proper sealing, these jars can last several months to a year or more.
FAQs
Can I use tap water instead of warm water?
Yes, but warm water helps dissolve glue or paint more evenly.
What can I use instead of glue or oil?
You can use glycerin only, but the motion might be faster. Gel-based soaps are another alternative.
Is this safe for toddlers?
Yes—with supervision. Ensure the lid is sealed tightly and avoid small parts that could be a choking hazard.
How long does the glow last?
Usually 15–30 minutes after charging, depending on the quality of your glow-in-the-dark materials.
Can I reuse the contents?
You can replace or add new elements over time, but old glitter may clump. For a fresh look, it’s best to create a new jar.
Conclusion
The Glow-in-the-Dark Ocean Jar is a perfect fusion of creativity, science, and relaxation. It’s easy to make, budget-friendly, and endlessly customizable for any theme or occasion. Whether you’re creating it as a calming sensory bottle, a child’s craft project, a glowing decoration, or a thoughtful DIY gift, this magical underwater world in a jar is sure to inspire awe and joy.
So gather your glitter, grab a jar, and let your creativity set sail into glowing, swirling oceans—right from the comfort of your own home.