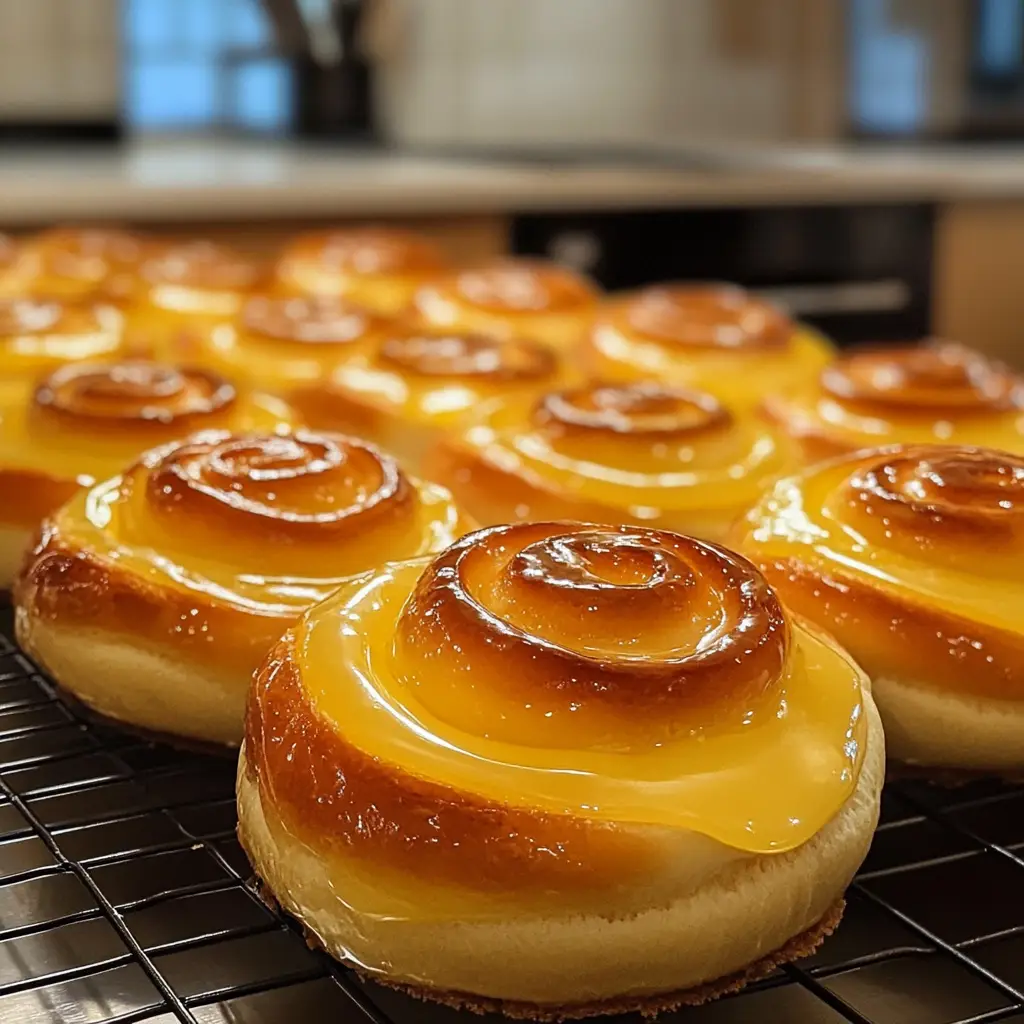
Introduction to Glazed Lemon Curd Buns Recipe
As a passionate home cook, I find joy in creating delightful treats that not only satisfy the taste buds but also bring a smile to the faces of my loved ones. One of my all-time favorite recipes is the Glazed Lemon Curd Buns. These buns are like little bites of sunshine, bursting with zesty lemon flavor and a sweet, glossy glaze that makes them irresistible.
It all started on a bright Saturday morning when I decided to experiment with some leftover lemon curd I had made for a tart. The sun was shining, and the scent of fresh lemons filled my kitchen, inspiring me to create something special. I combined my love for baking with the tangy goodness of lemon curd, and voilà! The Glazed Lemon Curd Buns were born. They quickly became a family favorite, and I often whip them up for brunch gatherings or cozy afternoons with a cup of tea.
What I adore about this recipe is its simplicity. With just a handful of ingredients, you can create a treat that feels fancy yet comforting. The soft, pillowy buns are filled with luscious lemon curd, and the glaze adds that perfect finishing touch. Each bite is a delightful dance of flavors, making it hard to stop at just one!
In this article, I’ll guide you through the process of making these scrumptious buns, sharing tips and tricks I’ve learned along the way. Whether you’re a seasoned baker or just starting out, I promise you’ll find joy in creating these delightful treats. So, let’s roll up our sleeves and get started on this lemony adventure!
Ingredients for Glazed Lemon Curd Buns Recipe
Before we dive into the delightful process of making Glazed Lemon Curd Buns, let’s gather our ingredients. Having everything ready makes the baking experience smoother and more enjoyable. Here’s what you’ll need:
Main Ingredients
- 2 cups all-purpose flour
- 1/4 cup granulated sugar
- 1/2 teaspoon salt
- 1 packet (2 1/4 teaspoons) active dry yeast
- 1/2 cup warm milk (about 110°F or 43°C)
- 1/4 cup unsalted butter, melted
- 1 large egg
- 1/2 cup lemon curd (store-bought or homemade)
- 1 cup powdered sugar (for glazing)
- 2 tablespoons fresh lemon juice (for glazing)
When choosing your ingredients, I recommend using high-quality butter and fresh lemons for the best flavor. The warmth of the milk is crucial for activating the yeast, so make sure it’s not too hot or too cold. Trust me, the right temperature makes all the difference!
Optional Add-ons
- 1 teaspoon vanilla extract (for added flavor)
- 1 tablespoon lemon zest (to enhance the lemony aroma)
- Sprinkles or edible glitter (for a fun touch on the glaze)
If you want to elevate your buns even further, consider adding a teaspoon of vanilla extract to the dough. It adds a lovely depth of flavor that pairs beautifully with the lemon. And don’t forget the lemon zest! It’s like a burst of sunshine in every bite. As for the sprinkles, they’re not just for kids; they add a whimsical touch that makes these buns even more special!
How to Prepare Glazed Lemon Curd Buns Recipe
Now that we have our ingredients ready, it’s time to roll up our sleeves and dive into the fun part—making the Glazed Lemon Curd Buns! I promise, the process is just as delightful as the end result. Let’s take it step by step, and I’ll share some of my favorite tips along the way.
Step 1: Making the Dough
First things first, let’s make the dough. In a large mixing bowl, combine the warm milk and active dry yeast. Let it sit for about 5 minutes until it becomes frothy. This is a sign that your yeast is alive and ready to work its magic!
Next, add the melted butter, sugar, egg, and salt to the yeast mixture. Stir it all together until well combined. Gradually add the flour, mixing until a soft dough forms. You might need to use your hands to knead it a bit, which is always a fun part!
Tips for Step 1
- Make sure your milk is warm, not hot. If it’s too hot, it can kill the yeast.
- Don’t rush the kneading process. Knead the dough for about 5-7 minutes until it’s smooth and elastic. It’s like giving your dough a little massage!
Step 2: Preparing the Lemon Curd
While the dough is rising, let’s prepare the lemon curd if you’re making it from scratch. In a saucepan, combine fresh lemon juice, sugar, and eggs. Whisk them together over low heat until the mixture thickens. This usually takes about 10 minutes. Once thickened, remove it from the heat and stir in some butter until it melts. Voila! You have a luscious lemon curd ready to fill your buns.
Tips for Step 2
- Keep stirring the mixture constantly to prevent it from curdling.
- Let the lemon curd cool completely before using it in the buns. It’ll be easier to handle!
Step 3: Assembling the Buns
Once your dough has risen (it should double in size), punch it down gently to release the air. Roll it out on a floured surface into a rectangle about 1/2 inch thick. Spread the cooled lemon curd evenly over the dough, leaving a small border around the edges. Then, roll the dough tightly from one end to the other, creating a log. Slice the log into equal pieces, about 1 inch thick.
Tips for Step 3
- Use a sharp knife or a bench scraper to cut the dough. This helps keep the edges neat.
- Don’t worry if some lemon curd spills out; it just adds to the deliciousness!
Step 4: Baking the Buns
Preheat your oven to 350°F (175°C). Place the sliced buns in a greased baking dish, leaving some space between them to rise. Cover the dish with a clean kitchen towel and let them rise for another 30 minutes. Once they’ve puffed up, pop them in the oven and bake for about 20-25 minutes, or until they’re golden brown.
Tips for Step 4
- Keep an eye on the buns as they bake. Every oven is different, and you want them just golden, not too dark.
- For an extra touch, brush the tops with melted butter right after they come out of the oven!
Step 5: Glazing the Buns
While the buns are cooling, let’s make the glaze. In a small bowl, mix the powdered sugar with fresh lemon juice until smooth. Once the buns have cooled slightly, drizzle the glaze over the top. You can use a spoon or a piping bag for a more decorative touch. The glaze will harden a bit, creating a beautiful finish!
Tips for Step 5
- For a thicker glaze, add more powdered sugar. For a thinner glaze, add a bit more lemon juice.
- Feel free to sprinkle some lemon zest on top of the glaze for an extra pop of flavor!
Equipment Needed for Glazed Lemon Curd Buns Recipe
Before we embark on our baking journey, let’s gather the essential tools that will make the process smooth and enjoyable. Having the right equipment on hand can make all the difference in your baking experience. Here’s what you’ll need:
- Mixing Bowls: A large mixing bowl for the dough and a smaller one for the glaze will do the trick. If you don’t have a large bowl, you can use two medium-sized bowls instead.
- Measuring Cups and Spoons: Accurate measurements are key to baking success. A set of dry measuring cups and spoons will help you get it just right.
- Whisk: A whisk is perfect for mixing the lemon curd and the glaze. If you don’t have one, a fork can work in a pinch!
- Rolling Pin: This is essential for rolling out the dough. If you don’t have a rolling pin, a clean wine bottle can serve as a great alternative.
- Sharp Knife or Bench Scraper: Use this for cutting the rolled dough into buns. A sharp knife will give you clean edges, but a bench scraper is also handy for lifting and transferring the buns.
- Baking Dish: A greased 9×13 inch baking dish is ideal for holding your buns. If you don’t have one, a round cake pan can work too!
- Kitchen Towel: This will help cover the buns while they rise, keeping them warm and cozy.
With these tools at your side, you’ll be well-equipped to create your Glazed Lemon Curd Buns. Remember, the joy of baking comes not just from the end result but also from the process itself. So, let’s get started and have some fun in the kitchen!
Variations of Glazed Lemon Curd Buns Recipe
While I absolutely adore the classic Glazed Lemon Curd Buns, there are so many fun variations you can try to keep things exciting in the kitchen! Each twist adds a unique flavor profile, making these buns even more delightful. Here are a few of my favorite variations:
- Blueberry Lemon Curd Buns: Add a handful of fresh or frozen blueberries to the lemon curd filling. The sweet-tart berries complement the lemon beautifully, creating a burst of flavor in every bite.
- Chocolate Chip Lemon Curd Buns: For a decadent twist, sprinkle some mini chocolate chips into the dough before rolling it up. The rich chocolate pairs surprisingly well with the zesty lemon curd.
- Herbed Lemon Curd Buns: Incorporate fresh herbs like rosemary or thyme into the dough for a savory touch. The herbal notes add depth and complexity, making these buns perfect for a brunch spread.
- Almond Lemon Curd Buns: Swap out some of the all-purpose flour for almond flour and add a splash of almond extract to the dough. This nutty flavor enhances the lemon and gives the buns a delightful twist.
These variations are just the tip of the iceberg! Feel free to get creative and experiment with your favorite flavors. After all, baking is all about having fun and making something uniquely yours. I can’t wait to hear about the delicious combinations you come up with!
Cooking Notes for Glazed Lemon Curd Buns Recipe
As I’ve baked these Glazed Lemon Curd Buns time and time again, I’ve gathered a few cooking notes that can help you achieve the best results. These little nuggets of wisdom can make a big difference in your baking journey!
- Room Temperature Ingredients: For the best texture, make sure your egg and butter are at room temperature before mixing. This helps create a smooth and cohesive dough.
- Don’t Rush the Rising: Allow the dough to rise until it has doubled in size. This step is crucial for achieving those soft, fluffy buns. Patience is key!
- Watch the Oven: Every oven is unique, so keep an eye on your buns as they bake. If they start to brown too quickly, you can cover them loosely with aluminum foil to prevent over-baking.
- Cool Before Glazing: Let the buns cool slightly before adding the glaze. This prevents the glaze from melting away and ensures a beautiful finish.
- Storage Tips: If you have leftovers (which is rare!), store them in an airtight container at room temperature for up to two days. You can also freeze them for up to a month—just thaw and reheat before enjoying!
These cooking notes are like little treasures I’ve picked up along the way. They help me create the perfect batch of Glazed Lemon Curd Buns every time. I hope they guide you on your baking adventure, making it as enjoyable and successful as possible!
Serving Suggestions for Glazed Lemon Curd Buns Recipe
Now that we’ve created these delightful Glazed Lemon Curd Buns, it’s time to think about how to serve them! Presentation can elevate your baking experience, making it even more enjoyable for you and your guests. Here are some of my favorite serving suggestions:
- Brunch Delight: Serve the buns warm on a beautiful platter alongside fresh fruit, like strawberries or blueberries. The vibrant colors and flavors create a lovely brunch spread that’s sure to impress!
- Tea Time Treat: Pair the buns with a pot of your favorite tea. The zesty lemon flavor complements herbal teas beautifully, making for a cozy afternoon treat.
- Ice Cream Indulgence: For a fun twist, serve the buns with a scoop of vanilla or lemon sorbet on the side. The creamy texture and cold temperature contrast wonderfully with the warm, soft buns.
- Breakfast Boost: Enjoy them as a quick breakfast option. Just pop a bun in the microwave for a few seconds to warm it up, and you’re ready to start your day with a burst of lemony goodness!
These serving suggestions are just a starting point! Feel free to get creative and make them your own. Whether it’s a casual family gathering or a fancy brunch, these Glazed Lemon Curd Buns will surely steal the show. Happy serving!
Tips for Perfecting Glazed Lemon Curd Buns Recipe
As I’ve baked my fair share of Glazed Lemon Curd Buns, I’ve gathered a treasure trove of tips that can help you achieve perfection. These little nuggets of wisdom can elevate your baking game and ensure your buns turn out just right every time. Here are my top tips:
- Measure Accurately: Baking is a science, so precise measurements are crucial. Use a kitchen scale for the best results, especially for flour and sugar.
- Don’t Skip the Rise: Allow the dough to rise fully. This step is essential for achieving that light and fluffy texture. If you’re in a hurry, find a warm spot in your kitchen to speed up the process.
- Experiment with Flavors: Don’t hesitate to add your twist! Whether it’s a hint of vanilla or a sprinkle of cinnamon, small changes can create delightful surprises.
- Use Fresh Ingredients: Fresh lemons and high-quality butter make a world of difference in flavor. Trust me, your taste buds will thank you!
- Practice Patience: Let the buns cool before glazing. This prevents the glaze from melting away and ensures a beautiful finish that’s Instagram-worthy!
With these tips in your back pocket, you’ll be well on your way to creating the most scrumptious Glazed Lemon Curd Buns. Remember, baking is all about enjoying the process, so have fun and let your creativity shine!
Breakdown of Time for Glazed Lemon Curd Buns Recipe
As a home cook, I know that time management is key in the kitchen. When I’m whipping up my Glazed Lemon Curd Buns, I like to have a clear idea of how long each step will take. This way, I can plan my baking adventure without feeling rushed. Here’s a handy breakdown of the time you’ll need:
- Prep Time: Approximately 20 minutes. This includes gathering your ingredients, making the dough, and preparing the lemon curd.
- Rising Time: About 1 hour. This is the time it takes for the dough to rise and double in size, so you can take a breather or enjoy a cup of tea while you wait!
- Cooking Time: 20-25 minutes. This is the time your buns will spend in the oven, filling your kitchen with that delightful lemony aroma.
- Total Time: Roughly 1 hour and 45 minutes. This includes all the prep, rising, and baking time, giving you a delicious batch of buns to enjoy!
Having this time breakdown helps me stay organized and makes the baking process feel more manageable. Plus, it builds anticipation for those warm, gooey buns that are just around the corner! So, grab your apron and let’s get baking!
Nutritional Information for Glazed Lemon Curd Buns Recipe
As a passionate home cook, I believe that enjoying delicious treats like Glazed Lemon Curd Buns can be part of a balanced lifestyle. While these buns are a delightful indulgence, it’s always good to know what you’re putting into your body. Here’s a general breakdown of the nutritional information for one Glazed Lemon Curd Bun:
- Calories: Approximately 200 calories
- Protein: 3 grams
- Fat: 7 grams
- Carbohydrates: 30 grams
- Sugar: 10 grams
- Fiber: 1 gram
Keep in mind that these values can vary based on the specific ingredients you use and the size of your buns. If you’re looking to lighten them up a bit, consider using less sugar in the glaze or swapping some of the all-purpose flour for whole wheat flour. No matter how you make them, these buns are sure to bring a burst of joy to your day!
Frequently Asked Questions about Glazed Lemon Curd Buns Recipe
As I’ve shared my Glazed Lemon Curd Buns recipe with friends and family, I’ve noticed a few common questions pop up. It’s always great to clarify any doubts, especially when it comes to baking. Here are some frequently asked questions that might help you on your baking journey:
Can I use store-bought lemon curd?
Absolutely! Using store-bought lemon curd can save you time and still yield delicious results. Just make sure to choose a high-quality brand for the best flavor. However, if you have the time, I highly recommend trying homemade lemon curd at least once. The fresh taste is simply unbeatable!
How do I store leftover buns?
If you happen to have any buns left (which is rare in my house!), store them in an airtight container at room temperature for up to two days. You can also freeze them for up to a month. Just thaw and reheat them in the microwave or oven before enjoying!
Can I make the dough ahead of time?
Yes, you can! If you want to prepare the dough in advance, simply make it and let it rise. After the first rise, punch it down and wrap it tightly in plastic wrap. You can refrigerate it for up to 24 hours. When you’re ready to bake, let it come to room temperature before proceeding with the recipe.
What can I substitute for all-purpose flour?
If you’re looking for alternatives, you can use a gluten-free all-purpose flour blend or substitute half of the all-purpose flour with whole wheat flour for a nuttier flavor. Just keep in mind that the texture may vary slightly, but the buns will still be delicious!
Can I add other flavors to the glaze?
Definitely! Feel free to get creative with your glaze. You can add a splash of vanilla extract, a hint of almond extract, or even a bit of orange juice for a citrus twist. The possibilities are endless, and it’s a fun way to personalize your buns!
These questions are just a few of the common inquiries I’ve encountered while baking my Glazed Lemon Curd Buns. If you have any other questions or need further clarification, don’t hesitate to reach out. Happy baking, and may your kitchen be filled with the delightful aroma of lemony goodness!
Conclusion on Glazed Lemon Curd Buns Recipe
As I wrap up this delightful journey of baking Glazed Lemon Curd Buns, I can’t help but feel a sense of joy and satisfaction. These buns are more than just a treat; they are a celebration of flavors, a burst of sunshine on a plate, and a way to bring loved ones together. The combination of soft, pillowy dough filled with luscious lemon curd and topped with a sweet glaze creates a symphony of taste that is simply irresistible.
What I love most about this recipe is its versatility. Whether you’re hosting a brunch, enjoying a cozy afternoon tea, or simply treating yourself, these buns fit the occasion perfectly. Plus, with the option to customize flavors and add your personal touch, every batch can be a new adventure in the kitchen.
So, I encourage you to roll up your sleeves and give this recipe a try. Embrace the process, savor the aromas, and enjoy the delightful moments that come with baking. I promise, the smiles and happy faces that follow will make it all worthwhile. Happy baking, and may your Glazed Lemon Curd Buns bring as much joy to your home as they have to mine!