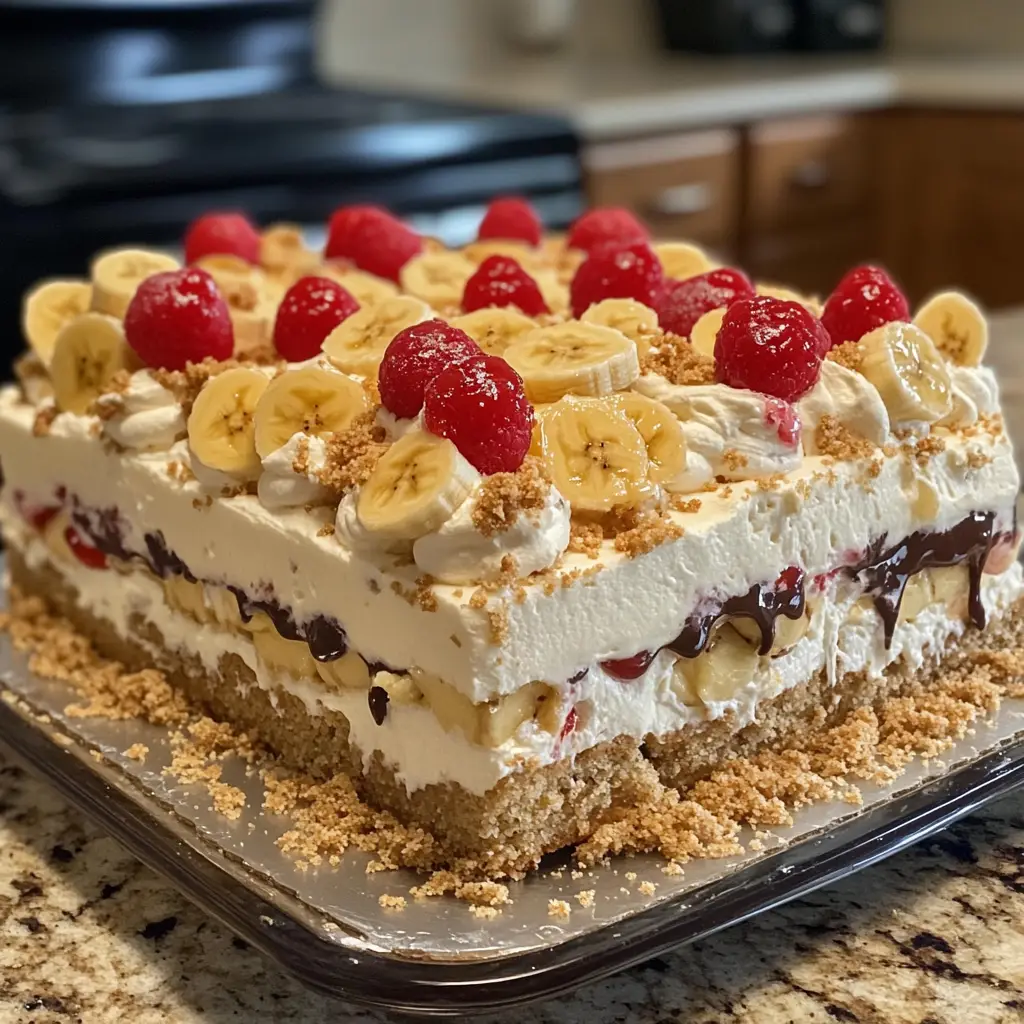
Introduction to Easy Layered No-Bake Banana Split Cake with Graham Crust
As a busy mom, I know how precious time can be, especially during the summer months when the kids are home. That’s why I absolutely adore this Easy Layered No-Bake Banana Split Cake with Graham Crust. It’s a delightful treat that requires minimal effort but delivers maximum flavor. Imagine a dessert that not only impresses your loved ones but also keeps you cool in the kitchen! This no-bake wonder is perfect for summer gatherings, potlucks, or simply a sweet escape after a long day. Trust me, your family will be begging for seconds!
Why You’ll Love This Easy Layered No-Bake Banana Split Cake with Graham Crust
This Easy Layered No-Bake Banana Split Cake with Graham Crust is a lifesaver for busy days. It comes together in just 20 minutes, leaving you with more time to enjoy summer fun. The combination of creamy, fruity, and chocolatey layers creates a taste explosion that will have everyone raving. Plus, it’s a no-bake recipe, so you can keep your kitchen cool while still serving up something spectacular!
Ingredients for Easy Layered No-Bake Banana Split Cake with Graham Crust
Gathering the right ingredients is the first step to creating this delightful dessert. Here’s what you’ll need:
- Graham cracker crumbs: These form the base of your cake, giving it that classic crunch and sweetness.
- Unsalted butter: Melted butter binds the crumbs together, creating a rich and buttery crust.
- Powdered sugar: This sweetener adds a touch of sweetness to the cream cheese mixture, making it smooth and creamy.
- Cream cheese: Softened cream cheese provides a rich, tangy flavor that balances the sweetness of the dessert.
- Whipped topping: This light and airy ingredient adds volume and creaminess to the filling, making it irresistible.
- Ripe bananas: Sliced bananas bring a natural sweetness and a lovely texture to the layers. Choose ripe ones for the best flavor!
- Pineapple chunks: These add a tropical twist and a juicy burst of flavor that complements the other fruits.
- Strawberries: Fresh strawberries not only add color but also a sweet-tart flavor that brightens the dessert.
- Chocolate syrup: A drizzle of chocolate syrup ties everything together, adding a decadent touch.
- Chopped nuts (optional): If you like a bit of crunch, sprinkle some chopped nuts on top for added texture and flavor.
For exact measurements, check the bottom of the article where you can find everything listed for easy printing. Feel free to get creative with your fruit choices! You can swap in your favorites or whatever you have on hand. This recipe is all about making it your own!
How to Make Easy Layered No-Bake Banana Split Cake with Graham Crust
Now that you have all your ingredients ready, let’s dive into the fun part—making this Easy Layered No-Bake Banana Split Cake with Graham Crust! Follow these simple steps, and you’ll have a stunning dessert that’s sure to impress.
Step 1: Prepare the Graham Cracker Crust
Start by combining your graham cracker crumbs and melted butter in a mixing bowl. Stir until the crumbs are fully coated and resemble wet sand. Then, press this mixture firmly into the bottom of a 9×13 inch pan. Make sure it’s even and compact; this will be the sturdy base for your cake!
Step 2: Make the Cream Cheese Mixture
In another bowl, mix the powdered sugar and softened cream cheese together until smooth. I like to use an electric mixer for this, but a whisk works too if you’re feeling strong! Once it’s creamy, gently fold in the whipped topping. This adds a lightness that makes the filling irresistible.
Step 3: Layer the Cream Cheese Mixture
Now, spread the cream cheese mixture evenly over your graham cracker crust. Use a spatula to smooth it out, making sure every corner is covered. This layer is the heart of your cake, so take your time to make it look nice!
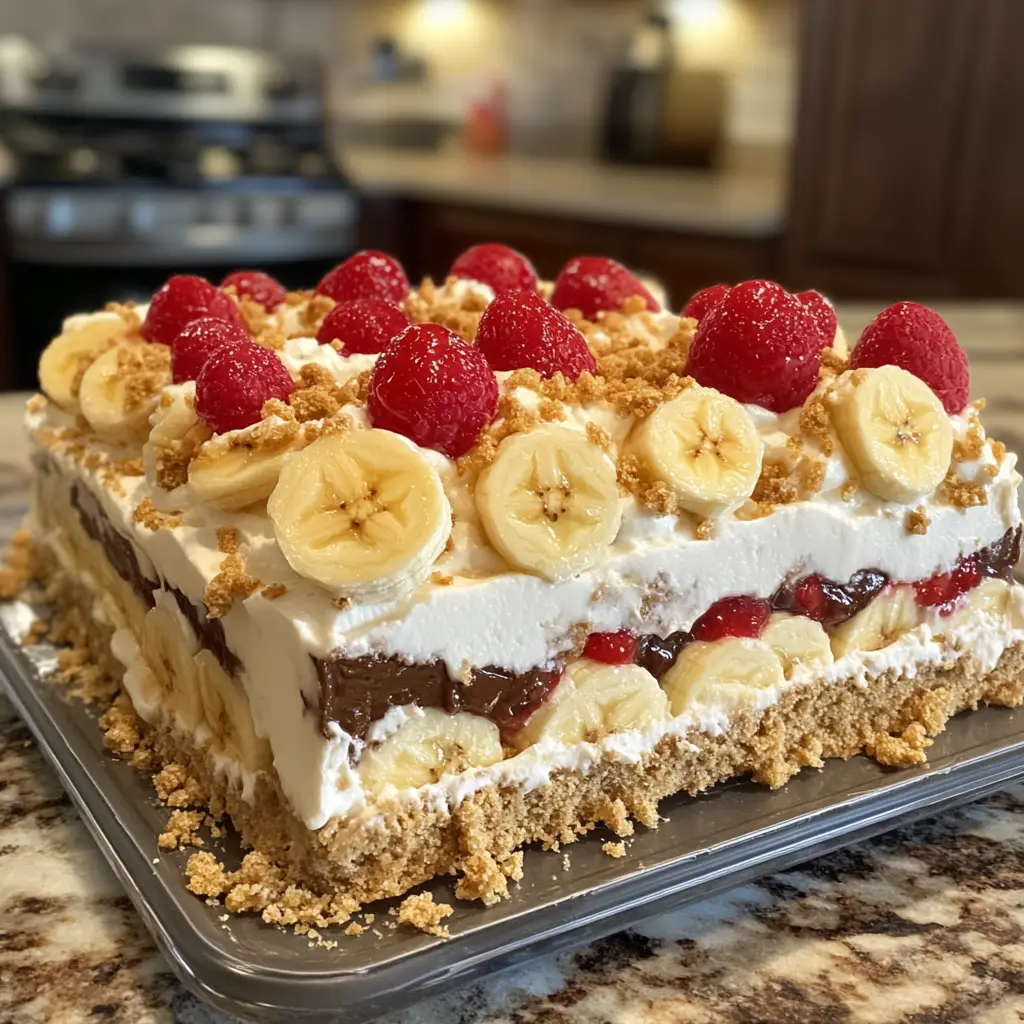
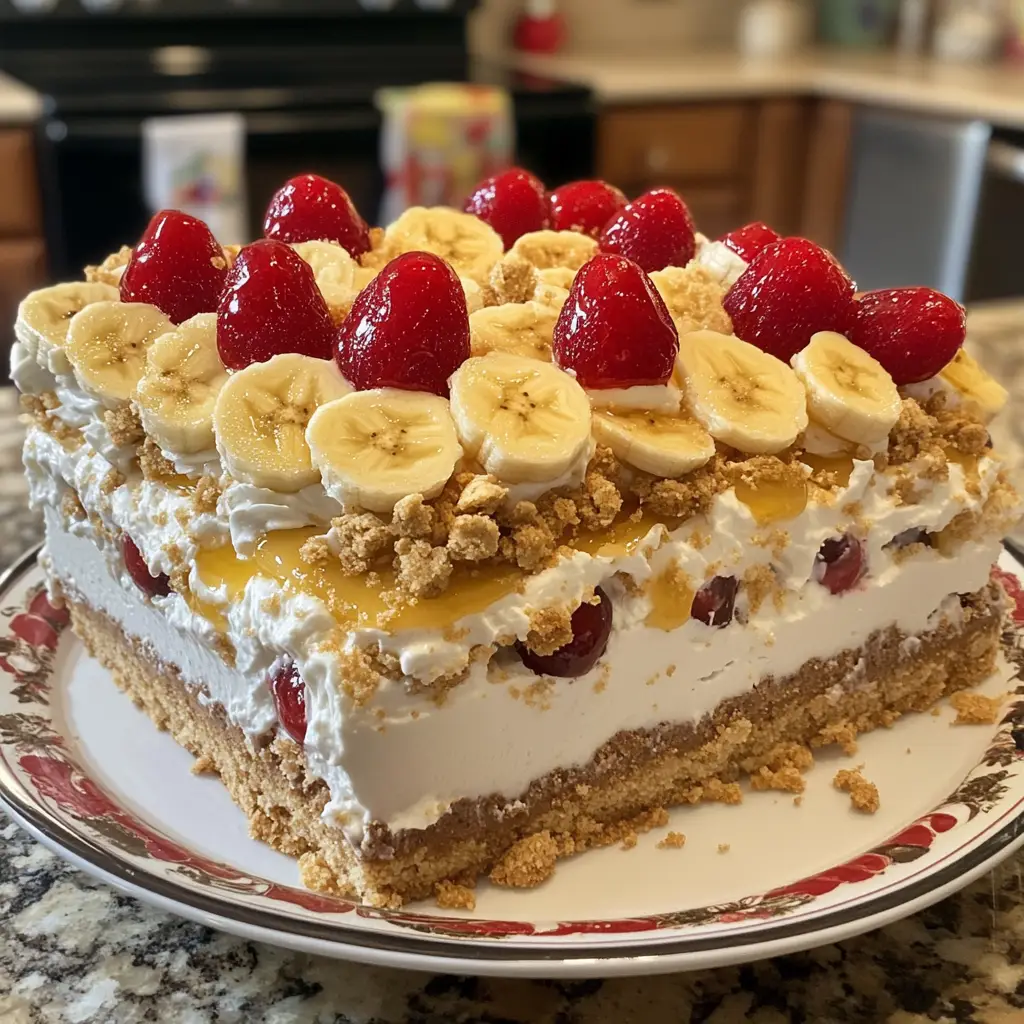
Step 4: Add the Fruit Layers
Next, it’s time to layer on the fruit! Start with the sliced bananas, followed by the pineapple chunks, and then the strawberries. Arrange them in a colorful pattern; it’s like creating a beautiful canvas of flavors. Each bite will be a delightful surprise!
Step 5: Drizzle with Chocolate Syrup
Now for the fun part—drizzling chocolate syrup over the fruit layer! You can be generous here; it adds a rich sweetness that ties everything together. Just let it flow like a chocolate waterfall, and don’t worry about being perfect!
Step 6: Top with Nuts
If you’re a fan of crunch, sprinkle some chopped nuts on top. This step is optional, but it adds a lovely texture contrast to the creamy layers. Plus, it gives your cake a little extra flair!
Step 7: Refrigerate
Finally, cover your masterpiece with plastic wrap and refrigerate for at least 4 hours, or overnight if you can wait! This chilling time allows the flavors to meld beautifully. When you’re ready to serve, just slice and enjoy the smiles on everyone’s faces!
Tips for Success
- Use ripe bananas for the best flavor and texture.
- Make this dessert a day ahead to save time and enhance the flavors.
- Feel free to mix and match fruits based on what you have on hand.
- For a firmer texture, refrigerate overnight before serving.
- Don’t skip the chilling time; it’s essential for the layers to set properly.
Equipment Needed
- 9×13 inch pan: This is essential for layering your cake. A glass or metal pan works well.
- Mixing bowls: You’ll need a couple for mixing the crust and cream cheese mixture. Any size will do!
- Spatula: A rubber spatula is perfect for spreading the cream cheese mixture evenly.
- Electric mixer or whisk: Use either to blend the cream cheese and powdered sugar smoothly.
- Plastic wrap: This is necessary for covering the cake while it chills in the fridge.
Variations
- Fruit Swap: Try using blueberries, raspberries, or peaches instead of the traditional fruits for a unique twist.
- Gluten-Free Option: Substitute graham cracker crumbs with gluten-free cookies or crushed nuts for a gluten-free crust.
- Vegan Version: Use dairy-free cream cheese and whipped topping, and replace butter with coconut oil for a vegan-friendly dessert.
- Chocolate Lovers: Add a layer of chocolate pudding between the cream cheese mixture and fruit for an extra chocolatey delight.
- Nut-Free: Omit the nuts or replace them with seeds like sunflower or pumpkin seeds for a nut-free option.
Serving Suggestions
- Pair with a scoop of vanilla ice cream for an extra creamy treat.
- Serve alongside fresh mint leaves for a pop of color and freshness.
- Complement with a chilled glass of lemonade or iced tea for a refreshing drink.
- Garnish with additional fruit slices on top for a beautiful presentation.
- Consider using colorful plates to enhance the visual appeal of your dessert.
FAQs about Easy Layered No-Bake Banana Split Cake with Graham Crust
Can I make this Easy Layered No-Bake Banana Split Cake with Graham Crust in advance?
Absolutely! In fact, making it a day ahead enhances the flavors. Just cover it well and refrigerate until you’re ready to serve.
What can I substitute for the graham cracker crust?
If you’re looking for alternatives, crushed cookies like Oreos or digestive biscuits work wonderfully. You can also use crushed nuts for a gluten-free option!
How long can I store leftovers?
Leftovers can be stored in the refrigerator for up to 3 days. Just make sure to cover it tightly to keep it fresh!
Can I use frozen fruit instead of fresh?
Yes, you can! Just make sure to thaw and drain any excess liquid from frozen fruit before layering it in the cake.
Is this dessert suitable for a crowd?
<pDefinitely! This Easy Layered No-Bake Banana Split Cake with Graham Crust yields 12 servings, making it perfect for summer gatherings or potlucks.
Final Thoughts
Creating this Easy Layered No-Bake Banana Split Cake with Graham Crust is more than just whipping up a dessert; it’s about making memories. Each layer tells a story, from the crunchy graham cracker base to the vibrant fruits that burst with flavor. I love how this recipe brings my family together, sparking joy and laughter around the table. Whether it’s a summer gathering or a simple weeknight treat, this cake is sure to delight. So, roll up your sleeves, gather your loved ones, and enjoy the sweet moments that come with every slice!
Print
Easy Layered No-Bake Banana Split Cake with Graham Crust: Discover the Perfect Summer Dessert!
- Total Time: 4 hours 20 minutes
- Yield: 12 servings 1x
- Diet: Vegetarian
Description
A delicious and easy-to-make no-bake banana split cake layered with a graham cracker crust, perfect for summer gatherings.
Ingredients
- 1 ½ cups graham cracker crumbs
- ½ cup unsalted butter, melted
- 1 cup powdered sugar
- 8 oz cream cheese, softened
- 1 cup whipped topping
- 3 ripe bananas, sliced
- 1 cup pineapple chunks, drained
- 1 cup strawberries, sliced
- ½ cup chocolate syrup
- ½ cup chopped nuts (optional)
Instructions
- In a bowl, combine graham cracker crumbs and melted butter, then press into the bottom of a 9×13 inch pan to form the crust.
- In another bowl, mix powdered sugar and cream cheese until smooth, then fold in whipped topping.
- Spread the cream cheese mixture over the graham cracker crust.
- Layer sliced bananas, pineapple chunks, and strawberries on top of the cream cheese mixture.
- Drizzle chocolate syrup over the fruit layer.
- Top with chopped nuts if desired.
- Refrigerate for at least 4 hours or overnight before serving.
Notes
- For best results, use ripe bananas.
- This dessert can be made a day in advance.
- Feel free to substitute other fruits based on your preference.
- Prep Time: 20 minutes
- Cook Time: 0 minutes
- Category: Dessert
- Method: No-Bake
- Cuisine: American
Nutrition
- Serving Size: 1 slice
- Calories: 250
- Sugar: 15g
- Sodium: 150mg
- Fat: 10g
- Saturated Fat: 5g
- Unsaturated Fat: 3g
- Trans Fat: 0g
- Carbohydrates: 35g
- Fiber: 2g
- Protein: 3g
- Cholesterol: 20mg
Keywords: No-Bake Banana Split Cake, Summer Dessert, Easy Dessert Recipe


