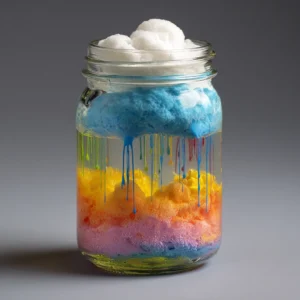
Introduction to Easy DIY Rainbow Bouncy Balls
Crafting is a wonderful way to express creativity, especially for busy moms and professionals looking to unwind. I’ve always found that taking a little time to create something with my hands can be incredibly therapeutic. One delightful project that combines fun and creativity is making Easy DIY Rainbow Bouncy Balls. This engaging activity not only allows you to create colorful toys but also provides a fantastic opportunity for quality time with your kids.
When I first stumbled upon this project, I was immediately drawn to the vibrant colors and the idea of making something that could bounce! I remember gathering my kids around the kitchen table, excited to dive into this colorful adventure. Whether you’re a crafting novice or a seasoned pro, this project is simple enough to fit into your busy schedule while delivering hours of enjoyment.
What I love most about these bouncy balls is how they spark creativity. Each ball can be a unique masterpiece, reflecting your child’s personality or mood. Plus, the joy of watching your kids play with something they made themselves is truly priceless. It’s moments like these that remind me of the importance of slowing down and enjoying the little things in life.
So, if you’re ready to unleash your inner artist and create some bouncy fun, let’s gather our materials and get started on this delightful DIY project!
Why You’ll Love This Easy DIY Rainbow Bouncy Balls
Creating Easy DIY Rainbow Bouncy Balls is a fantastic way to unleash your creativity without breaking the bank. I remember the first time I made these colorful balls with my kids; it was a whirlwind of laughter and excitement! The joy of seeing their faces light up as they rolled their very own creations was priceless.
This project is not only affordable but also incredibly simple, making it perfect for busy moms and professionals like us. With just a few ingredients that you probably already have at home, you can create something that brings joy and entertainment. Plus, the satisfaction of crafting something from scratch is a wonderful feeling.
As a busy mom, I often find it challenging to carve out time for creative activities. However, this project fits seamlessly into my schedule. The prep time is just 10 minutes, and the crafting time is only 30 minutes! Even with the 24-hour drying time, I can plan ahead and have a fun activity ready for the kids. It’s a win-win!
And let’s not forget the best part: the bonding experience. Crafting together allows us to connect, share stories, and create lasting memories. I’ve learned that it’s not just about the final product; it’s about the journey we take together. So, gather your materials, and let’s dive into this colorful adventure!
Materials Needed for Easy DIY Rainbow Bouncy Balls
To get started on your Easy DIY Rainbow Bouncy Balls, gather the following materials:
- 1/2 cup of white school glue: This is the base for your bouncy balls, providing the necessary stickiness to hold everything together.
- 1/2 cup of water: Helps to mix the glue and other ingredients smoothly, ensuring a consistent texture.
- 1/2 cup of cornstarch: Provides the necessary texture for the balls, giving them that delightful bounce.
- 1/2 cup of baking soda: Adds to the bounce factor, making your creations springy and fun!
- Food coloring (various colors): For creating vibrant, colorful balls that will brighten up playtime.
- 1 tablespoon of liquid dish soap: Used in the smoothing process to give your bouncy balls a polished finish.
As I gathered these materials for our first crafting session, I felt a wave of excitement wash over me. It’s amazing how simple ingredients can come together to create something so joyful! And the best part? You likely have most of these items already in your home, making this project not only fun but also budget-friendly.
*For a printable full list of materials, see below.*
Tools Required for Easy DIY Rainbow Bouncy Balls
To create your Easy DIY Rainbow Bouncy Balls, you will need a few essential tools that will make the process smooth and enjoyable. Here’s what you’ll need:
- Mixing bowl: This is where all the magic happens! A good-sized mixing bowl is essential for combining all your ingredients without making a mess.
- Measuring cups: Accurate measurements are key to achieving the perfect consistency for your bouncy balls. I always keep a set of measuring cups handy for my crafting adventures.
- Measuring spoons: These are perfect for precise measurements of smaller quantities, like the tablespoon of liquid dish soap. Trust me, having the right tools makes a world of difference!
- Whisk or spoon for mixing: You’ll need something to blend your ingredients thoroughly. I prefer using a whisk for a smooth mixture, but a sturdy spoon works just as well.
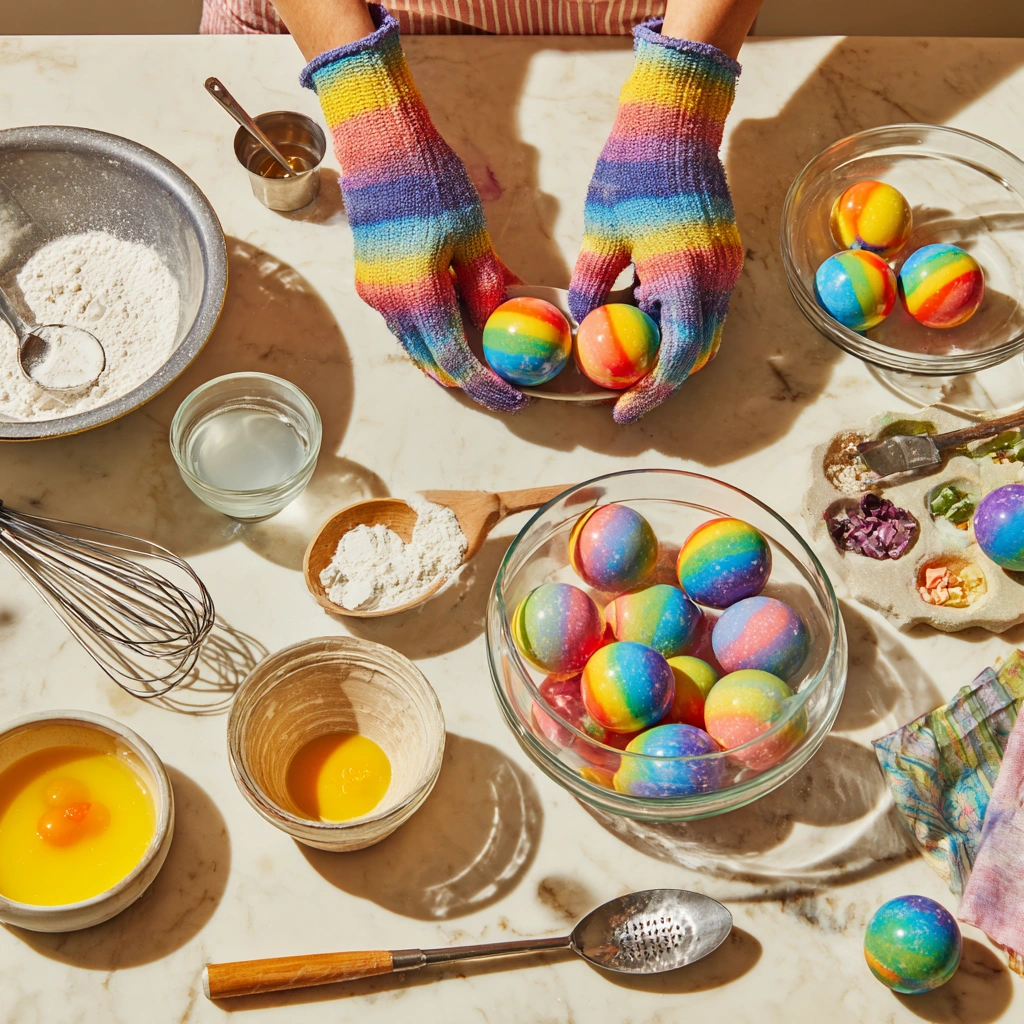
- Rubber gloves (optional): If you’re like me and prefer to keep your hands clean while crafting, wearing rubber gloves can be a great idea. Plus, it adds a fun touch to the process!
As I gathered these tools for our crafting session, I felt a sense of anticipation. Each tool plays a vital role in bringing our colorful creations to life. Remember, the right tools can make crafting not only easier but also more enjoyable. So, let’s get ready to roll up our sleeves and dive into this colorful adventure!
How to Make Easy DIY Rainbow Bouncy Balls
Follow these step-by-step instructions to create your Easy DIY Rainbow Bouncy Balls. I promise, it’s a fun and rewarding process that you can enjoy with your kids!
- Mix Glue and Water: In a mixing bowl, combine the white school glue and water, stirring until well mixed. I love watching the glue swirl into the water; it’s like a mini science experiment!
- Add Cornstarch and Baking Soda: Add the cornstarch and baking soda to the mixture, stirring until smooth. This is where the magic begins! The mixture will start to thicken, and you can feel the texture change.
- Divide for Colors: Divide the mixture into separate bowls for each color you want to create. I usually set out three or four bowls, each ready for a splash of color!
- Add Food Coloring: Add a few drops of food coloring to each bowl and mix until the desired color is achieved. This is my favorite part! Watching the colors blend and transform is so satisfying.
- Prepare Soapy Solution: In a separate bowl, mix the liquid dish soap with a little water to create a soapy solution. This will help smooth out your bouncy balls later on.
- Form the Balls: Using your hands (wear gloves if desired), take a small amount of the colored mixture and roll it into a ball. I find that the size of a golf ball works best, but you can make them any size you like!
- Smooth the Balls: Dip the ball into the soapy solution and then roll it in your hands to smooth it out. This step is crucial for that perfect bounce!
- Drying Time: Let the bouncy balls dry for 24 hours before playing with them. I know it’s hard to wait, but trust me, the anticipation makes it even more exciting!
As you follow these steps, remember to enjoy the process. Crafting is all about having fun and creating memories together. I can’t wait to hear how your Easy DIY Rainbow Bouncy Balls turn out!
Tips for Best Results
To ensure your Easy DIY Rainbow Bouncy Balls turn out perfectly, consider these practical tips that I’ve learned through my own crafting adventures:
- Experiment with Color Combinations: Don’t be afraid to get creative! I love mixing colors to create unique designs. For instance, swirling two colors together can give you a beautiful marbled effect. The possibilities are endless, and it’s a great way to let your kids express their creativity!
- Mix Ingredients Thoroughly: This step is crucial for achieving the best results. I’ve found that taking the time to mix the ingredients well makes a significant difference in the texture and bounce of the balls. If the mixture is lumpy, your bouncy balls may not turn out as expected, so whisk away until it’s smooth!
- Store Properly: Once your bouncy balls are dry, be sure to store them in a cool, dry place. I like to keep them in a small container or bag to prevent them from getting squished. Proper storage helps maintain their bounce and keeps them looking vibrant for longer.
These tips have helped me create some of the best Easy DIY Rainbow Bouncy Balls with my kids. Remember, crafting is all about having fun and learning together, so don’t stress too much about perfection. Enjoy the process, and let your creativity shine!
Project Variations
Get creative with your Easy DIY Rainbow Bouncy Balls by trying out these fun variations! I love how this project can be customized to fit different themes and styles, making it even more exciting for both kids and adults.
- Style Variations: One of my favorite things to do is create marbled effects by swirling colors together. Instead of mixing the colors completely, just add a few drops of each color into the same bowl and gently swirl them with a spoon. The result is a beautiful, unique bouncy ball that looks like a work of art!
- Color Changes: Depending on the mood or occasion, you can switch up the colors you use. For a softer look, try using pastel colors like light pinks, blues, and yellows. If you want something that really pops, go for neon colors! The vibrant hues will surely catch everyone’s attention during playtime.
- Seasonal Adaptations: I love making themed bouncy balls for different holidays. For instance, you can create red and green bouncy balls for Christmas or orange and black ones for Halloween. It’s a fun way to celebrate the seasons and get the kids involved in festive crafting!
These variations not only add a personal touch to your Easy DIY Rainbow Bouncy Balls but also keep the crafting experience fresh and exciting. I encourage you to experiment and let your creativity flow. Who knows what amazing designs you’ll come up with? Happy crafting!
Decoration and Usage Ideas
Once your Easy DIY Rainbow Bouncy Balls are complete, the fun doesn’t have to stop there! I’ve discovered several creative ways to use these vibrant creations that can add a splash of joy to your home and playtime.
- Playtime: These bouncy balls are perfect for outdoor games or indoor fun! I love taking them to the park for a game of catch or setting up a mini obstacle course in the backyard. Watching my kids giggle as they chase after the bouncing balls is a sight that warms my heart. Plus, they’re great for developing hand-eye coordination!
- Decorative Display: If you’re looking to brighten up your home, consider using your bouncy balls as colorful decor. I often place them in a clear glass bowl or a decorative jar on my coffee table. The vibrant colors add a cheerful touch to any room, and it’s a great conversation starter when guests come over!
- Party Favors: These bouncy balls make fantastic and unique party favors for kids’ birthday parties. I remember making a batch for my daughter’s party, and the kids were thrilled to take home their very own creations. You can even personalize them by adding a little tag with the child’s name or a fun message. It’s a delightful way to send guests home with a smile!
These ideas not only enhance the enjoyment of your Easy DIY Rainbow Bouncy Balls but also encourage creativity and playfulness in everyday life. I encourage you to think outside the box and come up with your own unique ways to incorporate these colorful balls into your family’s activities. The possibilities are endless, and the joy they bring is truly priceless!
FAQs about Easy DIY Rainbow Bouncy Balls
Q: Are these bouncy balls safe for kids?
A: Yes, as long as you use non-toxic materials and supervise young children during the crafting process. I always make sure to read labels and choose safe products, especially when crafting with my kids. It gives me peace of mind knowing they can enjoy their creations without any worries!
Q: How long do the bouncy balls last?
A: With proper storage in a cool, dry place, they can last for several weeks. I’ve found that keeping them in a small container helps prevent them from getting squished or damaged. Plus, it’s a great way to keep them organized for playtime!
Q: Can I use other types of glue?
A: White school glue is recommended for the best results, but you can experiment with other non-toxic glues. I’ve tried using clear craft glue in a pinch, and while it worked, I found that the school glue gives the best bounce. It’s all about finding what works best for you and your crafting style!
Final Thoughts
Creating Easy DIY Rainbow Bouncy Balls is not just a fun craft; it’s an opportunity to bond with your children and spark their creativity. I can’t tell you how many wonderful moments I’ve shared with my kids while crafting these colorful balls. Each session is filled with laughter, creativity, and a sense of accomplishment as we watch our creations come to life.
This project is simple, affordable, and perfect for busy moms and professionals like us who are always on the go. With just a few materials and a little bit of time, you can create something that brings joy and entertainment to your family. I love how this craft fits seamlessly into our busy schedules, allowing us to carve out precious moments together amidst the chaos of daily life.
So gather your materials, unleash your inner artist, and enjoy the joy of crafting together. Whether you’re making vibrant bouncy balls for playtime or creating unique decorations for your home, the possibilities are endless. Remember, the best memories are often made through simple, creative activities like this one! So, let’s get crafting and make some colorful memories that will last a lifetime!
Print
Easy DIY Rainbow Bouncy Balls for Creative Fun!
Description
This project involves creating colorful bouncy balls using simple ingredients, perfect for a fun and creative activity for kids and adults alike.
Instructions
- In a mixing bowl, combine the white school glue and water, stirring until well mixed.
- Add the cornstarch and baking soda to the mixture, stirring until smooth.
- Divide the mixture into separate bowls for each color you want to create.
- Add a few drops of food coloring to each bowl and mix until the desired color is achieved.
- In a separate bowl, mix the liquid dish soap with a little water to create a soapy solution.
- Using your hands (wear gloves if desired), take a small amount of the colored mixture and roll it into a ball.
- Dip the ball into the soapy solution and then roll it in your hands to smooth it out.
- Let the bouncy balls dry for 24 hours before playing with them.
Keywords: DIY, Rainbow Bouncy Balls, Kids Craft, Easy Craft, Colorful Balls