Sensory-Rich Introduction with Immediate Craving
Imagine biting into a cookie where the crispy edges give way to a soft, chewy center, and as you do, rich chocolate chips melt in your mouth, creating a symphony of flavors that dance on your palate. The aroma wafting from the oven is a delightful blend of buttery sweetness and a hint of vanilla, instantly transporting you back to cherished moments spent in the kitchen.
Growing up, Easter was always a special time in my family, filled with laughter, love, and, of course, baking. I remember standing on a stool beside my grandmother, eagerly mixing the dough while she shared stories of her own childhood baking adventures. The kitchen would be filled with the sound of our laughter and the sweet scent of cookies baking, creating memories that I hold dear to this day.
There’s something magical about sharing homemade treats with loved ones during festive gatherings. These Easter Chocolate Chip Cookies are not just a dessert; they are a way to connect, to celebrate, and to create new memories. Whether you’re serving them at an Easter brunch, bringing them to a family gathering, or surprising the kids with a sweet treat, these cookies are sure to bring smiles and joy to everyone around.
So, roll up your sleeves and get ready to bake a batch of these delightful cookies that are perfect for any occasion. Trust me, the joy of sharing them will be as sweet as the cookies themselves!
Why You’ll Love This Easter Chocolate Chip Cookies
These Easter Chocolate Chip Cookies are not just any cookies; they are a delightful experience that will have you reaching for seconds (and maybe thirds!). Here’s why they are bound to become a favorite in your household:
- Texture Contrast: The delightful crunch of the exterior gives way to a soft, chewy interior that creates a satisfying bite. Each cookie offers a perfect balance, making it hard to stop at just one!
- Flavor Balance: The rich chocolate flavor is harmonized beautifully with a hint of vanilla and the festive touch of colorful sprinkles. It’s a flavor explosion that captures the essence of Easter in every bite.
- Versatility: These cookies are perfect for various occasions, whether you’re enjoying them as a casual snack, serving them at an elegant dessert table, or packing them in lunchboxes for a sweet surprise.
- Ease of Preparation: With simple steps and readily available ingredients, this recipe is accessible for bakers of all skill levels. Even if you’re a novice, you’ll feel like a pro whipping up these treats!
- Universal Appeal: Loved by both kids and adults alike, these cookies are a go-to treat for any gathering. They bring smiles to faces young and old, making them a perfect addition to your holiday celebrations.
As you prepare to bake these cookies, just remember that the joy they bring is as sweet as the cookies themselves. So gather your loved ones, roll up your sleeves, and let’s create some delicious memories together!
Essential Tools & Preparation Strategy
Before we dive into the delightful world of baking these Easter Chocolate Chip Cookies, let’s gather our essential tools. Having the right equipment not only makes the process smoother but also ensures that your cookies turn out perfectly every time. Here’s what you’ll need:
- Mixing Bowls: These are necessary for separating dry and wet ingredients for optimal mixing. I recommend having at least two—one for dry and one for wet—to keep things organized.
- Whisk: A good whisk ensures that your dry ingredients are well combined, preventing any clumps that could affect the texture of your cookies.
- Electric Mixer: This tool is a game-changer! It facilitates easy creaming of butter and sugars, resulting in a fluffy texture that’s hard to achieve by hand.
- Baking Sheets: Essential for even baking. I often use multiple sheets to bake in batches, which saves time and allows for a steady flow of warm cookies!
- Parchment Paper: This handy tool prevents sticking and simplifies cleanup. Trust me, your future self will thank you for this one!
- Cookie Scoop: Using a cookie scoop ensures uniform cookie sizes, which is key for consistent baking results. Plus, it makes portioning the dough a breeze!
- Cooling Rack: Allowing cookies to cool evenly on a rack prevents sogginess and helps maintain that perfect texture.
- Measuring Cups and Spoons: Accurate measurements are crucial for perfect cookies. I always recommend the spoon and level method for flour to avoid any mishaps!
With these tools at your disposal, you’ll be well on your way to baking a batch of cookies that not only taste amazing but also look beautiful. So, let’s get ready to mix, bake, and enjoy the sweet aroma of homemade cookies filling your kitchen!
Ingredients & Their Roles in This Easter Chocolate Chip Cookies
Understanding the role of each ingredient in your Easter Chocolate Chip Cookies is key to achieving that perfect balance of flavor and texture. Let’s break down the ingredients and see how they contribute to the magic of these delightful treats:
Dry Ingredients:
- All-purpose flour: This is the backbone of your cookies, providing structure and texture. It helps create that delightful chewiness we all love.
- Baking soda: Acting as a leavening agent, baking soda helps the cookies rise and become light and fluffy. It’s essential for achieving that perfect cookie height!
- Salt: A pinch of salt enhances the overall flavor, balancing the sweetness and bringing out the rich chocolate notes.
Wet Ingredients:
- Unsalted butter: This ingredient adds richness and moisture, creating a tender cookie. Make sure it’s softened to room temperature for easy creaming!
- Granulated and brown sugar: Together, these sugars contribute sweetness and chewiness. Brown sugar, in particular, adds a hint of caramel flavor that elevates the cookies.
- Vanilla extract: Infusing the dough with a warm, inviting aroma, vanilla extract enhances the overall flavor profile, making each bite irresistible.
- Eggs: Eggs bind the ingredients together and add moisture, ensuring your cookies have that perfect soft and chewy texture.
Add-ins:
- Semi-sweet chocolate chips: The star ingredient! These chips melt beautifully, providing rich chocolate flavor that complements the cookie base perfectly.
- Easter-themed sprinkles: Not only do they add a festive touch, but they also bring a pop of color and fun to your cookies, making them perfect for the holiday!
Substitutions:
If you’re looking to customize your cookies, here are a couple of great substitutions:
- Dark chocolate chips: For a richer, more intense chocolate flavor, feel free to swap in dark chocolate chips.
- Coconut oil: If you need a dairy-free option, coconut oil can replace butter, adding a subtle coconut flavor while keeping the cookies moist.
With these ingredients and their roles in mind, you’re well on your way to baking a batch of cookies that will not only taste amazing but also create lasting memories. Let’s keep the momentum going and get ready for the next steps in our baking adventure!
Step-by-Step Guide to Perfect Easter Chocolate Chip Cookies
Now that you have all your ingredients and tools ready, let’s dive into the delightful process of making these Easter Chocolate Chip Cookies. Each step is designed to ensure that your cookies come out perfectly crispy on the edges and soft in the center, just like the ones I remember baking with my grandmother during Easter. The aroma of melting chocolate and vanilla will fill your kitchen, making it feel like a warm hug!
- Preheat your oven to 375°F (190°C). This is crucial for achieving that perfect golden-brown color.
- In a medium bowl, whisk together the flour, baking soda, and salt; set aside. This step ensures that your dry ingredients are evenly distributed, preventing any clumps.
- In a large bowl, cream together the softened butter, granulated sugar, and brown sugar until light and fluffy, about 2-3 minutes. This is where the magic begins, as the sugars dissolve into the butter, creating a luscious base.
- Add the eggs one at a time, mixing well after each addition, then stir in the vanilla extract. The mixture should be smooth and creamy, with a delightful aroma wafting through your kitchen.
- Gradually add the dry ingredients to the wet mixture, mixing until just combined. Be careful not to overmix; we want to keep that tender texture!
- Fold in the chocolate chips and Easter sprinkles until evenly distributed. This is the fun part—watching those colorful sprinkles dance through the dough!
- Drop rounded tablespoons of dough onto ungreased baking sheets, spacing them about 2 inches apart. This allows the cookies to spread without merging into one giant cookie.
- Bake for 9-11 minutes, or until the edges are golden brown but the centers are still soft. The smell will be irresistible, and you might find it hard to wait!
- Remove from the oven and let cool on the baking sheets for 5 minutes before transferring to wire racks to cool completely. This cooling time is essential for the cookies to set properly.
As you follow these steps, remember that baking is as much about the journey as it is about the destination. Enjoy the process, and don’t hesitate to sneak a taste of the dough—just like I did when I was a kid!
Chef’s Notes & Pro Tips for Flawless Results
As you embark on your baking journey with these Easter Chocolate Chip Cookies, I want to share some of my favorite tips and tricks that will help you achieve cookie perfection every time. Trust me, these little nuggets of wisdom come from years of trial and error in my own kitchen!
- Make-ahead Instructions: If you’re short on time, don’t worry! You can prepare and refrigerate the cookie dough for up to 3 days before baking. Just make sure to let it sit at room temperature for about 10-15 minutes before scooping and baking, as this will make it easier to handle.
- Storage: To keep your cookies fresh and delicious, store them in an airtight container at room temperature for up to 1 week. If you want to keep them longer, consider freezing them. Just layer them between parchment paper in a freezer-safe container, and they’ll be good for up to 3 months!
- Equipment Recommendations: Investing in quality baking sheets and a reliable electric mixer can make a world of difference. Look for heavy-duty baking sheets that promote even baking and a mixer with multiple speed settings to make creaming butter and sugar a breeze.
- Customization Options: Don’t be afraid to get creative! Experiment with different types of chocolate chips—dark, milk, or even white chocolate. You can also add nuts like walnuts or pecans for an extra crunch, or try incorporating dried fruits for a unique twist.
With these tips in your back pocket, you’ll be well-equipped to tackle any baking challenge that comes your way. Remember, the key to great cookies is not just in the ingredients, but in the love and care you put into each step. Happy baking!
Avoid These Common Cooking Mistakes
As you embark on your baking adventure with these Easter Chocolate Chip Cookies, it’s essential to be aware of some common pitfalls that can turn your cookie dreams into a baking nightmare. Trust me, I’ve been there, and I want to help you avoid these mistakes so you can enjoy perfectly baked cookies every time!
- Overmixing the dough: This is a classic mistake that leads to tough cookies. Remember, mix until just combined! The less you handle the dough, the softer your cookies will be.
- Incorrect flour measurement: Too much flour can dry out your cookies, leaving you with a crumbly texture. Use the spoon and level method to measure flour accurately—scoop it into your measuring cup with a spoon and level it off with a knife.
- Baking at the wrong temperature: Ensure your oven is preheated to 375°F (190°C) for optimal results. An oven thermometer can be a great investment to ensure your oven is at the right temperature.
- Not chilling the dough: If your dough is too warm, your cookies may spread too much while baking. Chill the dough for at least 30 minutes if necessary to maintain that perfect shape.
- Using old baking soda: Freshness is key! Old baking soda can lose its potency, leading to flat cookies. Always check the expiration date before using it.
- Improper spacing of cookies: Leave at least 2 inches between cookies on the baking sheet to allow for spreading. This will prevent them from merging into one giant cookie!
- Skipping the cooling time: Allowing cookies to cool on the baking sheet for a few minutes helps them set properly. If you skip this step, you might end up with a gooey mess instead of perfectly shaped cookies.
By keeping these common mistakes in mind, you’ll be well on your way to baking a batch of Easter Chocolate Chip Cookies that will impress everyone at your gathering. Remember, every baking experience is a learning opportunity, so don’t be discouraged if things don’t go perfectly the first time. Happy baking!
Creative Variations & Customizations
One of the best things about baking these Easter Chocolate Chip Cookies is the endless possibilities for creativity! Whether you want to add a personal touch or cater to different tastes, these variations and customizations will elevate your cookie game. Here are some fun ideas to inspire your baking adventure:
- Nutty Delight: For those who love a bit of crunch, add chopped walnuts or pecans to the dough. The nutty flavor pairs beautifully with the chocolate, creating a delightful texture contrast that will have everyone reaching for more!
- Coconut Twist: Incorporate shredded coconut into the dough for a tropical flavor that transports you to a sunny beach. The coconut adds a chewy texture and a hint of sweetness that complements the chocolate perfectly.
- Mint Chocolate: If you’re a fan of mint, try using mint chocolate chips instead of regular chocolate. This refreshing twist will give your cookies a unique flavor that’s perfect for springtime gatherings.
- Seasonal Sprinkles: Change up the sprinkles to match other holidays or themes. From pastel colors for Easter to vibrant reds and greens for Christmas, sprinkles can add a festive touch that makes your cookies even more special.
- Gluten-Free Option: For those with dietary restrictions, you can easily make these cookies gluten-free by substituting all-purpose flour with a gluten-free blend. Just ensure that the blend you choose is suitable for baking to achieve the best results.
These creative variations not only allow you to personalize your cookies but also make them suitable for different occasions and preferences. So, don’t hesitate to experiment and find your favorite combination. Happy baking!
Perfect Pairings: What to Serve With Easter Chocolate Chip Cookies
Now that you’ve baked a batch of these delightful Easter Chocolate Chip Cookies, it’s time to think about how to elevate your cookie experience even further! Here are some perfect pairings that will complement the rich chocolate and festive sprinkles, making your treats even more enjoyable:
- Cold Milk: You can’t go wrong with this classic pairing! A glass of cold milk enhances the cookie experience, balancing the sweetness and richness of the chocolate.
- Vanilla Ice Cream: For a truly indulgent treat, create a delicious cookie sundae by placing a warm cookie atop a scoop of vanilla ice cream. The melting ice cream combined with the warm cookie is pure bliss!
- Coffee or Tea: These cookies make for a perfect afternoon treat when paired with a cup of coffee or tea. The warmth of the beverage complements the cookies beautifully, making it a cozy experience.
- Colorful Dessert Table: If you’re hosting an Easter gathering, these cookies are ideal for a colorful dessert table. They’ll add a festive touch alongside other treats, creating a delightful spread that everyone will love.
- Fresh Fruit: Pair your cookies with fresh strawberries or raspberries for a refreshing contrast. The tartness of the fruit balances the sweetness of the cookies, making for a well-rounded dessert.
- Whipped Cream: For an indulgent touch, serve your cookies with a side of whipped cream. It adds a creamy texture that pairs wonderfully with the chocolatey goodness of the cookies.
- Chocolate Dessert Pizza: Get creative and use your cookies as a topping for a fun dessert pizza! Crumble the cookies over a chocolate spread on a pizza base for a unique and delicious treat.
- Gift Baskets: These cookies make a lovely addition to holiday gift baskets for friends and family. Package them up with some festive decorations for a sweet surprise that’s sure to bring smiles!
With these pairings, you can take your Easter Chocolate Chip Cookies to the next level, creating memorable moments and delightful experiences for you and your loved ones. So, gather around, enjoy these treats, and celebrate the joy of sharing delicious food!
Storage & Meal Prep Instructions
Once you’ve baked your delicious Easter Chocolate Chip Cookies, it’s important to know how to store them properly to maintain their freshness and flavor. Here are some handy tips for storage and meal prep that will keep your cookies delightful for days to come:
- Fridge Storage: To keep your cookies fresh, store them in an airtight container at room temperature for up to 1 week. This will help retain their soft and chewy texture, ensuring that each bite is just as delicious as the first.
- Freezer Storage: If you want to enjoy your cookies later, freeze them in a single layer on a baking sheet. Once frozen, transfer them to a freezer bag for up to 3 months. This method prevents them from sticking together and makes it easy to grab a cookie whenever the craving strikes!
- Reheating Methods: When you’re ready to enjoy your frozen cookies, simply warm them in the microwave for a few seconds or in the oven at 350°F (175°C) for a few minutes. This will bring back that fresh-baked warmth and gooey chocolate goodness that makes these cookies so irresistible.
By following these storage and meal prep instructions, you can ensure that your Easter Chocolate Chip Cookies remain a delightful treat for days (or even months) to come. So go ahead, bake a batch, and savor the joy of homemade cookies whenever you like!
Nutrition Facts & Health Insights
As we indulge in these delightful Easter Chocolate Chip Cookies, it’s important to be mindful of their nutritional content. Here’s a closer look at the nutrition facts and some health insights that make these cookies not just a treat, but a thoughtful choice for your celebrations:
| Nutrient | Amount per Serving (1 cookie) |
|---|---|
| Calories | 150 |
| Sugar | 10 grams |
| Sodium | 100 milligrams |
| Fat | 7 grams |
| Saturated Fat | 4 grams |
| Carbohydrates | 20 grams |
| Fiber | 1 gram |
| Protein | 2 grams |
| Cholesterol | 20 milligrams |
These cookies not only satisfy your sweet tooth but also offer some health benefits. For instance, dark chocolate, often used in cookie recipes, is known to contain antioxidants that can contribute to heart health. Additionally, using whole ingredients like unsalted butter and eggs provides essential nutrients, making these cookies a more wholesome treat compared to many store-bought options.
So, as you enjoy your Easter Chocolate Chip Cookies, remember that you’re not just indulging in a delicious dessert; you’re also making a thoughtful choice that can be part of a balanced diet. Happy baking and happy eating!
Frequently Asked Questions
As you embark on your baking journey with these Easter Chocolate Chip Cookies, you might have a few questions along the way. Don’t worry; I’ve got you covered! Here are some of the most common queries I’ve encountered, along with helpful answers to guide you:
- Can I substitute the butter for a dairy-free option?
Absolutely! You can use coconut oil or a dairy-free butter substitute to make these cookies dairy-free. Just ensure that the substitute is softened for easy mixing. - How do I prevent my cookies from spreading too much?
To prevent excessive spreading, make sure your dough is chilled for at least 30 minutes before baking. Additionally, ensure that your butter is softened but not melted, as melted butter can lead to flat cookies. - What can I use instead of eggs for a vegan version?
You can replace each egg with 1/4 cup of unsweetened applesauce or 1 tablespoon of ground flaxseed mixed with 2.5 tablespoons of water (let it sit for a few minutes to thicken). Both options work well to bind the ingredients together. - How long can I store the cookie dough in the fridge?
You can store the cookie dough in the fridge for up to 3 days. Just make sure to cover it tightly with plastic wrap or place it in an airtight container to prevent it from drying out. - Can I freeze the cookie dough before baking?
Yes! You can freeze the cookie dough for up to 3 months. Scoop the dough into balls and freeze them on a baking sheet. Once frozen, transfer them to a freezer bag. When you’re ready to bake, just add a couple of extra minutes to the baking time. - What’s the best way to measure flour accurately?
The best method is the spoon and level technique. Use a spoon to fluff up the flour in its container, then spoon it into your measuring cup without packing it down. Finally, level it off with a straight edge, like a knife, for an accurate measurement. - How do I know when the cookies are done baking?
Your cookies are done when the edges are golden brown, but the centers still look slightly soft. They will continue to cook on the baking sheet after being removed from the oven, so don’t worry if they seem a bit underbaked! - Can I use different types of chocolate chips?
Absolutely! Feel free to mix and match chocolate chips according to your preference. Dark chocolate, milk chocolate, or even white chocolate chips can all be used to create a delicious variation of these cookies. - What should I do if my cookies turn out too dry?
If your cookies are too dry, it’s likely due to too much flour or overbaking. To remedy this in the future, make sure to measure your flour accurately and keep an eye on the baking time. If they do turn out dry, try adding a small amount of frosting or a drizzle of chocolate on top to add moisture. - How can I make these cookies more festive for other holidays?
You can easily customize these cookies for different holidays by changing the sprinkles to match the occasion. For example, use red and green sprinkles for Christmas, pastel colors for spring, or even themed cookie cutters to create fun shapes!
With these FAQs answered, you’re well-equipped to tackle any challenges that may arise while baking your Easter Chocolate Chip Cookies. Remember, every baking experience is a chance to learn and grow, so don’t hesitate to experiment and have fun in the kitchen!
Final Inspiration & Kitchen Confidence
As you wrap up your baking adventure with these Easter Chocolate Chip Cookies, take a moment to celebrate the joy that baking brings into our lives. There’s something truly magical about creating delicious treats that not only satisfy our sweet cravings but also bring happiness to our family and friends. Each cookie you bake is a little piece of love, a way to connect with those you care about, and a chance to create lasting memories.
Remember, every batch you make is a step towards becoming a better baker. Whether your cookies turn out perfectly or not-so-perfectly, each experience teaches you something new. Embrace the process, learn from any mishaps, and don’t forget to enjoy the sweet rewards of your hard work. After all, baking is as much about the journey as it is about the destination!
So, I encourage you to roll up your sleeves, gather your loved ones, and dive into this delightful recipe. Share your creations, whether they’re perfectly shaped cookies or a fun, slightly lopsided batch. The joy of baking together is what truly matters. Let’s spread the love, one cookie at a time, and make this Easter a celebration filled with laughter, warmth, and, of course, delicious treats!
Print
Easter Chocolate Chip Cookies: Crispy, Creamy, Irresistible!
- Total Time: 25 minutes
- Yield: 24 cookies 1x
- Diet: Vegetarian
Description
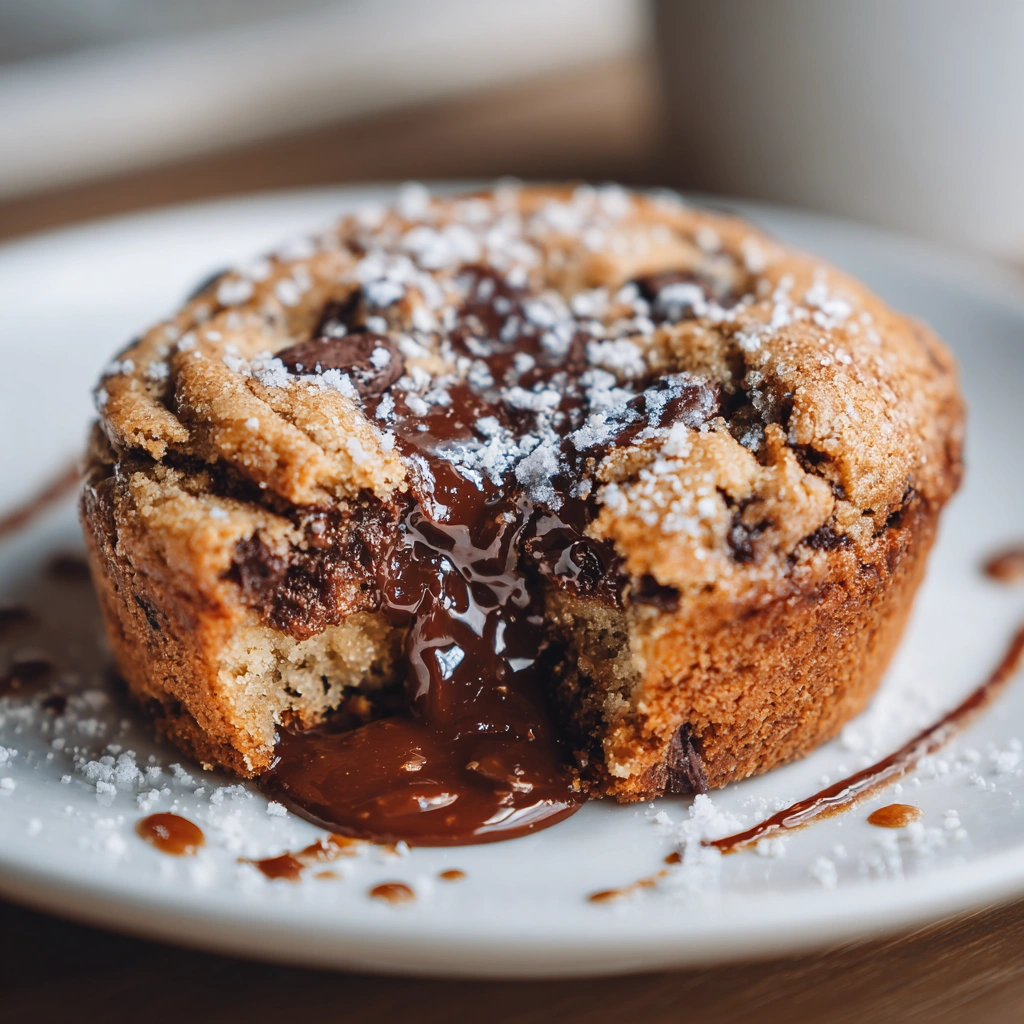
These Easter Chocolate Chip Cookies are a delightful treat, featuring a crispy exterior that gives way to a soft, chewy center. Each bite is bursting with rich chocolate flavor, complemented by a hint of vanilla and a sprinkle of colorful Easter-themed sprinkles for a festive touch.
Ingredients
- Dry Ingredients:
- 2 1/4 cups all-purpose flour
- 1 teaspoon baking soda
- 1/2 teaspoon salt
- Wet Ingredients:
- 1 cup unsalted butter, softened
- 3/4 cup granulated sugar
- 3/4 cup brown sugar, packed
- 1 teaspoon vanilla extract
- 2 large eggs
- Add-ins:
- 2 cups semi-sweet chocolate chips
- 1/2 cup Easter-themed sprinkles
Instructions
- Preheat your oven to 375°F (190°C).
- In a medium bowl, whisk together the flour, baking soda, and salt; set aside.
- In a large bowl, cream together the softened butter, granulated sugar, and brown sugar until light and fluffy, about 2-3 minutes.
- Add the eggs one at a time, mixing well after each addition, then stir in the vanilla extract.
- Gradually add the dry ingredients to the wet mixture, mixing until just combined.
- Fold in the chocolate chips and Easter sprinkles until evenly distributed.
- Drop rounded tablespoons of dough onto ungreased baking sheets, spacing them about 2 inches apart.
- Bake for 9-11 minutes, or until the edges are golden brown but the centers are still soft.
- Remove from the oven and let cool on the baking sheets for 5 minutes before transferring to wire racks to cool completely.
Notes
- Make-ahead: The cookie dough can be prepared and refrigerated for up to 3 days before baking.
- Storage: Store cookies in an airtight container at room temperature for up to 1 week.
- Substitutions: Use dark chocolate chips for a richer flavor or substitute coconut oil for butter for a dairy-free option.
- Prep Time: 15 minutes
- Cook Time: 10 minutes
- Category: desserts
- Method: baking
- Cuisine: American
Nutrition
- Serving Size: 1 cookie
- Calories: 150
- Sugar: 10 grams
- Sodium: 100 milligrams
- Fat: 7 grams
- Saturated Fat: 4 grams
- Unsaturated Fat: 2 grams
- Trans Fat: 0 grams
- Carbohydrates: 20 grams
- Fiber: 1 gram
- Protein: 2 grams
- Cholesterol: 20 milligrams
Keywords: Easter Chocolate Chip Cookies, chocolate chip cookies, Easter desserts, holiday baking, festive cookies, soft cookies, chewy cookies, cookie recipes, spring treats, homemade cookies, dessert ideas, baking recipes, family recipes, sweet treats


