Introduction to DIY Blue Crayon Suncatchers
Welcome to the colorful world of DIY Blue Crayon Suncatchers! If you’re looking for a fun and simple craft project that will brighten your home, you’ve come to the right place. This delightful DIY not only brings a splash of color to your windows but also creates a wonderful opportunity for bonding with your kids. Imagine the joy of watching the sunlight dance through your handmade creations, filling your space with warmth and cheer. Plus, it’s a rewarding experience that sparks creativity and imagination. Let’s get started on this colorful adventure together!
Why You’ll Love This DIY Blue Crayon Suncatcher
This DIY Blue Crayon Suncatcher project is a delightful blend of creativity and simplicity. It’s an affordable way to brighten your home while spending quality time with your kids. The process is relaxing, allowing you to unwind as you create something beautiful together. Plus, the joy of seeing your colorful suncatchers catch the sunlight is truly magical. It’s a perfect way to spark imagination and make lasting memories!
Materials and Tools Needed for DIY Blue Crayon Suncatchers
Gathering your materials is the first step in creating your stunning DIY Blue Crayon Suncatchers! Here’s what you’ll need:
- Blue crayons: The star of the show! Choose your favorite shades of blue to create a beautiful spectrum of color.
- Parchment paper: This will protect your iron and help achieve a smooth finish on your suncatchers.
- Wax paper: Essential for containing the melted crayon mess and creating that magical crayon sandwich.
- Iron: A low-heat iron is crucial for melting the crayons without burning them. Make sure to keep it on a safe setting!
- Scissors: You’ll need these to cut out your fun shapes once the crayons have melted.
- Hole punch: This handy tool will help you create a hole for hanging your suncatcher.
- String or ribbon: Use this to hang your beautiful creations in a sunny window, allowing them to shine!
Most of these materials are budget-friendly and can often be found around your home. If you’re looking for eco-friendly options, consider using old crayons that might be lying around or repurposing scrap paper instead of buying new supplies. Let’s get crafting!
How to Make DIY Blue Crayon Suncatchers
Now comes the fun part! Making your own DIY Blue Crayon Suncatchers is not only a delightful way to spend time with your kids, but it also fills your home with vibrant colors. Let’s dive into the step-by-step process that will transform simple blue crayons into stunning suncatchers that dance with light!
Step 1: Preheat Your Iron
First things first, preheat your iron to a low setting without steam. This is crucial for melting the crayons without burning them. Trust me, you don’t want to end up with a smoky kitchen! The anticipation builds as you prepare for the colorful magic to unfold.
Step 2: Prepare the Crayons
Next, grab those blue crayons and start shaving or breaking them into small pieces. Spread them evenly on a piece of wax paper. This is where the color magic begins! The vibrant blue shavings will soon melt into a beautiful masterpiece. I love watching my kids get creative, choosing which shades of blue to use. It’s like a mini art class right in our kitchen!
Step 3: Create a Crayon Sandwich
Now, cover the crayon pieces with another piece of wax paper. This will help contain the melted crayon mess and keep everything neat. It’s like making a delicious sandwich, but instead of bread, we’re using wax paper! Make sure the crayon pieces are snugly tucked in.
Step 4: Add Parchment Paper
Place a piece of parchment paper on top of the wax paper sandwich. This protects your iron and helps with even melting. It’s a simple step, but it makes a world of difference. I always remind my kids that this is the secret to a smooth and shiny suncatcher!
Step 5: Iron the Crayon Sandwich
Carefully press the iron on top of the parchment paper for a few seconds until the crayons melt and fuse together. Keep an eye on the process! The soft shimmer of the melted crayon under the lamp felt magical, and I could see my kids’ eyes widen in awe. It’s a moment of pure joy!
Step 6: Cool Down
Once you’ve melted the crayons, remove the sandwich from heat and let it cool for a minute. This is the hardest part—waiting! The anticipation is almost unbearable, but trust me, it’s worth it. You’ll want to see the beautiful creation that awaits!
Step 7: Cut Out Shapes
Now comes the fun part—cutting the melted crayon sheet into fun shapes like stars or hearts. Get creative with your designs! I love using cookie cutters for this step; it adds an extra layer of fun. My kids enjoy picking out their favorite shapes, and it’s a great way to spark their imagination.
Step 8: Punch a Hole
Use a hole punch to make a hole at the top of each shape. This is where your string or ribbon will go. It’s a small detail, but it’s essential for hanging your beautiful suncatcher. I always let my kids take turns with the hole punch—it’s a great way to practice their fine motor skills!
Step 9: Hang Your Suncatcher
Finally, thread a string or ribbon through the hole and hang your suncatcher in a sunny window. Enjoy the colorful display! Watching the sunlight filter through the blue hues is like bringing a piece of the sky indoors. It’s a simple yet stunning decoration that brightens up any room.
And there you have it! Your very own DIY Blue Crayon Suncatchers are ready to dazzle. I can’t wait to see how your creations turn out. Remember, crafting is all about having fun and expressing yourself, so let your creativity shine!
Tips for Best Results
- Experiment with different colors of crayons for a rainbow effect. Mixing shades can create stunning results!
- Make sure to use low heat to avoid burning the wax paper. A little patience goes a long way!
- Use cookie cutters to create fun shapes for your suncatchers. It’s a great way to add variety and excitement!
- Consider adding glitter for extra sparkle! A touch of shimmer can make your suncatchers truly magical.
Theme and Design Variations
Get creative with your DIY Blue Crayon Suncatchers by exploring different themes and designs! Here are some fun ideas to inspire your crafting:
- Create a winter theme with icy blue and white crayons for a frosty look that captures the essence of the season.
- Use bright colors for a summer vibe, mixing yellows and greens with your blues to evoke sunny days.
- Make heart shapes for Valentine’s Day, using shades of pink and red alongside blue for a sweet touch.
- Incorporate holiday colors like orange and black for Halloween or red and green for festive decorations during the winter holidays.
These variations not only keep the crafting experience fresh but also allow you to celebrate different seasons and occasions with your beautiful suncatchers!
Display and Use Ideas
Now that you’ve created your stunning DIY Blue Crayon Suncatchers, it’s time to showcase them! Here are some fun and creative ways to display or use your colorful creations:
- Hang them in windows to catch the sunlight, creating a beautiful kaleidoscope of colors that brightens your home.
- Use them as colorful decorations for parties, adding a festive touch to any celebration.
- Gift them to friends or family as a handmade present, sharing the joy of your crafting experience.
- Create a mobile with multiple suncatchers for a stunning display that dances in the breeze.
These ideas not only enhance your home decor but also spread joy and creativity to those around you!
FAQs about DIY Blue Crayon Suncatchers
As you embark on your colorful crafting journey, you might have a few questions about DIY Blue Crayon Suncatchers. Here are some common queries and their answers to help you along the way!
- Can I use other colors of crayons? Absolutely! Feel free to mix and match colors for a unique look. Imagine a rainbow of suncatchers brightening your windows!
- Is this project safe for kids? Yes, it is! However, always supervise children when using an iron. Safety first, so everyone can enjoy the fun!
- How do I clean up if I make a mess? No worries! Just use a damp cloth to wipe any crayon residue off surfaces. It’s an easy cleanup, so you can get back to crafting!
- What if my crayons don’t melt properly? If the crayons aren’t melting as expected, check that your iron is set to a low heat and that you’re using parchment paper. A little patience goes a long way!
- Can I make suncatchers in different shapes? Definitely! Get creative with cookie cutters or freehand your designs. The possibilities are endless, and it’s all about having fun!
These FAQs should help you feel more confident as you create your beautiful DIY Blue Crayon Suncatchers. Happy crafting!
Final Thoughts
Creating your own DIY Blue Crayon Suncatchers is not just a craft; it’s a joyful experience that fills your home with color and warmth. The satisfaction of seeing your kids’ faces light up as they hang their creations in the window is priceless. I encourage you to gather your materials, unleash your creativity, and dive into this fun project. Don’t forget to share your beautiful results with friends and family! Let’s spread the joy of crafting together and brighten up our homes with these delightful suncatchers!
Print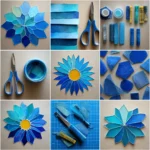
DIY Blue Crayon Suncatchers: Brighten Your Home with Colorful Joy!
Description
Create beautiful blue crayon suncatchers that will add a splash of color to your windows and brighten up your home.
Instructions
- Preheat your iron to a low setting without steam.
- Shave or break blue crayons into small pieces and spread them evenly on a piece of wax paper.
- Cover the crayon pieces with another piece of wax paper.
- Place a piece of parchment paper on top of the wax paper sandwich.
- Carefully press the iron on top of the parchment paper for a few seconds until the crayons melt and fuse together.
- Remove from heat and let it cool for a minute.
- Cut the melted crayon sheet into fun shapes (like stars or hearts).
- Use a hole punch to make a hole at the top of each shape.
- Thread a string or ribbon through the hole and hang your suncatcher in a sunny window.
- Category: Home Decor
Keywords: DIY Blue Crayon Suncatchers, Suncatcher Craft, Colorful Home Decor