Introduction to DIY Anemometer
In a world where technology often overshadows hands-on learning, creating a DIY anemometer can be a refreshing and educational experience. This simple yet effective tool allows you to measure wind speed, making it perfect for curious minds and busy moms looking to engage their children in science. Whether you’re decorating your backyard or teaching your kids about weather patterns, this project combines creativity with practicality. Plus, it’s a fantastic way to spend quality time together while crafting something useful!
Why You’ll Love This DIY Anemometer
Creating your own DIY anemometer is not only a fun project but also an affordable and straightforward way to introduce science concepts to your family. It encourages creativity, fosters learning, and can be completed in under an hour. With just a few materials and tools, you can make a wind speed tool that will spark curiosity and provide endless opportunities for outdoor exploration.
Materials Needed for DIY Anemometer
To create your DIY anemometer, gather the following materials:
- Plastic cups (4): These will serve as the spinning cups that catch the wind.
- Wooden dowel (1): This will be the main support structure for your anemometer.
- Balloon (1): Used to catch the wind and help the cups spin.
- Straw (1): Allows the cups to rotate freely.
- Scissors: For cutting the plastic cups.
- Glue: To attach the cups to the dowel.
- Marker: For marking wind speed measurements.
*For a printable full list of materials, see below.*
Tools Required for DIY Anemometer
To successfully create your DIY anemometer, you will need the following tools:
- Drill: To make a small hole in the wooden dowel for the straw.
- Ruler: For measuring distances and ensuring even spacing of the cups.
- Pencil: To mark where to cut or drill.
*If you don’t have a drill, you can use a sharp object to create a hole, but be cautious and ensure safety.*
How to Make DIY Anemometer
Follow these step-by-step instructions to create your own DIY anemometer:
- Prepare the Cups: Cut the plastic cups in half. This will create two halves for each cup, giving you a total of eight pieces.
- Attach the Cups: Using glue, attach four halves to the ends of the wooden dowel. Ensure they are evenly spaced for accurate readings.
- Create the Hole: Use the drill to make a small hole in the center of the wooden dowel. This hole will allow the straw to be inserted.
- Insert the Straw: Insert the straw through the hole in the dowel, ensuring it can spin freely. This is crucial for the anemometer to function properly.
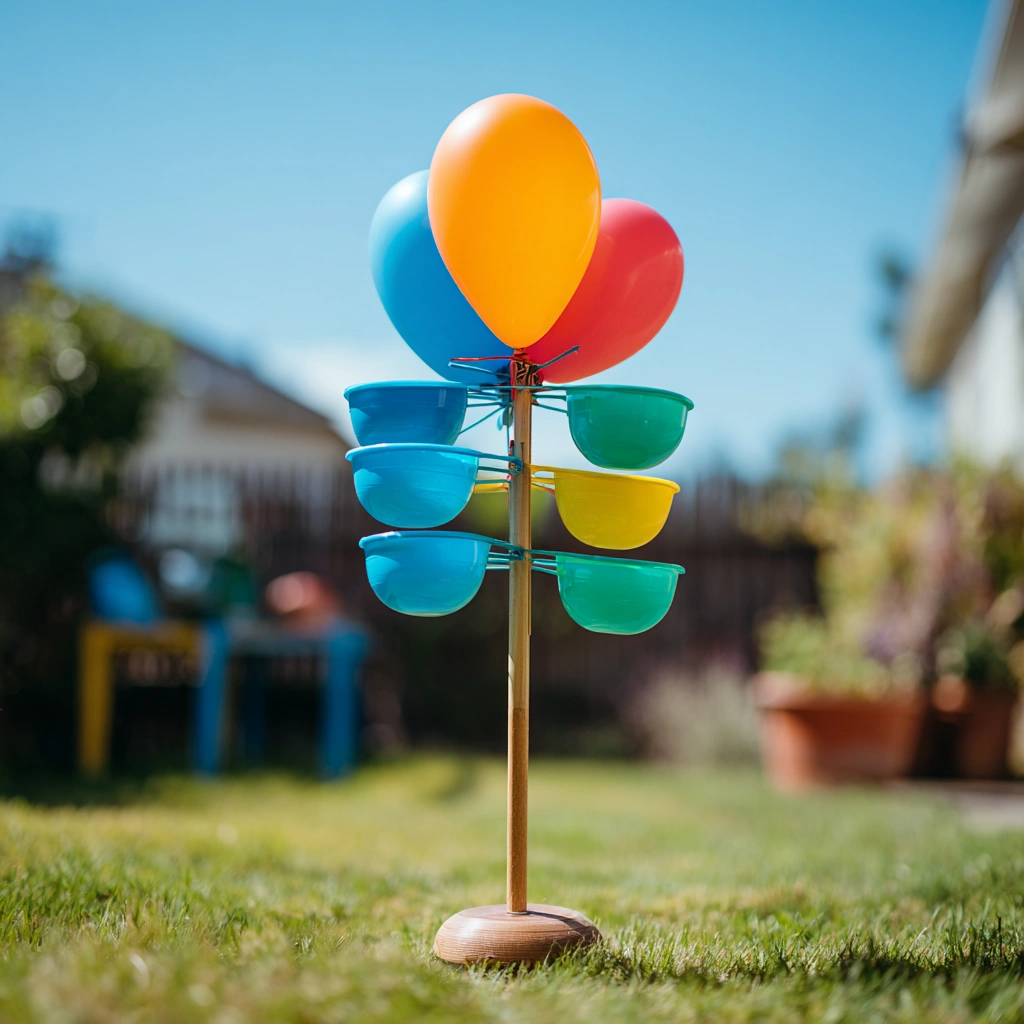
- Attach the Balloon: Attach the balloon to the top of the straw. This will catch the wind and help the cups spin.
- Mark Measurements: Using the marker, mark the wind speed measurements on the dowel. You can create a simple scale to help you gauge the wind speed.
- Test Your Anemometer: Place your anemometer outside on a windy day. Observe how the cups spin to measure the wind speed.
As I worked through these steps, I found that taking my time with each part made a big difference. The first time I rushed, my cups weren’t evenly spaced, and it affected the readings. So, don’t hesitate to double-check your work! Crafting is all about learning and enjoying the process.
Why You’ll Love This DIY Anemometer
Creating your own DIY anemometer is not only a fun project but also an affordable and straightforward way to introduce science concepts to your family. I remember the first time I made one with my kids; their eyes lit up as they watched the cups spin in the wind. It was a moment of pure joy and discovery!
This project encourages creativity and fosters learning in a hands-on way. As busy moms, we often juggle so many responsibilities, but this wind speed tool can be completed in under an hour. It’s a perfect way to sneak in some educational fun without feeling overwhelmed. Plus, the materials are simple and inexpensive, making it accessible for everyone.
With just a few materials and tools, you can create something that not only measures wind speed but also sparks curiosity about the world around us. I love how this project opens up conversations about weather patterns and the science behind wind. It’s amazing to see how a simple craft can lead to such rich discussions!
Imagine taking your DIY anemometer outside on a breezy day, watching the cups spin, and discussing how different wind speeds affect our environment. It’s these little moments that create lasting memories and inspire a love for learning. So gather your supplies, and let’s get crafting!
Materials Needed for DIY Anemometer
To create your DIY anemometer, gather the following materials:
- Plastic cups (4): These will serve as the spinning cups that catch the wind.
- Wooden dowel (1): This will be the main support structure for your anemometer.
- Balloon (1): Used to catch the wind and help the cups spin.
- Straw (1): Allows the cups to rotate freely.
- Scissors: For cutting the plastic cups.
- Glue: To attach the cups to the dowel.
- Marker: For marking wind speed measurements.
*For a printable full list of materials, see below.*
Tools Required for DIY Anemometer
To successfully create your DIY anemometer, you will need the following tools:
- Drill: This is essential for making a small hole in the wooden dowel for the straw. I remember the first time I used a drill; I was a bit intimidated, but it turned out to be easier than I thought!
- Ruler: A ruler is crucial for measuring distances and ensuring even spacing of the cups. Trust me, taking the time to measure will pay off in the accuracy of your wind speed readings.
- Pencil: Use a pencil to mark where to cut or drill. I always keep a pencil handy for crafting projects; it helps me visualize where everything will go before I make any permanent changes.
*If you don’t have a drill, you can use a sharp object to create a hole, but be cautious and ensure safety.* I learned this the hard way when I tried to improvise without the right tools. It’s always best to have the proper equipment to avoid any mishaps!
How to Make DIY Anemometer
Follow these step-by-step instructions to create your own DIY anemometer:
Step 1: Prepare the Cups
Cut the plastic cups in half. This will create two halves for each cup, giving you a total of eight pieces. I remember the first time I did this; I was surprised at how easy it was! Just make sure to use scissors carefully, and you’ll have your cups ready in no time.
Step 2: Attach the Cups
Using glue, attach four halves to the ends of the wooden dowel. Ensure they are evenly spaced for accurate readings. I found that taking a moment to measure the spacing made a huge difference in how well my anemometer worked. It’s like giving your craft a little extra love!
Step 3: Create the Hole
Use the drill to make a small hole in the center of the wooden dowel. This hole will allow the straw to be inserted. If you’re new to using a drill, don’t worry! Just take it slow, and you’ll be fine. I was a bit nervous the first time, but it turned out to be quite simple.
Step 4: Insert the Straw
Insert the straw through the hole in the dowel, ensuring it can spin freely. This is crucial for the anemometer to function properly. I remember feeling a sense of accomplishment when I saw the straw fit perfectly—it’s those little victories that make crafting so rewarding!
Step 5: Attach the Balloon
Attach the balloon to the top of the straw. This will catch the wind and help the cups spin. I love how a simple balloon can turn this project into something magical. Watching it catch the breeze is such a delight!
Step 6: Mark Measurements
Using the marker, mark the wind speed measurements on the dowel. You can create a simple scale to help you gauge the wind speed. This part is where you can get creative! I like to add little designs next to the numbers to make it visually appealing.
Step 7: Test Your Anemometer
Place your anemometer outside on a windy day. Observe how the cups spin to measure the wind speed. This is the moment you’ve been waiting for! I remember the excitement of seeing my kids’ faces light up as they watched the cups whirl around. It’s a beautiful reminder of how crafting can bring us closer together.
Tips for Best Results
As I embarked on my journey to create a DIY anemometer, I quickly learned that a few simple tips can make all the difference in achieving the best results. Here are some insights I gathered along the way:
- Ensure the cups are evenly spaced for accurate readings: This is crucial! When I first made my anemometer, I didn’t pay much attention to the spacing, and it affected how well it measured the wind speed. Take your time to position the cups evenly on the dowel. It’s like setting the stage for a performance; everything needs to be just right!
- Use a ruler to measure the distance between the cups for consistency: A ruler is your best friend in this project. I found that measuring the distance between each cup not only helped with accuracy but also made my anemometer look neat and professional. Plus, it’s a great way to involve your kids in the measuring process, turning it into a fun math lesson!
- Test in different wind conditions to understand how it works: Once your anemometer is complete, don’t just stop at one test! I remember taking mine out on a calm day and then on a breezy afternoon. The difference in how the cups spun was fascinating! It’s a wonderful opportunity to discuss with your kids how wind speed varies and what that means for our environment.
These tips not only enhance the functionality of your wind speed tool but also enrich the crafting experience. Remember, crafting is about learning and having fun, so embrace the process and enjoy every moment!
Project Variations
Once you’ve mastered the basics of your DIY anemometer, why not take it a step further? There are so many fun variations you can try to make your project even more exciting and personalized. Here are a few ideas that I’ve enjoyed experimenting with:
- Colorful Cups: Use different colored plastic cups to make your anemometer visually appealing. I remember the first time I used bright red and blue cups; it turned into a vibrant garden decoration! The kids loved picking their favorite colors, and it added a cheerful touch to our outdoor space.
- Seasonal Themes: Decorate your anemometer with seasonal designs, like flowers for spring or leaves for fall. This is a wonderful way to keep the project fresh and relevant throughout the year. I once added little paper flowers to mine during spring, and it became a delightful centerpiece for our garden parties!
- Size Adjustments: Experiment with larger or smaller cups to see how it affects the wind speed readings. I found that using larger cups made my anemometer spin faster, which was fascinating to observe. It’s a great way to introduce concepts of physics and aerodynamics to your kids while having fun!
These variations not only enhance the functionality of your wind speed tool but also allow for creativity and personalization. Crafting is all about exploration, so don’t hesitate to try new ideas and see what works best for you and your family. Each variation can lead to new discoveries and even more memorable moments together!
Decoration and Usage Ideas
Once your DIY anemometer is complete, the fun doesn’t stop there! I’ve discovered that this little project can serve multiple purposes, making it a delightful addition to your home and family activities. Here are some creative decoration and usage ideas that I’ve enjoyed:
- Garden Decor: Place your anemometer in your garden as a whimsical decoration. I love how it adds a touch of charm to my outdoor space. Watching the cups spin in the breeze not only looks beautiful but also invites curiosity from neighbors and friends. It’s a conversation starter that can lead to discussions about weather and nature!
- Educational Tool: Use your anemometer in science lessons to teach kids about weather and wind. I remember using ours during a home school lesson on meteorology. The kids were fascinated to see how the wind speed changed with different weather conditions. It’s a hands-on way to reinforce learning and make science come alive!
- Outdoor Activities: Take your anemometer on family outings to parks or beaches to measure wind speed during kite flying or sailing. I can’t tell you how much fun it is to compare the wind speed with how well our kites fly! It turns a simple day out into an exciting learning adventure, and the kids love being little scientists in the field.
These ideas not only enhance the functionality of your wind speed tool but also create opportunities for family bonding and exploration. Crafting is about more than just the end product; it’s about the experiences and memories you create along the way. So, get creative and enjoy every moment with your DIY anemometer!
FAQs about DIY Anemometer
Q: How accurate is a DIY anemometer?
A: While it may not be as precise as professional tools, it provides a fun and educational way to understand wind speed. I remember the first time I tested mine; it was more about the experience than the exact numbers. It sparked curiosity in my kids, and that’s what truly matters!
Q: Can I use other materials?
A: Yes! You can experiment with different materials, but ensure they are lightweight for better functionality. I once tried using paper cups instead of plastic, and while they worked, they didn’t spin as well. It’s all about finding the right balance, and that’s part of the fun!
Q: Is this project safe for kids?
A: Yes, but adult supervision is recommended, especially when using scissors and a drill. I always make sure to involve my kids in the safer parts of the project, like gluing and decorating, while I handle the more challenging tasks. It’s a great way to teach them about safety while crafting!
Final Thoughts
Creating a DIY anemometer is not just about measuring wind speed; it’s about fostering creativity, curiosity, and quality time with your family. I can’t tell you how many wonderful moments I’ve shared with my kids while working on this project. Each spin of the cups in the wind reminds us of the beauty of nature and the joy of learning together.
This simple project can lead to exciting outdoor adventures and valuable learning experiences. I remember one breezy afternoon when we took our anemometer to the park. Watching the cups whirl around while we discussed how wind affects our environment was a delightful blend of fun and education. It’s these moments that make crafting so special!
So gather your materials, roll up your sleeves, and enjoy the process of crafting something unique together. Don’t worry if things don’t go perfectly; crafting is all about experimenting and learning from our mistakes. I’ve had my fair share of crafting mishaps, but each one taught me something new and added to the fun!
Remember, the joy of DIY lies not just in the finished product, but in the memories you create along the way! Whether it’s a sunny day spent outside or a cozy afternoon indoors, your wind speed tool will serve as a reminder of the time you spent together. So, let your creativity flow, and enjoy every moment of this wonderful crafting journey!
Print
DIY Anemometer: Create Your Own Wind Speed Tool!
Description
This DIY project guides you through creating your own anemometer, a tool used to measure wind speed, using simple materials and tools.
Instructions
- Cut the plastic cups in half and attach them to the ends of the wooden dowel using glue.
- Use the drill to make a small hole in the center of the wooden dowel.
- Insert the straw through the hole in the dowel, ensuring it can spin freely.
- Attach the balloon to the top of the straw to catch the wind.
- Mark the wind speed measurements on the dowel using the marker.
- Test your anemometer by placing it outside on a windy day and observe the spinning cups to measure wind speed.
Keywords: DIY Anemometer, Measure Wind Speed, Wind Speed Tool, Kids Craft