Dill Pickle Ranch Chicken Taquitos: Crispy & Juicy Bliss!
Sensory-Rich Introduction with Immediate Craving
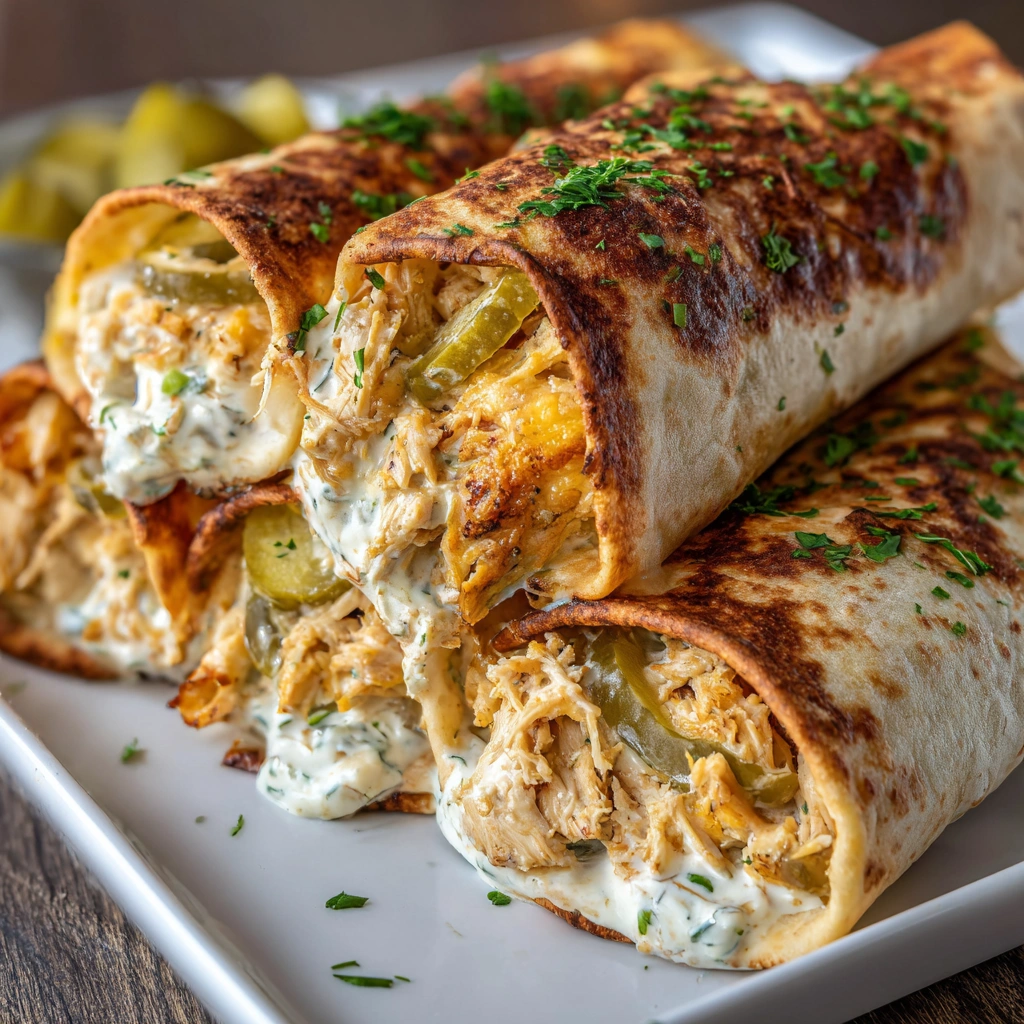
Imagine biting into a perfectly crisp taquito, the golden-brown tortilla giving way to a warm, savory filling that bursts with flavor. The tangy notes of dill pickles meld seamlessly with the creamy ranch dressing, while tender shredded chicken adds a satisfying heartiness. Each bite is a delightful contrast of textures—crunchy on the outside, juicy on the inside. This dish is not just a meal; it’s a celebration of flavors that transports you to a cozy gathering with friends or a lively game day party. Picture yourself sharing these Dill Pickle Ranch Chicken Taquitos with loved ones, laughter filling the air as you dip them into extra ranch dressing, creating memories that linger long after the last bite.
Why You’ll Love This Dill Pickle Ranch Chicken Taquitos
- Texture Contrast: The crispy exterior of the taquitos perfectly complements the tender, juicy filling, creating a delightful mouthfeel.
- Flavor Balance: The zesty dill pickles and creamy ranch dressing harmonize beautifully with the savory chicken, offering a well-rounded taste experience.
- Versatility: These taquitos can be served as appetizers, snacks, or even a main dish, making them suitable for any occasion.
- Ease of Preparation: With just a few simple steps, you can whip up these taquitos in under 35 minutes, perfect for busy weeknights or last-minute gatherings.
- Universal Appeal: The combination of familiar flavors makes these taquitos a hit with both kids and adults, ensuring everyone at the table will be satisfied.
Essential Tools & Preparation Strategy
- Mixing Bowl: Essential for thoroughly combining the filling ingredients, ensuring every bite is packed with flavor.
- Baking Sheet: Needed for evenly baking the taquitos, allowing them to crisp up perfectly.
- Brush: For applying olive oil to the tops of the taquitos, enhancing their crispiness.
- Measuring Cups: To ensure accurate ingredient quantities, which is crucial for the perfect filling consistency.
- Spatula: Useful for transferring the taquitos to the baking sheet without breaking them, maintaining their shape.
- Oven Mitts: Important for safely handling hot trays, preventing burns while you enjoy your culinary creation.
- Microwave (optional): For warming tortillas slightly before filling, making them easier to roll without cracking.
Ingredients & Their Roles in This Dill Pickle Ranch Chicken Taquitos
For the Filling:
- Cooked Shredded Chicken: The main protein source, providing heartiness and flavor.
- Dill Pickles: Adds a tangy crunch that elevates the overall taste profile.
- Ranch Dressing: Brings creaminess and a burst of flavor, tying the filling together.
- Shredded Cheddar Cheese: Adds richness and a gooey texture that enhances the filling.
For the Taquitos:
- Small Flour Tortillas: The base that holds the filling, providing a soft yet crispy exterior when baked.
- Olive Oil: Used for brushing the taquitos, ensuring a golden, crispy finish.
Substitutions:
- Greek Yogurt: Can replace ranch dressing for a lighter, healthier option.
- Corn Tortillas: A gluten-free alternative to flour tortillas, perfect for those with dietary restrictions.
Step-by-Step Guide to Perfect Dill Pickle Ranch Chicken Taquitos
- Preheat the Oven: Set your oven to 400°F (200°C) to ensure it’s hot enough for crispy taquitos.
- Mix the Filling: In a mixing bowl, combine 2 cups of cooked shredded chicken, 1/2 cup of finely chopped dill pickles, 1/2 cup of ranch dressing, and 1 cup of shredded cheddar cheese until well mixed.
- Prepare the Tortillas: Lay a tortilla flat and spoon about 2 tablespoons of the filling onto the lower third of the tortilla.
- Roll the Taquito: Tightly roll the tortilla around the filling, ensuring it’s snug, and place it seam-side down on a baking sheet.
- Brush with Olive Oil: Use a brush to apply olive oil to the tops of the taquitos for extra crispiness.
- Bake: Place the baking sheet in the preheated oven and bake for 15-20 minutes or until the taquitos are golden brown and crispy.
- Cool Before Serving: Remove from the oven and let cool for a few minutes before serving to avoid burns and allow flavors to settle.
Chef’s Notes & Pro Tips for Flawless Results
- Make-Ahead Instructions: Prepare the filling a day in advance and store it in the refrigerator for easy assembly later.
- Storage: Store leftover taquitos in an airtight container in the fridge for up to 3 days, ensuring they stay fresh.
- Equipment Recommendations: Consider using a silicone baking mat on your baking sheet for easy cleanup and even baking.
- Customization Options: Feel free to add other ingredients like black beans or corn to the filling for added flavor and texture.
Avoid These Common Cooking Mistakes
- Overfilling the Taquitos: This can cause them to burst while baking. Solution: Stick to 2 tablespoons of filling.
- Not Sealing the Tortillas Properly: This can lead to filling leaking out. Solution: Ensure the seam is tightly rolled down.
- Baking at Too Low a Temperature: This results in soggy taquitos. Solution: Always preheat the oven to 400°F (200°C).
- Using Cold Tortillas: This can make them crack. Solution: Warm tortillas slightly in the microwave before filling.
- Skipping the Oil Brush: This can lead to less crispy taquitos. Solution: Always brush with oil before baking.
- Not Letting Them Cool: This can make them difficult to handle. Solution: Allow to cool for a few minutes before serving.
- Using Too Much Ranch Dressing: This can make the filling too runny. Solution: Measure carefully and adjust to taste.
Creative Variations & Customizations
- Spicy Dill Pickle Ranch Chicken Taquitos: Add diced jalapeños to the filling for a spicy kick.
- Vegetarian Option: Substitute shredded chicken with black beans and corn for a meatless version.
- Buffalo Chicken Taquitos: Mix in buffalo sauce with the chicken for a tangy, spicy flavor.
- Cheesy Spinach Taquitos: Incorporate fresh spinach and extra cheese for a green twist.
- Seasonal Variations: Add roasted vegetables in the filling during the fall for a seasonal touch.
Perfect Pairings: What to Serve With Dill Pickle Ranch Chicken Taquitos
- Extra Ranch Dressing: For dipping, enhancing the flavor and creaminess.
- Fresh Garden Salad: A light, refreshing side that balances the richness of the taquitos.
- Guacamole: Offers a creamy contrast that complements the crunch of the taquitos.
- Spicy Salsa: Adds a kick of heat, perfect for those who enjoy a bit of spice.
- Pickled Jalapeños: For an extra tangy bite that elevates the flavor profile.
- Cold Beer: A classic pairing for game day, enhancing the overall experience.
- Coleslaw: Provides a crunchy texture that contrasts nicely with the soft filling.
- Tortilla Chips: For a fun appetizer spread, perfect for sharing.
Storage & Meal Prep Instructions
- Fridge Storage: Store leftover taquitos in an airtight container in the fridge for up to 3 days.
- Freezer Storage: Freeze uncooked taquitos on a baking sheet, then transfer to a freezer bag for up to 2 months. Bake from frozen, adding a few extra minutes to the cooking time.
- Reheating Methods: Reheat in the oven at 350°F (175°C) for about 10-15 minutes until heated through and crispy.
Nutrition Facts & Health Insights
| Nutrient | Per Taquito |
|---|---|
| Calories | 180 |
| Sugar | 1 gram |
| Sodium | 350 mg |
| Fat | 9 grams |
| Saturated Fat | 3 grams |
| Unsaturated Fat | 5 grams |
| Trans Fat | 0 grams |
| Carbohydrates | 18 grams |
| Fiber | 1 gram |
| Protein | 10 grams |
| Cholesterol | 30 mg |
Health Insights: The combination of chicken and cheese provides a good source of protein, while dill pickles add beneficial probiotics. Opting for Greek yogurt instead of ranch dressing can reduce calories and fat.
Frequently Asked Questions
- Can I use rotisserie chicken? Yes, rotisserie chicken is a great time-saver and adds flavor.
- What if I don’t have ranch dressing? You can make a quick homemade version with yogurt, herbs, and spices.
- Can I bake these taquitos in an air fryer? Yes, air frying is a great alternative for a crispier texture; cook at 375°F for about 10-12 minutes.
- How do I prevent the tortillas from cracking? Warm them slightly in the microwave before filling to make them more pliable.
- Can I make these taquitos gluten-free? Yes, use corn tortillas instead of flour tortillas.
- What’s the best way to reheat leftovers? Reheat in the oven for the best texture, or use an air fryer for a quick option.
- How can I customize the filling? Feel free to add vegetables, different cheeses, or spices to suit your taste.
- Can I freeze the taquitos? Yes, freeze uncooked taquitos and bake them directly from frozen.
Final Inspiration & Kitchen Confidence
As you embark on making these Dill Pickle Ranch Chicken Taquitos, remember that cooking is not just about following a recipe; it’s about creating joy and connection. Celebrate your culinary achievements, no matter how small, and share your delicious creations with friends and family. With each taquito you roll, you’re not just preparing a meal; you’re crafting memories that will last a lifetime. So gather your ingredients, embrace your kitchen confidence, and enjoy every crispy, juicy bite!
Print
Dill Pickle Ranch Chicken Taquitos: Crispy & Juicy Bliss!
- Total Time: 35 minutes
- Yield: 10 taquitos 1x
- Diet: Gluten-Free option available
Description
Dill Pickle Ranch Chicken Taquitos are a delightful fusion of crispy tortillas filled with tender, juicy chicken, tangy dill pickles, and a creamy ranch dressing. Each bite offers a satisfying crunch followed by a burst of savory and zesty flavors that dance on your palate.
Ingredients
- For the Filling:
- 2 cups cooked shredded chicken
- 1/2 cup dill pickles, finely chopped
- 1/2 cup ranch dressing
- 1 cup shredded cheddar cheese
- For the Taquitos:
- 10 small flour tortillas
- 1 tablespoon olive oil
Instructions
- Preheat your oven to 400°F (200°C).
- In a mixing bowl, combine the shredded chicken, chopped dill pickles, ranch dressing, and shredded cheddar cheese until well mixed.
- Lay a tortilla flat and spoon about 2 tablespoons of the filling onto the lower third of the tortilla.
- Tightly roll the tortilla around the filling and place seam-side down on a baking sheet.
- Brush the tops of the taquitos with olive oil for extra crispiness.
- Bake in the preheated oven for 15-20 minutes or until golden brown and crispy.
- Remove from the oven and let cool for a few minutes before serving.
Notes
- Make-ahead: You can prepare the filling a day in advance and store it in the refrigerator.
- Storage: Store leftover taquitos in an airtight container in the fridge for up to 3 days.
- Substitutions: Use Greek yogurt instead of ranch dressing for a lighter option.
- Prep Time: 15 minutes
- Cook Time: 20 minutes
- Category: appetizers
- Method: baking
- Cuisine: American
Nutrition
- Serving Size: 1 taquito
- Calories: 180
- Sugar: 1 gram
- Sodium: 350 milligrams
- Fat: 9 grams
- Saturated Fat: 3 grams
- Unsaturated Fat: 5 grams
- Trans Fat: 0 grams
- Carbohydrates: 18 grams
- Fiber: 1 gram
- Protein: 10 grams
- Cholesterol: 30 milligrams
Keywords: Dill Pickle Ranch Chicken Taquitos, taquitos, chicken taquitos, ranch dressing, dill pickles, crispy taquitos, easy appetizers, baked taquitos, party food, game day snacks, comfort food, Tex-Mex recipes, finger food