Indulge in Creamy Butterfinger Pie: A Crunchy Delight!
Sensory-Rich Introduction with Immediate Craving
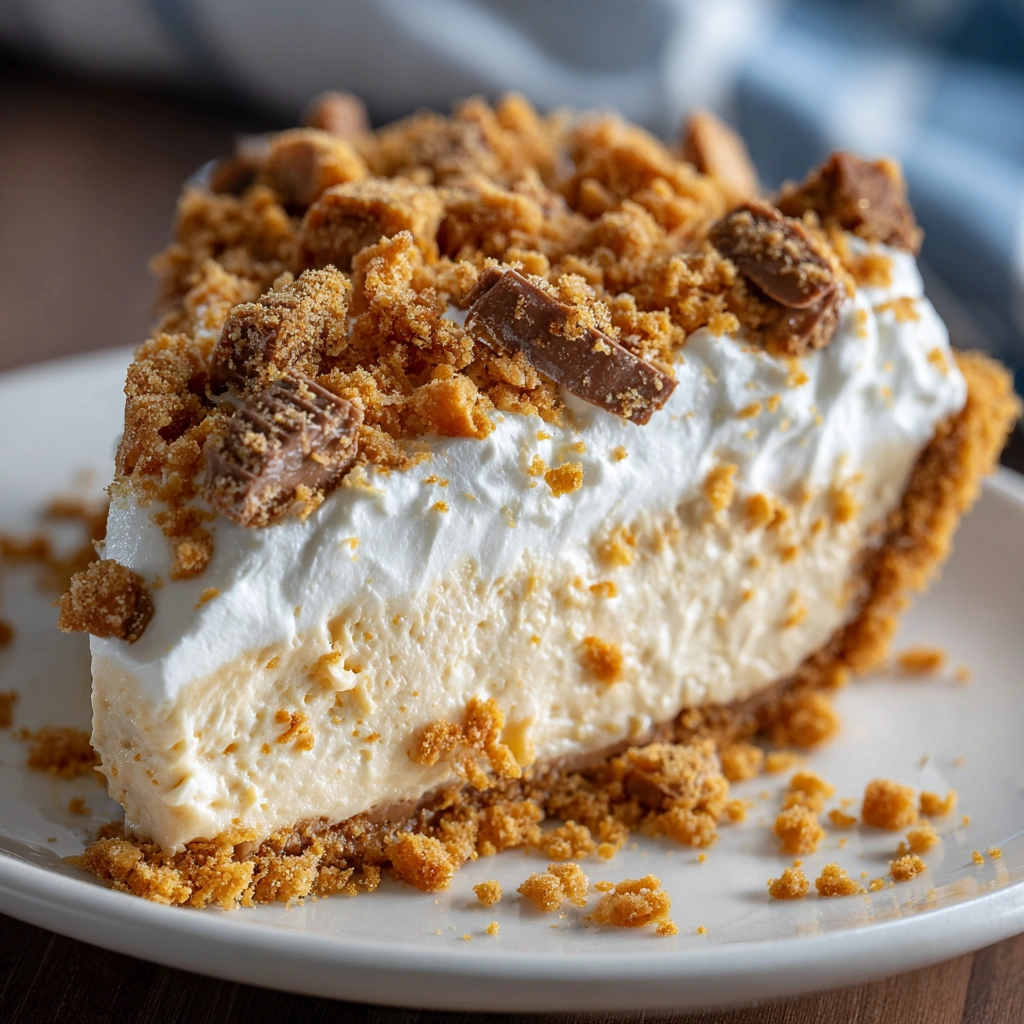
Imagine slicing into a velvety pie, the rich aroma of peanut butter and chocolate wafting through the air, instantly igniting your taste buds. As you take your first bite, the creamy filling melts in your mouth, while the crunchy Butterfinger pieces provide a satisfying contrast. This Creamy Butterfinger Pie is not just a dessert; it’s a celebration of flavors and textures that brings back memories of childhood treats and family gatherings. Whether it’s a summer barbecue, a holiday feast, or a cozy night in, this pie is the perfect indulgence to share with loved ones, creating moments of joy and connection.
Why You’ll Love This Creamy Butterfinger Pie
- Texture Contrast: The smooth, creamy filling pairs beautifully with the crunchy Butterfinger pieces, creating a delightful mouthfeel.
- Flavor Balance: The rich peanut butter and chocolate flavors are perfectly balanced with the sweetness of the pie, making it irresistible.
- Versatility: This pie can be served at various occasions, from casual get-togethers to formal celebrations, appealing to all palates.
- Ease of Preparation: With simple steps and minimal baking, this recipe is perfect for both novice and experienced bakers.
- Universal Appeal: Loved by kids and adults alike, this dessert is sure to please everyone at the table.
Essential Tools & Preparation Strategy
- 9-inch Pie Pan: Essential for shaping and baking the crust, ensuring even cooking.
- Mixing Bowls: Needed for efficiently combining ingredients; opt for glass or stainless steel for durability.
- Electric Mixer: Helps achieve a smooth filling and perfectly whipped cream, saving time and effort.
- Rubber Spatula: Useful for gently folding ingredients without deflating the whipped cream, ensuring a light texture.
- Measuring Cups and Spoons: Ensures accurate ingredient quantities, which is crucial for the perfect pie.
- Whisk: Handy for mixing the filling and whipping cream, providing a smooth consistency.
- Rolling Pin (optional): If you prefer a homemade crust, a rolling pin can help flatten dough evenly.
- Plastic Wrap: For covering the pie while it chills, preventing it from absorbing odors in the fridge.
Ingredients & Their Roles in This Creamy Butterfinger Pie
Crust
- Graham Cracker Crumbs: Forms the base of the pie, providing a sweet and crunchy texture.
- Unsalted Butter: Binds the crumbs together and adds richness.
- Granulated Sugar: Sweetens the crust, enhancing the overall flavor.
Filling
- Creamy Peanut Butter: The star ingredient, providing a rich, nutty flavor.
- Cream Cheese: Adds creaminess and a slight tang, balancing the sweetness.
- Powdered Sugar: Sweetens the filling without adding graininess.
- Heavy Whipping Cream: Creates a light and airy texture in the filling.
- Vanilla Extract: Enhances the overall flavor profile.
- Butterfinger Candy Bars: Adds crunch and a sweet, chocolatey flavor.
Topping
- Whipped Cream: Lightens the dessert and adds a fluffy texture.
- Crushed Butterfinger Candy Bars: Provides an extra crunch and visual appeal.
Step-by-Step Guide to Perfect Creamy Butterfinger Pie
- Preheat Oven: Set your oven to 350°F (175°C) to prepare for baking the crust.
- Prepare the Crust: In a mixing bowl, combine graham cracker crumbs, melted butter, and sugar. Mix until well combined.
- Shape the Crust: Press the mixture firmly into the bottom and up the sides of a 9-inch pie pan. Bake for 8-10 minutes until golden brown. Remove and let cool.
- Make the Filling: In a large bowl, beat together the peanut butter, cream cheese, and powdered sugar until smooth.
- Whip the Cream: In a separate bowl, whip the heavy cream and vanilla extract until stiff peaks form.
- Combine Mixtures: Gently fold the whipped cream into the peanut butter mixture until fully combined.
- Add Butterfinger: Stir in the crushed Butterfinger candy bars, ensuring even distribution.
- Fill the Crust: Pour the filling into the cooled crust and smooth the top. Refrigerate for at least 4 hours or until set.
- Serve: Before serving, top with whipped cream and additional crushed Butterfinger candy bars for garnish.
Chef’s Notes & Pro Tips for Flawless Results
- Make-Ahead Instructions: This pie can be made a day in advance, allowing the flavors to meld beautifully.
- Storage: Store leftovers in an airtight container in the fridge for up to 3 days.
- Equipment Recommendations: A stand mixer can make whipping cream easier, but a hand mixer works just as well.
- Customization Options: For a gluten-free option, use gluten-free graham crackers for the crust.
Avoid These Common Cooking Mistakes
- Overmixing the Filling: This can lead to a dense texture. Mix just until combined.
- Not Chilling Long Enough: The pie needs time to set properly. Refrigerate for at least 4 hours.
- Using Warm Crust: Ensure the crust is completely cooled before adding the filling to prevent melting.
- Not Crushing Butterfingers Finely: Large pieces can disrupt the texture. Crush them into small bits.
- Skipping the Whipped Cream: This adds lightness to the filling. Don’t omit it!
- Using Low-Fat Cream Cheese: This can affect the creaminess. Use full-fat for best results.
- Not Measuring Ingredients Accurately: This can alter the taste and texture. Use proper measuring tools.
Creative Variations & Customizations
- Chocolate Crust: Use chocolate cookie crumbs instead of graham crackers for a richer flavor.
- Nut-Free Version: Substitute sunflower seed butter for peanut butter to accommodate nut allergies.
- Seasonal Twist: Add pumpkin spice to the filling for a fall-inspired dessert.
- Vegan Option: Use vegan cream cheese and whipped coconut cream for a plant-based version.
- Mini Pies: Create individual servings by using a muffin tin for mini Butterfinger pies.
Perfect Pairings: What to Serve With Creamy Butterfinger Pie
- Chocolate Sauce: A drizzle adds richness and enhances the chocolate flavor.
- Vanilla Ice Cream: The cold creaminess contrasts beautifully with the pie’s texture.
- Fresh Berries: Their tartness balances the sweetness of the pie.
- Coffee or Espresso: A warm beverage enhances the dessert experience.
- Chocolate Mousse: Create a decadent dessert platter with complementary flavors.
- Milk: A classic pairing that complements the sweetness of the pie.
- Caramel Sauce: Adds an extra layer of flavor and richness.
- Flavored Whipped Cream: A hint of vanilla or almond extract can elevate the topping.
Storage & Meal Prep Instructions
- Refrigeration: Store the pie in the fridge for up to 3 days in an airtight container.
- Freezing: For longer storage, freeze the pie for up to 2 months. Thaw in the fridge before serving.
- Reheating: This pie is best served cold, but if desired, let it sit at room temperature for 15-20 minutes before serving.
Nutrition Facts & Health Insights
| Nutrient | Amount per Serving (1 slice) |
|---|---|
| Calories | 350 |
| Sugar | 25 grams |
| Sodium | 250 milligrams |
| Fat | 22 grams |
| Saturated Fat | 10 grams |
| Unsaturated Fat | 8 grams |
| Trans Fat | 0 grams |
| Carbohydrates | 30 grams |
| Fiber | 1 gram |
| Protein | 6 grams |
| Cholesterol | 30 milligrams |
Health Benefits of Key Ingredients
- Peanut Butter: Rich in protein and healthy fats, it provides energy and satiety.
- Cream Cheese: Adds creaminess and calcium, essential for bone health.
- Butterfinger: Offers a sweet treat in moderation, contributing to enjoyment and satisfaction.
Frequently Asked Questions
- Can I use crunchy peanut butter instead of creamy?Yes, it will add extra texture to the filling.
- How long can I store leftovers?Up to 3 days in the fridge.
- Can I make this pie gluten-free?Absolutely! Use gluten-free graham crackers for the crust.
- What can I substitute for heavy cream?You can use coconut cream for a dairy-free option.
- Is it necessary to chill the pie?Yes, chilling allows the filling to set properly.
- Can I use a different candy bar?Yes, feel free to experiment with other chocolate bars for different flavors.
- What if I don’t have a pie pan?You can use a square baking dish or individual ramekins.
- How do I know when the pie is set?The filling should be firm to the touch and hold its shape when sliced.
Final Inspiration & Kitchen Confidence
As you prepare this Creamy Butterfinger Pie, remember that cooking is not just about following a recipe; it’s about creating memories and sharing joy with those you love. Celebrate your achievements in the kitchen, and don’t hesitate to experiment with flavors and textures. Each pie you make is a step towards becoming a more confident cook. So gather your ingredients, roll up your sleeves, and indulge in the delightful experience of making this luscious dessert!
Print
“Indulge in Creamy Butterfinger Pie: A Crunchy Delight!”
- Total Time: 4 hours 40 minutes
- Yield: 8 servings 1x
- Diet: Vegetarian
Description
This Creamy Butterfinger Pie is a luscious dessert that combines a velvety filling with a crunchy, buttery crust. Each bite offers a delightful contrast of smooth chocolate and peanut butter flavors, complemented by the satisfying crunch of Butterfinger candy pieces.
Ingredients
- Crust:
- 1 ½ cups graham cracker crumbs
- ½ cup unsalted butter, melted
- ¼ cup granulated sugar
- Filling:
- 1 cup creamy peanut butter
- 8 oz cream cheese, softened
- 1 cup powdered sugar
- 1 cup heavy whipping cream
- 1 tsp vanilla extract
- 1 cup Butterfinger candy bars, crushed
- Topping:
- 1 cup whipped cream
- ½ cup Butterfinger candy bars, crushed
Instructions
- Preheat your oven to 350°F (175°C).
- In a mixing bowl, combine graham cracker crumbs, melted butter, and sugar. Mix until well combined.
- Press the mixture firmly into the bottom and up the sides of a 9-inch pie pan. Bake for 8-10 minutes until golden brown. Remove and let cool.
- In a large bowl, beat together the peanut butter, cream cheese, and powdered sugar until smooth.
- In a separate bowl, whip the heavy cream and vanilla extract until stiff peaks form.
- Gently fold the whipped cream into the peanut butter mixture until fully combined.
- Stir in the crushed Butterfinger candy bars.
- Pour the filling into the cooled crust and smooth the top. Refrigerate for at least 4 hours or until set.
- Before serving, top with whipped cream and additional crushed Butterfinger candy bars.
Notes
- This pie can be made a day in advance and stored in the refrigerator.
- Store leftovers in an airtight container in the fridge for up to 3 days.
- For a gluten-free option, use gluten-free graham crackers for the crust.
- Prep Time: 30 minutes
- Cook Time: 10 minutes
- Category: desserts
- Method: baking
- Cuisine: American
Nutrition
- Serving Size: 1 slice (1/8 of pie)
- Calories: 350
- Sugar: 25 grams
- Sodium: 250 milligrams
- Fat: 22 grams
- Saturated Fat: 10 grams
- Unsaturated Fat: 8 grams
- Trans Fat: 0 grams
- Carbohydrates: 30 grams
- Fiber: 1 gram
- Protein: 6 grams
- Cholesterol: 30 milligrams
Keywords: Creamy Butterfinger Pie, dessert, pie, peanut butter, chocolate, Butterfinger, no-bake pie, easy dessert, sweet treat, creamy filling, graham cracker crust, indulgent dessert, American cuisine