Color-Changing Flower Experiment: Create Stunning Blooms!
As I embarked on the Color-Changing Flower Experiment, I was reminded of the simple joys that crafting can bring, especially for busy moms like us. With our hectic schedules, it’s easy to overlook the little moments of creativity that can brighten our days. This project not only allowed me to indulge in a fun DIY activity but also provided a fantastic opportunity to bond with my kids while teaching them about the wonders of nature.
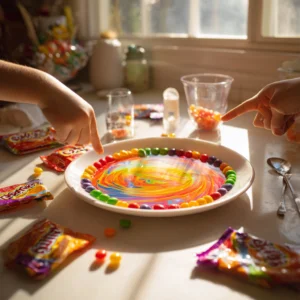
When I first gathered the materials—white flowers, food coloring, and clear vases—I felt a wave of excitement wash over me. The vibrant colors of the food dye promised a magical transformation, and I couldn’t wait to see the results. I remember the first time I tried this experiment; I was amazed at how quickly the flowers absorbed the colored water. It was like watching a painting come to life right before my eyes!
One of the challenges I faced was finding the time to set everything up. With just 10 minutes of prep time, I was able to cut the stems and mix the colors, making it a perfect project for a busy afternoon. I learned that even a small investment of time can yield beautiful results. Plus, the anticipation of waiting for the flowers to change color added an element of excitement for my kids. They eagerly checked on the flowers every hour, their faces lighting up with each new hue that appeared.
As I watched the flowers transform, I couldn’t help but think about how this simple experiment mirrored our lives. Just like the flowers, we too can change and grow, even amidst the chaos of our daily routines. So, if you’re looking for a delightful way to spend time with your children while exploring the beauty of science and art, I wholeheartedly recommend the Color-Changing Flower Experiment. It’s a colorful reminder that creativity can flourish, even in the busiest of lives!
Introduction to Color-Changing Flower Experiment
In a world where creativity often takes a backseat to busy schedules, the Color-Changing Flower Experiment offers a delightful escape into the realm of DIY and crafts. This engaging project not only beautifies your home but also serves as a fun educational activity for you and your children. Imagine watching white flowers transform into vibrant hues right before your eyes!
As a busy mom, I know how challenging it can be to find time for creative projects. However, this experiment is perfect for those of us looking to squeeze a little creativity into our day. It’s not just about the end result; it’s about the journey of discovery and the joy of crafting together with our kids. I remember the first time I introduced this experiment to my children. Their eyes widened with excitement as they anticipated the colorful transformation of the flowers.
What I love most about the Color-Changing Flower Experiment is that it combines art and science in a way that is accessible and fun. It’s a hands-on lesson in plant biology, showing how flowers absorb water and change color. This project is a wonderful opportunity to teach kids about nature while also allowing them to express their creativity. Plus, it’s a fantastic way to create lasting memories together!
So, if you’re looking for a simple yet captivating project that can brighten your home and your day, look no further than the Color-Changing Flower Experiment. Let’s dive into the materials and tools you’ll need to get started!
Why You’ll Love This Color-Changing Flower Experiment
The Color-Changing Flower Experiment is truly a gem in the world of DIY projects. As a craft lover, I can’t help but appreciate how this simple experiment can ignite creativity in both kids and adults alike. With just a handful of materials and a small time commitment, you can create stunning floral displays that not only beautify your home but also serve as a delightful conversation starter.
One of the things I adore about this project is its accessibility. You don’t need to be a crafting expert to enjoy it! I remember the first time I attempted this experiment with my children; we were all beginners, yet the results were nothing short of magical. Watching the flowers change color was like witnessing a mini miracle unfold right in our kitchen. It’s a reminder that creativity doesn’t have to be complicated to be impactful.
Moreover, this experiment is a wonderful opportunity to bond with your children. As busy moms, we often juggle multiple responsibilities, and finding quality time with our kids can be a challenge. The Color-Changing Flower Experiment allows us to step away from our hectic schedules and engage in a fun, educational activity together. I cherish the moments when my kids eagerly checked on the flowers, their faces lighting up with each new hue. It was a beautiful way to connect and share in the excitement of discovery.
In addition to being a fun activity, this experiment also serves as a fantastic educational tool. It introduces children to the fascinating world of plant biology in a hands-on way. As they observe how the flowers absorb colored water, they learn about the science behind it, all while having a blast. It’s a win-win situation that makes this project a must-try for any busy mom looking to sprinkle a little creativity into her family’s life!
Materials Needed for Color-Changing Flower Experiment
To get started on your Color-Changing Flower Experiment, gather the following materials:
- White flowers (e.g., carnations or daisies) – 3
- Food coloring – 3 different colors
- Water – 3 cups
- Clear vases or cups – 3
When I first prepared for this experiment, I was pleasantly surprised by how easy it was to find everything I needed. I simply picked up some fresh white flowers from my local grocery store, and I already had food coloring in my pantry from previous baking adventures. It felt like a mini treasure hunt, and I loved that I could involve my kids in the process of gathering materials.
As we collected the supplies, I encouraged my children to think about the colors they wanted to use. Would they go for vibrant reds and blues, or perhaps a soft pastel palette? This little brainstorming session added an extra layer of excitement to our crafting day. It’s amazing how such a simple project can spark creativity and imagination!
*For a printable full list of materials, see below.*
Tools Required for Color-Changing Flower Experiment
To embark on your Color-Changing Flower Experiment, you’ll need a few basic tools that are likely already in your kitchen. I remember the first time I gathered my supplies; it felt like preparing for a mini science adventure! Here’s what you’ll need:
- Scissors: These are essential for cutting the stems of the flowers at an angle, which helps them absorb water more effectively. I always keep a pair of craft scissors handy for projects like this!
- Measuring cup: Accurate measurements are key, especially when it comes to the water. A measuring cup ensures you get just the right amount for each vase. I often use a clear cup so my kids can see the water level as we fill it.
- Spoon for stirring: This is perfect for mixing the food coloring into the water. I like to use a spoon that’s easy for my kids to handle, making it a fun part of the process.
As I prepared for this experiment, I found that having the right tools made everything smoother and more enjoyable. If you don’t have these specific tools, don’t worry! Alternatives like kitchen shears for cutting or any cup for measuring will work just fine. The goal is to have fun and create beautiful blooms together!
How to Make Color-Changing Flower Experiment
Creating your own Color-Changing Flower Experiment is a delightful journey that I can’t wait to share with you! Follow these simple steps, and you’ll be on your way to witnessing a beautiful transformation right in your home.
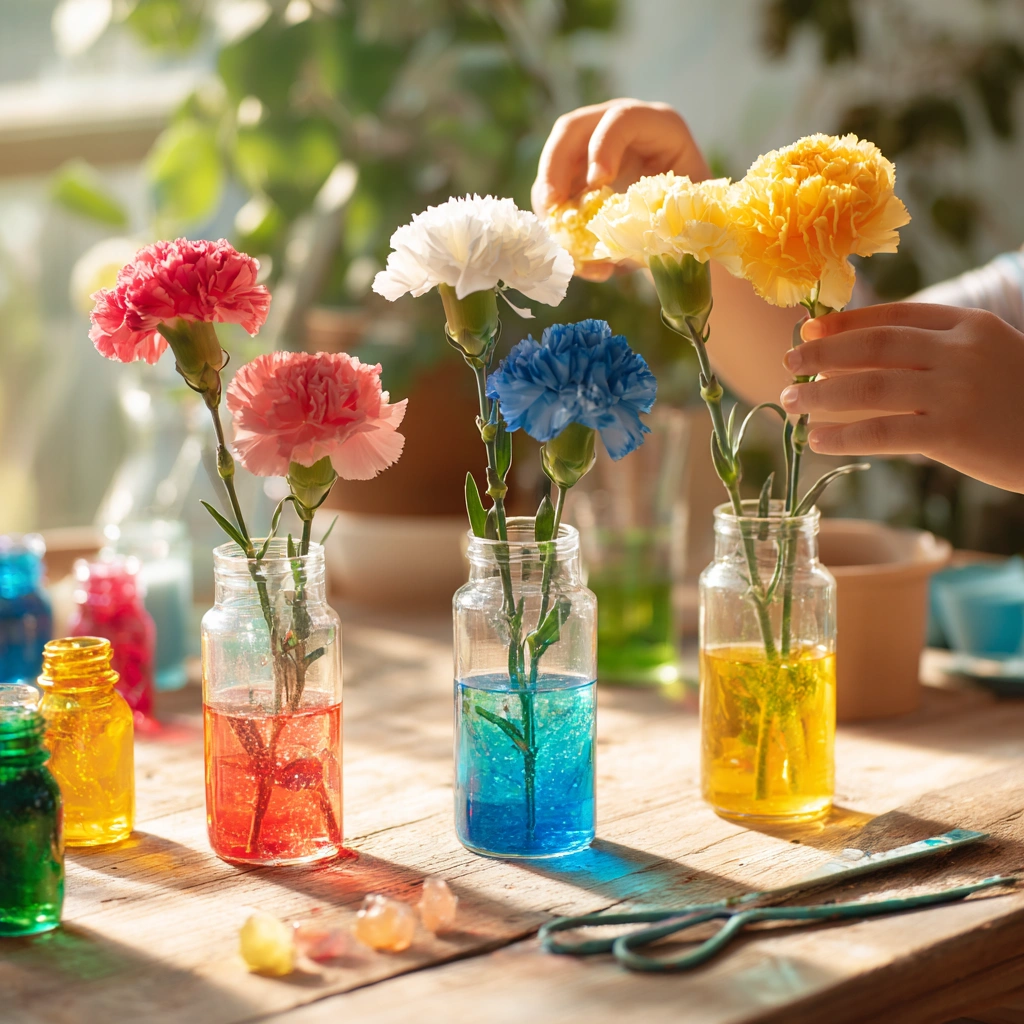
Step 1: Prepare the Flowers
Start by cutting the stems of the white flowers at an angle. This little trick is essential because it helps the flowers absorb water more effectively. I remember the first time I did this; I felt like a florist! The angled cut allows for a larger surface area, which means the flowers can drink up that colorful water more efficiently.
Step 2: Fill the Vases
Next, fill each clear vase or cup with one cup of water. As I poured the water, I loved watching it fill the vases, creating a blank canvas for the colors to come. It’s a simple step, but it sets the stage for the magic that’s about to happen!
Step 3: Add Food Coloring
Now comes the fun part! Add a few drops of different food coloring to each cup of water. I always encourage my kids to choose vibrant colors that excite them. Watching the colors swirl and mix in the water is like a mini art project in itself! The anticipation builds as you imagine how the flowers will look.
Step 4: Place the Flowers
Once the colors are in, it’s time to place one flower in each cup of colored water. Make sure the stems are submerged, as this is where the magic begins. I remember the joy on my kids’ faces as they carefully placed each flower, eager to see the results.
Step 5: Wait and Watch
Finally, be patient! Wait for a few hours or even overnight to see the color change in the flowers. This waiting period is filled with excitement and curiosity. I often found myself peeking at the flowers, marveling at how quickly they transformed. You’ll be amazed at the stunning results, and it’s a wonderful reminder of how nature works!
Tips for Best Results
To ensure your Color-Changing Flower Experiment is a success, I’ve gathered some helpful tips that I learned from my own experiences. These little nuggets of wisdom can make a big difference in the outcome of your project!
- Use fresh flowers for the best results. I can’t stress this enough! Fresh flowers absorb water more efficiently, which means you’ll see the color change happen more quickly and vibrantly. I always make a point to pick the freshest blooms I can find, and it really pays off!
- Experiment with different colors and combinations. Don’t be afraid to get creative! I remember one time we mixed red and blue food coloring, and the resulting purple was absolutely stunning. It’s a fun way to teach kids about color mixing while also making the experiment more visually exciting.
- Try using different types of flowers. Each flower has its own unique way of absorbing water, and it’s fascinating to see how they react to the colored water. I’ve tried this experiment with everything from daisies to roses, and each time, the results were a delightful surprise!
By keeping these tips in mind, you’ll not only enhance your Color-Changing Flower Experiment but also create a memorable experience for you and your children. Happy crafting!
Project Variations
Get creative with your Color-Changing Flower Experiment! One of the things I love most about this project is how versatile it can be. Each time I try it, I discover new ways to enhance the experience. Here are some fun variations to try that will keep the excitement alive:
- Style Variations: Don’t limit yourself to just carnations or daisies! Experiment with different types of flowers like roses or tulips for unique results. I remember the first time I used roses; the way they absorbed the color was simply breathtaking. Each flower has its own personality, and it’s fascinating to see how they react to the colored water.
- Color Changes: Why not mix colors in one vase for a tie-dye effect? I once combined red and yellow food coloring, and the resulting orange was a delightful surprise! This variation not only adds a fun twist but also teaches kids about color blending. Watching the colors swirl together is like creating a mini masterpiece right in your kitchen!
- Seasonal Adaptations: Use seasonal flowers and colors to match holidays or events. For instance, during spring, you could use pastel colors for Easter, or during fall, vibrant oranges and reds for Halloween. I love changing the theme based on the season; it keeps the project fresh and exciting for my kids. They look forward to seeing how the flowers will reflect the time of year!
These variations not only enhance the Color-Changing Flower Experiment but also provide endless opportunities for creativity and learning. So gather your materials, let your imagination run wild, and enjoy the beautiful transformations together!
Decoration and Usage Ideas
Once your flowers have changed color, the fun doesn’t stop there! I love finding creative ways to display our colorful blooms, and I’m excited to share some of my favorite ideas with you. These suggestions not only showcase your beautiful creations but also add a touch of joy to your home.
- Centerpieces: One of the simplest yet most impactful ways to use your colorful flowers is as a stunning centerpiece for your dining table. I remember hosting a family dinner and placing our vibrant blooms in the center. It instantly brightened the room and sparked conversations about our Color-Changing Flower Experiment. It’s a beautiful way to share the joy of crafting with guests!
- Gifts: The colorful flowers also make for thoughtful gifts. I’ve often presented them to friends or family members as a surprise. A small bouquet of these vibrant blooms can brighten anyone’s day! You can even pair them with a handwritten note explaining the experiment, adding a personal touch that shows you care.
- Home Decor: Don’t forget to place your colorful flowers in various rooms around your home! Whether it’s on a windowsill, a bedside table, or even in the bathroom, these cheerful blooms can add a pop of color and cheer to any space. I love moving them around to see where they fit best, and it’s a great way to refresh the decor without spending a dime!
As you explore these decoration and usage ideas, remember that the Color-Changing Flower Experiment is not just about the end result; it’s about the joy of creating and sharing beauty with those around you. So, let your imagination run wild and enjoy the vibrant displays you’ve created together!
FAQs about Color-Changing Flower Experiment
Q: How long will the color change last?
A: The color change can last for several days, but it may fade as the flowers begin to wilt. I remember the first time we did this experiment; the colors were vibrant for about three days before they started to lose their intensity. It was a beautiful reminder of how nature works, and we enjoyed every moment of it!
Q: Can I use other types of flowers?
A: Yes! Different flowers may absorb the dye differently, so feel free to experiment. I’ve tried this with everything from daisies to roses, and each type brought its own unique charm to the experiment. It’s fascinating to see how the colors interact with different petals!
Q: Is this experiment safe for kids?
A: Yes, but supervise young children when using scissors and ensure they wash their hands after handling food coloring. I always make it a point to explain the importance of safety while crafting. It’s a great opportunity to teach kids about being responsible while having fun!
Final Thoughts
The Color-Changing Flower Experiment is more than just a fun craft; it’s a wonderful way to connect with your children and explore the beauty of nature together. As I reflect on the times I’ve shared this project with my kids, I’m filled with warmth and joy. Watching the flowers transform from plain white to vibrant colors is not just visually stunning; it’s a reminder of the magic that can happen when we take a moment to create together.
In our busy lives, it’s easy to overlook the simple pleasures that crafting can bring. This experiment serves as a gentle nudge to slow down, engage with our children, and appreciate the little wonders of the world around us. I remember the laughter and excitement that filled our home as we eagerly checked on our flowers, each new hue sparking joy and curiosity.
So, gather your materials, invite your kids to join in, and let the magic of color-changing blooms brighten your home and hearts! Whether you’re a seasoned crafter or just starting out, this project is a beautiful way to create lasting memories. Embrace the journey, celebrate the creativity, and enjoy every colorful moment together!
Print
Color-Changing Flower Experiment: Create Stunning Blooms!
Description
The Color-Changing Flower Experiment is a fun and educational DIY project that demonstrates how plants absorb water and change color. By using food coloring and white flowers, you can create stunning blooms that change color right before your eyes.
Instructions
- Cut the stems of the white flowers at an angle to help them absorb water better.
- Fill each vase or cup with one cup of water.
- Add a few drops of different food coloring to each cup of water.
- Place one flower in each cup of colored water.
- Wait for a few hours or overnight to see the color change in the flowers.
Keywords: Color-Changing Flower Experiment, DIY, Educational Craft, Kids Activity, Science Experiment