Introduction to Color-Changing Crystal Treasure Stones
Welcome to the enchanting world of Color-Changing Crystal Treasure Stones! If you’re looking for a fun and creative DIY project that adds a sprinkle of magic to your home, you’ve come to the right place. This craft is not only simple but also incredibly rewarding, allowing you to unleash your inner artist. Imagine the joy of creating shimmering stones that change colors with the light! Whether you’re crafting with your kids or enjoying a quiet afternoon, this project is perfect for anyone seeking a delightful escape into creativity. Let’s unlock a rainbow of possibilities together!
Why You’ll Love This Color-Changing Crystal Treasure Stones
Creating Color-Changing Crystal Treasure Stones is a delightful blend of creativity and relaxation. This project is not only easy on the wallet but also a fantastic way to bond with your kids or friends. As you mix and pour, you’ll find joy in the process, watching your unique designs come to life. Plus, these shimmering treasures make for stunning home decor or heartfelt gifts, adding a touch of magic to any space!
Materials and Tools Needed for Color-Changing Crystal Treasure Stones
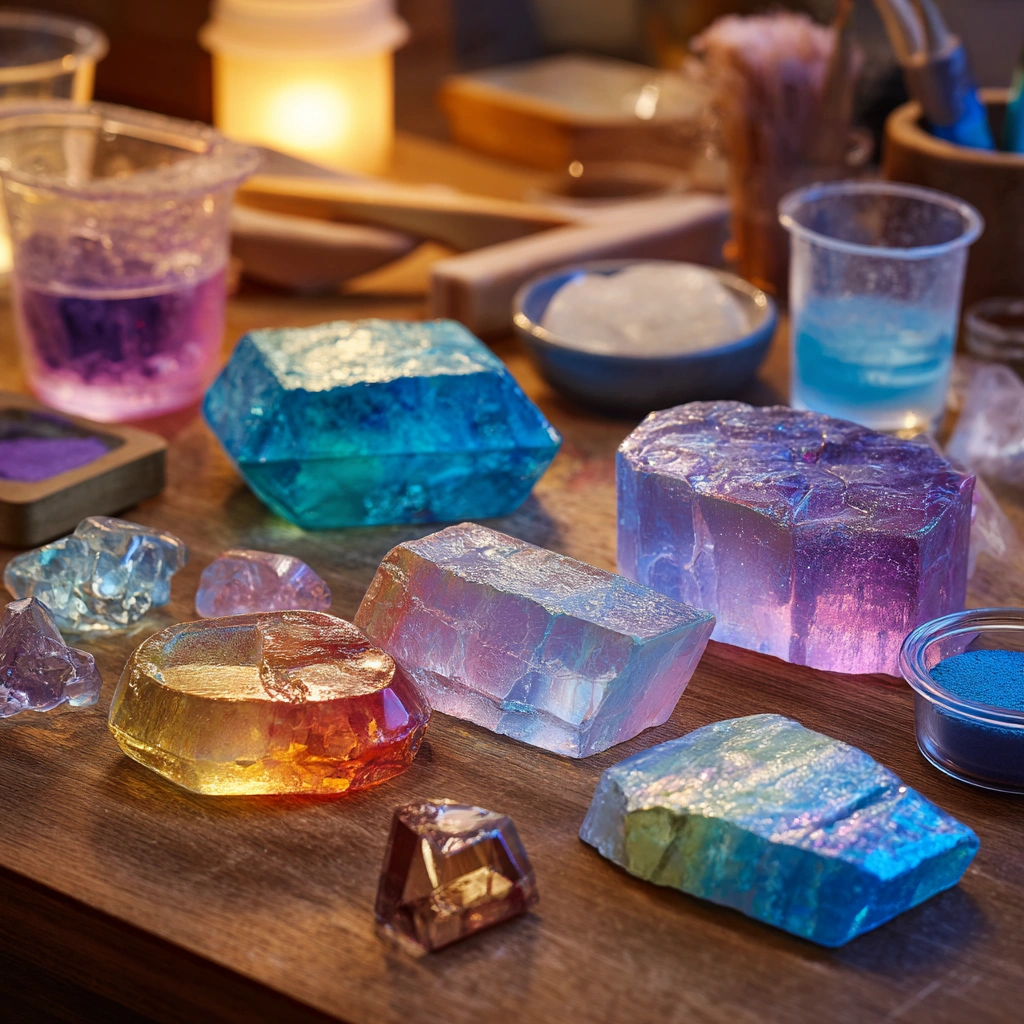
To embark on your Color-Changing Crystal Treasure Stones adventure, you’ll need a few essential materials and tools. First up is clear resin, the magical base that transforms into your shimmering stones. Color-changing pigment powder is next, adding that enchanting twist of color. Silicone molds are crucial for shaping your treasures, while mixing cups and stirring sticks help you blend everything smoothly.
Don’t forget protective gloves to keep your hands safe, and masking tape to secure your molds. If you want to add a polished touch, sandpaper can be handy for smoothing edges. For eco-friendly options, consider using biodegradable resin or natural pigments. Each item plays a vital role in bringing your creative vision to life!
How to Make Color-Changing Crystal Treasure Stones
Creating your own Color-Changing Crystal Treasure Stones is not just a craft; it’s a magical experience that brings out your inner artist! I remember the first time I mixed resin and watched it transform into shimmering stones. The anticipation was almost as exciting as the final reveal! Let’s dive into the steps to make these enchanting treasures together.
Step 1: Prepare Your Workspace
Before we get our hands messy, let’s set up a safe and clean crafting area. Cover your surfaces with newspaper or a drop cloth to catch any drips or spills. Trust me, this will save you from a sticky situation later! Make sure you have all your materials within reach, so you can focus on the fun part—creating! A well-organized workspace not only keeps things tidy but also sparks creativity as you dive into this colorful project.
Step 2: Safety First
Now, let’s talk safety! Put on your protective gloves to keep your hands safe from the resin. It’s super important to work in a well-ventilated area, too. Open a window or turn on a fan to keep the air fresh. I always feel more at ease knowing I’m taking precautions, especially when crafting with kids around! Remember, safety is key to enjoying this fun DIY without any worries.
Step 3: Mix the Resin
Grab your mixing cup and pour in the clear resin according to the package instructions. It’s like a science experiment! Stir the mixture thoroughly with a stirring stick until it’s completely blended. The soft shimmer of the resin as it swirls together is simply mesmerizing. Just remember, no lumps allowed—smooth is the name of the game! This step is crucial, as a well-mixed resin ensures your Color-Changing Crystal Treasure Stones will turn out beautifully.
Step 4: Add Color-Changing Pigment
Here comes the fun part! Add the color-changing pigment powder to your resin mixture. As you stir, watch the colors come to life! This is where your creativity shines. You can mix different pigments to create unique effects. I love experimenting with various shades to see how they change in different lights. It’s like unlocking a rainbow of creativity! Just be sure to mix well so that the color is evenly distributed throughout the resin.
Step 5: Pour into Molds
Now it’s time to pour your magical mixture into the silicone molds. Fill them to your desired level, but don’t overfill—trust me, it can get messy! If you’re feeling adventurous, you can even add glitter or small decorative items to the resin before pouring. The possibilities are endless! Just imagine how beautiful they’ll look once they’re cured. Pour slowly to avoid bubbles, and take your time to ensure each mold is filled just right.
Step 6: Secure and Cure
Once your molds are filled, use masking tape to secure them in place if needed. This helps prevent any accidental spills. Now, let’s play the waiting game! Allow the resin to cure according to the manufacturer’s instructions, usually 24-48 hours. I always find this part a bit torturous, but the excitement builds as you imagine the final product! Make sure to keep the molds in a safe spot where they won’t be disturbed during the curing process.
Step 7: Remove and Finish
After the curing time is up, it’s time for the big reveal! Carefully remove the stones from the molds. They should pop out easily, but if they’re a bit stubborn, a gentle twist can help. If you want a smoother finish, you can sand the edges lightly. The satisfaction of holding your own Color-Changing Crystal Treasure Stones is truly rewarding! You’ll be amazed at how these little gems can brighten up your space or make perfect gifts for loved ones.
Tips for Best Results
- Always mix resin in a well-ventilated area to avoid fumes.
- If you notice bubbles in your mixture, gently tap the sides of the mold to release them.
- For a unique touch, try layering different colors of resin in the molds.
- Store leftover resin in a sealed container for future projects.
- Don’t rush the curing process; patience leads to beautiful results!
Theme and Design Variations
- Seasonal Themes: Create autumn-inspired stones with warm oranges and browns, or winter-themed ones using icy blues and whites.
- Holiday Colors: For Halloween, mix black and orange pigments; for Christmas, try red and green!
- Kid-Friendly Versions: Use non-toxic, washable pigments for a safe crafting experience with younger crafters.
- Glitter Galore: Add glitter to your resin for a sparkling effect that catches the light beautifully.
- Nature-Inspired: Incorporate small leaves or flowers into the resin for a touch of the outdoors.
Display and Use Ideas
- Home Decor: Place your Color-Changing Crystal Treasure Stones in a decorative bowl or on a windowsill to catch the light and create a stunning display.
- Gift Giving: Wrap them up as unique gifts for friends and family, adding a personal touch to any occasion.
- School Crafts: Use them as fun classroom decorations or rewards for students, sparking creativity and excitement.
- Holiday Displays: Incorporate them into your seasonal decor, like using autumn colors for fall or icy hues for winter festivities.
FAQs about Color-Changing Crystal Treasure Stones
1. Can I use any type of resin for this project?
While you can use different types of resin, I recommend using a clear epoxy resin specifically designed for crafting. It cures well and provides a beautiful finish for your Color-Changing Crystal Treasure Stones.
2. How do I clean up if I spill resin?
If you spill resin, act quickly! Use paper towels to wipe up the excess, and then clean the area with rubbing alcohol. Always remember to wear gloves during cleanup to protect your skin!
3. What if my stones have bubbles in them?
Bubbles can happen, but don’t worry! If you notice them after pouring, gently tap the sides of the mold to release the bubbles. If they’re already cured, you can sand them down for a smoother finish.
4. How do I store leftover resin?
Store any leftover resin mixture in a sealed container away from direct sunlight. This way, you can save it for future projects without wasting any materials!
5. Are these stones safe for kids to handle?
Yes, once fully cured, Color-Changing Crystal Treasure Stones are safe for kids to handle. However, always supervise younger crafters during the mixing and pouring stages, as resin can be tricky to work with!
Final Thoughts
Creating Color-Changing Crystal Treasure Stones is not just a craft; it’s a journey filled with joy and creativity! The satisfaction of watching your unique designs come to life is truly magical. I encourage you to gather your materials, invite your kids or friends, and dive into this colorful adventure. Don’t forget to share your results—seeing your creations brings a smile to my face! So, unleash your inner artist and let the shimmering stones brighten your home or make perfect gifts. Happy crafting, and may your treasures shine bright!
Print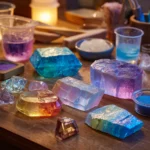
Color-Changing Crystal Treasure Stones: Unlock a Rainbow of Creativity!
Description
Create your own stunning color-changing crystal treasure stones that shimmer and shine in a variety of colors. This fun and creative DIY project is perfect for adding a touch of magic to your home decor or as unique gifts for friends and family.
Instructions
- Prepare your workspace by covering surfaces with newspaper or a drop cloth.
- Put on protective gloves to ensure safety while working with resin.
- Mix the clear resin according to the package instructions in a mixing cup.
- Add the color-changing pigment powder to the resin mixture and stir thoroughly until well combined.
- Pour the resin mixture into the silicone molds, filling them to the desired level.
- Use masking tape to secure the molds in place if needed.
- Allow the resin to cure as per the manufacturer’s instructions, usually 24-48 hours.
- Once cured, carefully remove the stones from the molds.
- If desired, sand the edges of the stones for a smoother finish.
- Category: Crafting
Keywords: Color-Changing, Crystal, Treasure Stones, DIY, Crafting, Resin Art


