
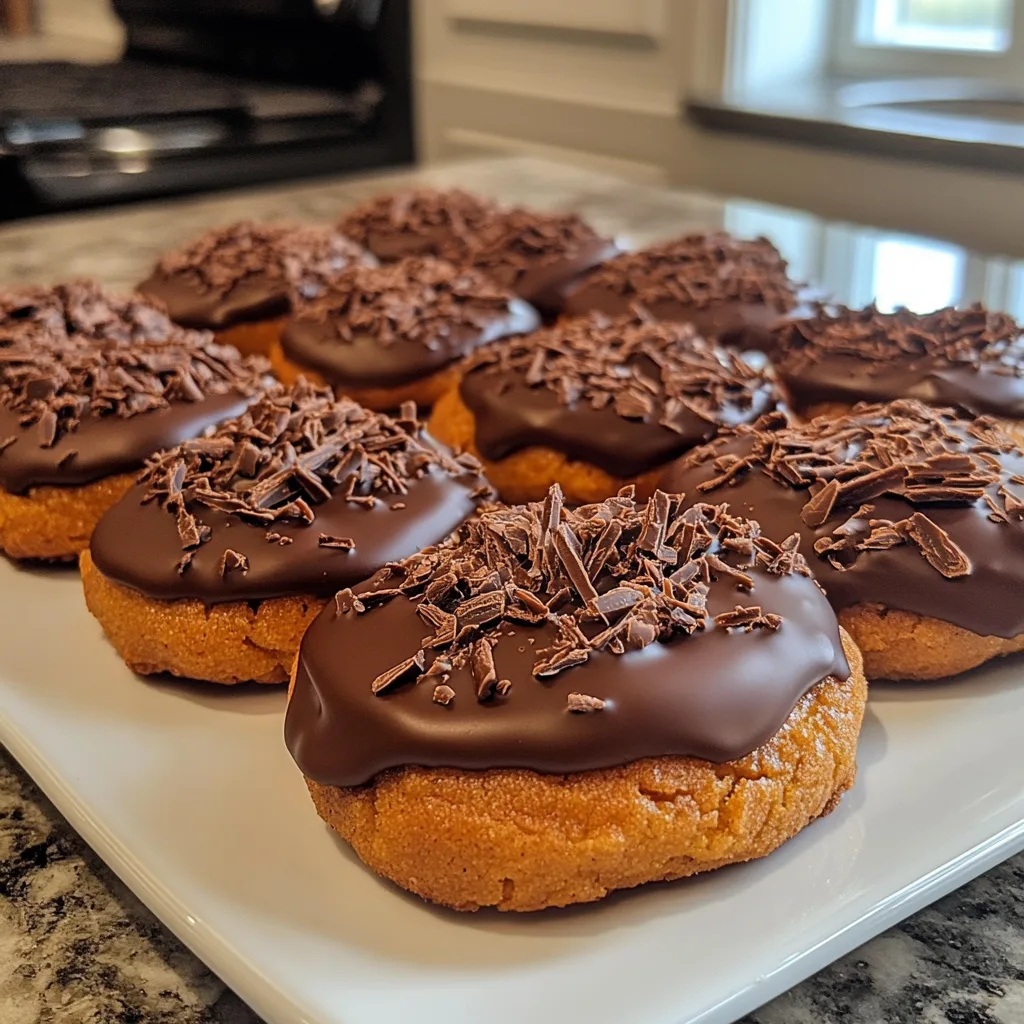
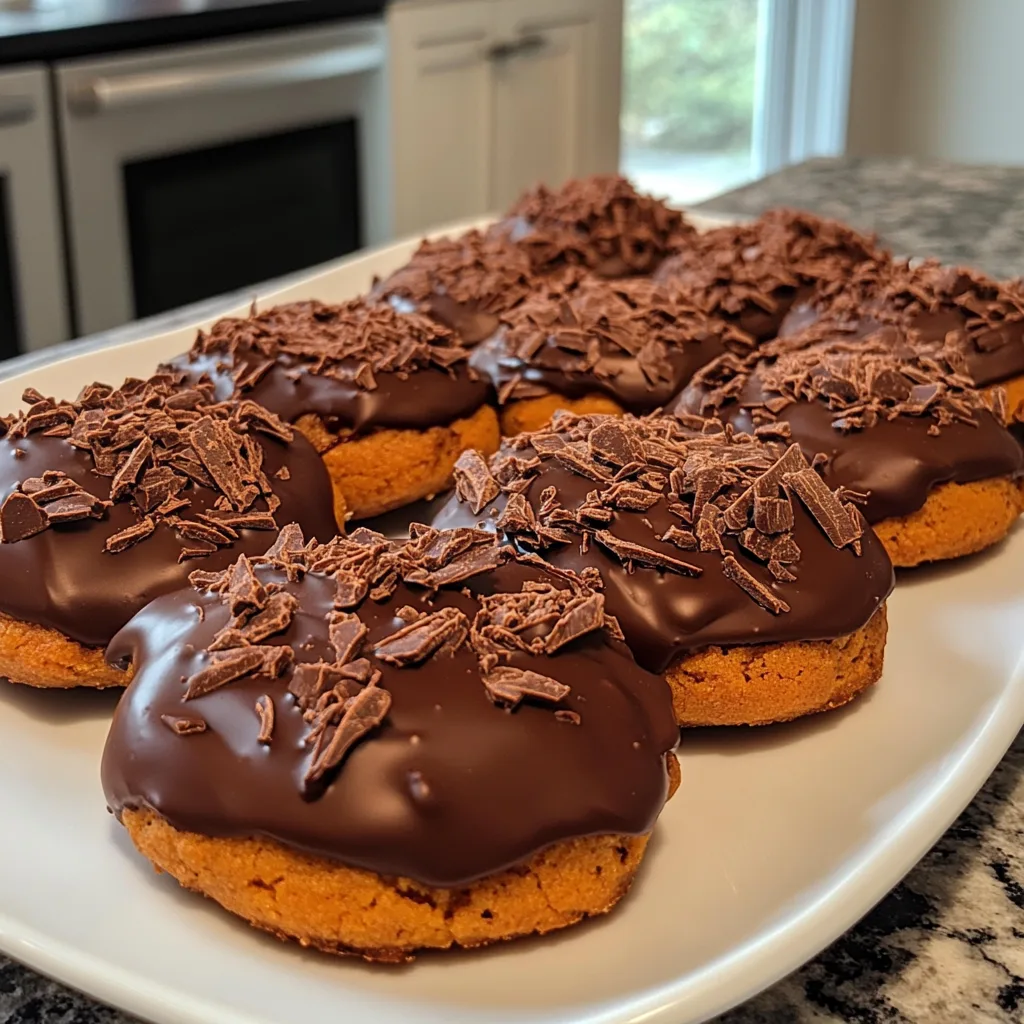
Introduction to Chocolate-Dipped Pumpkin Cookies
As the leaves turn and the air gets crisp, there’s nothing quite like the aroma of freshly baked Chocolate-Dipped Pumpkin Cookies wafting through the house. These delightful treats are not just a quick solution for a busy day; they’re a warm hug in cookie form! I love how they blend the cozy flavors of fall with the indulgence of rich chocolate. Whether you’re looking to impress your loved ones or simply treat yourself, this recipe is sure to bring smiles all around. Let’s dive into this delicious adventure together!
Why You’ll Love This Chocolate-Dipped Pumpkin Cookies
These Chocolate-Dipped Pumpkin Cookies are a dream come true for busy moms and professionals alike. They’re incredibly easy to whip up, taking just 35 minutes from start to finish. The soft, pillowy texture combined with the rich chocolate creates a flavor explosion that’s hard to resist. Plus, they’re perfect for sharing at gatherings or enjoying with a cup of coffee on a cozy afternoon. Trust me, you’ll want to make these again and again!
Ingredients for Chocolate-Dipped Pumpkin Cookies
Gathering the right ingredients is the first step to creating these delightful Chocolate-Dipped Pumpkin Cookies. Here’s what you’ll need:
- Pumpkin puree: This is the star of the show! It adds moisture and that lovely fall flavor.
- Sugar: Regular granulated sugar sweetens the cookies perfectly, balancing the pumpkin’s earthiness.
- Brown sugar: This adds a hint of caramel flavor and extra moisture, making the cookies soft and chewy.
- Vegetable oil: It keeps the cookies tender and moist. You can substitute with melted coconut oil for a different flavor.
- Eggs: They bind everything together and help the cookies rise, giving them that perfect texture.
- All-purpose flour: This is the base of the cookies, providing structure. You can use whole wheat flour for a healthier twist.
- Baking soda and baking powder: These leavening agents help the cookies rise and become fluffy.
- Ground cinnamon: A warm spice that enhances the fall flavor profile, making each bite comforting.
- Ground nutmeg: Just a pinch adds a lovely depth of flavor, reminiscent of holiday baking.
- Salt: A little salt enhances all the flavors, balancing the sweetness.
- Chocolate chips: The crowning glory! They melt beautifully and add a rich, decadent finish to the cookies.
For those who want to get creative, consider adding chopped nuts or dried fruits for extra texture. You can find the exact quantities for each ingredient at the bottom of the article, ready for printing!
How to Make Chocolate-Dipped Pumpkin Cookies
Now that we have our ingredients ready, let’s get baking! Follow these simple steps to create your own batch of Chocolate-Dipped Pumpkin Cookies. I promise, it’s easier than you think!
Step 1: Preheat the Oven
First things first, preheat your oven to 350°F (175°C). Preheating is crucial because it ensures even baking. If you skip this step, your cookies might end up unevenly cooked. Trust me, no one wants a gooey center!
Step 2: Mix Wet Ingredients
In a large bowl, combine the pumpkin puree, granulated sugar, brown sugar, and vegetable oil. Use a whisk or a spatula to mix them until smooth. This mixture should be creamy and well-blended. The pumpkin puree adds moisture, while the sugars create that delightful sweetness.
Step 3: Add Eggs
Next, crack in the eggs, one at a time. Mix well after each addition. This step is important because it helps to incorporate air into the batter, making your cookies light and fluffy. You want a smooth, homogenous mixture before moving on.
Step 4: Combine Dry Ingredients
In a separate bowl, whisk together the all-purpose flour, baking soda, baking powder, cinnamon, nutmeg, and salt. Mixing dry ingredients separately helps to evenly distribute the leavening agents and spices. This way, every cookie will have that perfect flavor and rise!
Step 5: Mix Wet and Dry Ingredients
Now, gradually add the dry mixture to the wet ingredients. Stir gently until just combined. Be careful not to overmix! Overmixing can lead to tough cookies. You want a soft dough that’s slightly sticky but holds its shape.
Step 6: Prepare Baking Sheet
Line a baking sheet with parchment paper. Using a spoon or cookie scoop, drop spoonfuls of dough onto the sheet, leaving space between each cookie. This allows them to spread without sticking together. Remember, they’ll puff up a bit while baking!
Step 7: Bake the Cookies
Pop the baking sheet into the oven and bake for 12-15 minutes. Keep an eye on them! You’ll know they’re done when the edges are lightly golden. A little tip: if you gently press the center and it springs back, they’re ready!
Step 8: Cool the Cookies
Once baked, remove the cookies from the oven and let them cool on the baking sheet for a few minutes. Then, transfer them to a wire rack to cool completely. Cooling is essential before dipping in chocolate; otherwise, the chocolate will melt too quickly!
Step 9: Melt the Chocolate
While the cookies cool, it’s time to melt the chocolate chips. You can do this in a microwave-safe bowl in 30-second intervals, stirring in between, or use a double boiler. Just be careful not to overheat the chocolate; it should be smooth and glossy.
Step 10: Dip the Cookies
Finally, dip each cooled cookie halfway into the melted chocolate. Let the excess chocolate drip off before placing them back on the wire rack. For a clean finish, you can gently shake the cookie to remove any drips. Allow the chocolate to set before enjoying your delicious creations!
Tips for Success
- Use room temperature ingredients for better mixing.
- Don’t skip the cooling step; it prevents chocolate from melting too fast.
- For a fun twist, try adding a pinch of cayenne pepper to the dough for a spicy kick.
- Keep an eye on baking time; ovens can vary.
- Store cookies in an airtight container to maintain freshness.
Equipment Needed
- Baking sheet: A standard cookie sheet works well; you can also use a stoneware baking pan.
- Parchment paper: This helps prevent sticking; aluminum foil can be a substitute.
- Mixing bowls: Use any size; a large bowl is ideal for mixing ingredients.
- Whisk or spatula: Either will do for mixing; a hand mixer can speed things up.
- Cookie scoop: This ensures even cookie sizes; a tablespoon works in a pinch.
Variations of Chocolate-Dipped Pumpkin Cookies
- Nutty Delight: Add chopped walnuts or pecans to the dough for a crunchy texture and nutty flavor.
- Spiced Up: Incorporate a pinch of ginger or allspice for an extra layer of warmth and spice.
- Gluten-Free Option: Substitute all-purpose flour with a gluten-free blend to accommodate dietary needs.
- Vegan Twist: Replace eggs with flaxseed meal mixed with water and use dairy-free chocolate chips.
- Frosted Version: Instead of dipping in chocolate, frost the cookies with cream cheese icing for a tangy contrast.
Serving Suggestions for Chocolate-Dipped Pumpkin Cookies
- Pair these cookies with a warm cup of spiced chai or pumpkin spice latte for a cozy treat.
- Serve alongside a scoop of vanilla ice cream for a delightful dessert experience.
- For a festive touch, arrange cookies on a decorative platter with autumn leaves.
- Drizzle extra melted chocolate over the cookies for an elegant presentation.
FAQs about Chocolate-Dipped Pumpkin Cookies
Can I use fresh pumpkin instead of canned puree?
Absolutely! If you have fresh pumpkin, just roast it until tender, then puree it. This will give your Chocolate-Dipped Pumpkin Cookies a fresh flavor that’s hard to beat.
How do I store leftover cookies?
Store your cookies in an airtight container at room temperature for up to a week. If you want to keep them longer, you can freeze them for up to three months. Just make sure to separate layers with parchment paper!
Can I make these cookies ahead of time?
Yes! You can prepare the dough in advance and refrigerate it for up to 24 hours. Just scoop and bake when you’re ready for fresh cookies. It’s a great time-saver for busy days!
What can I substitute for chocolate chips?
If you’re not a fan of chocolate, try using white chocolate chips, butterscotch chips, or even dried fruits like cranberries for a different flavor profile in your Chocolate-Dipped Pumpkin Cookies.
Are these cookies suitable for a gluten-free diet?
Yes! Simply swap out the all-purpose flour for a gluten-free flour blend. Your Chocolate-Dipped Pumpkin Cookies will still be delicious and soft!
Final Thoughts
Making Chocolate-Dipped Pumpkin Cookies is more than just baking; it’s about creating memories. The joy of mixing the ingredients, the delightful aroma filling your kitchen, and the smiles on your loved ones’ faces when they take that first bite are priceless. These cookies embody the essence of fall, bringing warmth and comfort to any gathering. Whether you’re enjoying them with a cup of tea or sharing them at a potluck, they’re sure to become a cherished tradition. So, roll up your sleeves and dive into this delicious adventure—you won’t regret it!
Print
Chocolate-Dipped Pumpkin Cookies: Indulge in Fall’s Best Treat!
- Total Time: 35 minutes
- Yield: 24 cookies 1x
- Diet: Vegetarian
Description
Delicious and soft pumpkin cookies dipped in rich chocolate, perfect for fall.
Ingredients
- 1 cup pumpkin puree
- 1 cup sugar
- 1/2 cup brown sugar
- 1/2 cup vegetable oil
- 2 large eggs
- 2 cups all-purpose flour
- 1 tsp baking soda
- 1 tsp baking powder
- 1 tsp ground cinnamon
- 1/2 tsp ground nutmeg
- 1/2 tsp salt
- 1 cup chocolate chips
Instructions
- Preheat the oven to 350°F (175°C).
- In a large bowl, mix pumpkin puree, sugar, brown sugar, and vegetable oil until well combined.
- Add eggs one at a time, mixing well after each addition.
- In another bowl, whisk together flour, baking soda, baking powder, cinnamon, nutmeg, and salt.
- Gradually add the dry ingredients to the wet ingredients, mixing until just combined.
- Drop spoonfuls of dough onto a baking sheet lined with parchment paper.
- Bake for 12-15 minutes or until the edges are lightly golden.
- Let cookies cool completely on a wire rack.
- Melt chocolate chips in a microwave or double boiler.
- Dip the cooled cookies halfway into the melted chocolate and place them back on the wire rack to set.
Notes
- Store cookies in an airtight container for up to a week.
- For a festive touch, sprinkle with chopped nuts or sprinkles before the chocolate sets.
- These cookies can be frozen for up to 3 months.
- Prep Time: 20 minutes
- Cook Time: 15 minutes
- Category: Dessert
- Method: Baking
- Cuisine: American
Nutrition
- Serving Size: 1 cookie
- Calories: 150
- Sugar: 10g
- Sodium: 50mg
- Fat: 7g
- Saturated Fat: 2g
- Unsaturated Fat: 5g
- Trans Fat: 0g
- Carbohydrates: 20g
- Fiber: 1g
- Protein: 2g
- Cholesterol: 20mg
Keywords: Chocolate-Dipped Pumpkin Cookies, Fall Treats, Pumpkin Cookies, Chocolate Cookies


