
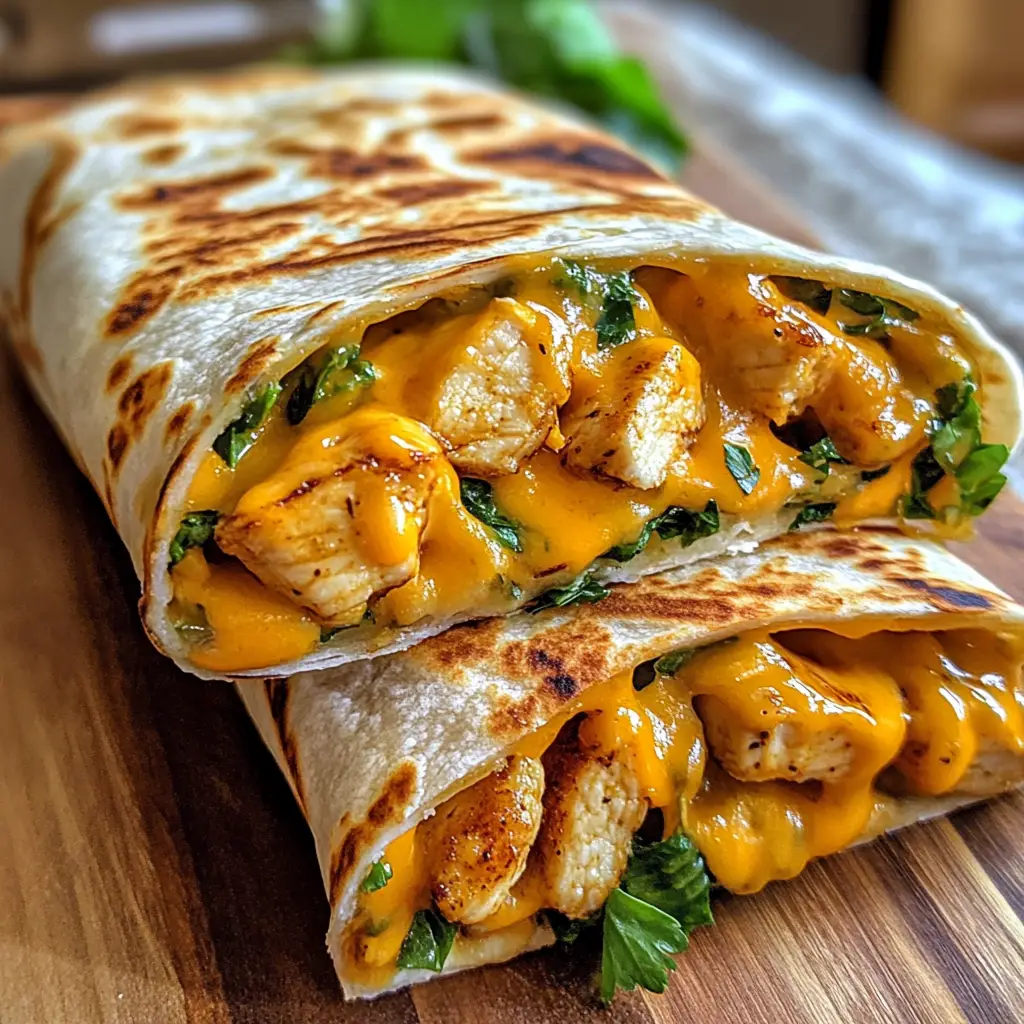
When it comes to comfort food, few dishes strike the perfect balance of flavor, ease, and heartiness like a well-made wrap. Whether you’re a busy parent looking for a quick dinner option, a student needing something satisfying after a long day, or simply someone who appreciates the magic of melted cheese and garlic, this Cheesy Garlic Chicken Wrap recipe is going to become a cherished staple in your kitchen.
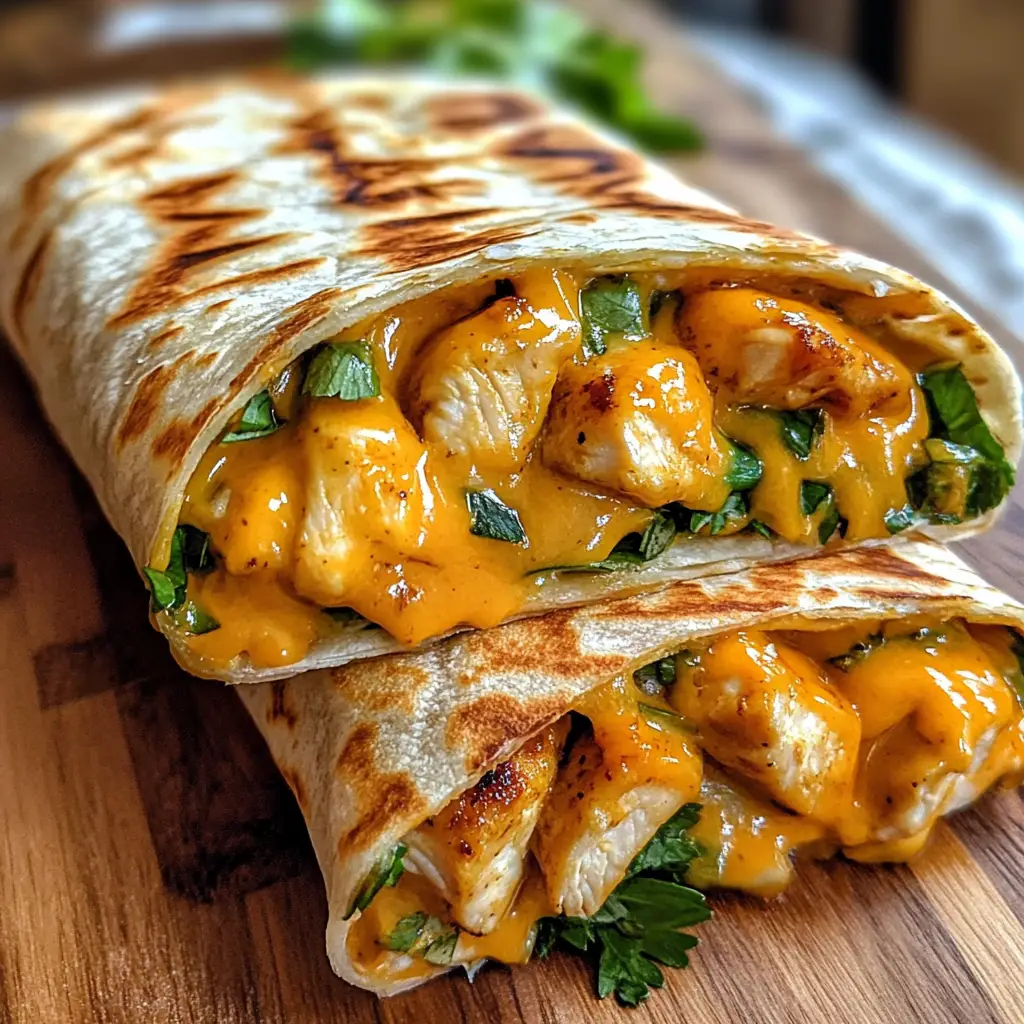
Combining juicy chicken, a medley of cheeses, aromatic garlic butter, and golden, toasted tortillas, this recipe offers everything you crave in a single handheld delight. With just a handful of ingredients and minimal prep time, you can whip up restaurant-quality wraps that are as versatile as they are satisfying.
Let’s dive deep into everything that makes this recipe stand out—and how you can tweak it to suit any craving or occasion.
Why You’ll Love This Recipe
✅ Simple Ingredients, Big Flavor
Every component of this dish is accessible and budget-friendly, yet when combined, the result is anything but ordinary. The creamy, cheesy filling infused with garlic and seasonings makes each bite deeply flavorful.
✅ Quick and Effortless
From prep to plate in under 30 minutes, these wraps are the perfect solution when you need something fast but still crave something hot and homemade.
✅ Perfectly Portable
Whether you’re packing lunch for work, heading on a road trip, or prepping freezer meals, these wraps hold up well and reheat beautifully.
✅ Versatile and Customizable
Add your favorite vegetables, swap the protein, or adjust the spice level—this recipe is incredibly flexible and can be tailored to every preference.
✅ Crowd Pleaser
Kids love the gooey cheese, adults enjoy the rich flavors, and everyone appreciates how filling and delicious these wraps are. They’re a hit at gatherings, potlucks, or casual dinners.
Ingredients Breakdown
Here’s everything you’ll need to create the ultimate cheesy garlic chicken wraps:
For the Wrap Filling:
-
2 cups cooked chicken breast, shredded or diced
Rotisserie chicken is a convenient and flavorful shortcut, but any cooked chicken works. -
1 cup shredded mozzarella cheese
Mild and melty, it provides that irresistible cheese pull. -
½ cup shredded cheddar cheese
Adds sharpness and a rich, creamy texture. -
¼ cup grated Parmesan cheese
Nutty and salty, this cheese deepens the overall flavor. -
2 tablespoons mayonnaise or sour cream
These ingredients add creaminess and help bind everything together. -
1 teaspoon garlic powder
Infuses the filling with mellow garlic flavor. -
½ teaspoon onion powder
Boosts the savory profile without overpowering. -
Salt and black pepper to taste
-
4 large flour tortillas
Soft and pliable, perfect for wrapping and grilling.
For Garlic Butter Brushing:
-
2 tablespoons butter, melted
-
1 teaspoon minced garlic (fresh or jarred)
Optional Garnish:
-
Chopped fresh parsley
Adds a pop of color and a fresh, herbaceous finish.
Step-by-Step Preparation Guide
Step 1: Prepare the Chicken and Cheese Filling
In a large mixing bowl, combine the cooked chicken with mozzarella, cheddar, and Parmesan. Add mayonnaise or sour cream to provide moisture and richness. Sprinkle in the garlic powder, onion powder, salt, and pepper. Use a spoon or spatula to mix everything thoroughly until well combined.
This step is key to ensuring every bite contains a little bit of everything—chicken, cheese, and seasoning in perfect balance.
Step 2: Fill and Roll the Wraps
Lay each tortilla flat on a clean surface. Scoop approximately 1/4 of the mixture onto the center of each tortilla.
To roll:
-
Fold the bottom of the tortilla over the filling.
-
Fold in both sides.
-
Roll tightly from the bottom up, forming a burrito-style wrap.
Ensure the seam is on the bottom so it seals better during cooking.
Step 3: Prepare the Garlic Butter
In a small bowl, mix the melted butter with minced garlic. This is your flavor weapon—brushing it on the outside of the wrap before cooking gives the tortilla a buttery, golden, and flavorful crust.
Step 4: Toast the Wraps
Heat a skillet or grill pan over medium heat. No additional oil is needed due to the garlic butter.
Place each wrap seam-side down in the hot skillet. Toast for about 2–3 minutes per side, or until golden brown and crispy. Use a spatula to press down slightly so the wrap seals and gets evenly crispy.
Step 5: Garnish and Serve
Once all sides are beautifully browned, remove the wraps from the skillet. Let them rest for a minute, then slice diagonally if desired. Sprinkle with chopped parsley for a touch of color and fresh flavor.
Creative Variations
These wraps are delicious as-is, but also serve as a great base for creative spins. Here are some ideas:
🔥 Spicy Buffalo Style
-
Add a tablespoon of buffalo sauce to the filling.
-
Use pepper jack instead of mozzarella for extra heat.
-
Serve with ranch or blue cheese dressing.
🥬 Loaded Veggie
-
Add sautéed mushrooms, spinach, bell peppers, or red onions.
-
Use a mix of cheeses like fontina or provolone for added flavor.
🍅 Pizza Wrap
-
Add a spoonful of marinara to the filling.
-
Include diced pepperoni or cooked sausage.
-
Top with Italian herbs and dip in more marinara.
🍖 BBQ Chicken Wrap
-
Replace mayo with BBQ sauce.
-
Add smoked gouda or Monterey Jack.
-
Great with coleslaw inside or on the side.
Meal Prep & Storage
To Store:
-
Fridge: Wrap leftovers in foil or store in airtight containers for up to 3 days.
-
Freezer: Freeze cooked or uncooked wraps tightly in foil and place in a freezer-safe bag for up to 2 months.
To Reheat:
-
Stovetop: Reheat on a skillet over medium heat to retain crispiness.
-
Oven: Bake at 350°F (175°C) for 10–12 minutes.
-
Microwave: Use for convenience, but note the tortilla may soften.
Serving Suggestions
These wraps are filling on their own but pair beautifully with a variety of sides:
-
Crispy potato wedges or sweet potato fries
-
Fresh garden salad with lemon vinaigrette
-
Roasted vegetables
-
Tomato basil soup or creamy chicken soup
-
Coleslaw or cucumber yogurt salad for a cooling contrast
-
Pickles or hot sauce on the side for extra zing
Tips for Success
-
Warm tortillas slightly before assembling to make them more pliable and prevent cracking.
-
Don’t overfill your wraps—this can lead to spillage during cooking.
-
Use a nonstick skillet or cast iron pan to get a perfectly browned exterior.
-
Cook seam-side down first to help seal the wrap closed.
-
Brush the wraps with garlic butter right before cooking, not too early—this keeps them crisp.
Prep Time: 10 minutes
Cooking Time: 10–12 minutes
Total Time: 20–25 minutes
Nutritional Information (Per Wrap – Approximate)
| Nutrient | Amount |
|---|---|
| Calories | 480 |
| Protein | 32g |
| Carbohydrates | 26g |
| Fat | 28g |
| Sodium | 720mg |
| Fiber | 2g |
| Sugar | 2g |
Note: Nutritional values will vary depending on brand and ingredient choices.
Frequently Asked Questions
Q: Can I make these wraps ahead of time?
Yes! You can prepare the filling 1–2 days in advance and store it in the fridge. You can also assemble the wraps and refrigerate them uncooked, then toast them fresh when ready.
Q: Can I bake the wraps instead of pan-frying them?
Absolutely. Preheat your oven to 400°F (200°C) and place the brushed wraps on a parchment-lined baking sheet. Bake for about 10–12 minutes, flipping once halfway through for even crispness.
Q: Can I make this recipe vegetarian?
Yes! Substitute the chicken with roasted vegetables, tofu, or even black beans and corn. Keep the cheeses and garlic butter for the same delicious flavor.
Q: Are there gluten-free options?
Yes. Simply use gluten-free tortillas and check that all seasonings and cheeses are certified gluten-free.
Q: What other cheeses can I use?
Any good melting cheese works well—try gouda, Swiss, provolone, or Monterey Jack for different flavor profiles.
Q: Can I add sauce to the filling?
Yes! Add BBQ sauce, ranch, buffalo sauce, or sriracha for a twist. Just be mindful of moisture—too much sauce can make the filling soggy.
Q: How do I make these wraps extra crispy?
Press them lightly with a spatula while toasting, and make sure your pan is hot before adding the wraps. You can also finish them in the oven for a few minutes for extra crunch.
Conclusion
These Cheesy Garlic Chicken Wraps are more than just a quick meal—they’re a crave-worthy comfort food that brings together everything we love about garlic bread, cheesy casseroles, and satisfying sandwiches in one convenient wrap. With an easy-to-follow recipe, customizable options, and endless pairing possibilities, it’s no wonder these wraps can quickly become a go-to favorite in your kitchen.
Perfect for lunch, dinner, or even party platters, this dish is proof that simple ingredients can create spectacular results. So gather your ingredients, fire up the skillet, and enjoy the cheesy, garlicky goodness of these irresistible wraps.
Print
Cheesy Garlic Chicken Wraps
- Total Time: 20–25 minutes
Ingredients
Here’s everything you’ll need to create the ultimate cheesy garlic chicken wraps:
For the Wrap Filling:
-
2 cups cooked chicken breast, shredded or diced
Rotisserie chicken is a convenient and flavorful shortcut, but any cooked chicken works. -
1 cup shredded mozzarella cheese
Mild and melty, it provides that irresistible cheese pull. -
½ cup shredded cheddar cheese
Adds sharpness and a rich, creamy texture. -
¼ cup grated Parmesan cheese
Nutty and salty, this cheese deepens the overall flavor. -
2 tablespoons mayonnaise or sour cream
These ingredients add creaminess and help bind everything together. -
1 teaspoon garlic powder
Infuses the filling with mellow garlic flavor. -
½ teaspoon onion powder
Boosts the savory profile without overpowering. -
Salt and black pepper to taste
-
4 large flour tortillas
Soft and pliable, perfect for wrapping and grilling.
For Garlic Butter Brushing:
-
2 tablespoons butter, melted
-
1 teaspoon minced garlic (fresh or jarred)
Optional Garnish:
-
Chopped fresh parsley
Adds a pop of color and a fresh, herbaceous finish.
Instructions
Step 1: Prepare the Chicken and Cheese Filling
In a large mixing bowl, combine the cooked chicken with mozzarella, cheddar, and Parmesan. Add mayonnaise or sour cream to provide moisture and richness. Sprinkle in the garlic powder, onion powder, salt, and pepper. Use a spoon or spatula to mix everything thoroughly until well combined.
This step is key to ensuring every bite contains a little bit of everything—chicken, cheese, and seasoning in perfect balance.
Step 2: Fill and Roll the Wraps
Lay each tortilla flat on a clean surface. Scoop approximately 1/4 of the mixture onto the center of each tortilla.
To roll:
-
Fold the bottom of the tortilla over the filling.
-
Fold in both sides.
-
Roll tightly from the bottom up, forming a burrito-style wrap.
Ensure the seam is on the bottom so it seals better during cooking.
Step 3: Prepare the Garlic Butter
In a small bowl, mix the melted butter with minced garlic. This is your flavor weapon—brushing it on the outside of the wrap before cooking gives the tortilla a buttery, golden, and flavorful crust.
Step 4: Toast the Wraps
Heat a skillet or grill pan over medium heat. No additional oil is needed due to the garlic butter.
Place each wrap seam-side down in the hot skillet. Toast for about 2–3 minutes per side, or until golden brown and crispy. Use a spatula to press down slightly so the wrap seals and gets evenly crispy.
Step 5: Garnish and Serve
Once all sides are beautifully browned, remove the wraps from the skillet. Let them rest for a minute, then slice diagonally if desired. Sprinkle with chopped parsley for a touch of color and fresh flavor.
- Prep Time: 10 minutes
Nutrition
- Calories: 480
- Sodium: 720mg
- Fat: 26g
- Carbohydrates: 26g
- Protein: 32g


