Baked Bloomin’ Apples: Juicy, Sweet, Irresistibly Creamy!
Sensory-Rich Introduction with Immediate Craving
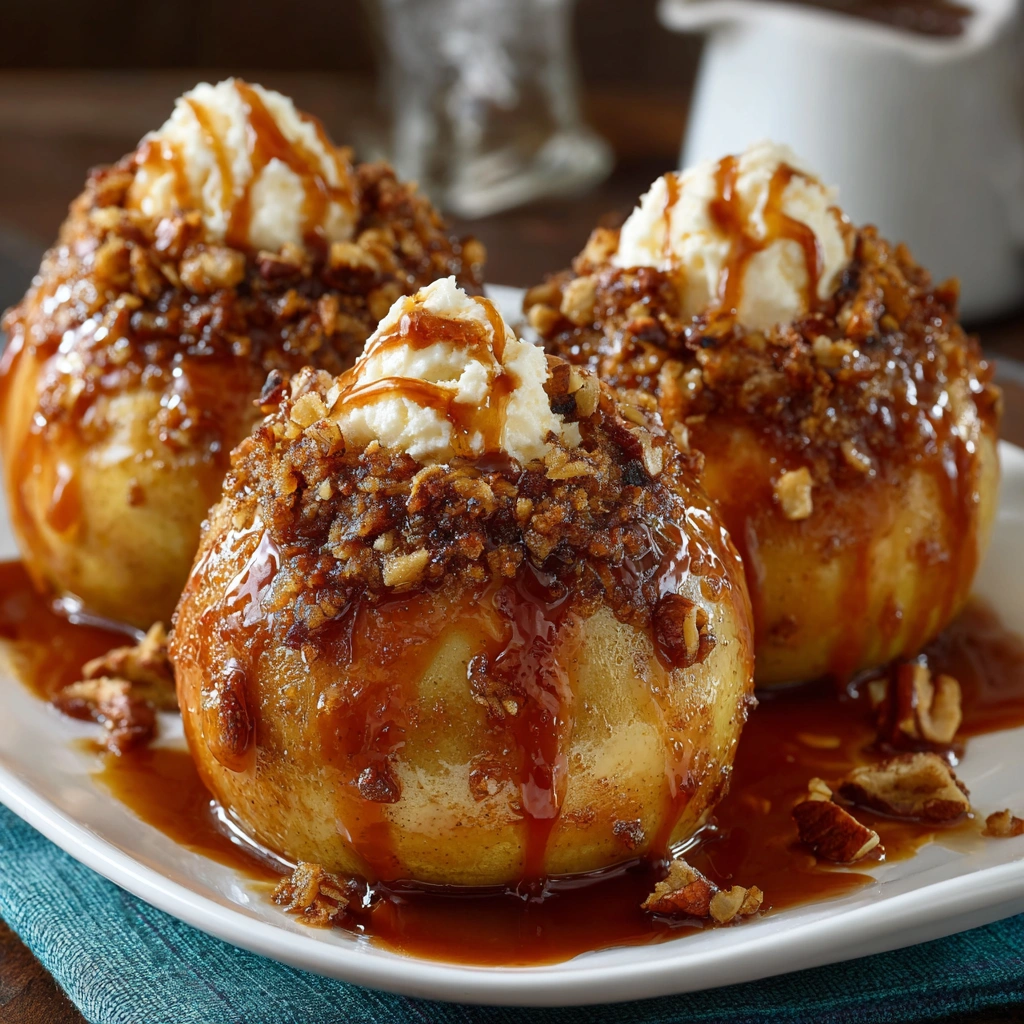
Imagine walking into a warm kitchen, the sweet aroma of cinnamon and caramel wafting through the air, wrapping you in a cozy embrace. As you approach the oven, your eyes are drawn to a baking dish filled with perfectly bloomed apples, their skins slightly crisped and their insides bubbling with a gooey, sweet filling. Each apple, a masterpiece of nature, is stuffed with a delightful mixture of oats, nuts, and spices, promising a burst of flavor with every bite. This is not just a dessert; it’s a nostalgic journey back to family gatherings, where laughter and love were shared over warm treats. Baked Bloomin’ Apples are perfect for cozy fall evenings, holiday celebrations, or simply as a sweet indulgence after a long day.
Why You’ll Love This Baked Bloomin’ Apples
- Texture Contrast: The crisp exterior of the apple contrasts beautifully with the warm, gooey filling, creating a delightful mouthfeel.
- Flavor Balance: The tartness of Granny Smith apples harmonizes with the sweetness of brown sugar and caramel, while cinnamon and nutmeg add warmth and depth.
- Versatility: These baked apples can be enjoyed as a dessert, breakfast treat, or even a snack, making them suitable for any time of day.
- Ease of Preparation: With minimal ingredients and straightforward steps, this recipe is perfect for both novice and experienced bakers.
- Universal Appeal: Loved by kids and adults alike, Baked Bloomin’ Apples are a crowd-pleaser that can be customized to suit various tastes.
Essential Tools & Preparation Strategy
- Oven: Essential for baking the apples to achieve the perfect tender texture.
- Baking Dish: A sturdy dish is necessary to hold the apples and any caramel sauce, ensuring even cooking.
- Apple Corer: Makes it easy to remove the core without damaging the apple, allowing for even stuffing.
- Mixing Bowl: Needed for combining the filling ingredients, ensuring a well-mixed and flavorful stuffing.
- Measuring Cups and Spoons: Accurate measurements ensure the right balance of flavors, crucial for a successful dish.
- Knife: For slicing the apples and preparing the filling ingredients, a sharp knife is essential for precision.
- Aluminum Foil: Useful for covering the apples during the first half of baking to prevent drying out.
- Cooling Rack: Allows the apples to cool slightly after baking, preventing burns when serving.
Ingredients & Their Roles in This Baked Bloomin’ Apples
- Granny Smith Apples: The star of the dish, providing tartness and structure.
- Brown Sugar: Adds sweetness and a rich, caramel-like flavor to the filling.
- Granulated Sugar: Balances the flavors and enhances sweetness.
- Ground Cinnamon: Infuses warmth and spice, elevating the overall flavor profile.
- Nutmeg: Adds a subtle depth and complexity to the filling.
- Rolled Oats: Contributes texture and heartiness to the stuffing.
- Chopped Pecans: Provides crunch and a nutty flavor that complements the apples.
- Unsalted Butter: Adds richness and helps bind the filling together.
- Caramel Sauce: Drizzled over the apples, it adds moisture and a decadent sweetness.
- Vanilla Ice Cream: A classic pairing that adds creaminess and balances the warm dessert.
Step-by-Step Guide to Perfect Baked Bloomin’ Apples
- Preheat the Oven: Set your oven to 350°F (175°C) to ensure it’s ready for baking.
- Core the Apples: Carefully remove the core from each apple, leaving the bottom intact, and slice them into thin wedges without cutting all the way through.
- Prepare the Filling: In a mixing bowl, combine brown sugar, granulated sugar, cinnamon, nutmeg, oats, and chopped pecans until well mixed.
- Stuff the Apples: Gently fill the crevices of the apples with the prepared mixture, ensuring an even distribution.
- Add Butter: Drizzle the melted butter over the stuffed apples, allowing it to seep into the filling.
- Arrange in Baking Dish: Place the apples in a baking dish and pour caramel sauce over them, ensuring they are well-coated.
- Bake: Place the dish in the preheated oven and bake for 25-30 minutes, or until the apples are tender and the filling is bubbly.
- Serve: Remove from the oven and let cool slightly before serving warm with a scoop of vanilla ice cream on top.
Chef’s Notes & Pro Tips for Flawless Results
- Make-Ahead Instructions: Prepare and stuff the apples a few hours in advance; cover and refrigerate until ready to bake.
- Storage: Store leftovers in an airtight container in the refrigerator for up to 3 days.
- Equipment Recommendations: A sturdy baking dish is crucial; consider using a glass dish for even heat distribution.
- Customization Options: Experiment with different nuts or add dried fruits like raisins or cranberries for added flavor.
Avoid These Common Cooking Mistakes
- Not Coring the Apples Properly: This can lead to uneven cooking. Ensure the core is fully removed.
- Overstuffing the Apples: This can cause the filling to spill out. Fill them generously but not excessively.
- Baking at Too High a Temperature: This can burn the outside while leaving the inside hard. Stick to 350°F.
- Using Soft Apples: Choose firm varieties like Granny Smith for the best texture.
- Not Covering the Apples: This can lead to drying out. Cover with foil for the first half of baking.
- Skipping the Caramel Sauce: This adds essential flavor and moisture. Don’t omit it!
- Not Letting Them Cool Slightly Before Serving: This can lead to burns. Allow a few minutes to cool.
Creative Variations & Customizations
- Gluten-Free Option: Substitute rolled oats with gluten-free oats for a gluten-free dessert.
- Nut-Free Version: Omit the pecans and replace them with additional oats or seeds for crunch.
- Spiced Variation: Add a pinch of cloves or allspice to the filling for an extra layer of flavor.
- Fruit Additions: Mix in dried cranberries or raisins for a fruity twist.
- Vegan Adaptation: Use coconut oil instead of butter and maple syrup instead of brown sugar for a vegan-friendly version.
Perfect Pairings: What to Serve With Baked Bloomin’ Apples
- Vanilla Ice Cream: A classic pairing that adds creaminess and balances the warm dessert.
- Whipped Cream: For added creaminess and a light texture.
- Extra Caramel Sauce: Drizzle over the top for a richer flavor experience.
- Chopped Walnuts: For added crunch and a nutty flavor.
- Warm Spiced Cider: A cozy beverage that complements the flavors of the apples.
- Cinnamon Ice Cream: For a delightful twist that enhances the spice profile.
- Cheddar Cheese: A slice of sharp cheddar offers a sweet and savory combination.
- Greek Yogurt: A healthier option that adds creaminess without the extra sugar.
Storage & Meal Prep Instructions
- Refrigeration: Store baked apples in an airtight container in the fridge for up to 3 days.
- Freezing: For longer storage, freeze the stuffed apples before baking. Thaw in the fridge overnight before baking.
- Reheating: Reheat in the oven at 350°F (175°C) for about 10-15 minutes or until warmed through.
Nutrition Facts & Health Insights
| Nutrient | Amount per Serving |
|---|---|
| Serving Size | 1 baked apple with filling and ice cream |
| Calories | 350 |
| Sugar | 40 grams |
| Sodium | 150 milligrams |
| Fat | 15 grams |
| Saturated Fat | 8 grams |
| Unsaturated Fat | 5 grams |
| Trans Fat | 0 grams |
| Carbohydrates | 55 grams |
| Fiber | 4 grams |
| Protein | 3 grams |
| Cholesterol | 30 milligrams |
Health Insights: Granny Smith apples are rich in fiber and vitamin C, while nuts provide healthy fats and protein, making this dessert a more nutritious option compared to traditional sweets.
Frequently Asked Questions
- Can I use other types of apples? Yes, but Granny Smith apples are recommended for their tartness and firmness.
- What can I substitute for brown sugar? Honey or maple syrup can be used for a different sweetness profile.
- How do I know when the apples are done? They should be tender and the filling bubbly; a fork should easily pierce the apple.
- Can I make this recipe vegan? Yes, substitute butter with coconut oil and use maple syrup instead of brown sugar.
- How long can I store leftovers? Leftovers can be stored in the refrigerator for up to 3 days.
- Can I freeze baked apples? Yes, freeze them before baking for longer storage.
- What if I don’t have an apple corer? You can use a knife to carefully remove the core, but be cautious not to cut through the bottom.
- Can I add more spices? Absolutely! Feel free to experiment with your favorite spices for added flavor.
Final Inspiration & Kitchen Confidence
As you pull your Baked Bloomin’ Apples from the oven, take a moment to appreciate the beautiful transformation of simple ingredients into a warm, inviting dessert. Celebrate your culinary achievement and share this delightful treat with loved ones, creating new memories around the table. Remember, cooking is not just about following a recipe; it’s about expressing love and creativity. So, roll up your sleeves, embrace the process, and let your kitchen become a haven of deliciousness. Enjoy every bite!
Print
Baked Bloomin’ Apples: Juicy, Sweet, Irresistibly Creamy!
- Total Time: 45 minutes
- Yield: 4 servings 1x
- Diet: Vegetarian
Description
Baked Bloomin’ Apples are a delightful dessert that combines the crisp texture of fresh apples with a warm, gooey filling. Each bite offers a sweet explosion of cinnamon and caramel flavors, complemented by a creamy topping that melts in your mouth.
Ingredients
- 4 medium-sized Granny Smith apples
- 1/2 cup brown sugar
- 1/4 cup granulated sugar
- 1 teaspoon ground cinnamon
- 1/4 teaspoon nutmeg
- 1/2 cup rolled oats
- 1/4 cup chopped pecans
- 1/4 cup unsalted butter, melted
- 1/2 cup caramel sauce
- Vanilla ice cream for serving
Instructions
- Preheat your oven to 350°F (175°C).
- Core the apples, leaving the bottom intact, and slice them into thin wedges without cutting all the way through.
- In a bowl, mix together the brown sugar, granulated sugar, cinnamon, nutmeg, oats, and chopped pecans.
- Gently stuff the mixture into the crevices of the apples.
- Drizzle the melted butter over the stuffed apples.
- Place the apples in a baking dish and pour caramel sauce over them.
- Bake in the preheated oven for 25-30 minutes, or until the apples are tender and the filling is bubbly.
- Serve warm with a scoop of vanilla ice cream on top.
Notes
- Make-ahead: You can prepare the apples and stuff them a few hours in advance; just cover and refrigerate until ready to bake.
- Storage: Store leftovers in an airtight container in the refrigerator for up to 3 days.
- Substitutions: Use honey or maple syrup instead of brown sugar for a different sweetness profile.
- Prep Time: 15 minutes
- Cook Time: 30 minutes
- Category: desserts
- Method: baking
- Cuisine: American
Nutrition
- Serving Size: 1 baked apple with filling and ice cream
- Calories: 350
- Sugar: 40 grams
- Sodium: 150 milligrams
- Fat: 15 grams
- Saturated Fat: 8 grams
- Unsaturated Fat: 5 grams
- Trans Fat: 0 grams
- Carbohydrates: 55 grams
- Fiber: 4 grams
- Protein: 3 grams
- Cholesterol: 30 milligrams
Keywords: Baked Bloomin’ Apples, baked apples, dessert, fall dessert, apple dessert, caramel apples, cinnamon apples, warm dessert, easy dessert, vegetarian dessert, cozy dessert, holiday dessert, sweet treats