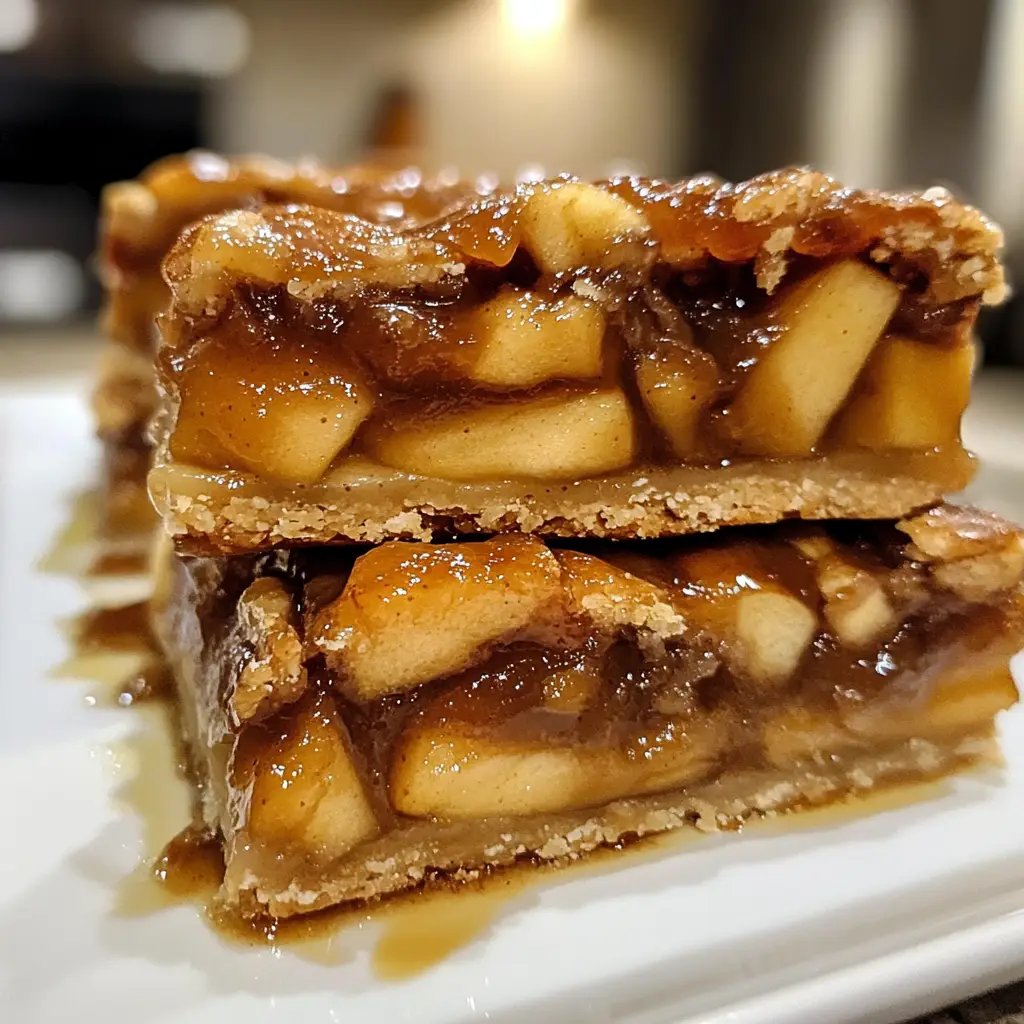
Introduction to Apple Pie Bars
As a busy mom, I know how precious time can be, especially when it comes to whipping up something delicious for my family. That’s why I absolutely adore these Apple Pie Bars! They capture the warm, comforting flavors of traditional apple pie but come together in a fraction of the time. Imagine the joy on your loved ones’ faces when you serve them these delightful treats! Whether it’s a quick dessert after dinner or a sweet snack for the kids, these bars are the perfect solution for any occasion. Trust me, they’ll dazzle your taste buds!
Why You’ll Love This Apple Pie Bars
These Apple Pie Bars are a game-changer for busy days! They’re incredibly easy to make, requiring just a handful of ingredients and minimal prep time. Plus, the delightful aroma of cinnamon and baked apples wafting through your kitchen is simply irresistible. You’ll love how they bring the classic taste of apple pie into a convenient bar form, making them perfect for sharing or enjoying solo with a cup of coffee!
Ingredients for Apple Pie Bars
Gathering the right ingredients is the first step to creating these delightful Apple Pie Bars. Here’s what you’ll need:
- All-purpose flour: This is the base for your crust, providing structure and a tender bite.
- Granulated sugar: Adds sweetness to the crust and balances the tartness of the apples.
- Brown sugar: Brings a rich, caramel-like flavor that enhances the overall taste.
- Unsalted butter: Essential for a flaky crust, it adds richness and moisture.
- Salt: Just a pinch enhances the flavors and balances the sweetness.
- Cinnamon: The warm spice that gives these bars their classic apple pie flavor.
- Nutmeg: A hint of this spice adds depth and warmth to the apple filling.
- Apples: The star of the show! Choose a mix of sweet and tart varieties for the best flavor.
- Lemon juice: Brightens the apple filling and prevents browning.
- Cornstarch: Helps thicken the apple mixture, ensuring it doesn’t get too runny.
- Vanilla extract: A splash of this adds a lovely aroma and enhances the sweetness.
Feel free to get creative! You can add nuts or raisins for extra texture. If you’re out of an ingredient, substitutions like whole wheat flour or coconut sugar can work too. For exact measurements, check the bottom of the article where you can find them available for printing!
How to Make Apple Pie Bars
Now that you have your ingredients ready, let’s dive into the fun part—making these scrumptious Apple Pie Bars! Follow these simple steps, and you’ll have a delightful dessert that’s sure to impress.
Step 1: Preheat the Oven
First things first, preheat your oven to 350°F (175°C). Preheating is crucial because it ensures even baking. If you skip this step, your bars might end up unevenly cooked. Trust me, you want that golden-brown crust!
Step 2: Prepare the Crust Mixture
In a mixing bowl, combine the all-purpose flour, granulated sugar, brown sugar, and salt. Then, add the softened butter and half of the cinnamon. Use a fork or your fingers to mix everything until it resembles coarse crumbs. This crumbly texture is what will create a delicious base for your Apple Pie Bars!
Step 3: Form the Base Layer
Next, take half of your crumb mixture and press it firmly into the bottom of a greased baking pan. Make sure it’s evenly spread out. This will be the sturdy foundation for your apple filling. Don’t be shy—press down hard to create a solid crust!
Step 4: Prepare the Apple Filling
In another bowl, toss your sliced apples with lemon juice, cornstarch, and the remaining cinnamon and nutmeg. This mixture will not only flavor the apples but also help thicken the filling. The lemon juice brightens the flavors, making each bite a burst of deliciousness!
Step 5: Assemble the Bars
Now it’s time to layer! Spread the apple mixture evenly over the crust in the baking pan. Then, sprinkle the remaining crumb mixture on top of the apples. This creates a lovely topping that will bake into a crunchy layer. It’s like a cozy blanket for your apples!
Step 6: Bake to Perfection
Pop your baking pan into the preheated oven and bake for 30-35 minutes. Keep an eye on it! You’ll know it’s done when the top is golden brown and the apples are bubbling. If you want to be extra sure, you can insert a toothpick into the center; it should come out clean.
Step 7: Cool and Cut
Once baked, remove the pan from the oven and let it cool for at least 15 minutes. This cooling time is essential! If you cut into the bars too soon, they might fall apart. After they’ve cooled, slice them into bars and get ready to enjoy!
Tips for Success
- Use a mix of sweet and tart apples for a balanced flavor.
- Don’t skip the cooling time; it helps the bars set properly.
- For a fun twist, add chopped nuts or raisins to the apple filling.
- Store leftovers in an airtight container to keep them fresh.
- Serve warm with a scoop of vanilla ice cream for an extra treat!
Equipment Needed
- Baking pan: A 9×9-inch pan works perfectly, but a larger one can be used for thinner bars.
- Mixing bowls: Use two bowls—one for the crust and one for the apple filling.
- Fork or pastry cutter: Great for mixing the crumbly crust mixture.
- Measuring cups and spoons: Essential for accurate ingredient measurements.
- Spatula: Handy for spreading the apple filling and crumb topping evenly.
Variations
- Gluten-free: Substitute all-purpose flour with a gluten-free blend for a delicious gluten-free option.
- Vegan: Replace the butter with coconut oil or vegan butter and use a flax egg instead of regular eggs if you choose to add them.
- Spiced up: Add a pinch of ginger or allspice to the apple filling for an extra kick of flavor.
- Nutty goodness: Mix in chopped walnuts or pecans for added crunch and flavor.
- Fruit fusion: Combine apples with other fruits like pears or cranberries for a unique twist on the classic recipe.
Serving Suggestions
- Serve warm with a generous scoop of vanilla ice cream for a delightful contrast.
- Pair with a hot cup of spiced chai or a refreshing glass of apple cider.
- Dust with powdered sugar for an elegant presentation.
- Top with whipped cream and a sprinkle of cinnamon for extra flair.
- Enjoy as a sweet snack with your afternoon coffee or tea!
FAQs about Apple Pie Bars
Can I use frozen apples for this recipe?
Absolutely! Frozen apples can work well in these Apple Pie Bars. Just make sure to thaw and drain any excess moisture before mixing them with the other ingredients. This will help keep your bars from becoming too soggy.
How do I store leftover Apple Pie Bars?
To keep your Apple Pie Bars fresh, store them in an airtight container in the refrigerator. They should last for about 3-4 days. You can also freeze them for longer storage; just make sure to wrap them tightly!
Can I make these Apple Pie Bars ahead of time?
Yes! You can prepare the bars a day in advance. Just bake them, let them cool, and store them in the fridge. When you’re ready to serve, you can warm them up slightly in the oven for that fresh-baked taste.
What type of apples are best for Apple Pie Bars?
I recommend using a mix of sweet and tart apples, like Granny Smith and Honeycrisp. This combination gives your bars a delightful balance of flavors. Feel free to experiment with your favorites!
Can I add other fruits to the filling?
Definitely! You can mix in other fruits like pears or cranberries for a fun twist. Just keep in mind that different fruits may alter the moisture content, so adjust the cornstarch accordingly.
Final Thoughts
Making these Apple Pie Bars is more than just baking; it’s about creating sweet memories with your loved ones. The aroma of cinnamon and baked apples fills your home, wrapping you in warmth and nostalgia. Each bite is a delightful reminder of family gatherings and cozy evenings. Whether you’re sharing them with friends or enjoying a quiet moment with a cup of tea, these bars bring joy to any occasion. So, roll up your sleeves and dive into this easy recipe. Trust me, your taste buds will thank you, and your family will be asking for seconds!
Print
Apple Pie Bars That Will Dazzle Your Taste Buds!
- Total Time: 55 minutes
- Yield: 12 bars 1x
- Diet: Vegetarian
Description
Delicious and easy-to-make apple pie bars that combine the flavors of traditional apple pie in a convenient bar form.
Ingredients
- 2 cups all-purpose flour
- 1/2 cup granulated sugar
- 1/2 cup brown sugar
- 1/2 cup unsalted butter, softened
- 1/2 teaspoon salt
- 1 teaspoon cinnamon
- 1/4 teaspoon nutmeg
- 3 cups peeled and sliced apples
- 1 tablespoon lemon juice
- 1 tablespoon cornstarch
- 1 teaspoon vanilla extract
Instructions
- Preheat the oven to 350°F (175°C).
- In a mixing bowl, combine flour, granulated sugar, brown sugar, butter, salt, and half of the cinnamon to form a crumbly mixture.
- Press half of the mixture into the bottom of a greased baking pan.
- In another bowl, mix sliced apples with lemon juice, cornstarch, and remaining cinnamon and nutmeg.
- Spread the apple mixture over the crust in the baking pan.
- Sprinkle the remaining crumb mixture over the apples.
- Bake for 30-35 minutes or until the top is golden brown.
- Allow to cool before cutting into bars.
Notes
- Serve warm with a scoop of vanilla ice cream for an extra treat.
- Store leftovers in an airtight container in the refrigerator.
- Feel free to add nuts or raisins for added texture.
- Prep Time: 20 minutes
- Cook Time: 35 minutes
- Category: Dessert
- Method: Baking
- Cuisine: American
Nutrition
- Serving Size: 1 bar
- Calories: 200
- Sugar: 15g
- Sodium: 150mg
- Fat: 8g
- Saturated Fat: 4g
- Unsaturated Fat: 3g
- Trans Fat: 0g
- Carbohydrates: 30g
- Fiber: 2g
- Protein: 2g
- Cholesterol: 20mg
Keywords: Apple Pie Bars, Dessert, Baking, Easy Recipe


