Introduction to Sweet and Salty Chocolate Layer Bars
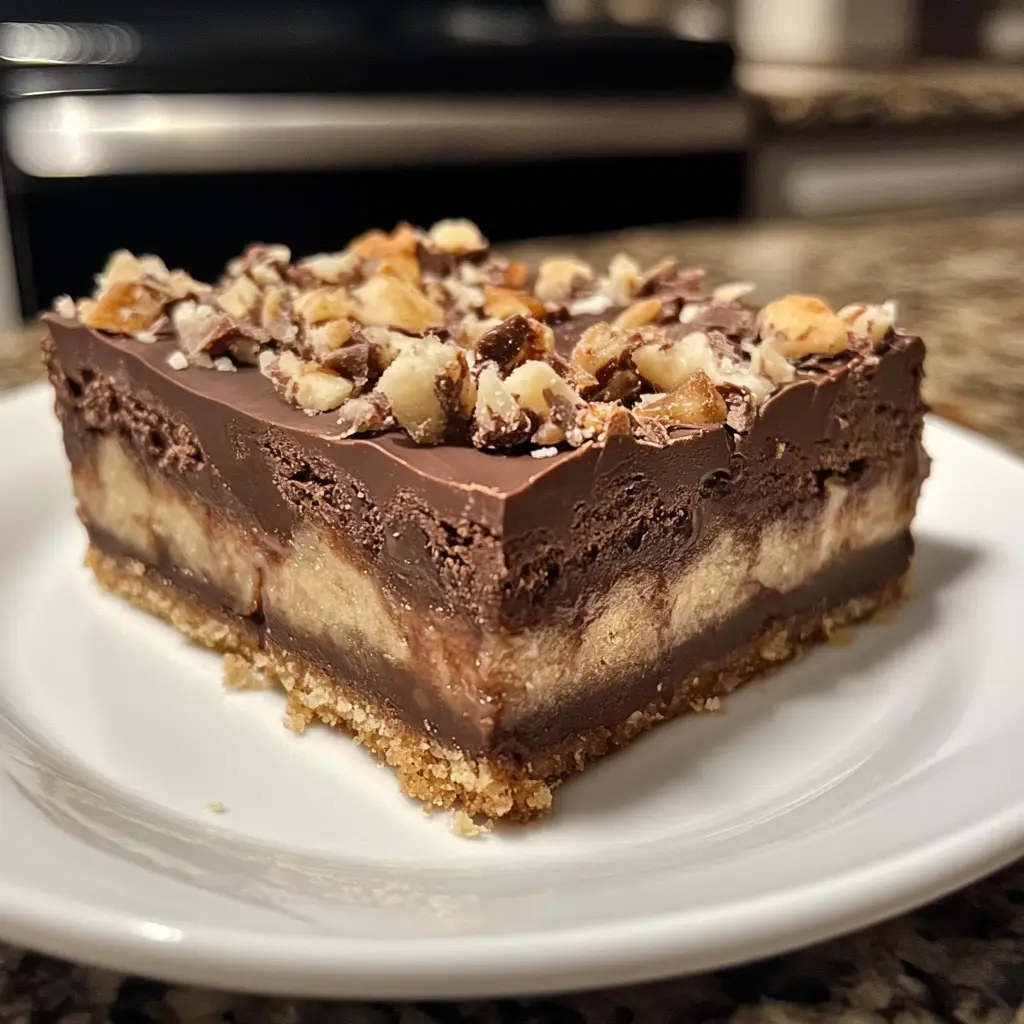
Ah, the magic of dessert! There’s something truly enchanting about the way flavors can dance together, creating a symphony of taste that leaves us craving more. One of my all-time favorite treats is the Sweet and Salty Chocolate Layer Bars. These delightful bars are a perfect blend of rich chocolate, a hint of sweetness, and a touch of saltiness that makes every bite feel like a celebration.
Let me take you back to the first time I made these bars. It was a rainy afternoon, and I was feeling a bit adventurous in the kitchen. I rummaged through my pantry, pulling out ingredients that seemed to whisper, “Use me!” As I layered the chocolate, the sweet filling, and the salty crunch, I felt like a mad scientist concocting a delicious potion. The aroma wafting through my home was simply irresistible, and I couldn’t wait to share my creation with family and friends.
What I love most about these bars is their versatility. They’re perfect for any occasion, whether it’s a cozy family gathering, a potluck with friends, or just a sweet treat to enjoy while binge-watching your favorite show. Plus, they’re incredibly easy to make! With just a few simple ingredients, you can whip up a batch that will impress even the pickiest of eaters.
In this article, I’ll guide you through the process of making these scrumptious Sweet and Salty Chocolate Layer Bars. From gathering the ingredients to the final chilling step, I’ll share tips and tricks that I’ve learned along the way. So, grab your apron, and let’s embark on this delicious journey together!
Ingredients for Sweet and Salty Chocolate Layer Bars
Before we dive into the delightful world of baking, let’s gather our ingredients! Having everything ready makes the process smoother and more enjoyable. I always find that when I have my ingredients prepped, it feels like I’m setting the stage for a culinary performance. Here’s what you’ll need to create your own batch of Sweet and Salty Chocolate Layer Bars.
Main Ingredients
- 1 cup of graham cracker crumbs
- ½ cup of unsalted butter, melted
- 1 cup of sweetened condensed milk
- 1 cup of semi-sweet chocolate chips
- ½ cup of chopped nuts (like pecans or walnuts)
- 1 teaspoon of vanilla extract
- ½ teaspoon of sea salt
When it comes to the ingredients, I always recommend using high-quality chocolate. It truly makes a difference in flavor! I love to use semi-sweet chocolate chips, but feel free to experiment with dark chocolate if you prefer a richer taste. And don’t skimp on the butter; it adds that luscious texture that makes these bars so irresistible.
Optional Add-ons
- ½ cup of shredded coconut for a tropical twist
- 1 cup of peanut butter chips for an extra layer of flavor
- 1 teaspoon of espresso powder to enhance the chocolate flavor
- Flaky sea salt for sprinkling on top
These optional add-ons can elevate your Sweet and Salty Chocolate Layer Bars to new heights! I once added a sprinkle of flaky sea salt on top, and it was like a little burst of magic in every bite. If you’re feeling adventurous, try mixing in some peanut butter chips for a delightful surprise. The possibilities are endless, and that’s what makes baking so much fun!
How to Prepare Sweet and Salty Chocolate Layer Bars
Now that we have our ingredients ready, it’s time to roll up our sleeves and get to the fun part—baking! I find that the process of making Sweet and Salty Chocolate Layer Bars is just as enjoyable as eating them. Each step is like a little adventure, and I can’t wait to share it with you. Let’s dive in!
Step 1: Prepare the Base Layer
First things first, we need to create a solid foundation for our bars. In a mixing bowl, combine the graham cracker crumbs and melted butter. Stir until the crumbs are well-coated and resemble wet sand. Then, press this mixture firmly into the bottom of a greased 9×9-inch baking pan. This will be the crunchy base that holds everything together.
Tips for Step 1
- Use the back of a measuring cup to press the crumbs down evenly. This helps create a sturdy base.
- If you want a little extra flavor, try adding a tablespoon of sugar or a pinch of cinnamon to the crumb mixture.
Step 2: Create the Sweet Layer
Next, let’s whip up the sweet layer! In a saucepan over low heat, combine the sweetened condensed milk, vanilla extract, and chopped nuts. Stir gently until everything is well mixed and heated through. Pour this luscious mixture over the prepared base layer, spreading it evenly with a spatula.
Tips for Step 2
- Be patient while heating the mixture; you want it warm but not boiling. This helps the flavors meld beautifully.
- Feel free to swap out the nuts for your favorite mix-ins, like dried fruit or even crushed cookies!
Step 3: Add the Salty Layer
Now comes the fun part—adding that delightful salty crunch! Sprinkle the chopped nuts (if you didn’t use them in the sweet layer) evenly over the sweet layer. This adds a wonderful texture and flavor contrast that makes these bars so special.
Tips for Step 3
- For an extra kick, consider using salted nuts instead of unsalted. It enhances the sweet and salty balance.
- Don’t be shy with the nuts; a generous layer adds to the overall deliciousness!
Step 4: Top with Chocolate
It’s time to bring it all together with a rich chocolate topping! Melt the semi-sweet chocolate chips in a microwave-safe bowl, heating in 30-second intervals and stirring in between until smooth. Pour the melted chocolate over the layered bars, spreading it evenly to cover everything.
Tips for Step 4
- For a glossy finish, add a teaspoon of vegetable oil to the chocolate before melting. It makes the chocolate shine!
- If you’re feeling adventurous, mix in some peanut butter with the chocolate for a creamy twist.
Step 5: Chill and Cut
Finally, we need to let our creation chill! Place the baking pan in the refrigerator for at least 2 hours, or until the chocolate is set. Once chilled, lift the bars out using the edges of the parchment paper (if you used it) and cut them into squares or rectangles.
Tips for Step 5
- For cleaner cuts, use a sharp knife and wipe it with a damp cloth between cuts.
- These bars can be stored in an airtight container in the fridge for up to a week—if they last that long!
And there you have it! Your very own batch of Sweet and Salty Chocolate Layer Bars is ready to be devoured. I can already imagine the smiles on everyone’s faces as they take that first bite. Enjoy the process, and happy baking!
Equipment Needed for Sweet and Salty Chocolate Layer Bars
Before we dive into the kitchen, let’s make sure we have all the right tools at our fingertips. Having the right equipment can make the process of creating Sweet and Salty Chocolate Layer Bars a breeze. Here’s a quick list of what you’ll need:
- 9×9-inch baking pan: This is perfect for holding all those delicious layers. If you don’t have one, a similar-sized dish will work just fine.
- Mixing bowls: A couple of medium-sized bowls will help you combine your ingredients without any fuss.
- Spatula: A rubber spatula is great for spreading the layers evenly. If you don’t have one, a wooden spoon can do the trick!
- Measuring cups and spoons: Accurate measurements are key to baking success. If you’re in a pinch, you can use any cup or spoon as a makeshift measure, just keep it consistent.
- Microwave-safe bowl: This is essential for melting the chocolate. If you prefer, you can also use a double boiler on the stove.
- Sharp knife: For cutting the bars into perfect squares. A serrated knife works wonders for this task!
- Parchment paper (optional): Lining your baking pan with parchment makes it easier to lift the bars out once they’re set. If you don’t have any, just greasing the pan will work too.
With these tools in hand, you’re all set to create your own batch of Sweet and Salty Chocolate Layer Bars. I always find that having everything organized makes the baking experience so much more enjoyable. So, let’s get cooking!
Variations of Sweet and Salty Chocolate Layer Bars
One of the things I adore about Sweet and Salty Chocolate Layer Bars is their flexibility. You can easily customize them to suit your taste or to use up what you have in your pantry. Here are a few delightful variations that I’ve tried and loved:
- Nutty Delight: Swap out the chopped nuts for your favorite nut butter. A layer of creamy almond or cashew butter adds a rich, nutty flavor that pairs beautifully with chocolate.
- Fruit Fusion: Add a layer of dried fruits like cranberries or apricots. The sweetness of the fruit complements the salty crunch perfectly, creating a delightful contrast.
- Minty Fresh: Mix in some peppermint extract into the chocolate layer for a refreshing twist. It’s like a chocolate mint dream!
- Spicy Kick: For those who love a little heat, sprinkle in some cayenne pepper or chili powder into the chocolate layer. It adds an unexpected zing that will surprise your taste buds.
These variations not only keep things exciting but also allow you to experiment with flavors. I remember the first time I added dried cherries; it was like a burst of joy in every bite! So, don’t hesitate to get creative and make these bars your own. The kitchen is your playground, after all!
Cooking Notes for Sweet and Salty Chocolate Layer Bars
As I’ve journeyed through the delightful world of baking these Sweet and Salty Chocolate Layer Bars, I’ve picked up a few handy cooking notes that can make your experience even smoother. Here are some tips that I always keep in mind:
- Room Temperature Ingredients: Whenever possible, use room temperature ingredients, especially the butter. It blends more easily, creating a smoother texture in your bars.
- Don’t Rush the Chilling: Patience is key! Allowing the bars to chill completely ensures that they set properly. If you cut them too soon, you might end up with a gooey mess instead of neat squares.
- Storage Tips: To keep your bars fresh, store them in an airtight container in the fridge. They can last up to a week, but I doubt they’ll last that long once you share them with friends and family!
- Experiment with Layers: Feel free to play around with the layers. You can add more chocolate or nuts, or even a layer of caramel for an extra indulgent treat. The sky’s the limit!
- Watch the Chocolate: When melting chocolate, be careful not to overheat it. Stirring frequently helps prevent burning and ensures a silky smooth finish.
These little notes have helped me create the perfect batch of Sweet and Salty Chocolate Layer Bars time and time again. Remember, baking is as much about enjoying the process as it is about the final product. So, have fun and let your creativity shine!
Serving Suggestions for Sweet and Salty Chocolate Layer Bars
Now that you’ve crafted your delicious Sweet and Salty Chocolate Layer Bars, it’s time to think about how to serve them! Presentation can elevate your dessert from simple to spectacular. Here are some of my favorite serving suggestions that I’ve enjoyed over the years:
- On a Platter: Arrange the bars on a beautiful serving platter, and dust them with a light sprinkle of powdered sugar. It adds a touch of elegance and makes them look irresistible!
- With Ice Cream: Serve a warm bar alongside a scoop of vanilla or salted caramel ice cream. The contrast of warm and cold is simply divine!
- Drizzled with Caramel: For an extra indulgent treat, drizzle some warm caramel sauce over the top before serving. It adds a rich sweetness that pairs perfectly with the salty notes.
- With Fresh Berries: A handful of fresh berries, like raspberries or strawberries, adds a pop of color and a refreshing tartness that balances the sweetness of the bars.
- As Party Favors: Cut the bars into smaller squares and package them in cute boxes or bags. They make delightful party favors that your guests will love!
These serving ideas not only enhance the experience but also make sharing your Sweet and Salty Chocolate Layer Bars even more enjoyable. I always find that a little creativity goes a long way in making dessert time special. So, gather your loved ones, and let the sweet moments unfold!
Tips for Making Sweet and Salty Chocolate Layer Bars
As I’ve baked my fair share of Sweet and Salty Chocolate Layer Bars, I’ve gathered a treasure trove of tips that can help you achieve the best results. Here are some of my favorite nuggets of wisdom that I always keep in mind:
- Prep Ahead: If you’re short on time, you can prepare the base layer a day in advance. Just cover it tightly and store it in the fridge until you’re ready to add the next layers.
- Use Quality Ingredients: The better the ingredients, the better the bars! I always opt for high-quality chocolate and fresh nuts. It truly makes a difference in flavor.
- Chill Between Layers: If you want to ensure that each layer sets perfectly, consider chilling the bars for about 15-20 minutes between adding layers. This helps maintain distinct layers and prevents them from mixing.
- Customize Your Toppings: Don’t hesitate to get creative with toppings! A sprinkle of crushed pretzels or a drizzle of white chocolate can add a fun twist.
- Share the Love: These bars are perfect for sharing! Whether it’s a family gathering or a potluck, everyone will appreciate your delicious creation. Plus, it’s a great way to spread joy!
With these tips in your back pocket, you’re all set to make the most scrumptious Sweet and Salty Chocolate Layer Bars ever. Remember, baking is about having fun and enjoying the process, so let your creativity shine!
Breakdown of Time for Sweet and Salty Chocolate Layer Bars
As a passionate home cook, I know that time management is key when it comes to baking. Understanding how long each step takes can help you plan your baking adventure better. Here’s a quick breakdown of the time you’ll need to whip up your Sweet and Salty Chocolate Layer Bars:
- Prep Time: 20 minutes – This includes gathering your ingredients, mixing the layers, and getting everything ready for the oven.
- Cooking Time: 15 minutes – This is the time it takes to bake the base layer and melt the chocolate topping.
- Chilling Time: 2 hours – Patience is key here! Allowing the bars to chill ensures they set properly and are easy to cut.
- Total Time: 2 hours and 35 minutes – This is the total time from start to finish, including prep, cooking, and chilling.
With this time breakdown, you can easily fit baking these delicious Sweet and Salty Chocolate Layer Bars into your day. I always find that the anticipation makes the final product even sweeter! So, gather your ingredients, set aside some time, and let the baking magic begin!
Nutritional Information for Sweet and Salty Chocolate Layer Bars
As a passionate home cook, I believe that enjoying a delicious treat like Sweet and Salty Chocolate Layer Bars can be part of a balanced lifestyle. While these bars are undeniably indulgent, it’s always good to know what you’re savoring. Here’s a quick look at the nutritional information for one serving (assuming you cut the batch into 16 squares):
- Calories: Approximately 200
- Fat: 10g (Saturated Fat: 5g)
- Carbohydrates: 25g
- Fiber: 1g
- Sugar: 12g
- Protein: 3g
Keep in mind that these values can vary based on the specific ingredients you choose. For instance, using dark chocolate or adding more nuts can change the nutritional profile. I always find it helpful to enjoy these bars in moderation, especially since they’re so rich and satisfying. Plus, sharing them with friends and family makes the experience even sweeter!
So, whether you’re treating yourself or sharing with loved ones, these Sweet and Salty Chocolate Layer Bars are sure to bring joy to your taste buds. Happy baking!
Frequently Asked Questions about Sweet and Salty Chocolate Layer Bars
As I’ve shared my love for Sweet and Salty Chocolate Layer Bars, I’ve often found myself answering a few common questions from fellow bakers and dessert lovers. It’s always a joy to help others navigate their baking adventures! Here are some frequently asked questions that might help you on your journey:
Can I make these bars gluten-free?
Absolutely! To make Sweet and Salty Chocolate Layer Bars gluten-free, simply swap out the graham cracker crumbs for gluten-free alternatives. There are many brands available that offer gluten-free graham crackers, or you can use crushed gluten-free cookies. The taste will still be delicious!
How do I store the bars?
To keep your bars fresh, store them in an airtight container in the refrigerator. They can last up to a week, but I can almost guarantee they won’t last that long once you share them with friends and family!
Can I freeze these bars?
Yes, you can freeze Sweet and Salty Chocolate Layer Bars! Just make sure they are completely chilled and set before wrapping them tightly in plastic wrap or aluminum foil. They can be frozen for up to three months. When you’re ready to enjoy them, simply thaw them in the refrigerator overnight.
What can I use instead of sweetened condensed milk?
If you’re looking for a substitute for sweetened condensed milk, you can make your own by combining 1 cup of milk with 1 cup of sugar and simmering it until it thickens. Alternatively, you can use coconut milk with sugar for a dairy-free option. Just keep in mind that the flavor may vary slightly!
Can I add more layers to the bars?
Of course! The beauty of Sweet and Salty Chocolate Layer Bars lies in their versatility. Feel free to add more layers, like a caramel layer or even a fruit layer. Just be mindful of the balance of flavors, and have fun experimenting!
These questions reflect the curiosity and creativity that come with baking. I love sharing my experiences and tips, and I hope these answers help you create your own delicious batch of Sweet and Salty Chocolate Layer Bars. Remember, the kitchen is a place for exploration, so don’t hesitate to ask more questions or try new things!
Conclusion on Sweet and Salty Chocolate Layer Bars
As I wrap up this delightful journey through the world of Sweet and Salty Chocolate Layer Bars, I can’t help but feel a sense of joy. These bars are more than just a dessert; they’re a celebration of flavors that come together in perfect harmony. The rich chocolate, the sweet layers, and the salty crunch create a symphony that dances on your taste buds, leaving you wanting more.
What I love most about these bars is their versatility. Whether you’re baking for a special occasion or simply treating yourself after a long day, they fit the bill perfectly. Plus, they’re easy to make, allowing even novice bakers to shine in the kitchen. With just a handful of ingredients and a little love, you can create something truly magical.
So, gather your loved ones, share these bars, and watch as smiles light up their faces. Remember, baking is not just about the end result; it’s about the memories you create along the way. I hope you enjoy making and sharing your own Sweet and Salty Chocolate Layer Bars as much as I have. Happy baking!