Introduction to Chocolate Covered Oreo Truffle Eggs Recipe
As a passionate home cook, I find joy in creating sweet treats that bring smiles to faces. One of my all-time favorite recipes is the Chocolate Covered Oreo Truffle Eggs. These delightful little bites are not just a feast for the taste buds; they also hold a special place in my heart. I remember the first time I made them for an Easter gathering. The excitement in the room was palpable as everyone eagerly anticipated the first bite. The moment those chocolatey, creamy truffle eggs melted in their mouths, I knew I had struck gold!
What I love most about this recipe is its simplicity. With just a handful of ingredients, you can whip up a batch that looks and tastes like it came from a fancy bakery. Plus, they’re incredibly versatile! You can customize them with different toppings or flavors, making them perfect for any occasion. Whether it’s a holiday celebration, a birthday party, or just a cozy night in, these truffle eggs are sure to impress.
In this article, I’ll guide you through the process of making these scrumptious treats. From gathering the ingredients to the final touches of decoration, I’ll share my tips and tricks to ensure your Chocolate Covered Oreo Truffle Eggs turn out perfectly every time. So, roll up your sleeves, and let’s dive into this sweet adventure together!
Ingredients for Chocolate Covered Oreo Truffle Eggs Recipe
Before we embark on our sweet journey, let’s gather all the ingredients we need for these delightful Chocolate Covered Oreo Truffle Eggs. I always believe that the quality of ingredients can make a world of difference in the final product. So, let’s make sure we have the best of the best!
Main Ingredients
- 1 package (15.35 oz) Oreo cookies: The classic choice! You can use regular or double-stuffed Oreos, depending on how rich you want your truffles to be.
- 8 oz cream cheese, softened: This is the magic ingredient that binds everything together. I prefer using full-fat cream cheese for a creamier texture.
- 16 oz chocolate chips: Semi-sweet chocolate chips work wonderfully, but feel free to experiment with milk or dark chocolate for different flavor profiles.
- 1 tablespoon coconut oil (optional): This helps to smooth out the chocolate when melting, giving it a lovely sheen.
Optional Add-ons
- Sprinkles: A fun way to add color and texture! Choose your favorite sprinkles to match the occasion.
- Chopped nuts: If you love a bit of crunch, finely chopped almonds or walnuts can add a delightful twist.
- Flavored extracts: A splash of vanilla or peppermint extract can elevate the flavor of your truffles. Just a drop will do!
- Drizzle of white chocolate: For a beautiful presentation, drizzle melted white chocolate over the dipped eggs.
Now that we have our ingredients ready, it’s time to get our hands a little messy and start creating these delicious treats! Remember, the best part of cooking is having fun and experimenting, so don’t hesitate to make this recipe your own!
How to Prepare Chocolate Covered Oreo Truffle Eggs Recipe
Now that we have our ingredients ready, it’s time to roll up our sleeves and dive into the fun part—preparing our Chocolate Covered Oreo Truffle Eggs! I promise, this process is as enjoyable as it is delicious. Let’s get started!
Step 1: Crush the Oreos
The first step is to crush those Oreos into fine crumbs. You can use a food processor for a quick job, or if you’re feeling a bit nostalgic, place them in a zip-top bag and crush them with a rolling pin. It’s a great way to relieve stress!
Tips for Crushing Oreos
- Make sure the Oreos are in small pieces before you start crushing. This helps achieve a finer crumb.
- Don’t worry if some chunks remain; they add a delightful texture to the truffles!
Step 2: Mix Cream Cheese with Crushed Oreos
Next, in a large mixing bowl, combine the crushed Oreos with the softened cream cheese. I like to use my hands for this part; it’s messy but fun! Just make sure everything is well blended.
Tips for Achieving the Right Consistency
- Ensure your cream cheese is at room temperature. This makes mixing much easier.
- If the mixture feels too dry, add a little more cream cheese until it’s moldable.
Step 3: Shape the Mixture into Egg Forms
Now comes the creative part! Take small portions of the mixture and roll them into egg shapes. I like to make them about the size of a small walnut. It’s all about finding that perfect balance!
Tips for Shaping Eggs
- Wet your hands slightly to prevent the mixture from sticking to your fingers.
- Try to make them uniform in size for even dipping later on.
Step 4: Chill the Egg Shapes
Once you’ve shaped all your eggs, it’s time to chill them in the refrigerator for about 30 minutes. This helps them firm up, making them easier to dip in chocolate.
Tips for Effective Chilling
- Place them on a parchment-lined baking sheet to avoid sticking.
- If you’re in a hurry, you can pop them in the freezer for about 15 minutes instead.
Step 5: Melt the Chocolate
While the eggs are chilling, let’s melt the chocolate. You can do this in a microwave-safe bowl or over a double boiler. I prefer the microwave for its convenience, but be careful not to overheat!
Tips for Melting Chocolate Smoothly
- Heat the chocolate in short bursts of 30 seconds, stirring in between until smooth.
- If using coconut oil, add it to the chocolate before melting for a silky finish.
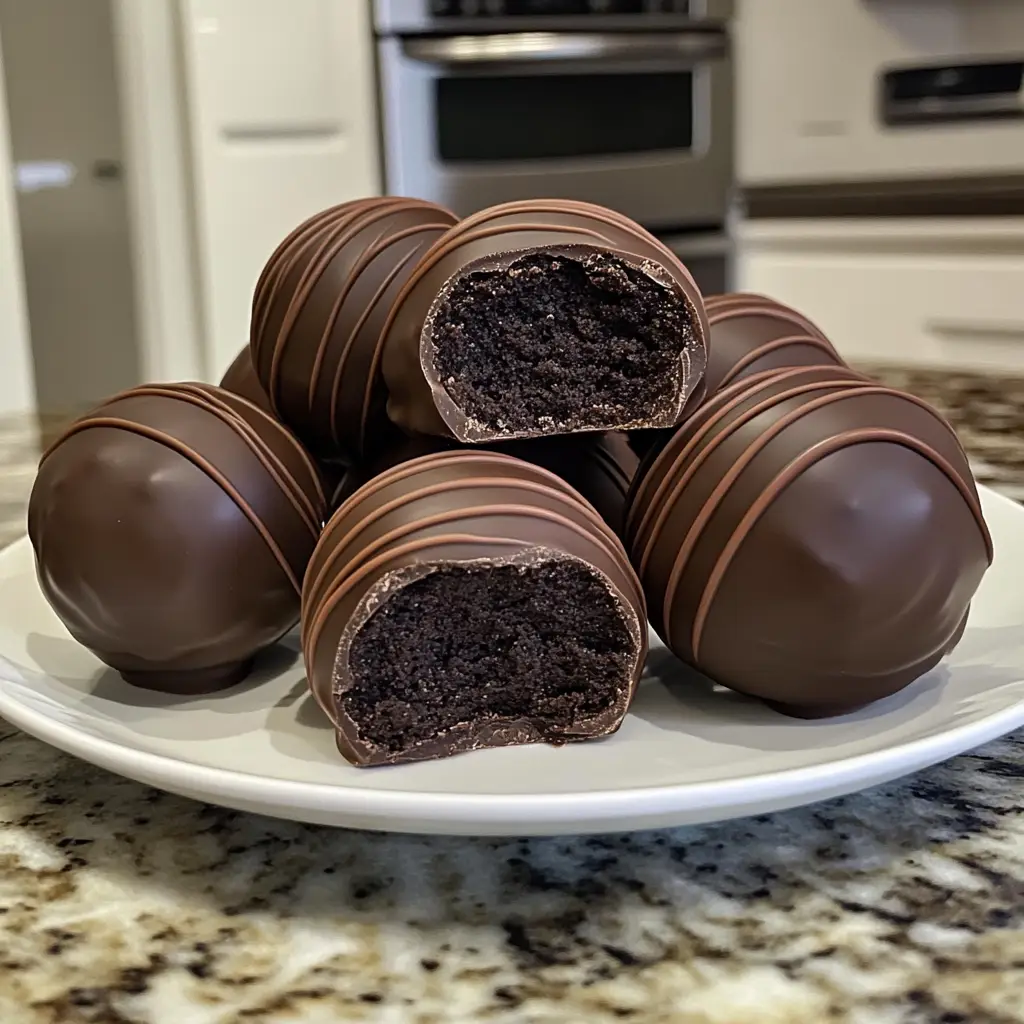
Step 6: Dip the Eggs in Chocolate
Now for the fun part—dipping! Take each chilled egg and dip it into the melted chocolate, ensuring it’s fully coated. Use a fork to lift it out, letting the excess chocolate drip off.
Tips for Even Coating
- Work quickly, as the chocolate can start to set if it cools too much.
- For a smoother finish, tap the fork gently against the bowl to remove excess chocolate.
Step 7: Decorate the Chocolate Covered Eggs
Finally, it’s time to get creative! While the chocolate is still wet, sprinkle your chosen toppings over the eggs. This is where you can let your imagination run wild!
Tips for Creative Decoration
- Use a piping bag to drizzle white chocolate for a beautiful design.
- Mix and match toppings for a colorful presentation that’s sure to impress!
And there you have it! Your Chocolate Covered Oreo Truffle Eggs are ready to be enjoyed. I can already picture the smiles on everyone’s faces as they take that first bite. Let’s move on to the equipment you’ll need for this delightful recipe!
Equipment Needed for Chocolate Covered Oreo Truffle Eggs Recipe
Before we dive into the kitchen, let’s gather the essential tools for making our Chocolate Covered Oreo Truffle Eggs. Having the right equipment can make the process smoother and more enjoyable. Here’s what you’ll need:
- Mixing Bowl: A large mixing bowl is perfect for combining the crushed Oreos and cream cheese. If you have a glass or ceramic bowl, it’s even better, as they don’t retain heat.
- Food Processor or Rolling Pin: Use a food processor to crush the Oreos quickly. If you prefer a more hands-on approach, a rolling pin and a zip-top bag work just as well!
- Cookie Sheet: A baking sheet lined with parchment paper is ideal for chilling the egg shapes. It prevents sticking and makes cleanup a breeze.
- Microwave-Safe Bowl or Double Boiler: You’ll need this for melting the chocolate. If you don’t have a double boiler, a microwave-safe bowl is a great alternative.
- Fork or Dipping Tool: A fork is perfect for dipping the eggs into the chocolate. If you have a dipping tool, feel free to use that for a more precise coating.
- Piping Bag (optional): If you want to get fancy with your decorations, a piping bag will help you drizzle chocolate or add intricate designs.
With these tools in hand, you’re all set to create your delicious truffle eggs! Remember, cooking is all about improvisation, so if you don’t have a specific tool, don’t hesitate to get creative with what you have. Let’s keep the fun rolling as we move on to the next steps!
Variations of Chocolate Covered Oreo Truffle Eggs Recipe
One of the things I adore about the Chocolate Covered Oreo Truffle Eggs is their versatility. You can easily switch things up to suit your taste or the occasion. Here are a few fun variations that I’ve tried and loved:
- Peanut Butter Oreo Truffle Eggs: Swap out the cream cheese for creamy peanut butter. The combination of chocolate and peanut butter is simply divine!
- Mint Chocolate Oreo Truffle Eggs: Add a few drops of peppermint extract to the cream cheese mixture for a refreshing minty twist. It’s like a cool breeze on a warm day!
- Cookie Dough Oreo Truffle Eggs: Mix in some mini chocolate chips to the Oreo and cream cheese mixture. It adds a delightful crunch and a taste of cookie dough heaven.
- Rainbow Sprinkles Oreo Truffle Eggs: Use colorful sprinkles in the chocolate coating for a festive look. Perfect for birthdays or celebrations!
- Dark Chocolate Oreo Truffle Eggs: For a richer flavor, use dark chocolate chips instead of semi-sweet. It’s a sophisticated twist that chocolate lovers will appreciate.
These variations not only keep things exciting but also allow you to cater to different preferences. I love experimenting with flavors and toppings, and I encourage you to do the same! The sky’s the limit when it comes to creating your own unique version of these delightful truffle eggs. So, let your creativity shine as we move on to the cooking notes!
Cooking Notes for Chocolate Covered Oreo Truffle Eggs Recipe
As I’ve journeyed through the delightful process of making Chocolate Covered Oreo Truffle Eggs, I’ve picked up a few cooking notes that can help you achieve the best results. These little tips can make a big difference in your truffle-making adventure!
- Room Temperature Ingredients: Always ensure your cream cheese is at room temperature before mixing. This helps create a smooth and creamy texture, making it easier to blend with the crushed Oreos.
- Chilling Time: Don’t rush the chilling process! Allowing the egg shapes to chill properly ensures they hold their form when dipped in chocolate. Trust me, it’s worth the wait!
- Chocolate Quality: Use high-quality chocolate for melting. It not only tastes better but also melts more smoothly, giving your truffles a beautiful finish.
- Experiment with Toppings: Don’t be afraid to get creative with your decorations! From crushed candies to edible glitter, the options are endless. It’s a fun way to personalize your truffles!
- Storage Tips: Store your finished truffle eggs in an airtight container in the refrigerator. They can last up to a week, but I doubt they’ll last that long once everyone gets a taste!
These cooking notes are like little nuggets of wisdom I’ve gathered over time. They’ll help you navigate the process with ease and confidence. Now, let’s move on to serving suggestions that will make your Chocolate Covered Oreo Truffle Eggs shine even brighter!
Serving Suggestions for Chocolate Covered Oreo Truffle Eggs Recipe
Now that our Chocolate Covered Oreo Truffle Eggs are ready, it’s time to think about how to present them! Presentation can elevate your treats from simple snacks to show-stopping desserts. Here are some of my favorite serving suggestions that will make your truffle eggs the star of the show:
- Elegant Platter: Arrange the truffle eggs on a beautiful serving platter. You can use a tiered stand for a stunning display that adds height and interest.
- Gift Boxes: Package a few truffle eggs in decorative boxes or cellophane bags tied with a ribbon. They make delightful gifts for friends and family, especially during holidays or special occasions.
- Chocolate Dipping Station: Set up a fun dipping station with various toppings like crushed nuts, sprinkles, and coconut flakes. Let guests customize their own truffle eggs for a hands-on experience!
- Accompanying Treats: Serve the truffle eggs alongside other sweet treats, like brownies or cookies, for a dessert platter that offers a variety of flavors and textures.
- Festive Touches: For special occasions, add themed decorations like edible glitter or colored sprinkles that match the event. It’s a simple way to make your truffles even more festive!
These serving suggestions not only enhance the visual appeal of your Chocolate Covered Oreo Truffle Eggs but also create a delightful experience for everyone enjoying them. I can already imagine the smiles and laughter as friends and family gather around to indulge in these sweet treats. Now, let’s keep the momentum going as we explore tips for perfecting this recipe!
Tips for Perfecting Chocolate Covered Oreo Truffle Eggs Recipe
As I’ve crafted my Chocolate Covered Oreo Truffle Eggs over the years, I’ve gathered a treasure trove of tips that can help you elevate your truffle-making game. These little nuggets of wisdom can make a world of difference, ensuring your treats are not only delicious but also visually stunning. Here are my top tips for perfecting this delightful recipe:
- Use Quality Chocolate: The chocolate you choose can make or break your truffles. Opt for high-quality chocolate chips or bars for a rich flavor and smooth texture. Trust me, it’s worth the splurge!
- Chill Between Steps: If you find the chocolate getting too thick while dipping, pop the eggs back in the fridge for a few minutes. This helps maintain their shape and makes dipping easier.
- Experiment with Flavors: Don’t hesitate to play around with different flavored extracts or add-ins. A hint of almond or orange zest can add a delightful twist to your truffles!
- Practice Your Dipping Technique: Dipping can be tricky! Use a fork to gently lower the egg into the chocolate, then lift it out and tap off the excess. This will help achieve a smooth, even coating.
- Be Creative with Decorations: Let your imagination run wild! Use a variety of toppings, from crushed candies to edible glitter, to make your truffles uniquely yours. It’s all about having fun!
With these tips in your back pocket, you’re well on your way to creating Chocolate Covered Oreo Truffle Eggs that will impress everyone. Remember, cooking is an adventure, so don’t be afraid to make it your own. Now, let’s take a look at the time breakdown for this delightful recipe!
Breakdown of Time for Chocolate Covered Oreo Truffle Eggs Recipe
As a home cook, I know that time management is key in the kitchen. When making Chocolate Covered Oreo Truffle Eggs, it’s helpful to have a clear idea of how long each step will take. Here’s a quick breakdown of the time you’ll need to whip up these delightful treats:
- Prep Time: Approximately 20 minutes. This includes gathering your ingredients, crushing the Oreos, and mixing everything together.
- Chilling Time: About 30 minutes. This step is crucial for firming up the egg shapes before dipping them in chocolate.
- Cooking Time: 15 minutes. This covers melting the chocolate and dipping the eggs, plus any decorating you want to do.
- Total Time: Roughly 1 hour and 5 minutes. With a little patience and love, you’ll have a batch of delicious truffle eggs ready to impress!
Knowing the time commitment helps me plan my baking adventures better. Plus, it’s always nice to have a timeline in mind when you’re preparing treats for a special occasion. So, gather your ingredients, and let’s get started on this sweet journey together!
Nutritional Information for Chocolate Covered Oreo Truffle Eggs Recipe
As a passionate home cook, I believe that enjoying sweet treats like Chocolate Covered Oreo Truffle Eggs can be part of a balanced lifestyle. While these delightful bites are certainly indulgent, it’s always good to know what you’re putting into your body. Here’s a general breakdown of the nutritional information for one truffle egg, based on the ingredients listed:
- Calories: Approximately 150 calories
- Fat: 8g (Saturated Fat: 4g)
- Carbohydrates: 18g (Sugars: 12g)
- Protein: 2g
- Fiber: 0.5g
Keep in mind that these values can vary based on the specific brands of ingredients you use and any optional add-ons you choose to include. If you’re looking to lighten things up a bit, consider using reduced-fat cream cheese or dark chocolate, which can offer a slightly healthier twist without sacrificing flavor.
Ultimately, it’s all about balance. Enjoying a Chocolate Covered Oreo Truffle Egg every now and then can bring joy and sweetness to your day. So, savor each bite and share them with loved ones for a truly delightful experience!
Frequently Asked Questions about Chocolate Covered Oreo Truffle Eggs Recipe
As I’ve shared my love for Chocolate Covered Oreo Truffle Eggs, I’ve noticed that many home cooks have similar questions. It’s always great to clarify any doubts to ensure your truffle-making experience is as smooth as possible. Here are some of the most frequently asked questions I’ve encountered, along with my answers:
Can I use different types of cookies instead of Oreos?
Absolutely! While Oreos are the classic choice, you can experiment with other cookies like chocolate wafers or even graham crackers. Just keep in mind that the flavor and texture may vary, but that’s part of the fun of cooking!
How long do the truffle eggs last?
When stored in an airtight container in the refrigerator, your Chocolate Covered Oreo Truffle Eggs can last up to a week. However, I doubt they’ll stick around that long once everyone gets a taste!
Can I freeze the truffle eggs?
Yes, you can freeze them! Just make sure to place them in a single layer on a baking sheet until they’re frozen, then transfer them to an airtight container. They can last for up to three months in the freezer. Just thaw them in the fridge before serving.
What can I use instead of cream cheese?
If you’re looking for a dairy-free option, you can use vegan cream cheese or even nut butter like almond or cashew butter. Just keep in mind that the flavor and texture will change slightly, but it can still be delicious!
How can I make the chocolate coating smoother?
To achieve a smoother chocolate coating, consider adding a tablespoon of coconut oil to the chocolate before melting. This helps create a glossy finish and makes the chocolate easier to work with.
Can I make these truffles ahead of time?
Definitely! You can prepare the truffle eggs a day or two in advance. Just make sure to store them properly in the fridge to keep them fresh. They’re perfect for making ahead of time for parties or gatherings!
These FAQs should help clear up any uncertainties you might have about making Chocolate Covered Oreo Truffle Eggs. Remember, cooking is all about experimenting and having fun, so don’t hesitate to make this recipe your own. Now, let’s wrap up our sweet adventure with a delightful conclusion!
Conclusion on Chocolate Covered Oreo Truffle Eggs Recipe
As we wrap up our sweet journey through the world of Chocolate Covered Oreo Truffle Eggs, I can’t help but feel a sense of joy and satisfaction. This recipe is not just about creating a delicious treat; it’s about the memories made while baking, the laughter shared with loved ones, and the smiles that light up faces when they take that first bite. These truffle eggs are a perfect blend of simplicity and indulgence, making them suitable for any occasion.
What I love most is their versatility. You can customize them to fit any theme or flavor preference, allowing your creativity to shine. Whether you’re making them for a holiday celebration, a birthday party, or just a cozy night in, these truffles are sure to impress. Plus, they’re easy to make, even for beginner cooks, which means anyone can join in on the fun!
So, gather your ingredients, roll up your sleeves, and dive into this delightful recipe. I promise that the experience will be as rewarding as the final product. Enjoy every moment, and don’t forget to share your creations with those you love. Happy cooking!