Introduction to Baked Cheddar Chive Dip
As a passionate home cook, I find joy in creating dishes that bring people together. One of my all-time favorites is the Baked Cheddar Chive Dip. This delightful dip has a way of transforming any gathering into a cozy celebration. I remember the first time I made it for a game night with friends. The aroma of melted cheese and fresh chives wafted through the air, and I could see their eyes light up with anticipation. It was a hit!
This dip is not just about flavor; it’s about the memories we create while sharing food. Whether it’s a casual get-together or a festive holiday party, this dip is the perfect companion. The creamy texture, combined with the sharpness of cheddar and the subtle oniony flavor of chives, makes it irresistible. I often find myself making it for potlucks, and it never fails to disappear within minutes!
What I love most about this recipe is its simplicity. With just a handful of ingredients, you can whip up a crowd-pleaser that feels gourmet. Plus, it’s incredibly versatile. You can serve it with crunchy veggies, crispy chips, or even warm bread. Each bite is a burst of flavor that leaves everyone wanting more.
So, if you’re ready to impress your friends and family with a dip that’s as delicious as it is easy to make, let’s dive into the world of Baked Cheddar Chive Dip. I promise, once you try it, you’ll be hooked!
Ingredients for Baked Cheddar Chive Dip
Before we dive into the cooking process, let’s gather our ingredients. I always believe that the quality of ingredients can make or break a dish. For this Baked Cheddar Chive Dip, I recommend using fresh, high-quality items to elevate the flavors. Here’s what you’ll need:
Main Ingredients
- 1 cup of sharp cheddar cheese, shredded
- 1 cup of cream cheese, softened
- 1/2 cup of sour cream
- 1/4 cup of mayonnaise
- 1/4 cup of fresh chives, chopped
- 1 teaspoon of garlic powder
- 1/2 teaspoon of salt
- 1/4 teaspoon of black pepper
When it comes to cheese, I always opt for sharp cheddar. It adds a robust flavor that pairs beautifully with the creamy elements. For the cream cheese, make sure it’s softened; this makes mixing a breeze. I often use homemade mayonnaise, but store-bought works just fine if you’re short on time.
Optional Add-ons
- 1/2 cup of cooked bacon bits
- 1/4 cup of diced jalapeños for a spicy kick
- 1/4 cup of grated Parmesan cheese for extra richness
- Fresh herbs like parsley or dill for garnish
Feel free to get creative! I love adding crispy bacon bits for a smoky flavor, or jalapeños if I’m in the mood for something spicy. The beauty of this dip is its adaptability. You can mix and match to suit your taste or the occasion. Just remember, the more you experiment, the more fun you’ll have!
How to Prepare Baked Cheddar Chive Dip
Now that we have our ingredients ready, it’s time to roll up our sleeves and get cooking! Making Baked Cheddar Chive Dip is a straightforward process that’s as enjoyable as it is rewarding. I love the anticipation that builds as the dip comes together. Let’s dive into the steps!
Step 1: Preheat the Oven
The first step is to preheat your oven to 350°F (175°C). This ensures that our dip bakes evenly and gets that lovely golden top.
Tips for Preheating
- Always preheat your oven before you start mixing. This way, the dip goes straight into a hot oven, helping it to rise and bubble beautifully.
- If your oven has a convection setting, use it! It circulates the heat, giving your dip an even better texture.
Step 2: Mix the Ingredients
In a large mixing bowl, combine all the main ingredients: sharp cheddar cheese, cream cheese, sour cream, mayonnaise, chopped chives, garlic powder, salt, and black pepper. I like to use a hand mixer for this step, but a sturdy spatula works just as well.
Tips for Mixing
- Make sure your cream cheese is at room temperature. This makes it easier to blend smoothly with the other ingredients.
- Don’t be afraid to taste as you mix! Adjust the seasoning to your liking. Sometimes, a pinch more salt or a dash of garlic powder can make all the difference.
Step 3: Transfer to Baking Dish
Once everything is mixed to perfection, it’s time to transfer the dip into a baking dish. I usually opt for a medium-sized casserole dish, but any oven-safe dish will do.
Tips for Choosing the Right Dish
- Choose a dish that’s shallow rather than deep. This allows for more surface area, which means a crispier top!
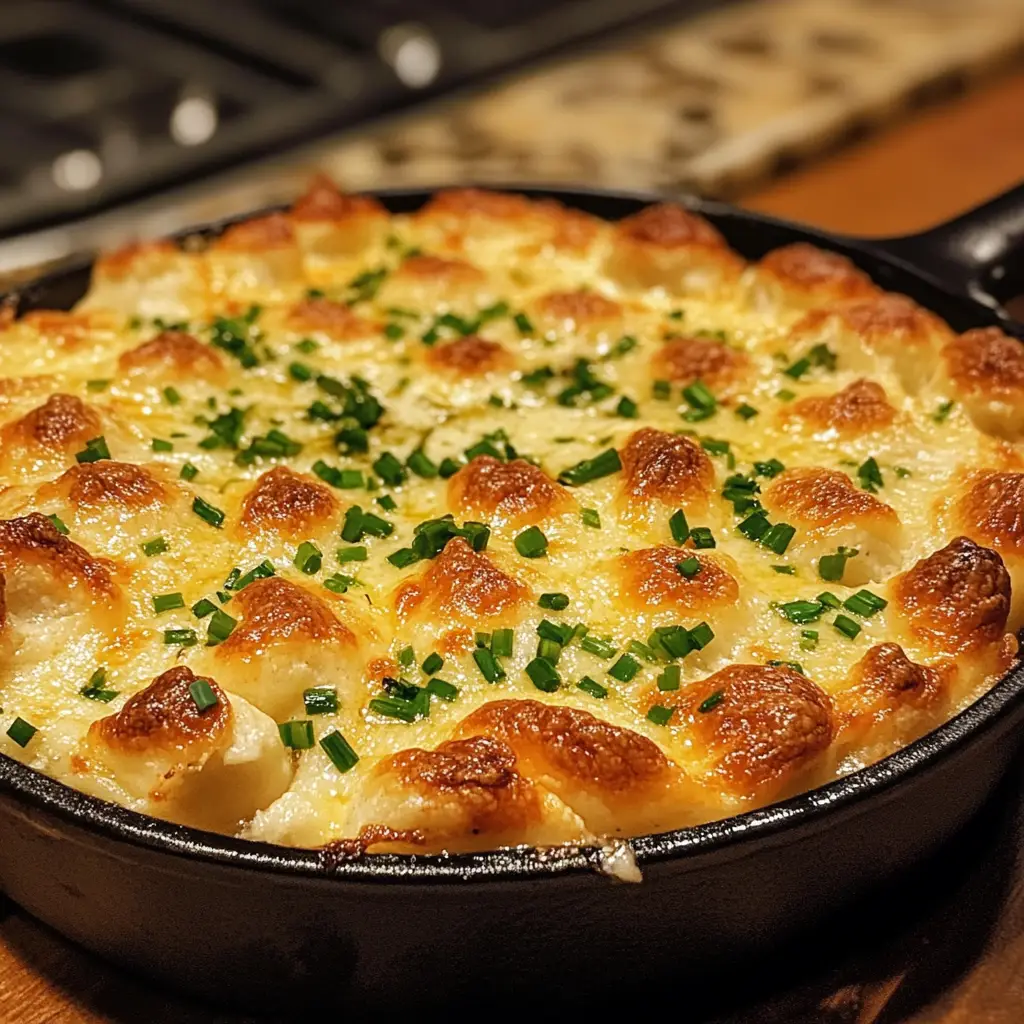
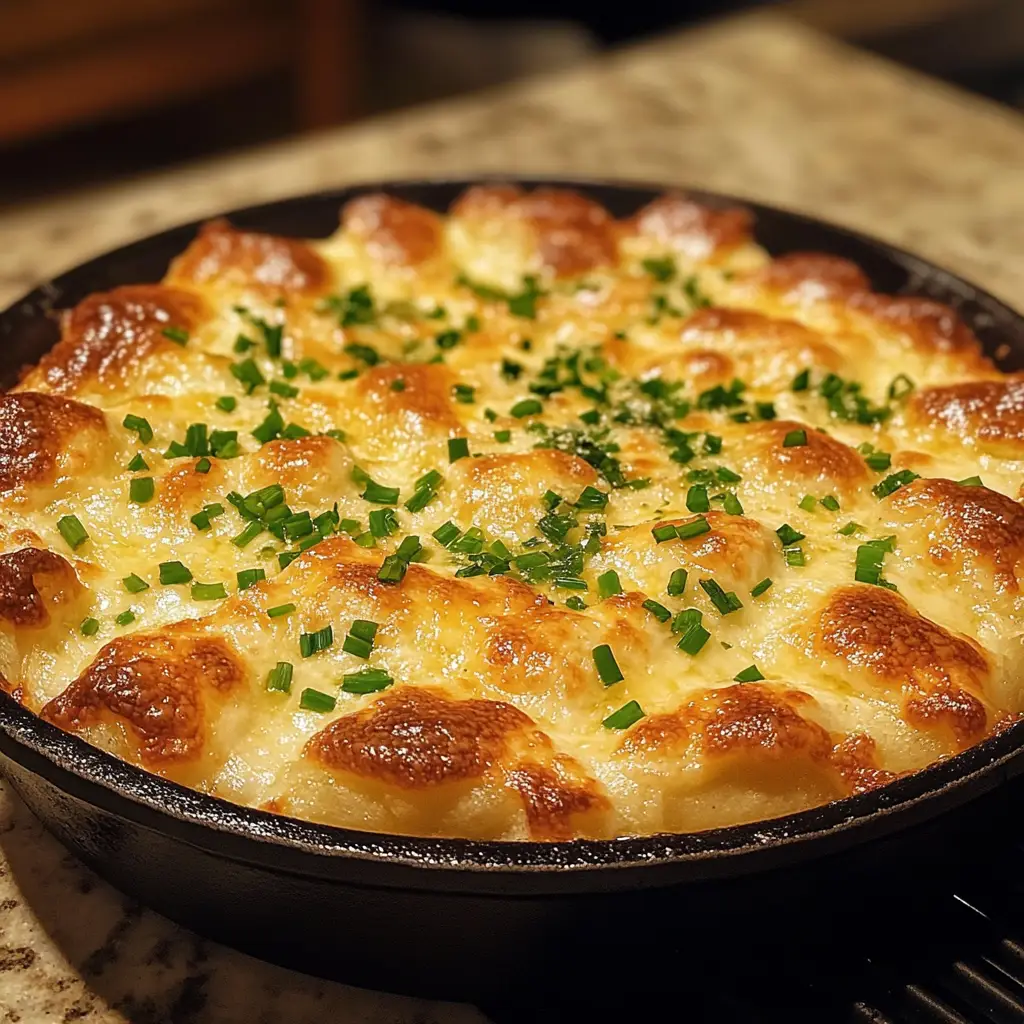
- If you want to impress, consider using a cast-iron skillet. It not only looks great but also retains heat beautifully.
Step 4: Bake the Dip
Now, it’s time to bake! Place your dish in the preheated oven and let it bake for about 25-30 minutes. You’ll know it’s ready when the top is golden and bubbly.
Tips for Baking
- Keep an eye on the dip during the last few minutes of baking. Ovens can vary, and you don’t want it to overcook.
- If you like a little extra crunch, broil the dip for the last 2-3 minutes. Just be sure to watch it closely to prevent burning!
And there you have it! The steps to create a mouthwatering Baked Cheddar Chive Dip that’s sure to be a hit at your next gathering. I can already smell the cheesy goodness wafting through my kitchen!
Equipment Needed for Baked Cheddar Chive Dip
Before we dive into the deliciousness of the Baked Cheddar Chive Dip, let’s make sure we have the right tools on hand. Having the right equipment can make the cooking process smoother and more enjoyable. Here’s what you’ll need:
- Mixing Bowl: A large mixing bowl is essential for combining all the ingredients. I prefer using a glass or stainless steel bowl because they’re easy to clean and durable.
- Hand Mixer or Spatula: A hand mixer makes blending the cream cheese and other ingredients a breeze. If you don’t have one, a sturdy spatula will work just fine—just be prepared for a bit more elbow grease!
- Baking Dish: A medium-sized casserole dish or an oven-safe skillet is perfect for baking the dip. If you want a crispy top, opt for a shallow dish to maximize surface area.
- Measuring Cups and Spoons: Accurate measurements are key to achieving the perfect flavor. I always keep a set of measuring cups and spoons handy.
- Oven Mitts: Safety first! Make sure to have a good pair of oven mitts to protect your hands when handling the hot dish.
If you don’t have a hand mixer, don’t fret! You can always mix by hand, just take your time to ensure everything is well combined. And if you’re short on baking dishes, any oven-safe container will do—just keep an eye on the baking time, as it may vary slightly.
With these tools ready, you’re all set to create a scrumptious Baked Cheddar Chive Dip that will have everyone coming back for seconds!
Variations of Baked Cheddar Chive Dip
One of the things I adore about the Baked Cheddar Chive Dip is its versatility. You can easily switch things up to suit your taste or the occasion. Here are a few fun variations that I’ve tried and loved:
- Spicy Cheddar Chive Dip: Add diced jalapeños or a splash of hot sauce for a fiery kick. This variation is perfect for those who enjoy a little heat!
- Herbed Cheddar Chive Dip: Mix in fresh herbs like parsley, dill, or thyme. The added freshness brightens the dip and gives it a garden-fresh flavor.
- Smoky Bacon Cheddar Chive Dip: Incorporate crispy bacon bits for a smoky, savory twist. The combination of cheese and bacon is simply irresistible!
- Veggie-Loaded Cheddar Chive Dip: Toss in some finely chopped bell peppers, spinach, or artichokes. This not only adds flavor but also a pop of color!
These variations allow you to get creative and tailor the dip to your liking. I often find that experimenting with different ingredients leads to delightful surprises. So, don’t hesitate to make this recipe your own!
Cooking Notes for Baked Cheddar Chive Dip
As I’ve learned through my culinary adventures, a few cooking notes can make all the difference when preparing the Baked Cheddar Chive Dip. Here are some tips that I always keep in mind to ensure my dip turns out perfectly every time:
- Room Temperature Ingredients: Make sure your cream cheese and sour cream are at room temperature before mixing. This helps them blend smoothly, creating a creamy texture that’s simply divine.
- Don’t Overmix: While it’s important to combine the ingredients well, be careful not to overmix. This can make the dip dense instead of light and fluffy. Just mix until everything is well incorporated.
- Adjust Seasoning: Taste your mixture before baking! Sometimes, a little extra salt or a dash of garlic powder can elevate the flavors. Trust your palate; it knows best!
- Storage Tips: If you have leftovers (which is rare!), store them in an airtight container in the fridge. The dip can last for about 3-4 days. Just reheat it in the oven or microwave before serving again.
- Serving Warm: This dip is best enjoyed warm. The gooey cheese and fresh chives shine when served right out of the oven. So, if you can, serve it immediately for the best experience!
These little notes have helped me perfect my Baked Cheddar Chive Dip over the years. I hope they guide you on your culinary journey as well!
Serving Suggestions for Baked Cheddar Chive Dip
Now that your Baked Cheddar Chive Dip is ready to go, it’s time to think about how to serve it! Presentation can elevate the experience, and I love to get creative with my serving ideas. Here are some of my favorite ways to enjoy this delicious dip:
- Crunchy Veggies: Fresh, crisp vegetables like carrot sticks, celery, and bell pepper strips make for a colorful and healthy pairing. They add a nice crunch that complements the creamy dip.
- Chips Galore: Tortilla chips or pita chips are always a hit! The salty crunch of the chips pairs perfectly with the rich flavors of the dip. I often set out a big bowl of chips for everyone to dive into.
- Warm Bread: Slices of warm baguette or toasted sourdough are fantastic for scooping up the dip. The bread soaks up the cheesy goodness, making each bite a delight.
- Crackers: A variety of crackers can add a fun twist. I love using whole grain or herb-flavored crackers for an extra layer of taste.
- Garnish: Don’t forget to sprinkle some extra chopped chives or a dash of paprika on top before serving. It adds a pop of color and makes the dip look even more inviting!
These serving suggestions not only enhance the flavor but also create a festive atmosphere. I always enjoy watching my friends and family gather around the dip, sharing stories and laughter. It’s moments like these that make cooking so rewarding!
Tips for Making Baked Cheddar Chive Dip
As I’ve whipped up my fair share of Baked Cheddar Chive Dip, I’ve gathered a few handy tips that can help you achieve dip perfection. These little nuggets of wisdom can make your cooking experience smoother and the end result even more delicious!
- Use Fresh Ingredients: Fresh chives and high-quality cheese can elevate your dip. I always opt for freshly chopped chives from my garden or the local farmer’s market. The flavor is unbeatable!
- Experiment with Cheese: While sharp cheddar is my go-to, don’t hesitate to mix in other cheeses like gouda or Monterey Jack for a unique twist. Each cheese brings its own character to the dip.
- Make Ahead: You can prepare the dip a day in advance. Just mix everything and store it in the fridge. When you’re ready to bake, pop it in the oven straight from the fridge—just add a few extra minutes to the baking time.
- Customize the Texture: If you prefer a chunkier dip, reserve some cheese and chives to fold in after mixing. This adds a delightful texture and makes each bite more interesting.
- Serve with a Variety: Offering a mix of dippers can make your spread more exciting. Consider including something sweet, like apple slices, alongside the savory options for a fun contrast!
These tips have helped me create a Baked Cheddar Chive Dip that’s always a crowd-pleaser. I hope they inspire you to make your own delicious version!
Breakdown of Time for Baked Cheddar Chive Dip
When it comes to whipping up a delicious Baked Cheddar Chive Dip, knowing how much time to set aside can make the process smoother. I always appreciate a clear timeline, especially when I’m juggling multiple dishes for a gathering. Here’s a quick breakdown of the time you’ll need:
- Prep Time: 10-15 minutes. This includes gathering your ingredients, mixing everything together, and transferring it to the baking dish. It’s a breeze!
- Cooking Time: 25-30 minutes. This is when the magic happens in the oven. You’ll want to keep an eye on it to achieve that perfect golden top.
- Total Time: 35-45 minutes. In just under an hour, you can have a warm, cheesy dip ready to impress your guests!
With this timeline in mind, you can plan your cooking session without any stress. I often find that having everything prepped and ready to go makes the experience even more enjoyable. Plus, it gives me more time to mingle with friends while the dip bakes to perfection!
Nutritional Information for Baked Cheddar Chive Dip
As a home cook, I always like to be mindful of what goes into my dishes, especially when sharing them with friends and family. The Baked Cheddar Chive Dip is not only delicious but also offers a satisfying blend of flavors. Here’s a quick look at the nutritional information per serving, which is about 1/4 cup:
- Calories: Approximately 200
- Protein: 6g
- Fat: 18g
- Carbohydrates: 4g
- Fiber: 0g
- Sugar: 1g
- Sodium: 300mg
Keep in mind that these values can vary based on the specific ingredients you use, especially if you opt for low-fat versions or add extra toppings. While this dip is rich and indulgent, it’s perfect for special occasions or as a treat during game nights. I always remind myself that balance is key, so enjoy it with fresh veggies or whole-grain crackers for a more wholesome experience!
Frequently Asked Questions about Baked Cheddar Chive Dip
As I’ve shared my love for Baked Cheddar Chive Dip, I often get questions from friends and family eager to try it themselves. It’s always fun to see their excitement! Here are some of the most common questions I receive, along with my answers to help you on your culinary journey:
Can I make the dip ahead of time?
Absolutely! You can prepare the dip a day in advance. Just mix all the ingredients and store it in the fridge. When you’re ready to bake, pop it in the oven straight from the fridge. Just add a few extra minutes to the baking time to ensure it heats through.
What can I use instead of chives?
If you don’t have chives on hand, don’t worry! You can substitute them with green onions or even finely chopped shallots. Each option brings a unique flavor, so feel free to experiment!
How do I store leftovers?
If you have any leftovers (which is rare!), store them in an airtight container in the fridge. The dip can last for about 3-4 days. Just reheat it in the oven or microwave before serving again. I recommend adding a splash of cream or a sprinkle of cheese on top before reheating to keep it creamy!
Can I freeze Baked Cheddar Chive Dip?
While I don’t recommend freezing the dip after it’s baked, you can freeze the unbaked mixture. Just prepare it, place it in a freezer-safe dish, and cover it tightly. When you’re ready to enjoy it, thaw it in the fridge overnight and bake as directed. It’s a great way to have a delicious dip ready for unexpected guests!
What should I serve with the dip?
The options are endless! I love serving it with crunchy veggies like carrots and celery, crispy tortilla chips, or warm bread. You can also get creative with a variety of crackers. Each pairing adds a delightful twist to the experience!
These questions often pop up, and I hope my answers help you feel more confident in making your own Baked Cheddar Chive Dip. Cooking is all about sharing and enjoying, so don’t hesitate to reach out if you have more questions or need tips along the way!
Conclusion on Baked Cheddar Chive Dip
In the world of dips, the Baked Cheddar Chive Dip stands out as a true crowd-pleaser. Its creamy texture, rich flavors, and delightful aroma make it a perfect addition to any gathering. I love how this dip not only satisfies the taste buds but also brings people together, creating moments filled with laughter and joy.
What makes this recipe so appealing is its simplicity and versatility. With just a handful of ingredients, you can create a dish that feels gourmet without spending hours in the kitchen. Plus, the ability to customize it with various add-ons means you can tailor it to suit any occasion or preference.
Whether you’re hosting a game night, a holiday party, or just a cozy evening at home, the Baked Cheddar Chive Dip is sure to impress. So, gather your ingredients, roll up your sleeves, and get ready to create a dip that will have everyone coming back for more. Trust me, once you make it, you’ll find yourself making it again and again!